


代码:
import io.netty.buffer.ByteBuf;
import io.netty.buffer.Unpooled;
import java.util.Arrays;
public class ByteBufTest {
public static void main(String[] args) {
// 0.创建一个非池化的ByteBuf,大小为10个字节
ByteBuf buf = Unpooled.buffer(10);
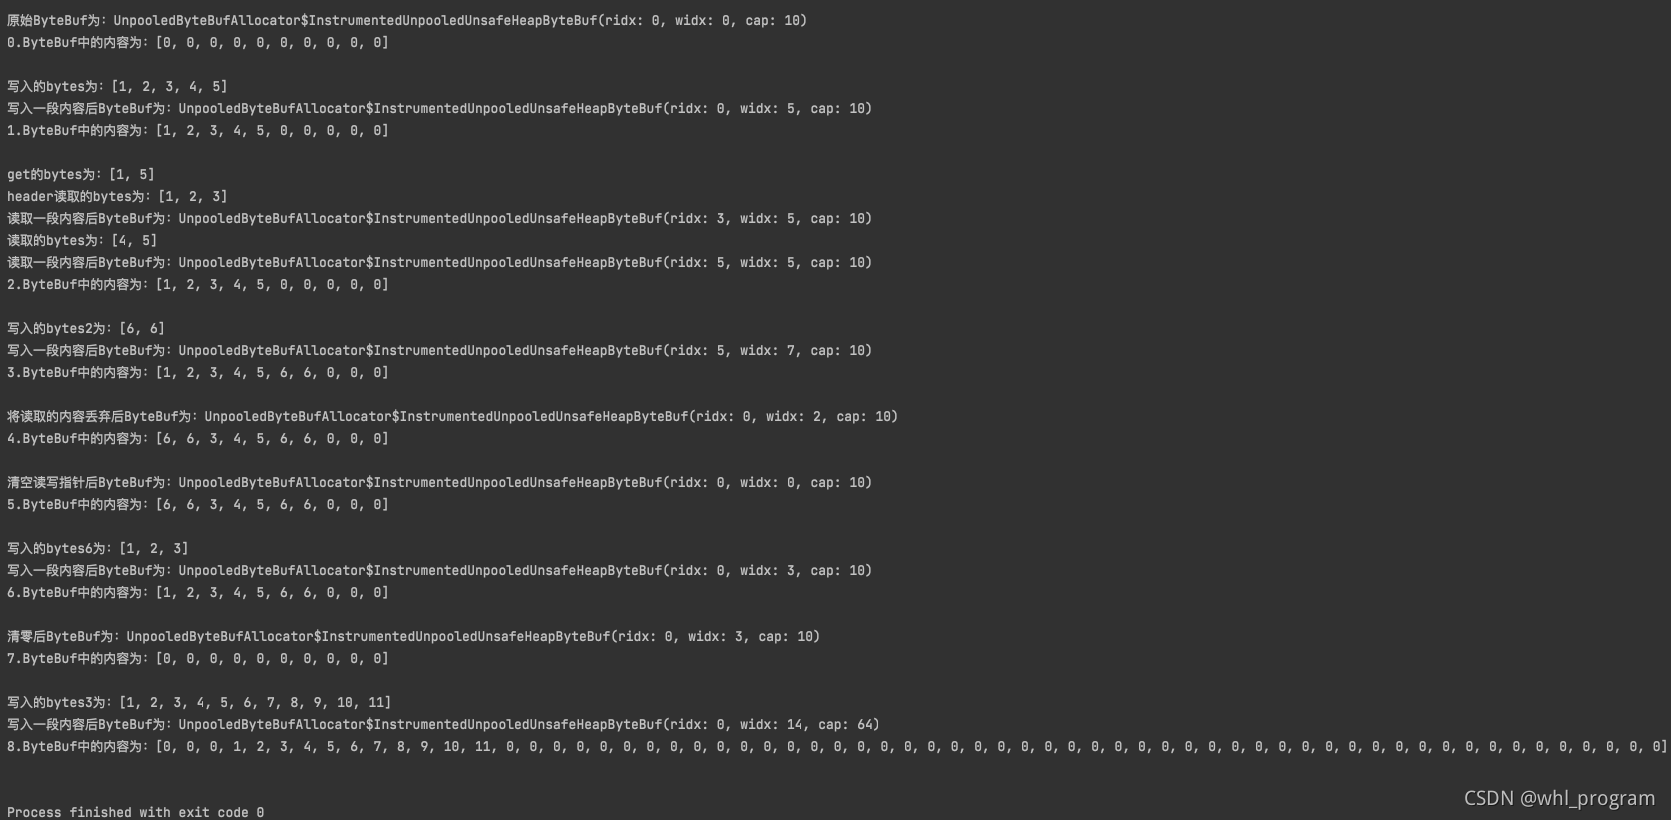
System.out.println("原始ByteBuf为:" + buf.toString());
System.out.println("0.ByteBuf中的内容为:" + Arrays.toString(buf.array()) + "\n");
// 1.写入一段内容
byte[] bytes = {1, 2, 3, 4, 5};
buf.writeBytes(bytes);
System.out.println("写入的bytes为:" + Arrays.toString(bytes));
System.out.println("写入一段内容后ByteBuf为:" + buf.toString());
System.out.println("1.ByteBuf中的内容为:" + Arrays.toString(buf.array()) + "\n");
// 2. 读取一段内容
byte b0 = buf.getByte(0);
byte b4 = buf.getByte(4);
System.out.println("get的bytes为:" + Arrays.toString(new byte[] {b0, b4}));
byte[] header = new byte[3];
buf.readBytes(header);
System.out.println("header读取的bytes为:" + Arrays.toString(header));
System.out.println("读取一段内容后ByteBuf为:" + buf.toString());
byte b1 = buf.readByte();
byte b2 = buf.readByte();
System.out.println("读取的bytes为:" + Arrays.toString(new byte[] {b1, b2}));
System.out.println("读取一段内容后ByteBuf为:" + buf.toString());
System.out.println("2.ByteBuf中的内容为:" + Arrays.toString(buf.array()) + "\n");
// 3.再次写入一段内容,比第一段内容少
byte[] bytes2 = {6, 6};
buf.writeBytes(bytes2);
System.out.println("写入的bytes2为:" + Arrays.toString(bytes2));
System.out.println("写入一段内容后ByteBuf为:" + buf.toString());
System.out.println("3.ByteBuf中的内容为:" + Arrays.toString(buf.array()) + "\n");
// 4.将读取的内容丢弃
buf.discardReadBytes();
System.out.println("将读取的内容丢弃后ByteBuf为:" + buf.toString());
System.out.println("4.ByteBuf中的内容为:" + Arrays.toString(buf.array()) + "\n");
// 5.清空读写指针
buf.clear();
System.out.println("清空读写指针后ByteBuf为:" + buf.toString());
System.out.println("5.ByteBuf中的内容为:" + Arrays.toString(buf.array()) + "\n");
// 6.再次写入一段内容,比第一段内容少
byte[] bytes6 = {1, 2, 3};
buf.writeBytes(bytes6);
System.out.println("写入的bytes6为:" + Arrays.toString(bytes6));
System.out.println("写入一段内容后ByteBuf为:" + buf.toString());
System.out.println("6.ByteBuf中的内容为:" + Arrays.toString(buf.array()) + "\n");
// 7.将ByteBuf清零
buf.setZero(0, buf.capacity());
System.out.println("清零后ByteBuf为:" + buf.toString());
System.out.println("7.ByteBuf中的内容为:" + Arrays.toString(buf.array()) + "\n");
// 8.再次写入一段超过容量的内容
byte[] bytes3 = {1, 2, 3, 4, 5, 6, 7, 8, 9, 10, 11};
buf.writeBytes(bytes3);
System.out.println("写入的bytes3为:" + Arrays.toString(bytes3));
System.out.println("写入一段内容后ByteBuf为:" + buf.toString());
System.out.println("8.ByteBuf中的内容为:" + Arrays.toString(buf.array()) + "\n");
}
}
结果:
ByteBuf动态扩容
capacity默认值:256字节,最大值:Integer.MAX_VALUE (2G)
buf.writeBytes(bytes3);方法调用时,通过AbstractByteBuf.ensureWritable0()方法进行检查
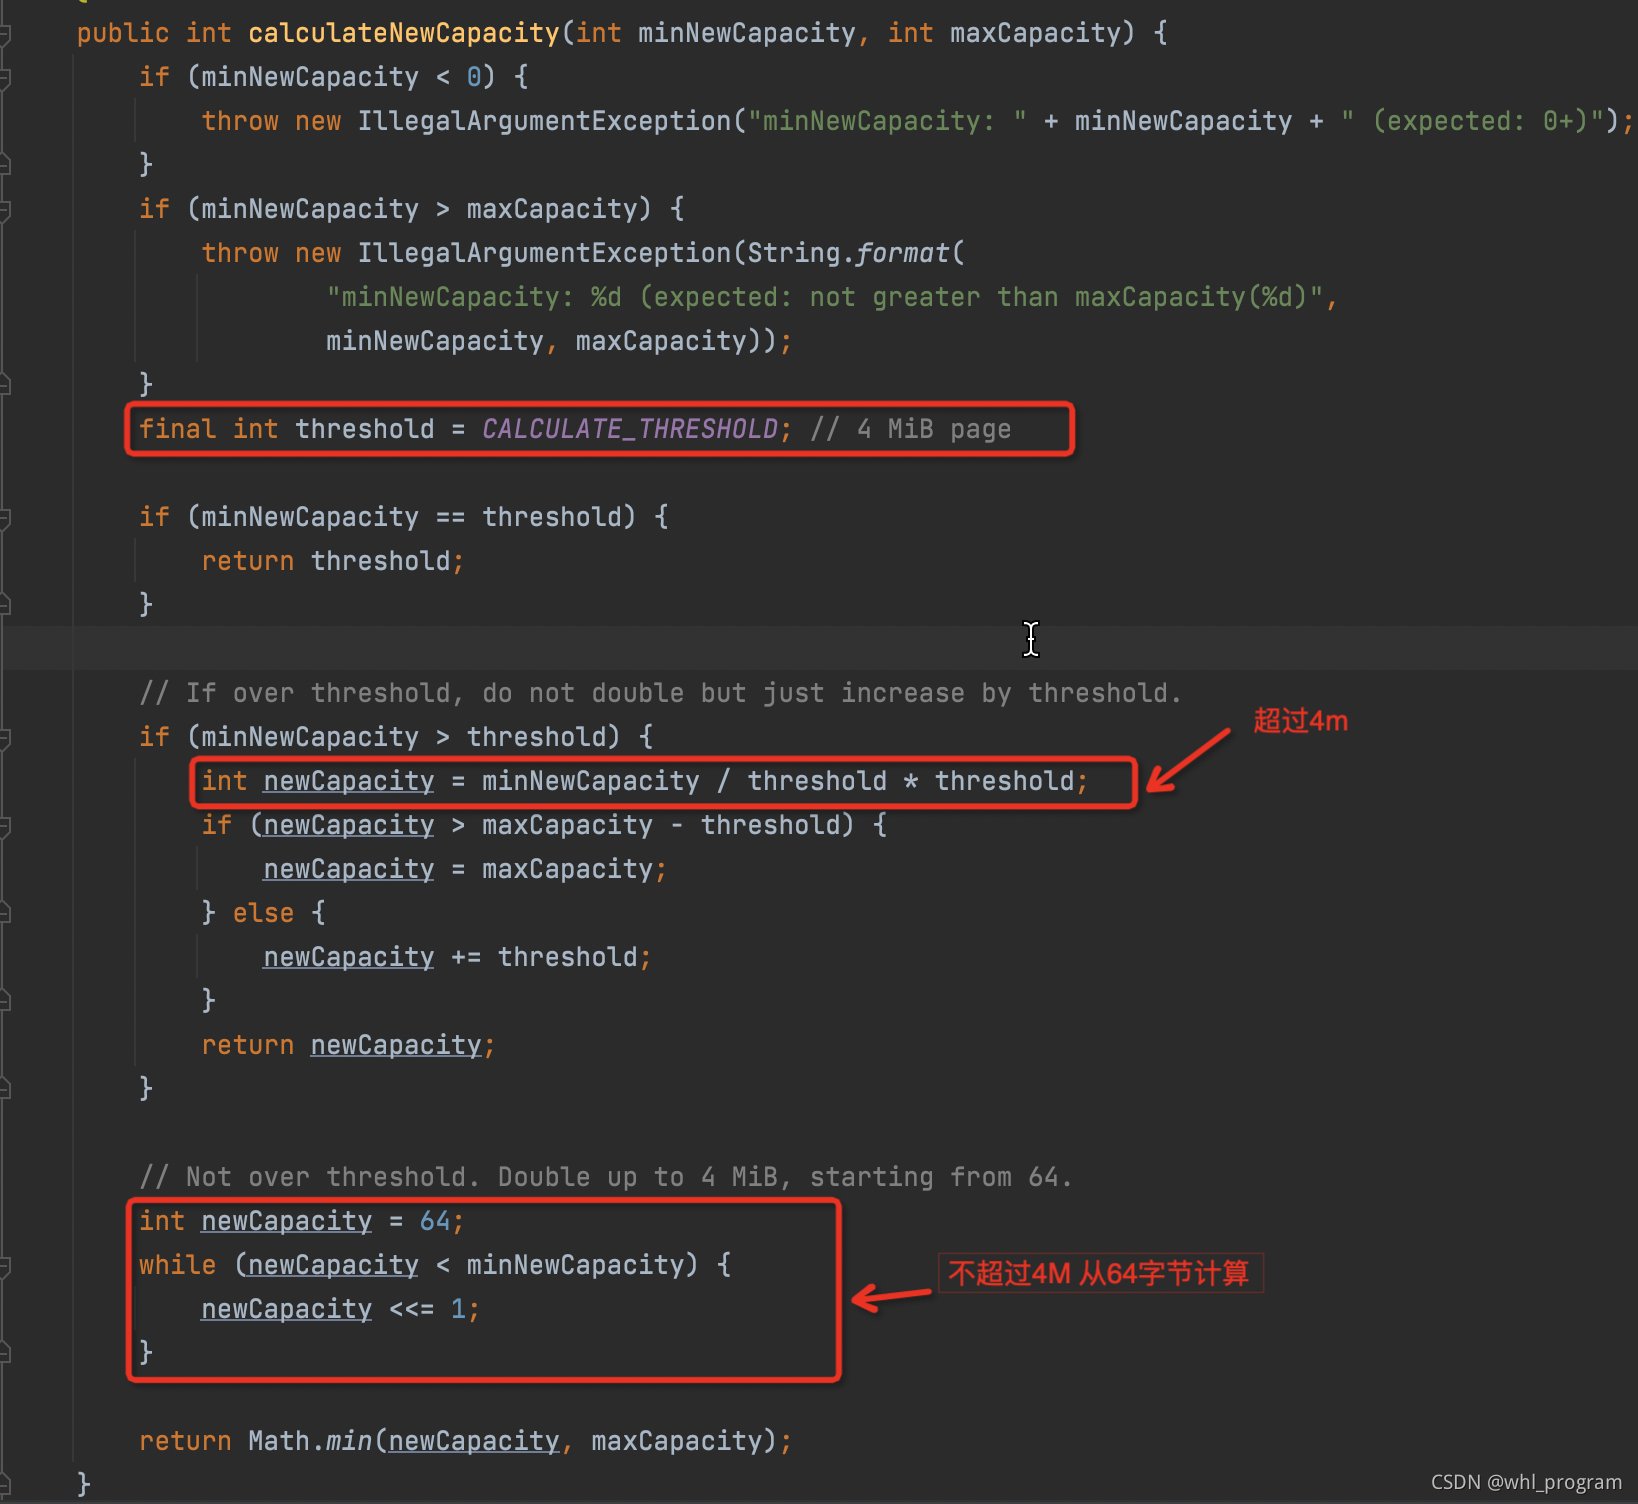
最终新容量计算方法:AbstractByteBufAllocator.calculateNewCapacity
根据capacity的最小值要求,对应有两套计算方法:
没超过4兆:从64字节开始,每次递增一倍,直至计算出来的newCapacity满足新容量最小要求
举例:
1.如果当前大小256,已写250,继续写10字节的数据,需要的最小容量要求是261,则新容量为64x2x2x2=512
2.(测试代码中)当前大小10,已写3,继续写11字节的数据,需要的最小容量要求应该是14,但最小值为为64,所以新容量为64(最小值)
超过4兆:新容量=新容量最小要求/4兆x4兆+4兆
示例:当前大小为3兆,已写3兆,继续写2兆,需要的最小容量大小为5兆,则新容量是8兆(不能超过最大值)
4兆的来源:一个固定的阈值AbstractByteBufAllocator.CALCULATE_THRESHOLD
计算源码如下


 751
751

 被折叠的 条评论
为什么被折叠?
被折叠的 条评论
为什么被折叠?
 到【灌水乐园】发言


