


TEC_OCR server 环境配置
第一步 下载tec_ocr需要的镜像文件
参照mmdetect2.3的dockerfile,下载镜像
ARG PYTORCH="1.5"
ARG CUDA="10.1"
ARG CUDNN="7"

FROM pytorch/pytorch:${PYTORCH}-cuda${CUDA}-cudnn${CUDNN}-devel

ENV TORCH_CUDA_ARCH_LIST="6.0 6.1 7.0+PTX"
ENV TORCH_NVCC_FLAGS="-Xfatbin -compress-all"
ENV CMAKE_PREFIX_PATH="$(dirname $(which conda))/../"

RUN apt-get update && apt-get install -y git ninja-build libglib2.0-0 libsm6 libxrender-dev libxext6 \
    && apt-get clean \
    && rm -rf /var/lib/apt/lists/*

# Install mmdetection
RUN conda clean --all
RUN git clone https://github.com/open-mmlab/mmdetection.git /mmdetection
WORKDIR /mmdetection
ENV FORCE_CUDA="1"
RUN pip install cython --no-cache-dir
RUN pip install "git+https://github.com/open-mmlab/cocoapi.git#subdirectory=pycocotools"
RUN pip install --no-cache-dir -e .
运行如下代码,build一个image
docker build -t mmdetection docker/
第二步 用mmdetection的镜像创建容器
利用现有镜像创建docker
sudo nvidia-docker create -it -v /home/u1/mikeyna/data/install-file/:/home/install-file -v /home/u1/mikeyna/code/TEC_Proj/tec_server_code:/home/tec_server_code -v /home/u1/mikeyna/data/tec_server_data:/home/tec_server_data --name tec-server8
第三步 在容器中安装依赖库
1.启动容器
sudo nvidia-docker run -ai tec-server8
2.根据ocr的github说明,安装ocr所需要的库
pip install mmcv==1.0.5 -i https://pypi.tuna.tsinghua.edu.cn/simple/
pip install lmdb pillow torchvision nltk natsort -i https://pypi.tuna.tsinghua.edu.cn/simple/
pip install opencv-python==3.4.2.17  -i https://pypi.tuna.tsinghua.edu.cn/simple/
pip install scikit-image==0.14.2  -i https://pypi.tuna.tsinghua.edu.cn/simple/
pip install scipy==1.1.0  -i https://pypi.tuna.tsinghua.edu.cn/simple/
3.安装pytorch1.5
pip install torch-1.5.0-cp37-cp37m-linux_x86_64.whl -i https://pypi.tuna.tsinghua.edu.cn/simple/
pip install torchvision-0.6.0-cp37-cp37m-linux_x86_64.whl -i https://pypi.tuna.tsinghua.edu.cn/simple/
pip install timm  -i https://pypi.tuna.tsinghua.edu.cn/simple/
4.安装server部署所需要的依赖库
pip install configobj -i https://pypi.tuna.tsinghua.edu.cn/simple/
pip install ConcurrentLogHandler -i https://pypi.tuna.tsinghua.edu.cn/simple/
pip install concurrent-log-handler -i https://pypi.tuna.tsinghua.edu.cn/simple/
pip install pika==1.1.0 -i https://pypi.tuna.tsinghua.edu.cn/simple/
5.将安装好环境的docker保存成镜像
sudo docker commit -a 'mikey' -m 'install torch1.5' tec-server8 tec-server-image8
第四步启动rabbitmq
下载rabbitmq镜像,并启动

sudo docker run -d --hostname my-rabbit --name rabbitmq --restart always -p 5672:5672 -p 15672:15672 rabbitmq:3.7.8
第五步利用的docker-compse部署服务
1.编写docker-compose.yml文件
version: "2.3"
services:

  tec-alg-server-test:
    image: tec-server-image9
    container_name: tec-server6
    runtime: "nvidia"
    environment:
        - NVIDIA_VISIBLE_DEVICES=0
        - TZ=Asia/Shanghai
        - LANG=C.UTF-8
    command:
        - /bin/bash
        - -c
        - |
         cd /home/tec_server_code
         chmod -R 777 /home/tec_server_data
         chmod +x monitor.sh
         ./monitor.sh
    volumes:
      - /home/u1/mikeyna/code/TEC_Proj/tec_server_code:/home/tec_server_code
      - /home/u1/mikeyna/data/tec_server_data:/home/tec_server_data

    restart: always
    logging:
       driver: "json-file"
       options:
         max-size: "200m"

    hostname: test3
    privileged: true

    tty: true


  tec-alg-server-publish:
    image: tec-server-image9
    container_name: tec-server-publish
    runtime: "nvidia"
    environment:
        - NVIDIA_VISIBLE_DEVICES=0
        - TZ=Asia/Shanghai
        - LANG=C.UTF-8
    command:
        - /bin/bash
        - -c
        - |
         cd /home/tec_server_code
         chmod -R 777 /home/tec_server_data
         chmod +x monitor_publish.sh
         ./monitor_publish.sh
    volumes:
      - /home/u1/mikeyna/code/TEC_Proj/tec_server_code_publish:/home/tec_server_code
      - /home/u1/mikeyna/data/tec_server_data_publish:/home/tec_server_data

    restart: always
    logging:
       driver: "json-file"
       options:
         max-size: "200m"

    hostname: test3
    privileged: true

    tty: true
2.启动docker服务
sudo docker-compose up
sudo docker-compose up -d
sudo docker-compose down
TEC_OCR server 调试方法
第一步:创建服务器端调试环境
1.根据镜像文件,创建调试用的本地docker容器tec-server-debug
sudo nvidia-docker create -it -v /home/u1/mikeyna/code/TEC_Proj/tec_server_code:/home/tec_server_code -v /home/u1/mikeyna/data/tec_server_data:/home/tec_server_data --name tec-server-debug
2.开启容器tec-server-debug
sudo docker start -ai tec-server-debug
3.运行入口程序代码
python main_tec.py

当收到客户端发送的消息,界面如下所示:

第二步,模拟客户端发送信息
运行send_mq.py可以模拟向tec_ocr server发送信息。

首先需要切换conda环境为mmdetect2.3.0,因为依赖一些库
然后运行send_mq.py即可
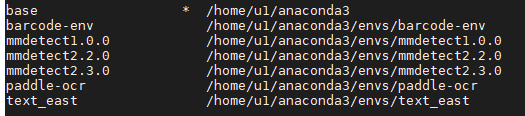
conda env list
conda activate mmdetect2.3.0
python send_mq.py


 1296
1296


 被折叠的 条评论
为什么被折叠?
被折叠的 条评论
为什么被折叠?
 到【灌水乐园】发言


