


Spring框架研究总结之AOP(一)
Spring是一个开源的企业应用框架,是一个分层架构,由7个定义稳定的模块所组成,而所有的模块都是在核心容器基础上搭建;其体系本身提供了强大的IOC(控制反转)、AOP(面向切面)以及DI(依赖注入)等较显著的功能,那么下面就来详细介绍下Spring框架的模块组成及相关特点。
l 什么是AOP
l 场景及概念
l AOP的使用
一、什么是AOP
AOP(Aspect-Oriented Programming),即为面向切面或方面编程,被认为是OOP(Object-OrientedProgramming),面向对象编程的拓展和完善。OOP引入了继承、封装及多态等特性来搭建一种对象层次结构,是垂直方向上的层级结构;而当我们要为分散的对象引入公共行为时,OOP则显得力不从心,也就是说OOP允许你定义从上到下的逻辑关系,却不适合定义从左到右的逻辑关系,比如:异常处理,它散布在所有对象结构中,这种散布在各处的无关代码片段被称之为横切代码片段,在OOP中导致了大量重复的代码,不利于各个模块的重用。而AOP则相反,它使用了横切技术,剖开封装对象的内部,并将那些影响了多个类的公共行为封装到了重用的模块,称之为“Aspect”,即方面。
所谓的的方面,可理解为将与业务无关,却被业务模块共同调用的逻辑或责任链封装起来,减少系统代码的重复,降低模块间的耦合度,并有利于日后的系统拓展和维护。有人做了个有趣的比喻:如果说“对象”是一个空心的圆柱体,其中封装的是对象的属性和行为;那么面向方面编程的方法,就仿佛一把利刃,将这些空心圆柱体剖开,以获得其内部的消息。而剖开的切面,也就是所谓的“方面”,然后它又以巧夺天功的妙手将这些剖开的切面复原,不留痕迹。
实现AOP的技术,主要分为两大类:一是采用动态代理技术,利用截取消息的方式,对该消息进行装饰,以取代原有对象行为的执行;二是采用静态织入的方式,引入特定的语法创建“方面”,从而使得编译器可以在编译期间织入有关“方面”的代码。
二、场景及概念
1、一般使用的场景
事务、权限、缓存、错误处理、记录跟踪、性能优化、持久化、同步处理及资源池等场景。
2、几个重要感概念
A、方面(Aspect)
某个关注点的模块化或片面化,该关注点可以横切多个对象,而事务机制是J2EE应用中一个很好的横切关注点例子,在Spring中,使用advisor或拦截器来实现面向方面功能的。
B、通知(Advice)
在某个关注点或是连接点上执行的动作行为,各种类型的通知,包括around、before、after及throws通知。大部分aop框架,包括spring框架,都是以拦截器模型来实现连接通知实现的,维护一个被围绕的连接点拦截器链子。在Spring中有4个通知advice,分别为:BeforeAdvice、AfterAdvice、ThrowAdvice及DynamicInstroductionAdvice,后面回详细介绍它们。
C、切入点(Pointcut)
一个通知将被引发的一系列连接点的集合,而aop框架允许开发者指定切入点:例如,使用正则表达式。 Spring定义了Pointcut接口,用来组合MethodMatcher和ClassFilter,可以通过名字很清楚的理解, MethodMatcher是用来检查目标类的方法是否可以被应用此通知,而ClassFilter是用来检查Pointcut是否应该应用到目标类上。
D、连接点(Introduction)
指的是,程序执行过程中明确的点,如方法的调用或特定的异常抛出。
E、引入
添加方法或字段到被通知的类。 Spring允许引入新的接口到任何被通知的对象。例如,你可以使用一个引入使任何对象实现 IsModified接口,来简化缓存。在Spring中要使用Introduction, 可有通过DelegatingIntroductionInterceptor来实现通知,通过DefaultIntroductionAdvisor来配置Advice和代理类要实现的接口。
F、目标对象(Target Object)
包含连接点的对象。也被称作被通知或被代理对象。
G、Aop代理(Aop Proxy)
AOP框架创建的对象,包含通知。在Spring中,AOP代理可以是JDK动态代理或者CGLIB代理。
H、织入
组装方面来创建一个被通知对象。这可以在编译时完成(例如使用AspectJ编译器),也可以在运行时完成。Spring和其他纯Java AOP框架一样,在运行时完成织入。
三、AOP的使用
Spring AOP(面向方面编程)框架,用于在模块化方面的横切关注点,是一个拦截器拦截一些动作,例如,当一个方法执行时,Spring AOP可以劫持一个执行的方法,在方法执行之前或之后添加额外的功能。具体请看下面的例子验证,对于重复性的代码,这里不会列出,请读者仔细研读并了解整体代码结构。
1、Advice通知
在Spring AOP中,目前有4种类型的通知支持:
• 通知(Advice)之前 - 该方法执行前运行;
• 通知(Advice)返回之后 – 运行后,该方法返回一个结果;
• 通知(Advice)抛出之后 – 运行方法抛出异常后;
• 环绕通知 – 环绕方法执行运行,结合以上这三个通知;
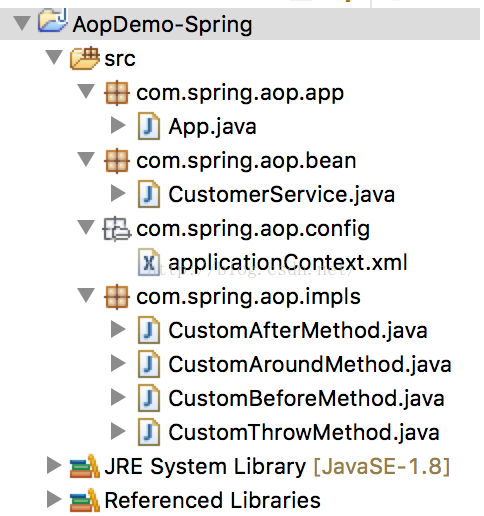
接下来,就来演示下如何实现上面的AOP通知支持。我们先创建一个Java项目,目录结构如下:
A、方法执行之前(MethodBeforeAdvice)
目标对象:
public class CustomerService{
private String name;
private String url;
public void setName(String name) {
this.name = name;
}
public void setUrl(String url) {
this.url = url;
}
public void printName() {
System.out.println("Customer name:" + this.name);
System.out.println("--------------------------");
}
public void printUrl() {
System.out.println("Customer url:" + this.url);
System.out.println("--------------------------");
}
public voidprintThrowException() {
System.out.println("Exception err throw!");
System.out.println("--------------------------");
throw newIllegalArgumentException();
}
}
织入方法:
public class CustomBeforeMethodimplements MethodBeforeAdvice {
@Override
public void before(Method method, Object[] args, Object target) throws Throwable {
System.out.println("CustomBeforeMethod:Before method becalled!");
}
}
XML配置:
<!-- target object -->
<bean id="customerService"class="com.spring.aop.bean.CustomerService">
<property name="name"value="Jackey" />
<property name="url"value="http://blog.csdn.net/why_2012_gogo"/>
</bean>
<!-- aop of before call the aopmethods -->
<bean id="customBeforeMethod"class="com.spring.aop.impls.CustomBeforeMethod"/>
<!-- proxy of aop listenerand callback -->
<bean id="customerServiceProxy"class="org.springframework.aop.framework.ProxyFactoryBean">
<property name="target"ref="customerService" />
<property name="interceptorNames">
<list>
<value>customBeforeMethod</value>
<value>customThrowMethod</value>
</list>
</property>
</bean>
如何验证:
public class App {
private staticApplicationContext context;
public static void main(String[] args) {
context = new ClassPathXmlApplicationContext("com/spring/aop/config/applicationContext.xml");
try {
CustomerServicecs = (CustomerService) context.getBean("customerServiceProxy");
cs.printName();
cs.printUrl();
cs.printThrowException();
}catch(Exception e) {
}
}
}
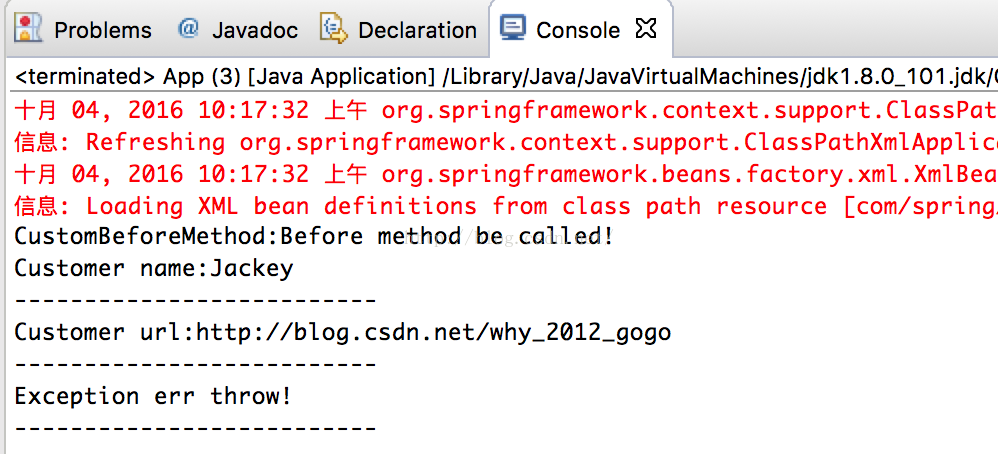
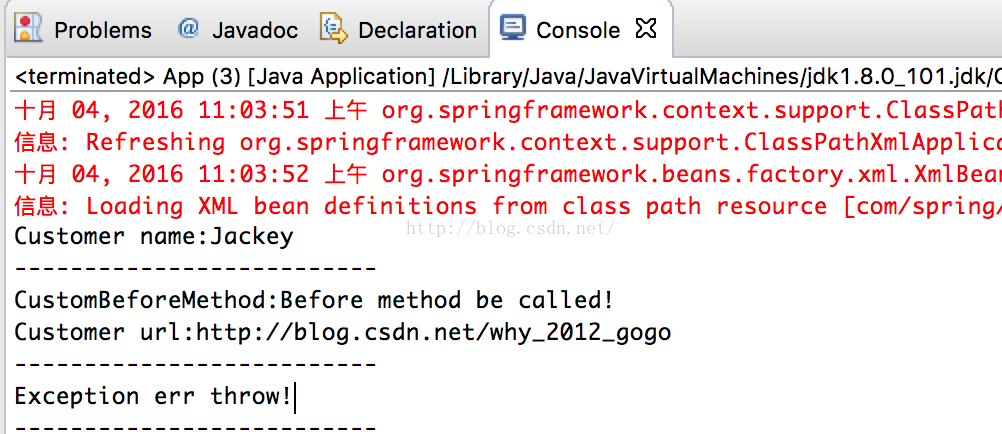
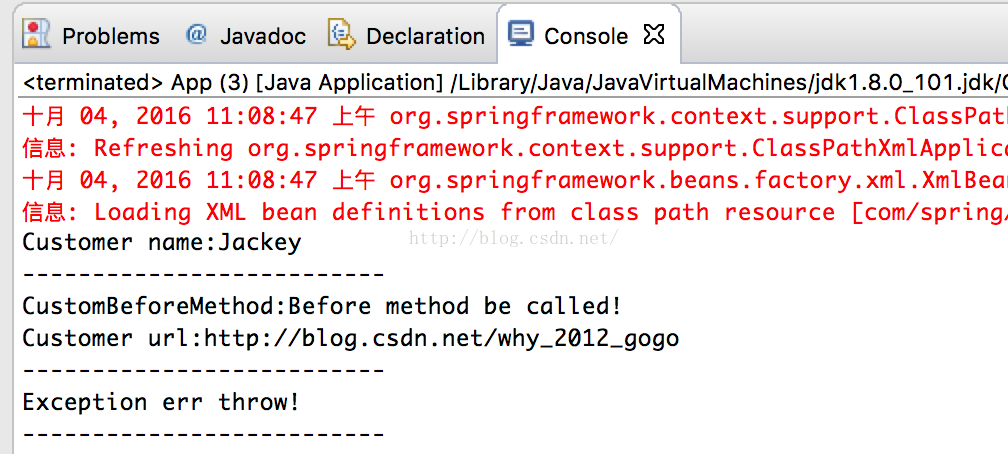
执行结果:

从上图看出,在执行目标对象的每个方法之前都会先执行织入的方法的执行,然后再执行目标对象自身的方法;同时,在抛出异常之后,执行了ThrowsAdvice接口实现类的异常方法。
B、方法返回之后(AfterReturningAdvice)
织入方法:
public classCustomAfterMethod implements AfterReturningAdvice{
@Override
public void afterReturning(ObjectreturnValue, Method method, Object[] args,Object target) throws Throwable {
System.out.println("CustomAfterMethod:After method becalled!");
}
}
XML配置:
<!-- aop of after call the aopmethods -->
<bean id="customAfterMethod"class="com.spring.aop.impls.CustomAfterMethod"/>
<!-- proxy of aop listenerand callback -->
<bean id="customerServiceProxy"class="org.springframework.aop.framework.ProxyFactoryBean">
<property name="target"ref="customerService" />
<property name="interceptorNames">
<list>
<value>customAfterMethod</value>
<value>customThrowMethod</value》
</list>
</property>
</bean>
执行结果:
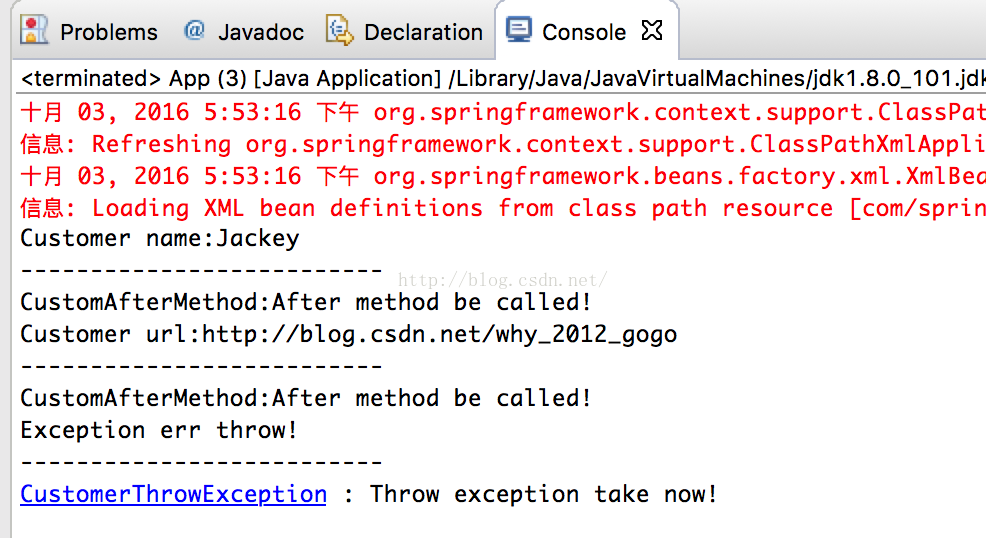
同样,在目标类中每个方法执行之后,织入的方法功能才执行。
C、抛出异常之后(ThrowsAdvice)
织入方法:
public classCustomAfterMethod implementsAfterReturningAdvice {
@Override
public voidafterReturning(Object returnValue, Method method, Object[] args,Object target) throws Throwable {
System.out.println("CustomAfterMethod:After method becalled!");
}
}
XML配置:
<!-- aop of throws call the aopmethods -->
<bean id="customThrowMethod"class="com.spring.aop.impls.CustomThrowMethod"/>
执行结果:
在上面的结果图中,已经罗列出。
D、方法执行前后(MethodInterceptor)
织入方法:
public classCustomAroundMethod implements MethodInterceptor {
@Override
public Object invoke(MethodInvocation methodInvocation) throws Throwable {
// same with MethodBeforeAdvice
System.out.println("CustomAroundMethod : Before methodcalled!");
try {
// proceed to original method
Objectresult = methodInvocation.proceed();
// same with AfterReturningAdvice
System.out.println("CustomAroundMethod : Before aftercalled!");
return result;
} catch(IllegalArgumentException e) {
// same with ThrowsAdvice
System.out.println("CustomAroundMethod : Throw exceptioncalled!");
throw e;
}
}
}
XML配置:
<!-- aop of around call the aopmethods -->
<bean id="customAroundMethod"class="com.spring.aop.impls.CustomAroundMethod"/>
<!-- proxy of aop listenerand callback -->
<bean id="customerServiceProxy"class="org.springframework.aop.framework.ProxyFactoryBean">
<property name="target"ref="customerService" />
<property name="interceptorNames">
<list>
<value>customAroundMethod</value>
</list>
</property>
</bean>
执行结果:

2、Advisor拦截
这里我们引入了“切入点”概念,并结合Advisor拦截机制,同样实现上面的通知效果,而且我们可以执行拦截的目标对象的方法,具体如下:
A、目标对象
public class CustomerService{
private String name;
private String url;
public void setName(String name) {
this.name = name;
}
public void setUrl(String url) {
this.url = url;
}
public void printName() {
System.out.println("Customer name:" + this.name);
System.out.println("--------------------------");
}
public void printUrl() {
System.out.println("Customer url:" + this.url);
System.out.println("--------------------------");
}
public voidprintThrowException() {
System.out.println("Exception err throw!");
System.out.println("--------------------------");
throw new IllegalArgumentException();
}
}
B、XML配置
目标对象:
<!-- target object -->
<bean id="customerService"class="com.spring.aop.bean.CustomerService">
<property name="name"value="Jackey" />
<property name="url"value="http://blog.csdn.net/why_2012_gogo"/>
</bean>
织入功能:
<!-- aop of before call the aopmethods -->
<bean id="customBeforeMethod"class="com.spring.aop.impls.CustomBeforeMethod"/>
代理拦截:
<!-- proxy of aop listenerand callback -->
<bean id="customerServiceProxy"class="org.springframework.aop.framework.ProxyFactoryBean">
<property name="target"ref="customerService" />
<property name="interceptorNames">
<list>
<!--<value>customBeforeMethod</value> -->
<!--<value>customAfterMethod</value>
<value>customThrowMethod</value>-->
<!--<value>customAroundMethod</value> -->
<value>customerAdvisor</value>
</list>
</property>
</bean>
切入点:
<!-- name match method pointcutof aop -->
<bean id="customerMethodPointcut"class="org.springframework.aop.support.NameMatchMethodPointcut">
<property name="mappedName"value="printName" />
</bean>
拦截器:
<!-- advisor match pointcut of aop-->
<bean id="customerAdvisor"class="org.springframework.aop.support.DefaultPointcutAdvisor">
<property name="pointcut"ref="customerMethodPointcut" />
<property name="advice"ref="customBeforeMethod" />
</bean>
C、织入功能
这里我们就以拦截目标对象的切入点方法执行之前的织入为例,其它拦截实现是相同的,这里不再赘述,具体如下:
public classCustomBeforeMethod implementsMethodBeforeAdvice {
@Override
public void before(Method method, Object[] args, Object target) throws Throwable {
System.out.println("CustomBeforeMethod:Before method becalled!");
}
}
D、如何验证
public class App {
private staticApplicationContext context;
public static void main(String[] args) {
context = new ClassPathXmlApplicationContext("com/spring/aop/config/applicationContext.xml");
try {
CustomerServicecs = (CustomerService) context.getBean("customerServiceProxy");
cs.printName();
cs.printUrl();
cs.printThrowException();
}catch(Exception e) {
}
}
}
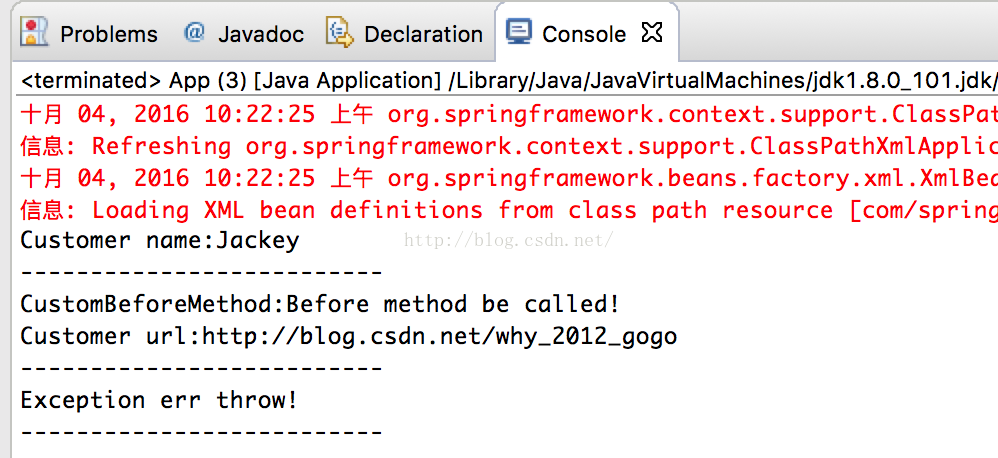
E、执行结果
从上图可以看出,我们只拦截了目标对象的printName()方法,所以只在执行该方法之前,才会执行织入的功能实现。
另外,上面的拦截器是根据目标对象的织入方法的名字进行拦截的,其实还可以根据正则表达式来拦截欲织入的方法的,此时需要使用到org.springframework.aop.support.RegexpMethodPointcutAdvisor
与根据名字进行拦截不同的地方,只是拦截器和代理配置不同,具体如下:
拦截器:
<bean id="customerAdvisor2"class="org.springframework.aop.support.RegexpMethodPointcutAdvisor">
<property name="patterns">
<list>
<value>.*Url.*</value>
</list>
</property>
<property name="advice"ref="customBeforeMethod" />
</bean>
代理拦截:
<!-- proxy of aop listenerand callback -->
<bean id="customerServiceProxy"class="org.springframework.aop.framework.ProxyFactoryBean">
<property name="target"ref="customerService" />
<property name="interceptorNames">
<list>
<value>customerAdvisor2</value>
</list>
</property>
</bean>
执行结果:
由于拦截器匹配的规则为.*Url.* ,所以只有目标对象中的printUrl()方法才会被拦截,从上图也看出了,在执行目标对象方法printUrl()之前,先执行了织入的printUrl功能方法。
3、自动代理
在前面介绍的通知的拦截,是通过手动设置ProxyFactoryBean代理工厂来实现的过滤和拦截功能,如果存在很多需要被拦截的目标对象,使用手动创建拦截会比较麻烦和不利于维护,因此可以使用Spring的自动代理创建者,来自动实现同样的功能,当然,如果拦截的对象不是很多,建议使用前者。自动代理实现比较简单,具体如下:
3.1、自动代理,结合advisor拦截
其它部分均相同,不同的是自动代理创建部分,如下:
XML配置:
<!-- auto proxy creator for beannames(advices) -->
<bean id="customerServiceAutoProxy"class="org.springframework.aop.framework.autoproxy.BeanNameAutoProxyCreator">
<property name="beanNames">
<list>
<value>*Service</value>
</list>
</property>
<property name="interceptorNames">
<list>
<value>customerAdvisor2</value>
</list>
</property>
</bean>
注意:
beanNames:正则或是全名匹配目标对象;
interceptorNames:直接引用前面创建的advisor即可;
如何验证:
public class App {
private staticApplicationContext context;
public static void main(String[] args) {
context = new ClassPathXmlApplicationContext("com/spring/aop/config/applicationContext.xml");
try {
CustomerServicecs = (CustomerService) context.getBean("customerServiceAutoProxy");
cs.printName();
cs.printUrl();
cs.printThrowException();
}catch(Exception e) {
}
}
}
此时,我们需要获得实例id为customerService,即目标对象本身,因为自动代理已经自动实例化,并匹配好目标对象以及初始化了拦截器。
执行结果:
3.2、自动代理拦截
这里要介绍的是Spring中的 DefaultAdvisorAutoProxyCreator ,它的功能可是强大的不得了,因为有了它,你只需要配置好Advisor拦截,并指定好欲织入的功能即可,因为其会自动搜索匹配目标对象(根据设置的拦截器匹配),并会自动创建代理Bean,完成拦截需求。
实现上面同样的功能,我们只需要做下面的几件事儿:
XML配置:
<!-- target object -->
<bean id="customerService"class="com.spring.aop.bean.CustomerService">
<property name="name"value="Jackey" />
<property name="url"value="http://blog.csdn.net/why_2012_gogo"/>
</bean>
<!-- aop of before call the aopmethods -->
<bean id="customBeforeMethod"class="com.spring.aop.impls.CustomBeforeMethod"/>
<bean id="customerAdvisor2"class="org.springframework.aop.support.RegexpMethodPointcutAdvisor">
<property name="patterns">
<list>
<value>.*Url.*</value>
</list>
</property>
<property name="advice"ref="customBeforeMethod" />
</bean>
<!-- auto default advisor proxycreator -->
<bean class="org.springframework.aop.framework.autoproxy.DefaultAdvisorAutoProxyCreator"/>
如何验证:
public class App {
private staticApplicationContext context;
public static void main(String[] args) {
context = new ClassPathXmlApplicationContext("com/spring/aop/config/applicationContext.xml");
try {
CustomerServicecs = (CustomerService) context.getBean("customerService");
cs.printName();
cs.printUrl();
cs.printThrowException();
}catch(Exception e) {
}
}
}
执行结果:
对于AspectJ与Spring AOP的整合以及AOP的事务例子,将在下篇文章中进行介绍,期望各位同学继续跟进,Spring框架之AOP(一)就介绍到这里,由于作者水平有限,如有问题请在评论发言或是QQ群讨论,谢谢。
技术讨论群:
245389109(新)


 1307
1307


 被折叠的 条评论
为什么被折叠?
被折叠的 条评论
为什么被折叠?
 到【灌水乐园】发言


