


gzip压缩
- 制作nginx的启动脚本
- 若没有安装http服务,则先安装http服务在执行下列命令
[root@server1 logs]# cp /usr/lib/systemd/system/httpd.service /etc/systemd/system/nginx.service
[root@server1 logs]# vim /etc/systemd/system/nginx.service##编辑启动脚本

[root@server1 conf]# vim nginx.conf##编辑配置文件,打开zip服务
[root@server1 conf]# pwd
/usr/local/nginx/conf
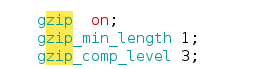
添加内容:
 33     gzip  on;##打开zip服务
 34     gzip_min_length 1;##设置压缩的最小字节数
 35     gzip_comp_level 3;##压缩等级(分为1到9级,越高压缩的越小)
编辑发布文件
[root@server1 nginx]# cd html
[root@server1 html]# ls
50x.html index.html
[root@server1 html]# du -sh index.html
2.6M index.html
可以看到压缩文件的大小远小与2.6M

对客户端的并发量与速度进行限制
nginx可以使用ngx_http_limit_req_module模块的limit_req_zone指令进行限流访问,防止用户恶意攻击刷爆服务器ngx_http_limit_req_module模块是nginix默认安装的,所以可以直接配置即可
- 配置文件的限流配置
vim /usr/local/nginx/conf/nginx.conf ##编译配置文件
36 limit_req_zone $binary_remote_addr zone=one:10m rate=1r/s;##http的限流模块,对与客户端ip进行限流,并且每秒只处理一个请求
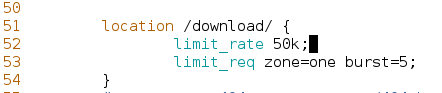
51 location /download/ { ##http服务的资源
52 limit_req zone=one;
53 }
[root@server1 nginx]# sbin/nginx -t##查看是否由语法错误,若成功则重启服务
nginx: the configuration file /usr/local/nginx/conf/nginx.conf syntax is ok
nginx: configuration file /usr/local/nginx/conf/nginx.conf test is successful
[root@server1 nginx]# systemctl restart nginx
- 查看
- 在nginx的默认发布目录下添加目录/download/并添加资源图片
[root@server1 nginx]# cd html
[root@server1 html]# ls
50x.html  index.html
[root@server1 html]# mkdir /usr/local/nginx/html/download
[root@server1 html]# mv ~/vim.jpg download/
[root@server1 html]# cd download/
[root@server1 download]# ls
vim.jpg
[root@server1 download]# du -sh vim.jpg
444K	vim.jpg
- 浏览器查看资源

- 物理机进行压力测试
[kiosk@foundation42 ~]$ ab -c 1 -n 10 http://172.25.42.1/download/vim.jpg ##-c表示并发数,-n表示请求次数 表示并发为1请求10次

请求次数为10,并发数为1的情况下,因为每次只能处理一个请求,所以时隔请求只接受了一个包而丢了9个包。
-
burst,nodelay的添加
-
burst指缓冲队列的长度
-
nodelay意为不延迟,即对用户的请求不做延迟处理,而是立即处理。即使针对rate=1r/s的配置,若配置了nodey,即使有别的请求到来,依旧会立即处理,若没有设置则会按照rate=1r/s只处理一个请求。
-
真正对限流作用的配置只是rate=1r/s与burst=5这两个配置
配置文件修改如下:

在物理机进行测试:

可以看到一次并发十个请求,没有失败 的请求,进行并发处理,一次处理五个请求,每个请求1s时间,花费将近10s
2.对客户端的限流限制(limit_rate模块)
- 配置文件的修改
[root@server1 nginx]# sbin/nginx -t
nginx: the configuration file /usr/local/nginx/conf/nginx.conf syntax is ok
nginx: configuration file /usr/local/nginx/conf/nginx.conf test is successful
[root@server1 nginx]# systemctl reload nginx.service
物理机测试查看效果:

并发数为1请求5次,每个vim.jpg的大小为400k左右,限流为50k,处理一个包时间为8s左右,则五个为40s左右
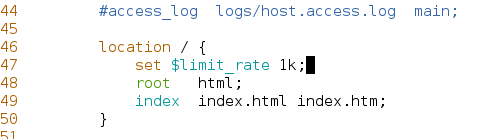
-
set $limit_rate 1k;##nginx每秒传输一个字节到浏览器中
-
在配置文件中加入限流
重启服务并添加测试数据
root@server1 nginx]# sbin/nginx -t
nginx: the configuration file /usr/local/nginx/conf/nginx.conf syntax is ok
nginx: configuration file /usr/local/nginx/conf/nginx.conf test is successful
[root@server1 nginx]# systemctl reload nginx.service
[root@server1 nginx]# cd html/
[root@server1 html]# ls
50x.html  download  index.html
[root@server1 html]# cat /etc/passwd > index.html
[root@server1 html]# du -sh *
4.0K	50x.html
444K	download
32K	index.html
在浏览器查看:
 https加密
-
简介:由俩部分组成:HTTP+SSL/TLS。也就是在HTTP上又加了一层处理加密信息的模块。服务和客户端的信息传输都会通过TSL进行加密,所以传输的数据都是加密后的数据 。
-
原理:客户端与服务器建立连接,各自生成私钥和公钥,是不同的。服务器返回给客户端一个公钥,然后客户端拿着这个公钥把要搜索的东西加密,称之为密文,并连并自己的公钥一起返回给服务器,服务器拿着自己的私钥解密密文,然后把响应到的数据用客户端的公钥加密,返回给客户端,客户端拿着自己的私钥解密文,把数据呈现出来。
-
加密实现
1.关闭nginx服务,重新编译,并添加ssl模块[root@server1 html]# systemctl stop nginx.service
2.重新编译
安装依赖性软件和依赖包
 [root@server1 ~]# yum install -y gd-devel-2.0.35-26.el7.x86_64.rpm
 [root@server1 ~]# yum install -y openssl-devel
 [root@server1 nginx-1.17.1]# ./configure --prefix=/usr/local/nginx --with-file-aio --with-http_realip_module --with-http_image_filter_module --with-http_ssl_module
[root@server1 nginx-1.17.1]# make
3.将新生成的nginx替换/usr/local/nginx/sbin/nginx文件
[root@server1 nginx-1.17.1]# ls
auto     CHANGES.ru  configure  html     Makefile  objs    src
CHANGES  conf        contrib    LICENSE  man       README
[root@server1 nginx-1.17.1]# cd objs/
[root@server1 objs]# cp nginx /usr/local/nginx/sbin/nginx
cp: overwrite ‘/usr/local/nginx/sbin/nginx’? y
- 在/etc/pki/tls/certs下生成证书并将锁和钥匙放在nginx的配置文件的目录下
[root@server1 objs]# cd /etc/pki/tls/certs
[root@server1 certs]# make cert.pem
[root@server1 certs]# cp cert.pem /usr/local/nginx/conf/

- 测试nginx的正常访问
1.编辑配置文件
 [root@server1 nginx]# sbin/nginx -t
nginx: the configuration file /usr/local/nginx/conf/nginx.conf syntax is ok
nginx: configuration file /usr/local/nginx/conf/nginx.conf test is successful
[root@server1 nginx]# systemctl reload nginx
[root@server1 nginx]# vim /etc/hosts

[root@foundation42 ~]# vim /etc/hosts

编写测试页,创建域名下的资源/web
[root@server1 nginx]# mkdir /web
[root@server1 nginx]# cd /web
[root@server1 web]# ls
index.html
[root@server1 web]# cat index.html
aini1wannian
[root@server1 web]#
测试访问:

可以正常访问
- 再次编辑配置文件加入https
1.编辑配置文件

2.重启服务
[root@server1 nginx]# sbin/nginx -t
nginx: the configuration file /usr/local/nginx/conf/nginx.conf syntax is ok
nginx: configuration file /usr/local/nginx/conf/nginx.conf test is successful
[root@server1 nginx]# systemctl reload nginx
3.访问页面


网页重定向
- 临时重定向
- 将www.westos.org重定向到https://www.westos.org
1.编写配置文件

2.重启服务
[root@server1 nginx]# sbin/nginx -t
nginx: the configuration file /usr/local/nginx/conf/nginx.conf syntax is ok
nginx: configuration file /usr/local/nginx/conf/nginx.conf test is successful
[root@server1 nginx]# systemctl reload nginx
测试:
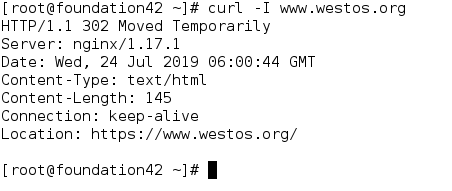
302表示临时重定向,可以看到我们访问的为www.westos.org,而页面的位置却到了https://www.westos.org
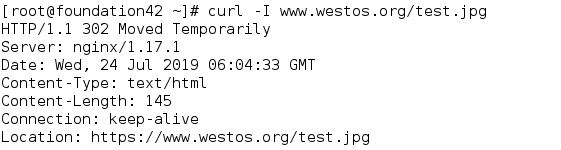
当配置文件中的rewrite重写时后不加$1时只可以定向到https://www.westos.org/,而无法定位到用户输入的地址
-
永久重定向
-
在临时重定向的重写规则后加入“permanent”即可
-

-
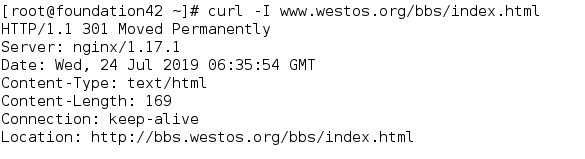
将www.westos.org/bbs/index.html重定向到http://bbs.westos.org/bbs/index.html
1.编写配置文件

2.重启服务
[root@server1 nginx]# sbin/nginx -t
nginx: the configuration file /usr/local/nginx/conf/nginx.conf syntax is ok
nginx: configuration file /usr/local/nginx/conf/nginx.conf test is successful
[root@server1 nginx]# systemctl reload nginx
3.编写测试页并添加资源
[root@server1 nginx]# mkdir /bbs
[root@server1 nginx]# cd /bbs
[root@server1 bbs]# ls
index.html
[root@server1 bbs]# cat index.html
i love you chengzi
[root@server1 bbs]#
4.测试机添加解析

测试:

301表示永久重定向,可以看到访问的为www.westos.org/bbs/index.html,可实际访问的却为http://bbs.westos.org/bbs/index.html
-
.将bbs.westos.org重定向到https://westos.org/bbs下
1.编写配置文件
2.重启服务
[root@server1 nginx]# sbin/nginx -t
nginx: the configuration file /usr/local/nginx/conf/nginx.conf syntax is ok
nginx: configuration file /usr/local/nginx/conf/nginx.conf test is successful
[root@server1 nginx]# systemctl reload nginx3.测试页编写
[root@server1 nginx]# cd /web
[root@server1 web]# cp -r /bbs/ /web/
[root@server1 web]# ls
bbs index.html
[root@server1 web]#
测试:
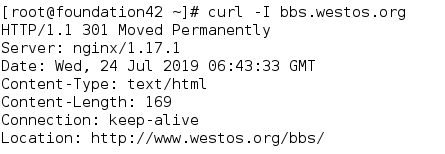
访问的为bbs.westos.org,实际位置在www.westos.org/bbs/
图片盗链与防盗链
添加新的nginx主机server2并添加配置文件

[root@server2 web]# /usr/local/nginx/sbin/nginx -t
nginx: the configuration file /usr/local/nginx/conf/nginx.conf syntax is ok
nginx: configuration file /usr/local/nginx/conf/nginx.conf test is successful
[root@server2 web]# /usr/local/nginx/sbin/nginx -s reload
2.server2上添加解析
[root@server2 web]# vim /etc/hosts

3.srver2添加测试页
[root@server2 logs]# mkdir /web
[root@server2 logs]# cd /web
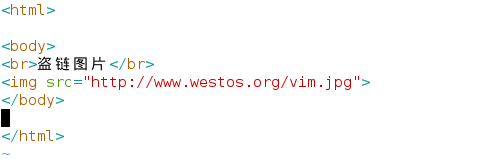
[root@server2 web]# vim index.html
[root@server2 web]# cat index.html
<html>
<body>
<br>盗链图片</br>
<img src="http://www.westos.org/vim.jpg">
</body>
</html>
4.物理机添加解析
[root@foundation42 ~]# vim /etc/hosts

5.在server1的配置文件中添加www.westos.org,并且添加资源
[root@server1 web]# vim /usr/local/nginx/conf/nginx.conf

[root@server1 web]# cp /usr/local/nginx/html/download/vim.jpg /web##添加图片
物理机查看www.westos.org/vim.jpg

6.使用server2的daolian.westos.org查看网页

- 防盗链
1.server1修改配置文件

[root@server1 web]# /usr/local/nginx/sbin/nginx -t
nginx: the configuration file /usr/local/nginx/conf/nginx.conf syntax is ok
nginx: configuration file /usr/local/nginx/conf/nginx.conf test is successful
[root@server1 web]# systemctl reload nginx.service
2.再次访问“daolian.westos.org”
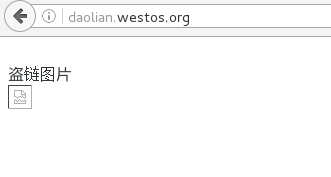
防盗链成功
- 防盗链返回图片
1.编辑server1配置文件

[root@server1 web]# /usr/local/nginx/sbin/nginx -t
nginx: the configuration file /usr/local/nginx/conf/nginx.conf syntax is ok
nginx: configuration file /usr/local/nginx/conf/nginx.conf test is successful
[root@server1 web]# systemctl reload nginx.service
2.添加/bbs目录下的资源
[root@server1 bbs]# cd /bbs
[root@server1 bbs]# ll
total 2208
-rw-r–r-- 1 root root 2258352 Jul 24 16:15 kkx.png
再次访问“daolian.westos.org”
 工作的时候可不能像我这么皮,依旧返回了一张资源图片,可以选择自己要打的广告图片或者其它有意思的图片。
记录客户机真实ip
| ip | 类别 |
|---|---|
| 172.25.42.1 | 服务器 |
| 172.25.42.2 | 代理 |
| 172.25.42.254 | 客户机 |
需要添加http_realip_module模块
配置代理

配置服务器

客户机访问
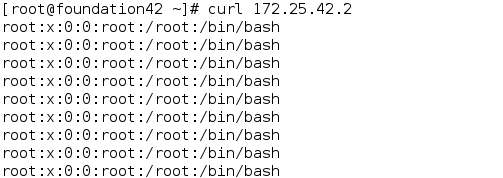
查看日志


 345
345


 被折叠的 条评论
为什么被折叠?
被折叠的 条评论
为什么被折叠?
 到【灌水乐园】发言


