


近日在k8s上部署了一个ES8.12.0的集群,在部署过程中,发现无论是官方、还是网上的文章,都没有一站式能搞定的(官网文档非常碎片化,出了问题只能去官网的问题反馈去查,网上的其他文章可能是版本的问题与最新版ES不太适配),因此把我的部署过程整理分享出来,希望能帮到需要的同学。
--------------------- 原创不易,如果大家看完觉得有帮助,希望能多多点赞关注,感谢各位的支持 ----------------------
镜像
官网的镜像可以直接使用,docker.elastic.co/elasticsearch/elasticsearch:8.12.0
部署坑点
-
最新版ES默认启用了SSL安全性,镜像默认的启动命令会自动生成证书,不过只能让服务单点启动成起来,想做个集群或者配置kibana都不行,纯粹就是个摆设。需要重新生成整套的证书,官网还没有一套完整的文档都是东一块,西一块;
-
ES代码中针对部署状态做了强安全性的校验导致k8s部署时要处理更多细节如:
配置文件不允许做软链(部署k8s一般都把配置文件外挂成comfigmap便于维护,挂载configmap后,在通过软连方式替换掉原有的配置文件可以实现配置文件实时更新),启动会报异常‘
$ES_HOME目录(默认是/usr/share/elasticsearch)极其子目录的owner必须是elasticsearch:elasticsearch,证书的目录可以例外,否则也会启动报异常
-
安全证书需要适配节点IP,因此需要K8S容器绑定固定IP,使用Calico网络组件最新版3.27.0,支持在pod的annotations中添加声明 “cni.projectcalico.org/ipAddrs”: “[“xx.xx.xx.xx”]” 来绑定固定ip(一般不建议绑定,因为绑定后,容器更新重启需要等原容器销毁后新容器才能启动,平滑重启,滚动更新相当于废了)
-
原始镜像没有优化系统内核参数,需要在容器初始化时通过root权限处理,而这就导致镜像默认启动命令不会执行自动初始化,也不会再生成默认证书,启动一定失败!!因为ES代码里面有校验如果启动脚本的进程pid不是1,就不会自动做初始化,必须手动处理(写到这里我想骂人。。。)
综上所述,想要通过官网镜像部署ES集群,就不能使用默认自动初始化,而这就导致启动必然失败,首次启动只能通过在command中使用 sleep 3600; 把容器挂住,然后在到容器中通过elasticsearch-certuti生成全套证书后,再配置好证书挂载目录后,才能正常启动。
配置文件可以通过cat 命令在启动命令执行前将挂载的自定义配置文件内容替换到默认配置文件中
部署过程
部署2个实例的集群,1主1从
准备主节点 k8s部署yml文件
PVC声明,这里我是用的是local-path-provisioner本地存储,可以根据自己的环境替换
---

#声明存储使用
#local存储  storage_class:local-path-provisioner(rancher)
apiVersion: v1
kind: PersistentVolumeClaim
metadata:
  name: es-010-pvc
  namespace:  es
spec:
  accessModes:
    - ReadWriteOnce #本地存储只支持ReadWriteOnce
  storageClassName: local-path #local-path: 容器删除,存储local-path动态删除,local-path-retain: 容器删除,存储local-path保留,local-path|local-path-retain为手动安装的storageclass
  resources:
    requests:
      storage: 50Gi #声明最少要使用存储空间,不足则无法创建 Gi=G Mi=M
  #persistentVolumeReclaimPolicy: Delete # PVC 回收策略 Retain 保留| Delete 清除 | PV: local-path-provisioner(rancher) 不支持设置该属性
暴露ES集群service, service 我一般是采用固定ip,方便给nginx做upsream
---

# api service

apiVersion: v1
kind: Service
metadata:
  name: es-01-svc
  namespace:  es
  annotations:
    desc : elastic 01 集群 name-server的服务访问入口
spec:
  selector:
    es-cluster: es-01
  type: ClusterIP   #type:  ClusterIP【默认】 | NodePort | LoadBalancer(外部负载均衡) | ExternalName (外部DNS解析)
  clusterIP: 10.106.220.1
  ports:
    - port: 9200
      targetPort: 9200
      name: httpport
    - port: 9300
      targetPort: 9300
      name: transport
      #nodePort: 32000

---
StatefulSet配置(ES肯定是有状态的)
要点说明
-
只能单副本 replicas: 1
-
需要指定以root来启动pod并开启特权(因为需要优化内核参数)
-
挂载data跟logs目录,使用的PVC
-
挂载证书目录es-010-cert-file,使用的hostPath,配置文件中可以用绝对目录也可以用相对目录,相对目录的话当前位置是在 ${ES_HOME}/config/ 下,所以我才会把证书目录挂载到config子目录中;
-
通过command来同步配置文件,并重设目录用户,添加hosts(可选),再以elasticsearch用户启动服务
-
elasticsearch.yml配置要点说明
command中增加 “sleep 3600;” 生成完证书删除掉,不要注释,要删除。discovery.seed_hosts: [“10.244.220.10:9300”,“10.244.220.11:9300”]
这行配置是用于发现集群中的节点,首次启动时注释掉,等后面需要初始化集群的时候再打开首次启动单点使用
cluster.initial_master_nodes: [“10.244.220.10”],启动成功后,进行证书初始化
后续集群启动开启 discovery.seed_hosts 进行集群启动,由于之前单点启动成功已经有master了,故此是可以成功启动集群的cluster.name: "es-01"同一个集群的节点要保持一致
-
这里我还初始化了一下pod的hosts,可以让本地通过域名来执行脚本或访问api而不用写死ip
apiVersion: apps/v1
kind: StatefulSet # Deployment | StatefulSet | DaemonSet | JobSet
metadata:
  name:   es-010
  namespace:  es
spec:
  replicas: 1  #运行副本数
  selector:
    matchLabels:
      k8s-app:  es-010 #与下方template节点中的 labels 保持一致
  revisionHistoryLimit: 10 #设定保留最近的几个revision 用于回滚,默认10
  #serviceName: "nginx-headless" #设置绑定的service,以支持内部dns访问 <pod-name>.<svc-name>.<namespace>.svc.cluster.local
  updateStrategy: #更新策略 [Statefulset]
  #strategy: #更新策略 [Deployment]
    type: RollingUpdate # RollingUpdate (滚动更新) | OnDelete (删除时更新)
    rollingUpdate:
      #maxSurge: 1  #[Deployment]支持-升级过程中可以启动超过原先设置的POD数量的上限:数量 或 百分比 1 | 20%
      #maxUnavailable: 1 #[Deployment]支持-升级过程中无法提供服务的POD数量的上限:数量 或 百分比 1 | 20%,最好与maxSurge保持一致,这样能确保更新过程中的服务能力不会下降
      partition: 0 #[Statefulset] 灰度发布控制器,每次只更新部署的pod序号 >= partition的pod,如果有5个pod[0-4],0=更新所有,4=更新1pod,3=更新2pod
  template:
    metadata:
      labels:
         k8s-app: es-010
         es-cluster: es-01
      annotations:
        #elasticearch 安全证书要求,需要固定节点ip
        "cni.projectcalico.org/ipAddrs": "[\"10.244.220.10\"]"  #pod绑定固定ip,依赖于calico ipam插件,必须使用calico 3.24.1以上的版本才可以
    spec:
      restartPolicy: Always
      #使用指定用户运行,当前pod下所有容器都生效
      securityContext:
        runAsUser: 0  #以root运行
      containers:
        - name: es-010
          image: docker.elastic.co/elasticsearch/elasticsearch:8.12.0
          imagePullPolicy: IfNotPresent # IfNotPresent | Always | Never
          securityContext: ##开启特权,因为要调整系统内核
            privileged: true
          resources:
            requests:
              memory: "4Gi" #Gi=G Mi=M 只支持整数
              cpu: "2000m" #1000m=1cpu (cpu物理线程)
            limits:
              memory: "6Gi" #Gi=G Mi=M 只支持整数
              cpu: "3000m"  #1000m=1cpu (cpu物理线程)
          #securityContext: ###添加参数启用容器root权限
          #  privileged: true
          ports:
          - containerPort: 9200
            protocol: TCP
          - containerPort: 9300
            protocol: TCP
          command: ["/bin/sh","-c"]
          args: #可以设置多行命令,不过启动后初始化还是推荐使用postStart钩子函数来执行,不能有#注释符
           #将挂载的配置文件同步到默认的ES配置文件中,因为elastic的安全机制,软连接无法生效
           #将${POD_NAME}'.es.ndcto.com添加到本机hosts中,以便于与http.p12中的授信主机名适配
          - |
            cat /config/elasticsearch.yml > /usr/share/elasticsearch/config/elasticsearch.yml;
            cat /config/jvm.options > /usr/share/elasticsearch/config/jvm.options;
            chown -R elasticsearch:elasticsearch /usr/share/elasticsearch;
            chown -R elasticsearch:elasticsearch /elasticsearch;

            swapoff -a
            echo 'elasticsearch  -  nproc   4096' >> /etc/security/limits.conf;
            echo 'elasticsearch  -  nofile  65535' >> /etc/security/limits.conf;
            echo 'elasticsearch soft memlock unlimited' >> /etc/security/limits.conf;
            echo 'elasticsearch hard memlock unlimited' >> /etc/security/limits.conf;

            echo 'vm.max_map_count=262144'  >> /tmp/sysctl.conf;
            echo 'vm.swappiness=0'          >> /tmp/sysctl.conf;
            echo 'vm.overcommit_memory=1'   >> /tmp/sysctl.conf;
            echo 'vm.zone_reclaim_mode=0'   >> /tmp/sysctl.conf;
            echo 'net.ipv4.tcp_retries2=5'  >> /tmp/sysctl.conf;

            sysctl -p;

            echo ''${POD_IP}' es01.es.ndcto.com' >> /etc/hosts;
            echo ''${POD_IP}' es-01-svc' >> /etc/hosts;

            su - elasticsearch -c "/usr/share/elasticsearch/bin/elasticsearch -p /elasticsearch/elasticsearch.pid";
            sleep 3600;

          env:   #环境变量配置
          - name: POD_NAME
            valueFrom:
              fieldRef:
                apiVersion: v1
                fieldPath: metadata.name
          - name: POD_IP
            valueFrom:
              fieldRef:
                fieldPath: status.podIP
          volumeMounts:
          - name: es-volume    #挂载部署目录
            mountPath: /elasticsearch/data
            subPathExpr: $(POD_NAME)/elasticsearch/data
          - name: es-volume  #挂载部署目录
            mountPath: /elasticsearch/logs
            subPathExpr: $(POD_NAME)/elasticsearch/logs
          - name: es-volume  #挂载部署目录
            mountPath: /usr/share/elasticsearch/.cache
            subPathExpr: $(POD_NAME)/elasticsearch/cache
          - name: es-volume  #挂载部署目录
            mountPath: /usr/share/elasticsearch/plugins
            subPathExpr: $(POD_NAME)/elasticsearch/plugins
          - name: es-010-cert-file  #挂载存储目录
            mountPath: /usr/share/elasticsearch/config/local-certs
          - name: es-010-config  #挂载配置文件
            mountPath: /config
          - name: host-time  #挂载本地时区
            mountPath: /etc/localtime
            readOnly: true
      volumes:
      - name: es-volume  #使用pvc
        persistentVolumeClaim:
          claimName: es-010-pvc
      - name: es-010-config  #使用pvc
        configMap:    #使用configMap
          name:  es-010-config
          defaultMode: 420 #420-644 493-755
      - name: es-010-cert-file
        hostPath: #挂载主机的目录
          path: /data/deploy/k8s/elasticsearch/certs
          type: ""
      - name: host-time
        hostPath: #挂载本地时区
          path: /etc/localtime
          type: ""

---
configmap配置
要点
---

apiVersion: v1
kind: ConfigMap #配置信息
metadata:
  name: es-010-config #es-010配置
  namespace:  es
data:
  elasticsearch.yml: |
    #首次启动会失败,需要重新生成证书并复制到所有节点上(xpack.security配置中的证书位置)
    cluster.name: "es-01"
    node:
      name: "es-010"
      #指定节点角色
      #roles: [ data, master]

    # 为HTTP 和传输流量设置此节点的地址。 elastic将监听该地址的所有请求,0.0.0.0 代表监听本机所有网络地址的请求,指定地址则仅监听该地址的请求(接受IP、主机名或特殊值)。
    network.host: 10.244.220.10

    # 默认不开启
    # 开启是为了能够在内网与其他节点通讯,使得新节点可以加入集群,0.0.0.0 代表监听本机所有网络地址的请求,指定地址则仅监听该地址的请求(接受IP、主机名或特殊值)。
    transport.host: 10.244.220.10

    # 用于节点发现
    # 首次启动时不开启
    #discovery.seed_hosts: ["10.244.220.10:9300","10.244.220.11:9300"]

    # 初始主节点配置,集群形成后,从每个节点的配置中删除此设置。
    # 单点首次启动
    cluster.initial_master_nodes: ["10.244.220.10"]

    # 初始集群配置至少3台,集群形成后,从每个节点的配置中删除此设置,需要按顺序启动
    #cluster.initial_master_nodes: ["10.244.220.10","10.244.220.11","10.244.220.12"]

    #配置存储路径
    path.data:  /elasticsearch/data
    path.logs:  /elasticsearch/logs

    # 开启es跨域与head插件
    http.cors.allow-origin: "*"
    http.cors.enabled: true
    http.cors.allow-headers: Authorization
    http.max_content_length: 200mb

    #linux在使用内存锁时仍会交换堆外内存。要防止堆外内存交换,请禁用所有交换文件。
    bootstrap.memory_lock: true

    #限制高成本查询
    search.default_search_timeout: "50s"
    #必须set为true,否则kibana报错
    search.allow_expensive_queries: true

    #禁用通配符模糊匹配删除索引
    action.destructive_requires_name: true

    # 设置自动创建索引(可选)
    # 一些商业功能会自动在 Elasticsearch 中创建索引。 默认情况下,Elasticsearch 配置为允许自动创建索引,不需要额外的步骤
    #action.auto_create_index: .monitoring*,.watches,.triggered_watches,.watcher-history*,.ml*

    #----------------------- BEGIN SECURITY AUTO CONFIGURATION -----------------------
    #
    # The following settings, TLS certificates, and keys have been automatically
    # generated to configure Elasticsearch security features on 07-02-2024 12:57:00
    #
    # --------------------------------------------------------------------------------

    # Enable security features


    xpack.security:
      enabled: true
      autoconfiguration:
        enabled: true

    xpack.security.enrollment.enabled: true

    # Enable encryption for HTTP API client connections, such as Kibana, Logstash, and Agents
    xpack.security.http.ssl:
      enabled: true
      # pem证书配置方式
      #key: local-certs/elastic-http.key
      #certificate: local-certs/elastic-http.crt
      #certificate_authorities: [ "local-certs/elastic-http.crt" ]
      keystore.path: local-certs/http.p12

    # Enable encryption and mutual authentication between cluster nodes
    xpack.security.transport.ssl:
      enabled: true
      verification_mode: certificate
      # pem证书配置方式
      #key: local-certs/ca.key
      #certificate: local-certs/ca.crt
      #certificate_authorities: [ "local-certs/ca.crt" ]

      # pks12证书配置方式
      keystore.path: local-certs/elastic-certificates.p12
      truststore.path: local-certs/elastic-certificates.p12


    #----------------------- END SECURITY AUTO CONFIGURATION -------------------------

  jvm.options: |
    -Xms4g
    -Xmx4g
    -XX:+UseG1GC

    ## JVM temporary directory
    -Djava.io.tmpdir=${ES_TMPDIR}

    # Leverages accelerated vector hardware instructions; removing this may
    # result in less optimal vector performance
    20-:--add-modules=jdk.incubator.vector

    # REMOVE once bumped to a JDK greater than 21.0.1, https://github.com/elastic/elasticsearch/issues/103004
    19-21:-XX:CompileCommand=exclude,org.apache.lucene.util.MSBRadixSorter::computeCommonPrefixLengthAndBuildHistogram
    19-21:-XX:CompileCommand=exclude,org.apache.lucene.util.RadixSelector::computeCommonPrefixLengthAndBuildHistogram

    ## heap dumps

    # generate a heap dump when an allocation from the Java heap fails; heap dumps
    # are created in the working directory of the JVM unless an alternative path is
    # specified
    -XX:+HeapDumpOnOutOfMemoryError

    # exit right after heap dump on out of memory error
    -XX:+ExitOnOutOfMemoryError

    # specify an alternative path for heap dumps; ensure the directory exists and
    # has sufficient space
    -XX:HeapDumpPath=/elasticsearch/data

    # specify an alternative path for JVM fatal error logs
    -XX:ErrorFile=/elasticsearch/logs/hs_err_pid%p.log

    ## GC logging
    -Xlog:gc*,gc+age=trace,safepoint:file=/elasticsearch/logs/gc.log:utctime,level,pid,tags:filecount=32,filesize=64m
证书生成
通过 kubectl apply -f 部署文件,可以部署ES-010 主节点以及 集群的service访问入口,ES服务会启动失败,不过由于slepp 3600; 容器会保持在running 状态,我们可以通过kubecl exec 进去容器内去生成证书。
ES使用的证书一共有4套
1.CA证书,用于生成其他证书
2.transport证书,用于ES节点之间通讯
3.http证书,用于client访问,包括ES自带的/bin下的脚本文件也会依赖这个证书调用当前ES的API(跟K8S kubedctl kubeadm 类似)
4.kibana访问ES集群的证书
当前可以简单粗暴的在配置中把所有ssl校验都设置为false来忽略这些安全校验,不过这不是我的初衷
生成CA证书
${ES_HOME}/bin/elasticsearch-certutil ca
这里可以选择添加证书密码,如果添加密码的话,后续使用CA证书去生成其他证书都需要先校验密码
默认会在${ES_HOME}目录下生成 elastic-stack-ca.p12 这个证书文件,在实际操作中根据自己的实际情况进行调整
使用CA证书生成 transport证书
${ES_HOME}/bin/elasticsearch-certutil cert --ca ${ES_HOME}/elastic-stack-ca.p12
最终会生成1个elastic-certificates.p12的证书文件
使用CA证书生成http证书
/usr/share/elasticsearch/bin/elasticsearch-certutil http
执行后需要按提示输入一些选项
#   需要设置一些选项
 创建CSR: 否 {选是的话,需要使用自己的CA根证书}
 使用已创建CA:是
 输入CA文件路径:/elastic-stack-ca.p12   ${ES_HOME}/elastic-stack-ca.p12
 CA文件密码:创建CA证书时没有设置就回车,设置了就填写
 设置证书过期时间:可以按年月日计算,例如10y为10年,10d为10天,10m为10个月。
 是否为每个节点创建独立的证书:是  (使用同一个证书。)
 录入需要使用证书的主机名   即可以通过https访问的主机名或域名,域名可以设置通配符如:*.es.example.com |  这里我用的是 es-01-svc.es 也就是{ES集群serviceapi的name}.{service所在的命名空间},同个集群内都可以使用,k8s集群内部访问都是通过service的域名来做请求的,可以多个,每个换行。
 录入需要使用证书的IP       需要设置证书适用集群节点的ip,否则后期增加节点会不可用,还得重新生成证书 : 输入ES集群节点将要绑定的ip地址,可以多个,每个换行
 设置证书密码:建议为空,省点麻烦,这么多证书认证已经够够的了
以上完成后将在${elasticsearch_home}下生成一个zip压缩文件。 解压文件,生成一个文件夹,里面包含两个文件夹:
elasticsearch文件夹包含http.p12及elasticsearch.yml的配置参考;
kibana文件夹包含elasticsearch-ca.pem及kibana.yml的配置参考;(注意:kibana仅有这个证书是不够的)
用java/bin/keytool http.p12证书中注入CA证书
这步很重要,否则生成的http.p12根本用不了,会提示异常,也是最让我想吐槽的地方,官方文档的安装步骤里根本没提,只是因为问题反馈有人说,才找到解答说这步是在哪哪哪,这也是我觉得ES官方文档很碎片化的原因,要说没有的吧,在某个地方也说了,但是从安装说明那开始走,找不到!!
ERROR: Unable to create an enrollment token. Elasticsearch node HTTP layer SSL configuration Keystore doesn't contain any PrivateKey entries where the associated certificate is a CA certificate, with exit code 73
# 这里需要使用java/bin/keytool 给http.p12证书中注入CA证书
# 如果http.p12证书没有设置密码,只需要在命令中添加  -storepass "" 参数

keytool -importkeystore -destkeystore <filename-http-PKCS12> -srckeystore <filename-PKCS12-contains-CA-Cert.p12> -srcstoretype PKCS12
$ES_HOME/jdk/bin/keytool -importkeystore -destkeystore ./http.p12 -srckeystore ./elastic-stack-ca.p12  -srcstoretype PKCS12 -storepass ""
到这里ES需要的3个证书(配置里只配2个)就齐了
CA:elastic-stack-ca.p12
trasport: elastic-certificates.p12 (需要在配置文件中指定位置)
http: http.p12 (需要在配置文件中指定位置)
这时候需要配置好证书把集群启动起来,在我这里的配置中,我把 elastic-stack-ca.p12、http.p12、elastic-certificates.p12 都通过hostpath 挂载到了所有pod的${ES_HOME}/config/local-certs/中(要确保pod调度到的所有Node的该存储目录中都有这3个文件),实际配置中只需要 http.p12、elastic-certificates.p12 为了以后便于维护我还是都放进去了。
这时候需要调整一下部署文件,以我的集群1主1从举例
- 所有节点的配置中开启节点发现,并把主从节点的ip端口都填进去,transport端口默认就是9300,也可以不指明
discovery.seed_hosts: ["10.244.220.10:9300","10.244.220.11:9300"]
- 注释单节点初始化
 # 首次启动单点
#cluster.initial_master_nodes: ["10.244.220.10"]
- 删除 commond中的 sleep 3600;
其他节点配置
从节点1的k8s部署配置如下,有更多节点2,3,4,5 可以参考复制该配置,并调整name,ip属性值
声明单独的存储PVC
---

#声明存储使用
#local存储  storage_class:local-path-provisioner(rancher)
apiVersion: v1
kind: PersistentVolumeClaim
metadata:
  name: es-011-pvc
  namespace:  es
spec:
  accessModes:
    - ReadWriteOnce #本地存储只支持ReadWriteOnce
  storageClassName: local-path #local-path: 容器删除,存储local-path动态删除,local-path-retain: 容器删除,存储local-path保留,local-path|local-path-retain为手动安装的storageclass
  resources:
    requests:
      storage: 50Gi #声明最少要使用存储空间,不足则无法创建 Gi=G Mi=M
  #persistentVolumeReclaimPolicy: Delete # PVC 回收策略 Retain 保留| Delete 清除 | PV: local-path-provisioner(rancher) 不支持设置该属性
pod部署说明
- es-cluster: es-01 不要动这是为了让集群service能匹配到集群内的所有pod,集群内节点需要保持一致
---


apiVersion: apps/v1
kind: StatefulSet # Deployment | StatefulSet | DaemonSet | JobSet
metadata:
  name:   es-011
  namespace:  es
spec:
  replicas: 1  #运行副本数
  selector:
    matchLabels:
      k8s-app:  es-011 #与下方template节点中的 labels 保持一致
  revisionHistoryLimit: 10 #设定保留最近的几个revision 用于回滚,默认10
  #serviceName: "nginx-headless" #设置绑定的service,以支持内部dns访问 <pod-name>.<svc-name>.<namespace>.svc.cluster.local
  updateStrategy: #更新策略 [Statefulset]
  #strategy: #更新策略 [Deployment]
    type: RollingUpdate # RollingUpdate (滚动更新) | OnDelete (删除时更新)
    rollingUpdate:
      #maxSurge: 1  #[Deployment]支持-升级过程中可以启动超过原先设置的POD数量的上限:数量 或 百分比 1 | 20%
      #maxUnavailable: 1 #[Deployment]支持-升级过程中无法提供服务的POD数量的上限:数量 或 百分比 1 | 20%,最好与maxSurge保持一致,这样能确保更新过程中的服务能力不会下降
      partition: 0 #[Statefulset] 灰度发布控制器,每次只更新部署的pod序号 >= partition的pod,如果有5个pod[0-4],0=更新所有,4=更新1pod,3=更新2pod
  template:
    metadata:
      labels:
         k8s-app: es-011
         es-cluster: es-01
      annotations:
        #elasticearch 安全证书要求,需要固定节点ip
        "cni.projectcalico.org/ipAddrs": "[\"10.244.220.11\"]"  #pod绑定固定ip,依赖于calico ipam插件,必须使用calico 3.24.1以上的版本才可以
    spec:
      restartPolicy: Always
      #使用指定用户运行,当前pod下所有容器都生效
      securityContext:
        runAsUser: 0  #以root运行
        #fsGroup: 1000  #指定存储卷挂载归属用户组
        #runAsUser: 1000 #以指定用户运行容器
      containers:
        - name: es-011
          image: docker.elastic.co/elasticsearch/elasticsearch:8.12.0
          imagePullPolicy: IfNotPresent # IfNotPresent | Always | Never
          securityContext: ##开启特权,因为要调整系统内核
            privileged: true
          resources:
            requests:
              memory: "4Gi" #Gi=G Mi=M 只支持整数
              cpu: "2000m" #1000m=1cpu (cpu物理线程)
            limits:
              memory: "6Gi" #Gi=G Mi=M 只支持整数
              cpu: "4000m"  #1000m=1cpu (cpu物理线程)
          #securityContext: ###添加参数启用容器root权限
          #  privileged: true
          ports:
          - containerPort: 9200
            protocol: TCP
          - containerPort: 9300
            protocol: TCP
          command: ["/bin/sh","-c"]
          args: #可以设置多行命令,不过启动后初始化还是推荐使用postStart钩子函数来执行,不能有#注释符
           #将挂载的配置文件同步到默认的ES配置文件中,因为elastic的安全机制,软连接无法生效
           #将${POD_NAME}'.es.ndcto.com添加到本机hosts中,以便于与http.p12中的授信主机名适配
          - |
            cat /config/elasticsearch.yml > /usr/share/elasticsearch/config/elasticsearch.yml;
            cat /config/jvm.options > /usr/share/elasticsearch/config/jvm.options;
            chown -R elasticsearch:elasticsearch /usr/share/elasticsearch;
            chown -R elasticsearch:elasticsearch /elasticsearch;

            swapoff -a
            echo 'elasticsearch  -  nproc   4096' >> /etc/security/limits.conf;
            echo 'elasticsearch  -  nofile  65535' >> /etc/security/limits.conf;
            echo 'elasticsearch soft memlock unlimited' >> /etc/security/limits.conf;
            echo 'elasticsearch hard memlock unlimited' >> /etc/security/limits.conf;

            echo 'vm.max_map_count=262144'  >> /tmp/sysctl.conf;
            echo 'vm.swappiness=0'          >> /tmp/sysctl.conf;
            echo 'vm.overcommit_memory=1'   >> /tmp/sysctl.conf;
            echo 'vm.zone_reclaim_mode=0'   >> /tmp/sysctl.conf;
            echo 'net.ipv4.tcp_retries2=5'  >> /tmp/sysctl.conf;

            sysctl -p;

            echo ''${POD_IP}' es01.es.ndcto.com' >> /etc/hosts;
            echo ''${POD_IP}' es-01-svc' >> /etc/hosts;
            su - elasticsearch -c "/usr/share/elasticsearch/bin/elasticsearch -p /elasticsearch/elasticsearch.pid";

          env:   #环境变量配置
          - name: POD_NAME
            valueFrom:
              fieldRef:
                apiVersion: v1
                fieldPath: metadata.name
          - name: POD_IP
            valueFrom:
              fieldRef:
                fieldPath: status.podIP
          volumeMounts:
          - name: es-volume    #挂载部署目录
            mountPath: /elasticsearch/data
            subPathExpr: $(POD_NAME)/elasticsearch/data
          - name: es-volume  #挂载部署目录
            mountPath: /elasticsearch/logs
            subPathExpr: $(POD_NAME)/elasticsearch/logs
          - name: es-volume  #挂载部署目录
            mountPath: /usr/share/elasticsearch/.cache
            subPathExpr: $(POD_NAME)/elasticsearch/cache
          - name: es-volume  #挂载部署目录
            mountPath: /usr/share/elasticsearch/plugins
            subPathExpr: $(POD_NAME)/elasticsearch/plugins
          - name: es-011-cert-file  #挂载存储目录
            mountPath: /usr/share/elasticsearch/config/local-certs
          - name: es-011-config  #挂载配置文件
            mountPath: /config
            #readOnly: true
          - name: host-time  #挂载本地时区
            mountPath: /etc/localtime
            readOnly: true
      volumes:
      - name: es-volume  #使用pvc
        persistentVolumeClaim:
          claimName:  es-011-pvc
      - name: es-011-config  #使用pvc
        configMap:    #使用configMap
          name:  es-011-config
          defaultMode: 420 #420-644 493-755
      - name: es-011-cert-file
        hostPath: #挂载主机的目录
          path: /data/deploy/k8s/elasticsearch/certs
          type: ""
      - name: host-time
        hostPath: #挂载本地时区
          path: /etc/localtime
          type: ""

---
挂载配置文件,各节点除了node.name跟network.host 都相同,当然也可以指定不同的node.role
apiVersion: v1
kind: ConfigMap #配置信息
metadata:
  name: es-011-config #es-010配置
  namespace:  es
data:
  elasticsearch.yml: |
    cluster.name: "es-01"
    node:
      name: "es-011"
      #指定节点角色
      #roles: [ data, master]
    # 为HTTP 和传输流量设置此节点的地址。 elastic将监听该地址的所有请求,0.0.0.0 代表监听本机所有网络地址的请求,指定地址则仅监听该地址的请求(接受IP、主机名或特殊值)。
    network.host: 10.244.220.11

    # 默认不开启
    # 开启是为了能够在内网与其他节点通讯,使得新节点可以加入集群,0.0.0.0 代表监听本机所有网络地址的请求,指定地址则仅监听该地址的请求(接受IP、主机名或特殊值)。
    transport.host: 10.244.220.11

    # 用于节点发现
    discovery.seed_hosts: ["10.244.220.10:9300","10.244.220.11:9300"]

    # 初始主节点配置,集群形成后,从每个节点的配置中删除此设置。
    # 单点首次启动
    #cluster.initial_master_nodes: ["10.244.220.11"]

    # 初始集群配置至少3台,集群形成后,从每个节点的配置中删除此设置,需要按顺序启动
    #cluster.initial_master_nodes: ["10.244.220.10","10.244.220.11","10.244.220.12"]

    #配置存储路径
    path.data:  /elasticsearch/data
    path.logs:  /elasticsearch/logs

    # 开启es跨域与head插件
    http.cors.allow-origin: "*"
    http.cors.enabled: true
    http.cors.allow-headers: Authorization
    http.max_content_length: 200mb

    #linux在使用内存锁时仍会交换堆外内存。要防止堆外内存交换,请禁用所有交换文件。
    #k8s容器无法执行
    bootstrap.memory_lock: true

    #限制高成本查询
    search.default_search_timeout: "50s"
    #必须set为true,否则kibana报错
    search.allow_expensive_queries: true

    #禁用通配符模糊匹配删除索引
    action.destructive_requires_name: true

    # 设置自动创建索引(可选)
    # 一些商业功能会自动在 Elasticsearch 中创建索引。 默认情况下,Elasticsearch 配置为允许自动创建索引,不需要额外的步骤
    #action.auto_create_index: .monitoring*,.watches,.triggered_watches,.watcher-history*,.ml*

    #----------------------- BEGIN SECURITY AUTO CONFIGURATION -----------------------
    #
    # The following settings, TLS certificates, and keys have been automatically
    # generated to configure Elasticsearch security features on 07-02-2024 12:57:00
    #
    # --------------------------------------------------------------------------------

    # Enable security features


    xpack.security:
      enabled: true
      autoconfiguration:
        enabled: true

    xpack.security.enrollment.enabled: true

    # Enable encryption for HTTP API client connections, such as Kibana, Logstash, and Agents
    xpack.security.http.ssl:
      enabled: true
      # pem证书配置方式
      #key: local-certs/elastic-http.key
      #certificate: local-certs/elastic-http.crt
      #certificate_authorities: [ "local-certs/elastic-http.crt" ]
      keystore.path: local-certs/http.p12

    # Enable encryption and mutual authentication between cluster nodes
    xpack.security.transport.ssl:
      enabled: true
      verification_mode: certificate
      # pem证书配置方式
      #key: local-certs/ca.key
      #certificate: local-certs/ca.crt
      #certificate_authorities: [ "local-certs/ca.crt" ]

      # pks12证书配置方式
      keystore.path: local-certs/elastic-certificates.p12
      truststore.path: local-certs/elastic-certificates.p12


    #----------------------- END SECURITY AUTO CONFIGURATION -------------------------

  jvm.options: |
    -Xms4g
    -Xmx4g
    -XX:+UseG1GC

    ## JVM temporary directory
    -Djava.io.tmpdir=${ES_TMPDIR}

    # Leverages accelerated vector hardware instructions; removing this may
    # result in less optimal vector performance
    20-:--add-modules=jdk.incubator.vector

    # REMOVE once bumped to a JDK greater than 21.0.1, https://github.com/elastic/elasticsearch/issues/103004
    19-21:-XX:CompileCommand=exclude,org.apache.lucene.util.MSBRadixSorter::computeCommonPrefixLengthAndBuildHistogram
    19-21:-XX:CompileCommand=exclude,org.apache.lucene.util.RadixSelector::computeCommonPrefixLengthAndBuildHistogram

    ## heap dumps

    # generate a heap dump when an allocation from the Java heap fails; heap dumps
    # are created in the working directory of the JVM unless an alternative path is
    # specified
    -XX:+HeapDumpOnOutOfMemoryError

    # exit right after heap dump on out of memory error
    -XX:+ExitOnOutOfMemoryError

    # specify an alternative path for heap dumps; ensure the directory exists and
    # has sufficient space
    -XX:HeapDumpPath=/elasticsearch/data

    # specify an alternative path for JVM fatal error logs
    -XX:ErrorFile=/elasticsearch/logs/hs_err_pid%p.log

    ## GC logging
    -Xlog:gc*,gc+age=trace,safepoint:file=/elasticsearch/logs/gc.log:utctime,level,pid,tags:filecount=32,filesize=64m
然后通过kubectl apply -f …yaml 顺序部署主从节点,正常的话,会出现一大段的info初始化日志,没有error。
启动成功后,用kubectl exec -it 进去到任一容器中,重置elastic账号 与 kibana-system(kibana专用)账号
${ES_HOME}/bin/elasticsearch-reset-password -u elastic -i
${ES_HOME}/bin/elasticsearch-reset-password -u kibana_system -i
通过service 的 cluster ip 查看一下集群状态,需要输出刚才重置的elastic账号的密码
https://${svc_cluster_ip}:9200/_cat/nodes?v
正常输出
至此elasticsearch集群部署完成,后续可以根据需要安装插件,比如分词器elasticsearch-analysis-ik
只需要下载插件的压缩包,然后在所有ES节点的 ${ES_HOME}//plugins/中创建该插件的目录,比如针对 elasticsearch-analysis-ik 我建了个analysis-ik的目录,然后将压缩包通过 kubectl cp 复制进去再解压缩,重启ES节点,ES节点启动后会自动扫描安装插件。
注意插件的适配版本一定要与当前ES集群的版本一致,否则会报错 !!!
生成kibana使用的证书
除了之前生成http证书时生成的 elasticsearch-ca.pem 之外还有3个文件
kibana.crt,kibana.key,kibana.csr
下面先生成 kibana.csr,kibana.key
# 生成kibana证书,在es节点中执行
# -dns 证书适配的域名(kibana访问的es集群时使用的域名),多个可用,分隔 ,也可以使用 -ip 设置证书适配的ip
#
/usr/share/elasticsearch/bin/elasticsearch-certutil csr -name kibana -dns es-01-svc
这里我依然是通过域名方式来处理,使用的是es集群的service 域名,注意因为我的kibana是跟我的ES部署在k8s集群中的同一个namespace下,因此才可以通过https|http://service-name:port 直接访问。否则还需要按照k8s规则拼完整的service域名,这里就先不展开,反正只要kiibana跟es 部署在1个ns下就没问题。
执行后默认会生成 csr-bundle.zip
解压缩后得到kibana.csr ,kibana.key,用它2生成 kibana.crt
# 生成crt文件
openssl x509 -req -in kibana.csr -signkey kibana.key -out kibana.crt
将3个文件kibana.csr、kibana.key、kibana.crt打包下载到本地,包括elasticsearch-ca.pem 一并挂载到到 kibana pod的目录中,这里我使用/config/local_certs,实际kibana配置文件中并没有配kibana.csr,为了以后便于维护我也放了进去。
kibana k8s部署文件
照例先声明存储PVC
---

#声明存储使用
#local存储  storage_class:local-path-provisioner(rancher)
apiVersion: v1
kind: PersistentVolumeClaim
metadata:
  name: kibana-010-pvc
  namespace:  es
spec:
  accessModes:
    - ReadWriteOnce #本地存储只支持ReadWriteOnce
  storageClassName: local-path #local-path: 容器删除,存储local-path动态删除,local-path-retain: 容器删除,存储local-path保留,local-path|local-path-retain为手动安装的storageclass
  resources:
    requests:
      storage: 20Gi #声明最少要使用存储空间,不足则无法创建 Gi=G Mi=M
  #persistentVolumeReclaimPolicy: Delete # PVC 回收策略 Retain 保留| Delete 清除 | PV: local-path-provisioner(rancher) 不支持设置该属性
---
声明service
# api service

apiVersion: v1
kind: Service
metadata:
  name: kibana-01-svc
  namespace:  es
  annotations:
    desc : elastic 01 集群 kibana的服务访问入口
spec:
  selector:
    kibana-cluster: kibana-01
  type: ClusterIP   #type:  ClusterIP【默认】 | NodePort | LoadBalancer(外部负载均衡) | ExternalName (外部DNS解析)
  clusterIP: 10.106.220.221
  ports:
    - port: 5601
      targetPort: 5601
      name: httpport
声明StatefulSet ,这里不要绑定固定ip
apiVersion: apps/v1
kind: StatefulSet # Deployment | StatefulSet | DaemonSet | JobSet
metadata:
  name:   kibana-010
  namespace:  es
spec:
  replicas: 1  #运行副本数
  selector:
    matchLabels:
      k8s-app:  kibana-010 #与下方template节点中的 labels 保持一致
  revisionHistoryLimit: 10 #设定保留最近的几个revision 用于回滚,默认10
  #serviceName: "nginx-headless" #设置绑定的service,以支持内部dns访问 <pod-name>.<svc-name>.<namespace>.svc.cluster.local
  updateStrategy: #更新策略 [Statefulset]
  #strategy: #更新策略 [Deployment]
    type: RollingUpdate # RollingUpdate (滚动更新) | OnDelete (删除时更新)
    rollingUpdate:
      #maxSurge: 1  #[Deployment]支持-升级过程中可以启动超过原先设置的POD数量的上限:数量 或 百分比 1 | 20%
      #maxUnavailable: 1 #[Deployment]支持-升级过程中无法提供服务的POD数量的上限:数量 或 百分比 1 | 20%,最好与maxSurge保持一致,这样能确保更新过程中的服务能力不会下降
      partition: 0 #[Statefulset] 灰度发布控制器,每次只更新部署的pod序号 >= partition的pod,如果有5个pod[0-4],0=更新所有,4=更新1pod,3=更新2pod
  template:
    metadata:
      labels:
         k8s-app: kibana-010
         kibana-cluster: kibana-01
      annotations:
        #"cni.projectcalico.org/ipAddrs": "[\"10.244.220.10\"]"  #pod绑定固定ip,依赖于calico ipam插件,必须使用calico 3.24.1以上的版本才可以
    spec:
      restartPolicy: Always
      #使用指定用户运行,当前pod下所有容器都生效
      securityContext:
        runAsUser: 0  #以root运行
        #fsGroup: 1000  #指定存储卷挂载归属用户组
        #runAsUser: 1000 #以指定用户运行容器
      containers:
        - name: kibana-010
          image: docker.elastic.co/kibana/kibana:8.12.0
          imagePullPolicy: IfNotPresent # IfNotPresent | Always | Never
          #securityContext: ##要调整系统内核参数才开启特权容器
          #  privileged: true
          resources:
            requests:
              memory: "1Gi" #Gi=G Mi=M 只支持整数
              cpu: "1000m" #1000m=1cpu (cpu物理线程)
            limits:
              memory: "2Gi" #Gi=G Mi=M 只支持整数
              cpu: "2000m"  #1000m=1cpu (cpu物理线程)
          #securityContext: ###添加参数启用容器root权限
          #  privileged: true
          ports:
          - containerPort: 8601
            protocol: TCP
          command: ["/bin/sh","-c"]
          args: #可以设置多行命令,不过启动后初始化还是推荐使用postStart钩子函数来执行,不能有#注释符
          - |
            cat /config/kibana.yml > /usr/share/kibana/config/kibana.yml;
            echo ''${POD_IP}' kibana01.ndcto.com' >> /etc/hosts;
            su - kibana -c "/usr/share/kibana/bin/kibana";

          env:   #环境变量配置
          - name: POD_NAME
            valueFrom:
              fieldRef:
                apiVersion: v1
                fieldPath: metadata.name
          - name: POD_IP
            valueFrom:
              fieldRef:
                fieldPath: status.podIP
          volumeMounts:
          - name: kibana-volume    #挂载部署目录
            mountPath: /usr/share/kibana/data
            subPathExpr: $(POD_NAME)/data
          - name: kibana-volume  #挂载部署目录
            mountPath: /usr/share/kibana/logs
            subPathExpr: $(POD_NAME)/logs
          - name: kibana-010-config  #挂载配置文件
            mountPath: /config
          - name: kibana-010-cert-file  #挂载ssl证书目录
            mountPath: /config/local-certs/

          - name: host-time  #挂载本地时区
            mountPath: /etc/localtime
            readOnly: true
      volumes:
      - name: kibana-volume  #使用pvc
        persistentVolumeClaim:
          claimName: kibana-010-pvc
      - name: kibana-010-config  #使用pvc
        configMap:    #使用configMap
          name:  kibana-010-config
          defaultMode: 420 #420-644 493-755
      - name: kibana-010-cert-file
        hostPath: #挂载主机的目录
          path: /data/deploy/k8s/kibana/certs
          type: ""
      - name: host-time
        hostPath: #挂载本地时区
          path: /etc/localtime
          type: ""

---
声明configmap
- server.publicBaseUrl、server.host
可以根据自己的需要填写,我习惯都是挂个域名然后通过内网配个hosts来访问 - elasticsearch.hosts 配置kibana访问ES集群的地址,这里用的就是ES service的访问地址
- elasticsearch.password 是我们之前设定的kibana_system账号的密码
apiVersion: v1
kind: ConfigMap #配置信息
metadata:
  name: kibana-010-config #es-010配置
  namespace:  es
data:
  kibana.yml: |
    #服务器端口
    server.port: 5601
    server.publicBaseUrl: "https://kibana01.xxx.com"
    server.host: "kibana01.xxx.com"
    server.shutdownTimeout: "5s"

    monitoring.ui.container.elasticsearch.enabled: true
    elasticsearch.hosts: [ "https://es-01-svc:9200" ]

    elasticsearch.ssl.verificationMode: none
    elasticsearch.ssl.certificateAuthorities: [ "/config/local-certs/elasticsearch-ca.pem" ]

    server.ssl.enabled: true
    server.ssl.certificate: /config/local-certs/kibana.crt
    server.ssl.key: /config/local-certs/kibana.key


    #访问es服务器账号密码
    elasticsearch.username: "kibana_system"
    elasticsearch.password: "password"

    # =================== System: Logging ===================

    #logging.root.level: info

    # Example with size based log rotation
    logging.appenders.default:
      type: rolling-file
      fileName: /usr/share/kibana/logs/kibana.log
      policy:
        type: time-interval
      strategy:
        type: numeric
        pattern: '-%i'
        max: 10
      layout:
        type: json

    # Logs queries sent to Elasticsearch.
    #logging.loggers:
    #  - name: elasticsearch.query
    #    level: debug

    # Logs http responses.
    #logging.loggers:
    #  - name: http.server.response
    #    level: debug

    # Logs system usage information.
    #logging.loggers:
    #  - name: metrics.ops
    #    level: debug

    # Enables debug logging on the browser (dev console)
    #logging.browser.root:
    #  level: debug

    # =================== System: Other ===================
    # The path where Kibana stores persistent data not saved in Elasticsearch. Defaults to data
    path.data: /usr/share/kibana/data

    # Specifies the path where Kibana creates the process ID file.
    pid.file: /usr/share/kibana/kibana.pid

    # Set the interval in milliseconds to sample system and process performance
    # metrics. Minimum is 100ms. Defaults to 5000ms.
    #ops.interval: 5000

    # Specifies locale to be used for all localizable strings, dates and number formats.
    # Supported languages are the following: English (default) "en", Chinese "zh-CN", Japanese "ja-JP", French "fr-FR".
    #i18n.locale: "en"

---
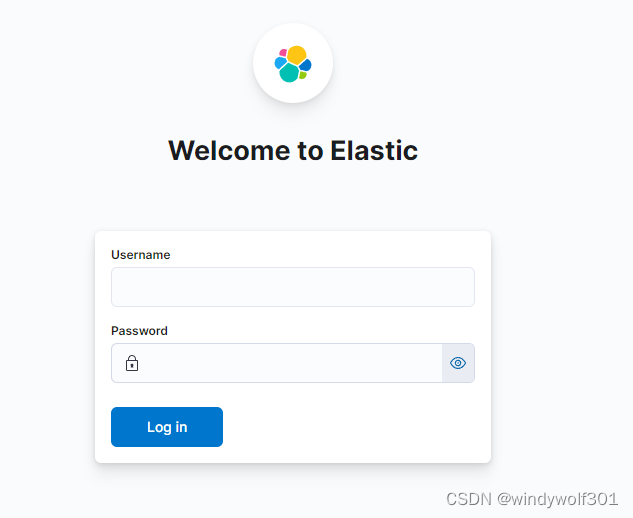
最后通过kubectl apply -f 部署即可,部署成功后,通过kibana的serviceip访问
https://serviceip:5601/会出现登录界面,这时候需要输入elastic的账号登录进去
通过kibana dev-tool一样可以查看ES集群状态

好了,到此,本文结束,希望对大家有所帮助
--------------------- 原创不易,如果大家看完觉得有帮助,希望能多多点赞关注,感谢各位的支持 ----------------------


 1万+
1万+

 被折叠的 条评论
为什么被折叠?
被折叠的 条评论
为什么被折叠?
 到【灌水乐园】发言


