


1.Attempted import error: 'FieldContext' is not exported from 'rc-field-form' (imported as 'RcFieldContext')
升级一下 antd 的版本。
保证 rc-field-form 是高版本
2.要使用TypeScript创建一个新的 Create React App 项目,您可以运行:
npx create-react-app my-app --template typescript要么
yarn create react-app my-app --template typescript3.Cannot find module 'umi-request' or its corresponding type declarations报错
最近接触ant design,再上手的时候,在用ProTable组件代码时,导入下面代码,编译报错
import request from 'umi-request';
发现可以通过 npm add 模块名 的方式,像npm add umi-request 处理这种报错,就能正常启动了
4.Cannot find module 'react-router-dom' or its corresponding type declarations.
npm i @types/react-router-dom5.React引入import qs from ‘querystring‘报错
报错原因:
webpack5中移除了nodejs核心模块的polyfill自动引入,所以需要手动引入。
解决办法:将import qs from 'querystring‘改成import qs from 'qs'
6. 在ts中axios返回not exist on type 'AxiosResponse'
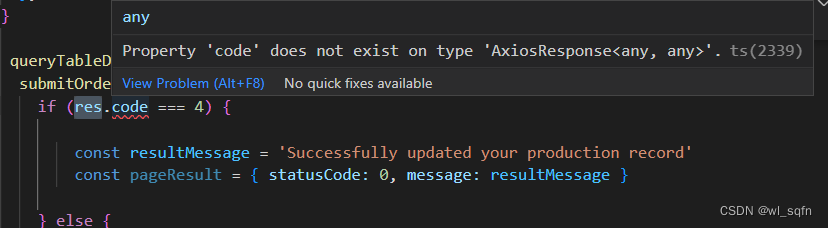
解决方法是新增一个 axios.d.ts 文件,内容如下,就可以解决了
import * as axios from 'axios'

declare module 'axios' {
  interface AxiosInstance {
    (config: AxiosRequestConfig): Promise<any>
  }
}
7.React 的TS环境下使用 http-proxy-middleware页面打不开,像下面这样

根据http-proxy-middleware文档 在src目录创建setupProxy.js后,页面无法打开,是由于setupProxy.js低版本配置。
setupProxy.js低版本配置:
const proxy = require('http-proxy-middleware')

module.exports = function(app) {
  app.use(
    proxy('/api1', {  //api1是需要转发的请求(所有带有/api1前缀的请求都会转发给5000)
      target: 'http://localhost:5000', //配置转发目标地址(能返回数据的服务器地址)
      changeOrigin: true, //控制服务器接收到的请求头中host字段的值
      pathRewrite: {'^/api1': ''} //去除请求前缀,保证交给后台服务器的是正常请求地址(必须配置)
    }),
    proxy('/api2', {
      target: 'http://localhost:5001',
      changeOrigin: true,
      pathRewrite: {'^/api2': ''}
    })
  )
}
修改setupProxy.js
const { createProxyMiddleware } = require("http-proxy-middleware")
module.exports = function (app) {
  app.use(
    createProxyMiddleware("/api1",{
      target: "http://localhost:5000", //配置转发目标地址(能返回数据的服务器地址)
      changeOrigin: true, //控制服务器接收到的请求头中host字段的值
      pathRewrite: { "^/api1": "" },
    }),
    createProxyMiddleware("/api2",{
      target: "http://localhost:5001", //配置转发目标地址(能返回数据的服务器地址)
      changeOrigin: true, //控制服务器接收到的请求头中host字段的值
      pathRewrite: { "^/api2": "" },
    })
  )
}
重启项目,问题解决.
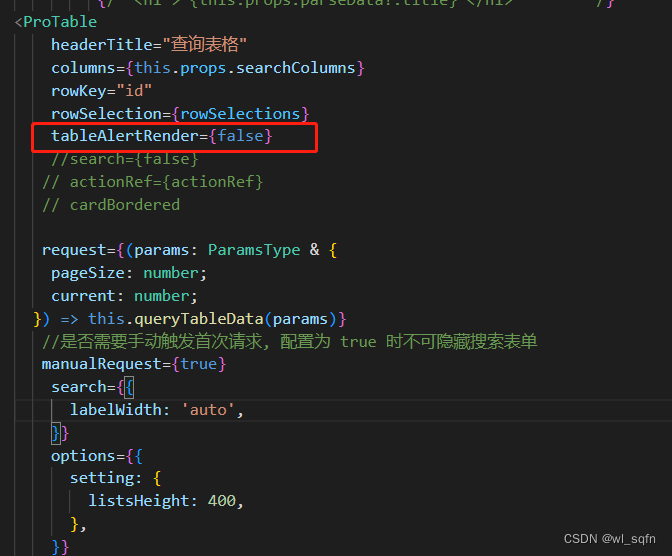
8.Protable 单选多选配置,选中多选框,取消头部展示的选中几项的提示
隐藏头部信息 tableAlertRender={false}
9.procompents组件中 rowSelections中getCheckboxProps实现多选框不能选但是能取到它的数据
在 procomponents 中,你可以通过`ProTable` 中的`rowSelection` 属性来实现类似的操作。
首先,在`getCheckboxProps` 中设置对应行的`disabled` 属性为`true`:
const rowSelection = {
  // ...其他配置
  getCheckboxProps: (record) => ({
    disabled: record.status === 'disabled',
  }),
};
然后,在`onSelectedRowKeysChange` 的回调函数中手动处理选择的行,将被禁用的行从选择中剔除,但仍然可以获取这些行的数据:
const [selectedRowKeys, setSelectedRowKeys] = useState([]);
//...
const onSelectedRowKeysChange = (keys) => {
  // 过滤掉被禁用的行
  const filteredKeys = keys.filter((key) => {
    const rowData = dataSource.find((item) => item.key === key);
    return rowData && rowData.status !== 'disabled';
  });
  setSelectedRowKeys(filteredKeys);
};
//...
<ProTable
  // ...其他属性
  rowSelection={{
    selectedRowKeys,
    onChange: onSelectedRowKeysChange,
    getCheckboxProps: (record) => ({
      disabled: record.status === 'disabled',
    }),
  }}
/>
在上述代码中,我们将选择的行存储在`selectedRowKeys` 状态中,并在`onSelectedRowKeysChange` 回调函数中手动处理选择的行。在这个函数中,我们使用`filter` 方法过滤掉被禁用的行,并将剩下的行的 key 存储到`selectedRowKeys` 状态中。
这样,被禁用的行虽然不能被选择,但仍然可以获取它们的数据。
10.Argument of type 'any[]' is not assignable to parameter of type 'SetStateAction<never[]>'.
Type 'any[]' is not assignable to type 'never[]'.
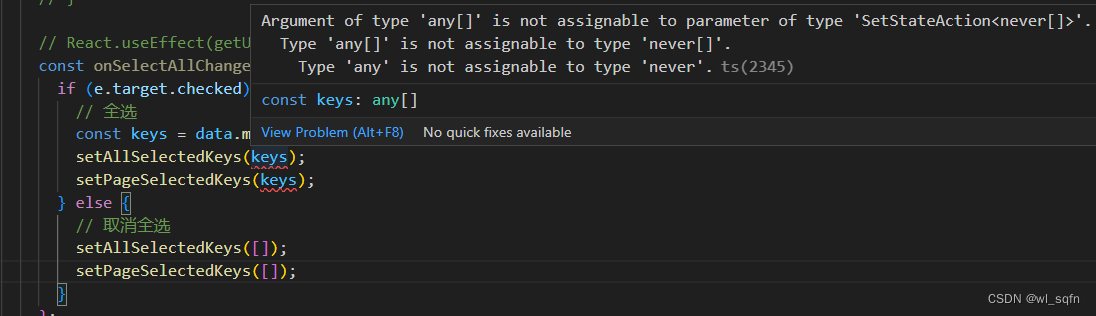
出现上面错误的原因是:ts默认初始化空数组为 never[] 类型,跟你赋值的数据类型不匹配
修改为: [] as any[],即可

11.ProTable 表格跨页选择的实现
背景:因为所用的项目查询的数据量比较大实现分页查询,所以当点击换页时界面会从后台获取数据刷新界面,所以跨页选择的数据会丢失。
实现思路:通过将之前的和现在的selectedRowKeys进行解构赋值,合并到一个数组里、去重、再根据下面2个api的回调函数里的参数的 selected的值 判断 选中 还是 去除勾选,来删除某个元素、还是添加。
在antd Table组件的rowSelection属性官方文档(链接),于是被我发现了两个个可以用的上的API,叫做onSelect和onSelectAll

首先我们可以看到onSelect需要传入一个函数作为回调,然后这个方法的参数里有record, selected, selectedRows这几项(nativeEvent原生事件我不关心),经过测试后确定
1、record就是当前操作(选中或取消选中)的item
2、selected是个布尔值,true代表本次是选中操作,false就是取消选中
3、selectedRows是一个数组,就是当前已选择的items(没有跨页的记录)
至于onSelectAll,是在点击全选和取消全选时触发的回调函数,截图中也可以看到,它有selected, selectedRows, changeRows这三个参数
1、selected,同上,true全选,false取消全选
2、selectedRows,也同上,当前已选择的items(没有跨页的记录)
3、changeRows,这个可就优秀了,它就是你的全选/取消全选操作引起变化的items数组,打个比方,如果一页10个,你一个都没选呢,点全选,就会新选择10个,那么changeRows就是这10条数据,如果你已经选了6条,你又点了全选,那么就相当于你又一次性选了4条,那么changeRows就是这4条
然后基于这些参数,我们来定义一个可以跨页记录的selectedRows,我取名叫selectedRowsPlus
(注:因为我的是个函数式组件,所以使用useState.如果是类式组件在state中定义selectedRowKeys,selectionRowsPlus,selectedRows即可)
 const [selectedRowKeys, setSelectedRowKeys] = useState([] );

 const [selectionRowsPlus, setSelectionRowsPlus] = useState([] as any []);

 const [selectedRows, setSelectedRows] = useState([]as any []);
然后是Table组件的rowSelection配置,
render(){
        const { productListSelectedRowKeys,productListSelectedRows } = this.state;
     const rowSelections: TableRowSelection<GithubIssueItem> = {
        selectedRowKeys,
        onSelect: onSelect,
        onSelectAll: onSelectAll,
        onChange: onSelectChange,
        preserveSelectedRowKeys: true,//当数据被删除时仍然保留选项的 key,即能实现在点击下一页上一页选中的内容也是选中的
        getCheckboxProps: (record:any) => ({
          disabled: record.available === 'Invalid'
        })
      };
        return(
        <div>
  <ProTable
              //searchColumns这个属性设置的是后台传递的界面需要展示的查询条件和查询列表的属性值
              columns={searchColumns}
              //一定要设置这个,否则每行数据没有主键,无法进行单行选中
              rowKey="fileName"
              rowSelection={rowSelections}
              tableAlertRender={false}
               //该列设置的是点击查询按钮,跳转后端获取数据的方法
              request={(params: ParamsType & {
                pageSize: number;
                current: number;
              }, _sort, _filter) => queryTableData(params)}
              //但是默认的查询表单 rules 是不生效的。需要配置 ignoreRules,才会执行指定的必录等相关规则
              form={{
                ignoreRules: false,
              }}
              //(加载查询界面时是否需要手动触发首次请求), 配置为 true 时不可隐藏搜索表单
              manualRequest={true}
              search={{
                labelWidth: 'auto',
              }}
              options={{
                setting: {
                  listsHeight: 400,
                },
              }}

              pagination={{
                defaultPageSize: 10,
                //为true时代表在界面可以自己选择一页展示几条数据
                showSizeChanger: true,
                onChange: (page) => console.log(page),
              }}

              dateFormatter="string"
              />
        </div>
        )
 }
然后是具体的回调方法的实现
 const onSelect = (record:any,selected:any,selectedRows:any,nativeEvent:any) => {
    console.log("record:",record);
    console.log("selected:",selected);
    console.log("selectedRows:",selectedRows);
    console.log("nativeEvent:",nativeEvent);
    if(selected){
      let productListSelectedRowsPlus = selectionRowsPlus;

      productListSelectedRowsPlus.push(record);

      setSelectionRowsPlus([...new Set(productListSelectedRowsPlus)]);

    }
    if(!selected){
        let productListSelectedRowsPlus = selectionRowsPlus;
        let delIndex !:number;
        for(let i=0;i<productListSelectedRowsPlus.length;i++){
            //此处的fileName代表的是多行数据设置的主键,主键不一致需修改
            if(productListSelectedRowsPlus[i].fileName==record.fileName){
                delIndex = i;
                break;
            }
        }
        console.log(delIndex);
        productListSelectedRowsPlus.splice(delIndex,1);
        setSelectionRowsPlus([...new Set(productListSelectedRowsPlus)]);


    }
}
const onSelectAll = (selected:any,selectedRows:any,changeRows:any) =>{
    console.log("selected:",selected);
    console.log("selectedRows:",selectedRows);
    console.log("changeRows:",changeRows);
    if(selected){
        let productListSelectedRowsPlus = selectionRowsPlus;
        setSelectionRowsPlus([...new Set(productListSelectedRowsPlus.concat(changeRows))]);


    }
    if(!selected){
        let productListSelectedRowsPlus = deepCopy(selectionRowsPlus);
        let delIndex = [];
        for(let i=0;i<productListSelectedRowsPlus.length;i++){
            for(let j=0;j<changeRows.length;j++){
                if(changeRows[j].id==productListSelectedRowsPlus[i].id){
                    delIndex.push(i);
                    break;
                }
            }
        }
        console.log(delIndex);
        for(let k=0;k<delIndex.length;k++){
            delete productListSelectedRowsPlus[delIndex[k]];
        }
        let pureProductListSelectedRowsPlus = productListSelectedRowsPlus.filter((item:any)=>{
            return item != undefined;
        })
        setSelectionRowsPlus([...new Set(pureProductListSelectedRowsPlus)]);

    }
}
上面调用的深拷贝的方法是
const deepCopy:any = (data:any) => {
  if (data.constructor.name === 'Array') {
    // 判断为数组类型
    var arrCopy = []
    for (var i = 0, len = data.length; i < len; i++) {
      //遍历数组
      if (data[i] instanceof Object) {
        arrCopy.push(deepCopy(data[i]))
      } else {
        // 基本类型
        arrCopy.push(data[i])
      }
    }
    return arrCopy;

  } else { // 为对象
    var objCopy = {};
    for (let x in data) {
      if(data[x] instanceof Object){
        objCopy[x] = deepCopy(data[x])
      }else{ // 基本类型
        objCopy[x] = data[x];
      }
   }
    return objCopy;
 }
}
这样 selectedRowsPlus属性中就是最终所有页码中最终选择的数据。
12.ProFormSelect组件中如何获取到多选的值
12.1 这是第一种下拉框中的值只有一级的实现方式
1.先定义的存储下拉框中值的属性并创建调用后端获取数据的方法
//siteList为定义的存储下拉框中值的属性
const [siteList,setsiteList]=React.useState();


//用来调用后端获取下拉框数据的方法
const getSiteList =  () => {
  getSites("WAL").then(res => {
    if (res.code === 4) {
      setsiteList(res.data)//此处已经把后台返回的数据添加到siteList属性中,在select组件中直接调用即可
    }
  }, err => {
    console.log(err)
  })

}
2.先创建一个公共的调用后端的类,我这里定义成request.js
import React from 'react';
import ReactDOM from 'react-dom';
import { Spin } from 'antd';
import axios from 'axios'
import Constants from './constants'
import { getLocalStorage, setLocalStorage } from './storage'

let isLock = false;
let refreshSubscribers = [];
let requestCount = 0
function showLoading() {
  if (requestCount === 0) {
    var dom = document.createElement('div')
    dom.setAttribute('id', 'loading')
    document.body.appendChild(dom)
    ReactDOM.render(<Spin tip="Loading..." size="large" />, dom)
  }
  requestCount++
}

function hideLoading() {
  requestCount--
  if (requestCount === 0) {
    document.body.removeChild(document.getElementById('loading'))
  }
}

//push所有请求到数组中
function subscribeTokenRefresh(cb) {
  refreshSubscribers.push(cb)
}

//刷新请求(refreshSubscribers数组中的请求得到新的token之后会自执行,用新的token去请求数据)
function onRrefreshed(token) {
  refreshSubscribers.map(cb => cb(token))
}

//刷新token
function refreshToken(config, token, resolve, reject) {
  axios({
    method: "get",
    url: `${Constants.API_ROOT_URL}/oauth/v1.0/getUserInfo?token=${token}`,
  }).then(response => {
    isLock = false;//释放锁
    const res = response.data
    // if the custom code is not 20000, it is judged as an error.
    if (res.code === 401) {
      window.location.href = '/config/loginexpired';
      return reject(res);
    } else if (res.code === 412) {
      window.location.href = '/config/userdeactivated';
      return reject(res);
    } if (res.code !== 4) {
      // message.error(`Error: ${res.msg || res.message}`)
      return res;
    }
    setLocalStorage('user', res.data.user)
    setLocalStorage('needRefreshToken', false)

    config.headers['token'] = token
    config.headers['user'] = res.data.user
    resolve(config);
    //执行数组里的函数,重新发起被挂起的请求
    onRrefreshed(res.data.user)
    //清空数组中保存的请求
    refreshSubscribers = []
  }).catch(err => {
    return err;
  });
}


// create an axios instance
const service = axios.create({
  baseURL: Constants.API_ROOT_URL, // url = base url + request url
  withCredentials: true, // send cookies when cross-domain requests
  timeout: 120000 // request timeout
})

// request interceptor
service.interceptors.request.use(
  config => {

    if(config.method === 'get'){
      config.params = {
        _t: Date.now(),
        ...config.params,
      };
    }
    // do something before request is sent
    if (config.isLoading !== false) {
      showLoading()
    }
    //config.headers['retailer'] = Constants.RETAILER
    config.headers['Content-Type'] = config.contentType || 'application/json'

    const user = getLocalStorage('user')
    const token = getLocalStorage('token')
    const needRefreshToken = getLocalStorage('needRefreshToken')
    if ((!user && token) || needRefreshToken) {
      //判断当前是否正在请求刷新token
      if (!isLock) {
        isLock = true;//isLock设置true,锁住防止死循环。
        //使用Promise等待刷新完成返回配置信息
        let refresh = new Promise((resolve, reject) => {
          refreshToken(config, token, resolve, reject);
        })
        return refresh

      } else {
        //判断当前url是否是刷新token的请求地址,如果是直接下一步。
        if (config.url.indexOf("/config/loginexpired") === -1 || config.url.indexOf("/config/userdeactivated") === -1) {
          //把请求(token)=>{....}都push到一个数组中
          let retry = new Promise((resolve, reject) => {
            //(token) => {...}这个函数就是回调函数
            subscribeTokenRefresh((user) => {
              config.headers['token'] = token
              config.headers['user'] = user
              //将请求挂起
              resolve(config)
            })
          })
          return retry
        } else {
          config.headers['token'] = getLocalStorage('token')
          config.headers['user'] = user
          return config;
        }
      }
    } else {
      config.headers['token'] = token
      config.headers['user'] = user
      return config
    }
  },
  error => {
    // do something with request error
    hideLoading()
    console.log(error) // for debug
    return Promise.reject(error)
  }
)

// response interceptor
service.interceptors.response.use(
  /**
   * If you want to get http information such as headers or status
   * Please return  response => response
  */

  /**
   * Determine the request status by custom code
   * Here is just an example
   * You can also judge the status by HTTP Status Code
   */
  response => {
    hideLoading()
    const res = response.data
    // if the custom code is not 20000, it is judged as an error.
    if (res.code === 401) {
      window.location.href = '/config/loginexpired';
      return Promise.reject(res);
    } else if (res.code === 412) {
      window.location.href = '/config/userdeactivated';
      return Promise.reject(res);
    } if (res.code !== 4) {
      // message.error(`Error: ${res.msg || res.message}`)
      return res;
    } else {
      return res
    }
  },
  error => {
    console.log('err' + error) // for debug
    hideLoading()
    // Message({
    //   message: error.message,
    //   type: 'error',
    //   duration: 5 * 1000
    // })
    return Promise.reject(error)
  }
)

export default service
3.创建一个叫search.js的类,用来统一存储前端调用后台的所有方法
注意:只有下面的getSites方法为本次获取下拉框中值需要用的
import request from '../utils/request'

export function submitOrder(data){
    return request({
        url: `/search/v1.0/submitOrder`,
        method: 'post',
        data: data,
        headers: {
            retailer: '111'
          },
        contentType: 'application/json'
    })
}


export function queryVipsData(data){
    return request({
        url: `/search/v1.0/queryVipsData`,
        method: 'post',
        data: data,
        // headers: {
        //     retailer: '111'
        //   },
        contentType: 'application/json'
    })
}

export function getSites(data){
        return request({
            url: '/search/v1.0/getSites',
            method: 'get',
            headers: {
                retailer: data
              }
        })
}
4.ProFormSelect 下拉框组件
const [selectedsiteList,setselectedsiteList]=React.useState<DtoType[]>();
type DtoType ={
key: string;
value: string;
label: string;
}
const handleChangeSite = (values:any) => {
setselectedsiteList(values);
}
<ProFormSelect
name="Site"
label="Site[multiple]" //界面上展示的标题名
showSearch //开启搜索
options={siteList}
//就说用handleChangeResend中value获取选中的值一直取不到,之前只是把下拉框的值赋给valueEnum属性,没有给options属性也赋值导致的
valueEnum={siteList}
fieldProps={{
mode: 'multiple',
onChange: (value) => handleChangeSite(value),
autoClearSearchValue:true//选中后清空搜索框
}}
placeholder="Please select the site to Resend"
rules={[
//这个代表的是必选校验和对应的提示语
{ required: true, message: 'Please select the site to Resend!', type: 'array' },
]}
/>
12.2 这种是下拉框中的值存在多级的实现方式
实现结果就像下面这种
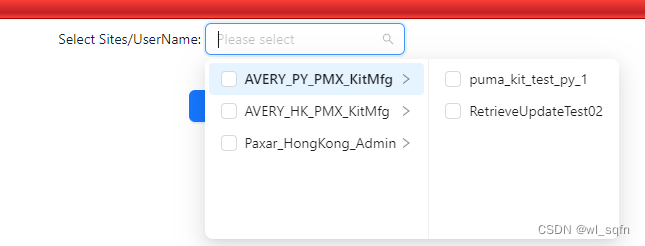
1.用下面组件进行实现
        <Cascader
            style={{ width: '100%' }}
            options={siteList}
            onChange={(value, selectedOptions) => onChange(value,selectedOptions)}
            multiple //代表支持多选
            placeholder="Please select"
            maxTagCount="responsive"
            showSearch={{ filter }}
    onSearch={(value) => console.log(value)}
          />
2.下拉框中的值获取同上面第一种一样。下面重点记录下在后端怎样组装这种多级数据
这是返回的数据格式
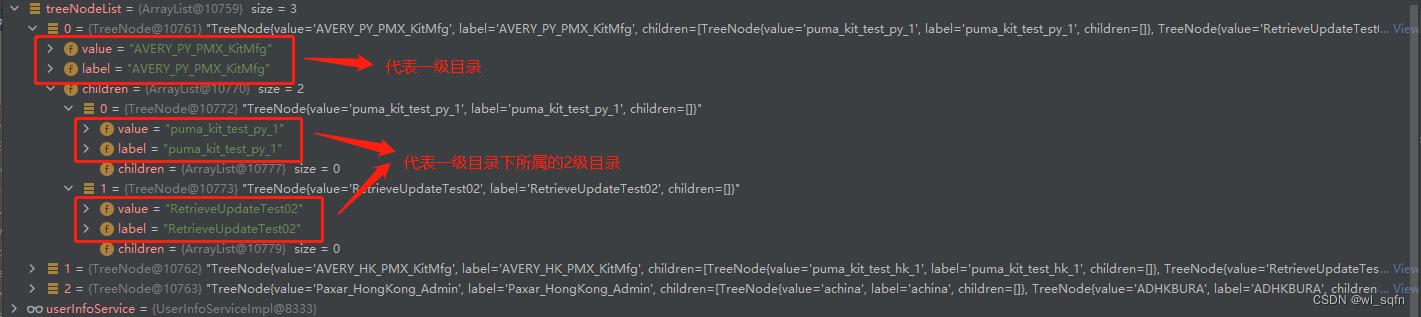
3.后台中先创建相关对象
import java.util.ArrayList;
import java.util.List;

public class TreeNode {
    private String value;
    private String label;

    private List<TreeNode> children = new ArrayList();


    public String getValue() {
        return value;
    }

    public void setValue(String value) {
        this.value = value;
    }

    public String getLabel() {
        return label;
    }

    public void setLabel(String label) {
        this.label = label;
    }

    public List<TreeNode> getChildren() {
        return children;
    }

    public void setChildren(List<TreeNode> children) {
        this.children = children;
    }

    public TreeNode(String value, String label) {
        this.value = value;
        this.label = label;
    }
    public TreeNode(String value, String label,List<TreeNode> children) {
        this.value = value;
        this.label = label;
        this.children=children;
    }

    public TreeNode() {
    }

    @Override
    public String toString() {
        return "TreeNode{" +
                "value='" + value + '\'' +
                ", label='" + label + '\'' +
                ", children=" + children +
                '}';
    }
}
实现类
   public List<TreeNode> getUserListByRetailer(String retailer) {
        List<UserInfo> userList = null;
        List<TreeNode> result =  new ArrayList<>();
        try {
           //这个是查询数据的脚本,返回的结果中的site要作为一级选项,name作为二级选项
            userList = userInfoMapper.getUserListByRetailer(retailer);

            Map<String, TreeNode> map = new HashMap<>();
            for (UserInfo user : userList) {
                String site = user.getSite();
                TreeNode treeNode;
                if (map.containsKey(site)) {
                    treeNode = map.get(site);
                    treeNode.getChildren().add(new TreeNode(user.getUserName(), user.getUserName()));

                } else {
                    treeNode = new TreeNode();
                    treeNode.setLabel(user.getSite());
                    treeNode.setValue(user.getSite());
                    treeNode.setChildren(setChildrenList(user.getUserName()));
                }

                map.put(site, treeNode);
            }


            for (Map.Entry<String, TreeNode> entry : map.entrySet()) {

                result.add(entry.getValue());
            }
            System.out.println(result);
        } catch (Exception e) {
            e.printStackTrace();
        }
        return result;
    }
13.css - 无法在 .tsx 文件中导入 CSS 模块
使用新版本的 React,要使用 CSS 模块,您无需在 Webpack 中配置任何内容或拒绝您的元素。 您需要做的就是:
- npm add css-modules-loader,安装 css-modules-loader : GitHub - gajus/react-css-modules: Seamless mapping of class names to CSS modules inside of React components.
- 更改文件名styles.css至 styles.module.css
- 将 css 文件导入您的组件:import styles from './styles.module.css'
- 在组件中使用类名
<div className={styles.app}> Hello World </div>14.column定义中用了valueType: 'textarea',没效果
在使用protable组件中的column属性中定义一个valueType为'textarea'的文本框时,无法展示为文本域。觉得这就是个坑,在他们的github上找了好久后才找到。因为查询列表中出现一个文本域的话可能会导致样式没法展示,因此底层默认textarea就为普通的文本框。
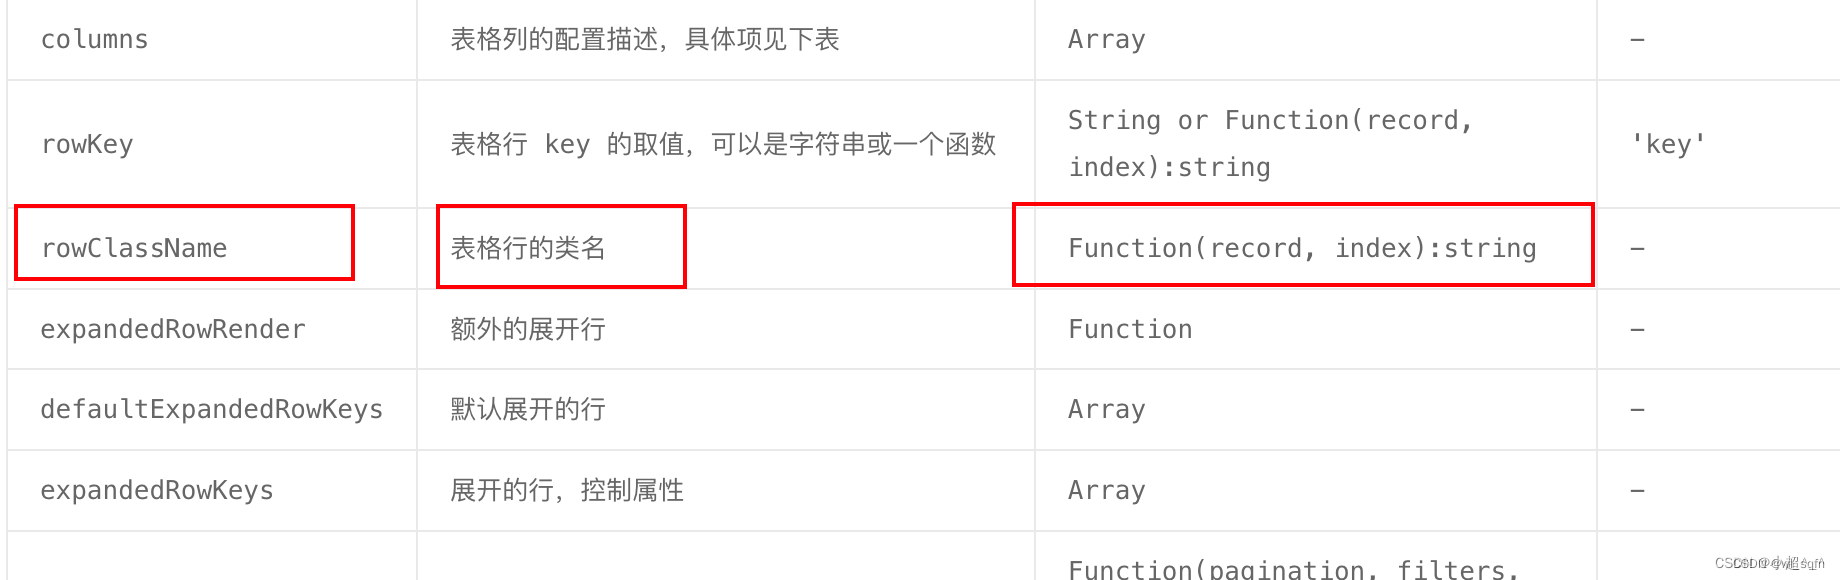
15.react Antd 表格内通过rowClassName 实现 某一行改变背景颜色的方法
表格代码
<ProTable
              //headerTitle="查询表格"
              columns={searchColumns}
              //一定要设置这个,否则每行数据没有主键,无法进行单行选中
              rowKey="fileName"
              rowClassName={getRowClassName} //改变某一行的背景颜色
/>
方法代码
 import classes from './Vips.module.css'

 const getRowClassName = (record:any) => {
    if (record.available === "Invalid") {       // 根据这一行的状态,改变不同的颜色
        return `${classes.warning}`;         // 加 s.  是因为上面引入的问题
    } else {
        return '';
    }
  }
样式代码
在css中添加这个
.warning {
  background: #df3404;
}
16.使用java.util.local中new一个local时为什么zh-CN变成zh-cn
这是因为Java中的语言环境代码采用的是ISO 639-1标准,该标准中规定语言代码必须为小写字母,而国家/地区代码采用的是ISO 3166-1标准,该标准中规定国家/地区代码必须为大写字母。因此,当使用Java中的Locale类创建语言环境时,语言代码会被强制转换为小写字母,以符合ISO 639-1标准的要求。
17.react中用ConfigProvider包父组件后怎样处理子组件也能实现国际化配置
在 React 中使用 `ConfigProvider` 包裹父组件后,子组件也能够继承其配置。如果需要在子组件中也实现国际化,可以按照以下步骤:
1. 在父组件中引入 `react-intl` 库的 `IntlProvider` 和 `FormattedMessage` 组件以及 `ConfigProvider` 组件。
import { ConfigProvider } from 'antd';
import { IntlProvider, FormattedMessage } from 'react-intl';
import messages from './i18n';
2. 在父组件中将 `ConfigProvider` 组件包裹在 `IntlProvider` 组件中,并且将 `messages` 对象传递给 `IntlProvider` 组件用于国际化。
function ParentComponent({ children }) {
  return (
    <IntlProvider locale="zh-CN" messages={messages['zh-CN']}>
      <ConfigProvider>
        {children}
      </ConfigProvider>
    </IntlProvider>
  );
}
3. 在子组件中使用 `FormattedMessage` 组件,而无需在子组件中再次引入 `IntlProvider` 组件。因为子组件通过 `ConfigProvider` 继承父组件的配置,所以 `FormattedMessage` 组件同样可以从父组件继承国际化配置。
function ChildComponent() {
  return (
    <div>
      <FormattedMessage id="greeting" defaultMessage="Hello World!" />
    </div>
  );
}
在 `路径i18n下的messages.js 对象中添加子组件中需要翻译的文本内容。
const messages = {
  'zh-CN': {
    greeting: '你好,世界!'
  },
  'en-US': {
    greeting: 'Hello World!'
  }
};
18.react中用window.location.href从子组件返回到父组件后国际化配置出现问题
如果在 React 应用中使用`window.location.href` 从子组件返回父组件后再次加载页面,可能会导致国际化配置出现问题。这是因为在从子组件返回父组件后,页面的状态可能会被重置,包括国际化配置的状态也可能被重置,从而导致国际化配置失效。
为了解决这个问题,可以考虑使用 React Router 或其他路由库来管理页面的路由,以避免直接使用`window.location.href` 的方式导航到页面。使用路由库可以将页面的状态保存在路由中,从而避免页面状态重置导致的国际化配置失效问题。
如果使用了 React Router 等路由库,可以通过以下方式在父组件中传递国际化配置给子组件:
1. 在父组件中使用`React Router` 等路由库配置页面路由。
<Switch>
  <Route exact path="/" component={ParentComponent} />
  <Route path="/child" component={ChildComponent} />
</Switch>
2. 在父组件中通过路由传递国际化配置给子组件。
function ParentComponent({ location }) {
  const { pathname } = location;
  return (
    <ConfigProvider locale={pathname === '/child' ? 'en-US' : 'zh-CN'}>
      <ChildComponent />
    </ConfigProvider>
  );
}
在上面的例子中,父组件`ParentComponent` 中的`ConfigProvider` 组件根据当前路由路径判断子组件`ChildComponent` 所使用的语言环境。当路由路径为 `child` 时,使用英文环境,否则使用中文环境。这样就可以在子组件中正确地继承父组件的国际化配置了。
3.或者将界面选择的语言存储到本地
// 获取语言
export function getLanguage() {
  const lang = navigator.language ; // 常规浏览器语言和IE浏览器
  const localStorageLang = localStorage.getItem("lang");
  const defaultLang = localStorageLang || lang;
  return defaultLang;
}

// 修改html.lang显示
export function changeHtmlLang(lang) {
  return document.getElementById("lang").lang = lang;
}

// 设置语言
export function setLanguage(lang) {
  const defaultLang = localStorage.setItem("lang", lang);
  return defaultLang;
}
调用上面getLanguage()方法进行初始化获取语言
const [currentLocale, setCurrentLocale] = useState(getLanguage());
将currentLocale这个值赋值给下面的locale属性即可
<IntlProvider messages={messages[currentLocale]} locale={currentLocale} >
19.在ProTable组件中实现只将那个单元格的颜色变成红色
19.1方法一
下面的json为后端返回的查询结果列表的数据
// 遍历数据,将属性为available值为Invalid的单元格的样式设置为红色
       const processedData = (json:any) =>json.map((record: any) => {
        const newRecord = { ...record };
        if (newRecord.available === "Invalid") {
          newRecord.available = <span style={{ color: 'red' }}>Invalid</span>;
        }
        return newRecord;
      });
在下面调用后端接口返回数据时进行处理,添加上相关样式即可
import { ParamsType} from '@ant-design/pro-components';
const queryTableData = async (params: ParamsType) => {
        const msg = await queryVipsData({
          page: params.current,
          pageSize: params.pageSize,
          ...params
        });
        return {
          total: msg.data.total,
          data: processedData(msg.data.data),
          // success 请返回 true,
          // 不然 table 会停止解析数据,即使有数据
          success: true,
          // 不传会使用 data 的长度,如果是分页一定要传
        };

    }
在protable组件中的调用
<ProTable
//headerTitle="查询表格"
columns={searchColumns}
//一定要设置这个,否则每行数据没有主键,无法进行单行选中
rowKey="fileName"
rowSelection={rowSelections}
tableAlertRender={false}
request={(params: ParamsType & {
pageSize: number;
current: number;
}, _sort, _filter) => queryTableData(params)} />
19.2方法二
因为后端返回的json报文中的一个列属性(columns)的值中没法返回一个render的箭头函数方法,这种方式是在前端中手动添加一个自定义的render方法,让这个列的属性值为invalid时,字体变红
    const processedData=(columns:any) =>columns.map((col: any) => {
      if (col.dataIndex === 'available') { // 如果是目标列
        // 返回列配置对象,覆盖默认配置
        return {
          ...col,
          // 自定义渲染函数  text表示当前行的值,record表示当前行的数据
          render: (text: any,record: any) => {
            console.log("text***"+text)

            if (record.available === 'Invalid') { // 如果值为 invalid
              return <span style={{ color: 'red' }}>{text}</span>; // 返回一个样式为红色的 span 标签
            }
            return <span>{text}</span>; // 否则返回一个普通的 span 标签

          },
        };

      }
      return col;
    })
protable中是这样调用的,在protable的组件中的columns属性中调用上面的processedData方法进行处理,当目标列为(dataIndex === 'available')时添加一个render方法,并当值为Invalid的字体颜色改成红色
<ProTable
              //headerTitle="查询表格"
              columns={processedData(searchColumns)}
              //一定要设置这个,否则每行数据没有主键,无法进行单行选中
              rowKey="fileName"
              rowSelection={rowSelections}
              tableAlertRender={false}
              request={(params: ParamsType & {
                pageSize: number;
                current: number;
              }, _sort, _filter) => queryTableData(params)}
              />
20.在ProTable组件中实现 重置按钮只清空查询条件,不进行数据的再次查询
在tsx文件中让reset按钮点击时调用handleReset 方法,并且在查询的方法处添加判断,如果没有输入条件,则不会查询数据
import React ,{useState,useRef}from 'react';
import classes from './Vips.module.css'
import ProTable from '@ant-design/pro-table';
import { ParamsType } from '@ant-design/pro-components';
import {queryVipsData} from "../../api/search";


export default  (props:any) => {

    const {error,parseData}=props;

    const [submitSuccessfully, setSubmitSuccessfully] = useState(false);

    const actionRef = useRef<any>();


    const queryTableData = async (params: ParamsType) => {

        const { current, pageSize, ...rest } = params; // 从 params 中取出页码、页大小和其他查询条件
        if (!Object.values(rest).some(Boolean)) { // 如果没有输入条件,则不会查询数据
          return { data: [], total: 0, success: true };
        }
        const msg = await queryVipsData({
          page: params.current,
          pageSize: params.pageSize,
          ...params

        });
        return {
          total: msg.data.total,
          data: msg.data.data,
          // success 请返回 true,
          // 不然 table 会停止解析数据,即使有数据
          success: true,
          // 不传会使用 data 的长度,如果是分页一定要传
        };

    }
    const handleReset = () => {
        const { form } = actionRef.current;
        if (form) {
          form.resetFields(); // 重置表单中所有字段值
          actionRef.current.submit(); // 提交表单
        }
      };


      if (error===true) {

        return <span  className={ classes.typography } >{parseData?.errorMessage}</span>

      }else{

      return (
        <div>
        {(submitSuccessfully === false) &&

        <div>
              <ProTable
              //columns={processedData(searchColumns)}
              //handleReset点击重置按钮调用的方法,
              onReset={handleReset}

              //点击查询按钮,调用后端获取查询结果数据的方法
              request={queryTableData}
              actionRef={actionRef}

              //但是默认的查询表单 rules 是不生效的。需要配置 ignoreRules,才会执行指定的必录等相关规则
              form={{
                ignoreRules: false  }}

              //是否需要手动触发首次请求, 配置为 true 时不可隐藏搜索表单
              manualRequest={true}
              />
               </div>
                }

          </div>

      );
  }


}
21.nodejs的版本升级到18.16时启动react项目报错 ERROR in ./node_modules/@ant-design/pro-table/es/utils/index.js 258:18-36
export 'arrayMoveImmutable' (imported as 'arrayMoveImmutable') was not found in '@ant-design/pro-utils'
- Node.js 18.16版本与`@ant-design/pro-table`的兼容性需要查看`@ant-design/pro-table`的文档或GitHub页面,以查看支持的Node.js版本。通常,`@ant-design/pro-table`的主要版本(1.x,2.x等)将支持特定的Node.js版本,而次要版本(1.0,1.1等)将支持更具体的Node.js版本。
- 你可以查看`@ant-design/pro-table`的`package.json`文件或其文档,以查看它所依赖的Node.js版本或支持的Node.js版本。另外,你可以根据所使用的Node.js版本,选择相应版本的`@ant-design/pro-table`进行安装。
- 例如,如果你正在使用Node.js 18.16版本,可以尝试安装`@ant-design/pro-table`的2.x版本,以确保兼容性。或者,你也可以查看`@ant-design/pro-table`文档中的更新日志,以找到最新版本是否支持Node.js 18.16版本。
我在采用把@ant-design/pro-table`的改成2.x版本的
1. 首先,在你的React项目中打开终端,进入项目目录,并运行以下命令卸载当前的`@ant-design/pro-table`:


npm uninstall @ant-design/pro-table

2. 接下来,安装最新版本的2.x`@ant-design/pro-table`。使用以下命令:


npm install @ant-design/pro-table@2.x

3. 安装成功后,回到你项目的入口文件(一般是`App.js`或`index.js`),并将`@ant-design/pro-table`引入到你的项目中。使用以下代码:


import ProTable from '@ant-design/pro-table';

4. 因为`@ant-design/pro-table`的2.x版本的API与1.x版本有所不同,你需要根据新版本的API修改相应的代码。可以参考`@ant-design/pro-table`的官方文档,了解API的使用方式。

5. 修改完成后,运行你的React项目,并确保`@ant-design/pro-table`正常工作。

注意:在升级`@ant-design/pro-table`到2.x版本之前,最好备份你的代码,以便在出现问题时恢复。
22.使用prolayout组件,实现菜单
实现后的效果展示
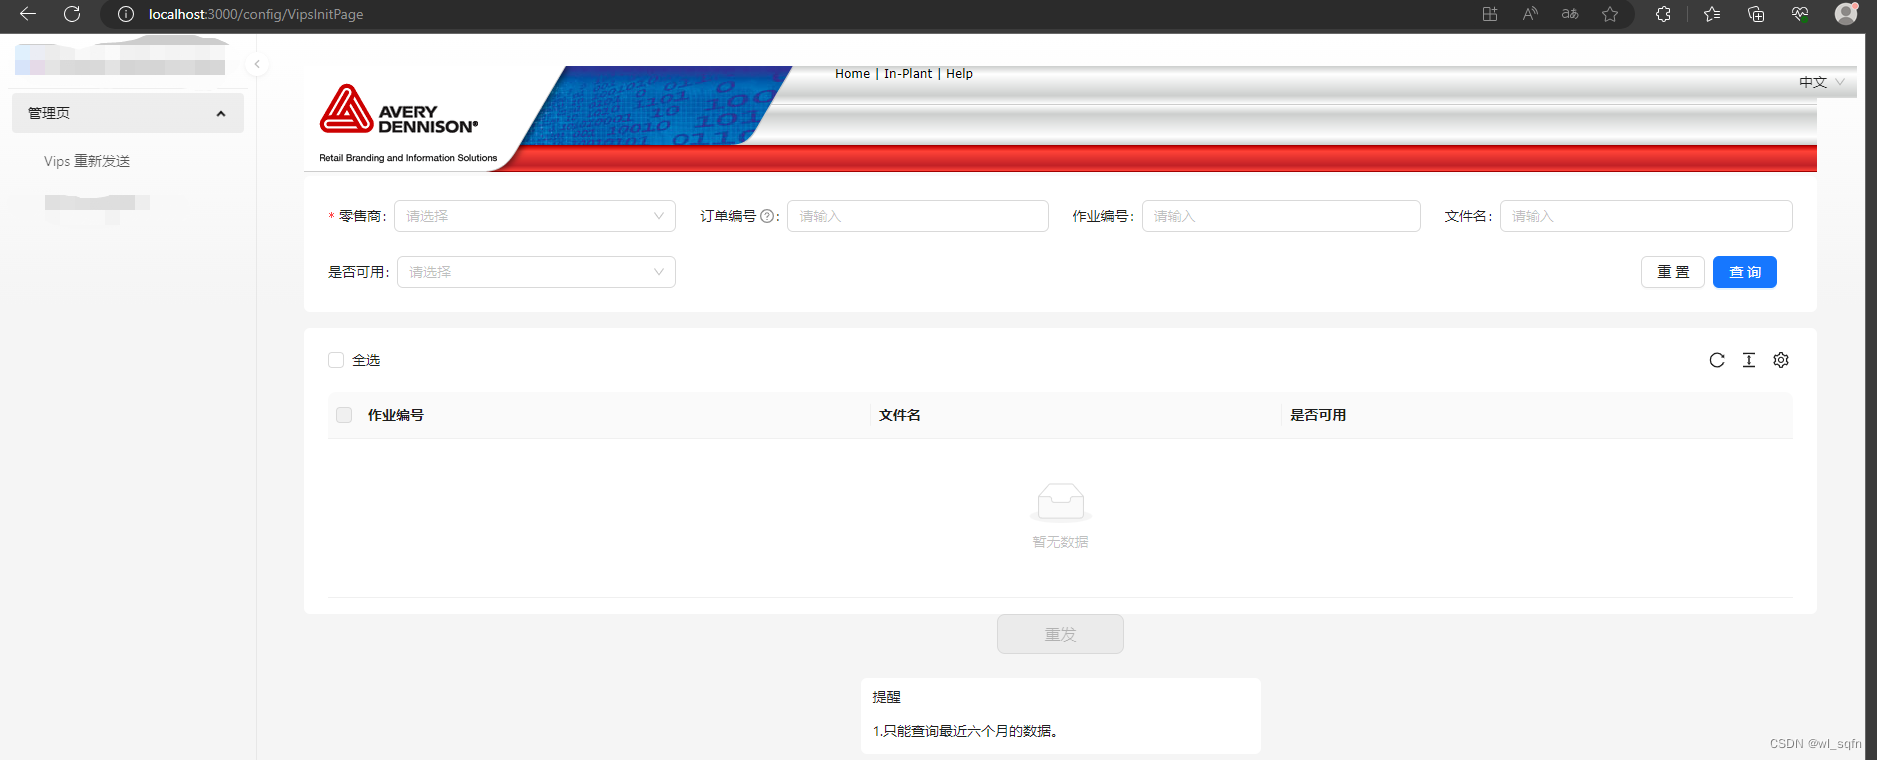
- 项目架构和上面一样,从后端获取到要展示的菜单的json报文,用Prolayout组件展示到界面
- 并结果路由组件,实现菜单项的界面跳转
前端代码
1.App.tsx的入口文件内容如下,是在Section组件中添加路由配置和菜单展示的
import React ,{Fragment}from 'react';
import Section from './layouts/Section/Section'
import { LOCALES } from "./components/i18n/locales";
import {  useState } from 'react';


export const AppContext = React.createContext({});

  export default function App(){

        return(

              <div>
              <Fragment>
              <Section />
            </Fragment>
            </div>


        )

}
2.Section.tsx
import React from 'react'
import LoginExpired from '../../pages/Error/LoginExpired'
import UserDeactivated from '../../pages/Error/UserDeactivated'
import AuthRoute from './AuthRoute'
import  SearchPage from '../../pages/SearchPage'
import ReloadI18n from '../../pages/ReloadI18n'
import Network1 from '../../pages/Network1'
import Network2 from '../../pages/Resend/Network2'
import VipsInitPage  from '../../pages/Vips/VipsInitPage'
import { Link, useHistory } from 'react-router-dom';
import {getMenus} from '../../api/search'
import { MenuDataItem ,ProLayout} from '@ant-design/pro-layout';
import { useState } from 'react';
import { Router,withRouter } from 'react-router-dom';
import { FormattedMessage } from 'react-intl'
import VipsInitPageMU from '../../pages/Vips/VipsInitPageMU'


   function Section (){
    const routerMap = [
      {path: "/loginexpired", name: "LoginExpired", component: LoginExpired},
      {path: "/userdeactivated", name: "userdeactivated", component: UserDeactivated},
      {path: "/VipsInitPage", name: "VipsInitPage", component: VipsInitPage},
    ]

    const [menuData, setMenuData] = useState<MenuDataItem[] >  ([]);

    const  getMenuList=()=> {
   //此处是调用后端获取菜单json报文
      getMenus().then(res => {
        if (res.code === 4) {
          setMenuData(res.data)
        }
      })
       }
    React.useEffect(getMenuList,[])

           //使用了`useHistory`钩子来获取`history`对象,而不是从外部传入。当用户点击菜单项时,会先触发`onClick`事件中的路由跳转逻辑,这样做的好处是可以清除路由库的缓存,确保页面能正确跳转到目标组件界面。

  const history = useHistory();


  const menuDataRender = (menuList:any) => {
    return menuList.map((menu:any) => {
      if (menu.children && menu.children.length > 0) {
        return {
          ...menu,
          name:
          <FormattedMessage id={menu.name} defaultMessage={menu.name} />,
          children: menuDataRender(menu.children),
        };
      } else {
        return {
          ...menu,
          name: (
            <FormattedMessage id={menu.name} defaultMessage={menu.name} />
          ),
        };
      }
    });
  };

  const handleClick = (path:string) => {
    history.push(path);
    window.location.reload();
  };

  const menuItemRender = (menuData:any, defaultDom:any) => {


      return <div style={{ display: "inline-block"}}>
      <Link to={{pathname: menuData.path}}
      onClick={()=>handleClick(menuData.path)}
      >
      <FormattedMessage id={`${menuData.name.props.id}`}   />
      </Link>
      </div>
  };

    return(

        /*用Switch组件包裹多个Route组件。
          在Switch组件下,不管有多少个Route的路由规则匹配成功,都只会渲染第一个匹配的组件*/

        <div>
      <Router history={history}>

        <ProLayout    siderWidth={256}
        title='D2comm Administration'
        menuDataRender={() => menuDataRender(menuData)} menuItemRender={menuItemRender}>
        <AuthRoute  routerConfig={routerMap} ></AuthRoute>
      </ProLayout>
      </Router>
        </div>
    );
  };

  export default withRouter(Section);
3.Section.tsx 中 要引入的getMenus()方法,调用后端
export function getMenus(){

    return request({

        url: '/menus/v1.0/getMenuList',

        method: 'get'


    })

}
4.Section.tsx 中的AuthRoute.jsx组件
import React, { Component } from 'react'
import { Route, Redirect ,withRouter} from 'react-router-dom'
import qs from 'qs'
import { setLocalStorage, getLocalStorage } from '../../utils/storage'
import Header from '../Header/Header'
import classes from '../../pages/Vips/Vips.module.css'

export  class AuthRoute extends Component {


  componentWillMount() {
    this.setToken()
  }

  setToken = () => {
    const { search } = this.props.location
    const token = getLocalStorage("token");
    if (search) {
      const searchParams = qs.parse(search.substr(1))
      if( this.isValidToken(searchParams.token) && token !== searchParams.token) {
        setLocalStorage('token', searchParams.token)
        setLocalStorage('needRefreshToken', true)
      }

    }
  }

  isValidToken = (token) => {
    const reg = /[0-9a-zA-Z][0-9a-zA-Z][0-9a-zA-Z][0-9a-zA-Z][0-9a-zA-Z][0-9a-zA-Z][0-9a-zA-Z][0-9a-zA-Z]-[0-9a-zA-Z][0-9a-zA-Z][0-9a-zA-Z][0-9a-zA-Z]-[0-9a-zA-Z][0-9a-zA-Z][0-9a-zA-Z][0-9a-zA-Z]-[0-9a-zA-Z][0-9a-zA-Z][0-9a-zA-Z][0-9a-zA-Z]-[0-9a-zA-Z][0-9a-zA-Z][0-9a-zA-Z][0-9a-zA-Z][0-9a-zA-Z][0-9a-zA-Z][0-9a-zA-Z][0-9a-zA-Z][0-9a-zA-Z][0-9a-zA-Z][0-9a-zA-Z][0-9a-zA-Z]/
    return reg.test(token)
  }
   onChangeLanguage = (e) => {
    //setLocale(e.target.value);
    localStorage.setItem("locale", e.target.value);
  };
  render() {
    const { routerConfig, location } = this.props;
    const { pathname, search } = location;
    const searchParams = qs.parse(search.substr(1))
    const token = searchParams.token || getLocalStorage('token')
    const isLogin = this.isValidToken(token)

      if (isLogin) {
        return (
                    <div  className={ classes.wrapper }>
                    //Header组件可以自定义菜单项跳转界面上方的公共header区域要展示什么
                      <Header />
                      { routerConfig.map(item => (

                        <Route exact path={item.path} component={item.component} />

                      ))}
                      </div>


        )
      } else  {
        return <Redirect to="/loginexpired" />
      }

  }
}
export default withRouter(AuthRoute);
后端代码
1.创建一个Menu对象
public class Menu {
 private String name;
 private String path;

 private List<Menu> children;

 public String getPath() {
  return path;
 }

 public void setPath(String path) {
  this.path = path;
 }

 public String getName() {
  return name;
 }

 public void setName(String name) {
  this.name = name;
 }


 public List<Menu> getChildren() {
  return children;
 }

 public void setChildren(List<Menu> children) {
  this.children = children;
 }

 public Menu(String path, String name, List<Menu> children) {
  this.path = path;
  this.name = name;
  this.children = children;
 }


}
2.获取json菜单报文
@GetMapping("/v1.0/getMenuList")
public ResponseEntity<ApiResponseMessage> getMenuList() {
    // 菜单数据
    List<Menu> menuList = new ArrayList<>();
    Menu menu2 = new Menu("/Vips", "menu.Administration_page", null);
    Menu menu2_1 = new Menu("/VipsInitPage", "Vips_Resend", null);

    menuList.add(menu2);

    ApiResponseMessage  result=new ApiResponseMessage(ApiResponseMessage.OK, menuList);
    return new ResponseEntity<>(result, HttpStatus.OK);
}
23.报错Too many re-renders. React limits the number of renders to prevent an infinite loop,解决方式
- 这个错误通常是由于在组件的渲染过程中,多次触发了`useEffect` 钩子导致的。出现这种情况可能是因为`searchColumns` 的值发生了变化,触发了`useEffect` 的重新运行,然后又在`useEffect` 中对`searchColumns` 进行了修改,导致了循环渲染。
你可以尝试使用`useMemo` 钩子来缓存并优化`parseColumn` 函数的结果。
1. 首先,在组件的开头引入`useMemo`:
import React, { useMemo } from 'react';
2. 在组件中使用`useMemo` 来缓存`parseColumn` 函数的结果:
const parsedColumns = useMemo(() => parseColumn(parseData), [parseData]);
在这里,`useMemo` 函数的第一个参数是一个回调函数,该回调函数返回`parseColumn(parseData)` 的结果。第二个参数是一个数组,包含了所有会影响`parseColumn` 结果的依赖项。只有当这些依赖项发生变化时,`parseColumn` 函数才会重新执行。
3. 将`parsedColumns` 传递给`columns` 属性:
<DataGrid rows={rows} columns={parsedColumns} />
通过使用`useMemo` 缓存`parseColumn` 函数,并且只在依赖项发生改变时重新执行,可以避免不必要的重复渲染,并解决`Too many re-renders` 错误。
注意:请确保`parseData` 是一个不可变对象,或者在依赖项数组中正确地包含`parseData` 的所有引用。否则,`useMemo` 可能无法正确地检测依赖项的变化。


 1283
1283


 被折叠的 条评论
为什么被折叠?
被折叠的 条评论
为什么被折叠?
 到【灌水乐园】发言


