


shiro功能以及基础知识
shiro主要有两部分内容,一个是认证另一个是授权
- 认证:当一个用户去登录系统时,shiro会去认证这个用户是否为可登录用户。
- 授权:一个系统会有好几种角色的用户,如管理员或者是普通用户,那怎么去定义管理员和普通用户呢这个就需要shiro中的授权机制去赋给用户不同的角色权限
认证的基础知识与流程
1,shiro中认证的关键对象
- **suject:**主体,访问系统的用户,主体可以使用户,程序,进行认证的窦被称为主体。
- **Principal:**身份信息,基本上指的就是用户名,也可以是其他的,但是身份信息必须要具有唯一性。
- **Credential:**凭证信息,只有主体自己知道的安全信息,如密码,证书等
2,认证流程

Shiro会把身份信息和凭证信息包装成一个令牌Token,去到shiro里面的核心架构里面的安全管理器进行验证是否合法。如果信息一致可以进入系统,如果不一致就认证失败。
3,具体操作
(1)引入shiro的依赖
		<dependency>
            <groupId>org.apache.shiro</groupId>
            <artifactId>shiro-core</artifactId>
            <version>1.3.2</version>
        </dependency>
(2)引入shiro的配置文件
这是一个*.ini文件。*.Ini文件,就类似于txt文件,ini文件可以写一些复杂的数据格式,这个配置文件要放在maven文件的resources文件夹中。用来学习shiro书写我们系统相关权限数据。把权限数据先放到ini配置文件中,并不用先直接连接数据库
[users]
# user 'root' with password 'secret' and the 'admin' role
root = secret, admin
# user 'guest' with the password 'guest' and the 'guest' role
guest = guest, guest
# user 'presidentskroob' with password '12345' ("That's the same combination on
# my luggage!!!" ;)), and role 'president'
presidentskroob = 12345, president
# user 'darkhelmet' with password 'ludicrousspeed' and roles 'darklord' and 'schwartz'
darkhelmet = ludicrousspeed, darklord, schwartz
# user 'lonestarr' with password 'vespa' and roles 'goodguy' and 'schwartz'
lonestarr = vespa, goodguy, schwartz
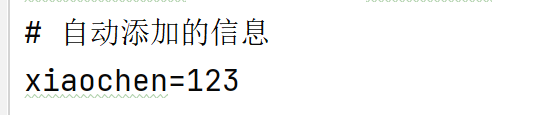
# 自动添加的信息
xiaochen=123
# -----------------------------------------------------------------------------
# Roles with assigned permissions
#
# Each line conforms to the format defined in the
# org.apache.shiro.realm.text.TextConfigurationRealm#setRoleDefinitions JavaDoc
# -----------------------------------------------------------------------------
[roles]
# 'admin' role has all permissions, indicated by the wildcard '*'
admin = *
# The 'schwartz' role can do anything (*) with any lightsaber:
schwartz = lightsaber:*
# The 'goodguy' role is allowed to 'drive' (action) the winnebago (type) with
# license plate 'eagle5' (instance specific id)
goodguy = winnebago:drive:eagle5
(3)在配置文件中添加一些固定内容
上一步添加了shiro的配置文件,我们可以在配置文件去添加自己的信息。
例子:下图,xiaochen=123,的意思就是用户名是xiaochen,密码是123是可以登录到我们系统的。
相当于在配置文件中写死一些用户名和密码,让其通过shiro的权限。
(tip:这只是shiro的流程的一部分,在后面我们会直接连接数据库获取数据库的用户名和密码)
(4)写主方法来测试一下shiro的功能
这个方法的流程就是shiro进行认证需要操作的过程。注意这里的realm是用的原始Relam-IniRealm
package com.example.shiro.demoshiro;

import org.apache.shiro.SecurityUtils;
import org.apache.shiro.authc.IncorrectCredentialsException;
import org.apache.shiro.authc.UnknownAccountException;
import org.apache.shiro.authc.UsernamePasswordToken;
import org.apache.shiro.mgt.DefaultSecurityManager;
import org.apache.shiro.mgt.SecurityManager;
import org.apache.shiro.realm.text.IniRealm;
import org.apache.shiro.subject.Subject;

//测试一下shiro的功能
public class TestAuthenticator {
    public  static  void main(String[] args){
//        1,创建安全管理器对象
        DefaultSecurityManager securityManager=new DefaultSecurityManager();
//        2,给安全管理器设置realm,并且读取shiro.ini配置文件中的内容
        securityManager.setRealm(new IniRealm("classpath:shiro.ini"));
//        3,全局的工具类,securityUtils ,提供了认证和退出的相关办法.
//        给全局安全的工具类设置安全管理器
        SecurityUtils.setSecurityManager(securityManager);
//        4,拿到关键对象 subject主体
        Subject subject = SecurityUtils.getSubject();

//        5,创建令牌,创建一个用户密码令牌的对象,并且进行赋值
        UsernamePasswordToken token = new UsernamePasswordToken("xiaochen","123");

//        6,进行用户认证,并且输出多个异常信息
        try{
            System.out.println("认证状态:"+subject.isAuthenticated());//获取认证状态信息
            subject.login(token); //用户认证
            System.out.println("认证状态:"+subject.isAuthenticated());
        }catch(UnknownAccountException e){
            e.printStackTrace();//进行打印异常信息
            System.out.println("认证失败,用户不存在");
        }catch(IncorrectCredentialsException e) {
            e.printStackTrace();//进行打印异常信息
            System.out.println("认证失败,用户信息错误");
        }catch(Exception e){
                e.printStackTrace();//进行打印异常信息
        }

    }
}
4,读取数据库中的信息
在3中,我们引入了shiro的配置文件shiro.ini,用户名和密码都是在这里面进行设置的,但是在真正使用shiro时,是需要数据库中存储的信息,所以不可避免的我们要用shiro连接数据库。
(1),源码理论分析
首先,我们可以通过realm进行实现,我们的数据是来自于数据库还是ini配置文件。
通过源码我们找到了:
最终执行用户名比较的 simpleAccountRealm类下面的doGetAuthenticationInfo方法中完成用户名校验,这个simpleAccountRealm是继承了AuthorizingRealm类的,如果我们写一个类去改成数据库作为校验数据,那也需要新建一个类去继承这个AuthorizingRealm类。
最终密码的校验,是在类AuthenticatingRealm中的assertCredentialsMatch方法中完成密码校验的。是自动去完成的。
(2),自定义连接数据库的realm类
自定义Realm类去继承AuthorizingRealm类实现里面的doGetAuthenticationInfo方法去进行重定义认证的来源路径,我们这儿是改成数据库的数据,doGetAuthorizationInfo()方法是进行授权
package com.example.shiro.realm;

import org.apache.shiro.authc.AuthenticationException;
import org.apache.shiro.authc.AuthenticationInfo;
import org.apache.shiro.authc.AuthenticationToken;
import org.apache.shiro.authc.SimpleAuthenticationInfo;
import org.apache.shiro.authz.AuthorizationInfo;
import org.apache.shiro.realm.AuthorizingRealm;
import org.apache.shiro.subject.PrincipalCollection;

/**
 * 该类时进行自定义Realm  将认证或者授权的数据来源转为数据库
 */
public class CustomerRealm extends AuthorizingRealm {

//    授权的方法
    @Override
    protected AuthorizationInfo doGetAuthorizationInfo(PrincipalCollection principalCollection) {
        return null;
    }
//     认证的方法
    @Override
    protected AuthenticationInfo doGetAuthenticationInfo(AuthenticationToken authenticationToken) throws AuthenticationException {
//在token中获取用户名
        String principal = (String) authenticationToken.getPrincipal();
        System.out.println(principal);
//        根据身份信息使用jdbc或者mybatis查询相关数据库,这里使用假的数据进行验证
//        本来要返回一个AuthenticationInfo对象,这是使用的是这个类的实现类simpleAuthenticationInfo
        if("xiaochen".equals(principal)){
//            参数1:是数据库中返回的正确的用户名,参数2:返回数据库中的正确密码,参数3:提供当前realm的名字 this.getName(),用这个方法实现即可。
            SimpleAuthenticationInfo simpleAuthenticationInfo = new SimpleAuthenticationInfo("xiaochen","123",this.getName());
            return simpleAuthenticationInfo;

        }

        return null;
    }
}
(3),写主方法去测试realm
package com.example.shiro.demoshiro;


import com.example.shiro.realm.CustomerRealm;
import org.apache.shiro.SecurityUtils;
import org.apache.shiro.authc.AuthenticationException;
import org.apache.shiro.authc.UsernamePasswordToken;
import org.apache.shiro.mgt.DefaultSecurityManager;
import org.apache.shiro.subject.Subject;

/**
 * 使用自定义realm的测试类,这里使用的是自定义的Realm类,那就不用ini配置文件中的了
 */
public class TestCustomerRealmAuthentictor {
    public static void main(String[] args) {
        //    创建securityManager
        DefaultSecurityManager defaultSecurityManager = new DefaultSecurityManager();
        //    设置我们的reaml
        defaultSecurityManager.setRealm(new CustomerRealm());
//        将安全工具类设置安全管理器
        SecurityUtils.setSecurityManager(defaultSecurityManager);
//        通过安全工具类获取subject
        Subject subject = SecurityUtils.getSubject();
//        创建令牌token
        UsernamePasswordToken token = new UsernamePasswordToken("xiaochen", "123");
        try {
            subject.login(token);
            System.out.println(subject.isAuthenticated());//打印验证状态
        } catch (AuthenticationException e) {
            e.printStackTrace();
        }

    }


}


 1560
1560


 被折叠的 条评论
为什么被折叠?
被折叠的 条评论
为什么被折叠?
 到【灌水乐园】发言


