


本问是对spring框架学习后对AOP,IoC.DI等核心概念的的总结性文档,对框架认识不足之处请各位前辈指正!!!
原创文章:转载请注明出处!!!
Spring框架概述
-
Spring框架的概述
Spring是一个开源框架,Spring是于2003 年兴起的一个轻量级的Java 开发框架,由Rod Johnson 在其著作Expert One-On-One J2EE Development and Design中阐述的部分理念和原型衍生而来。它是为了解决企业应用开发的复杂性而创建的。框架的主要优势之一就是其分层架构,分层架构允许使用者选择使用哪一个组件,同时为 J2EE 应用程序开发提供集成的框架。Spring使用基本的JavaBean来完成以前只可能由EJB完成的事情。然而,Spring的用途不仅限于服务器端的开发。从简单性、可测试性和松耦合的角度而言,任何Java应用都可以从Spring中受益。Spring的核心是控制反转(IoC)和面向切面(AOP)。简单来说,Spring是一个分层的JavaSE/EE full-stack(一站式) 轻量级开源框架。 -
Spring的优点
方便解耦,简化开发 (高内聚低耦合)
Spring就是一个工厂(容器),可以将所有对象创建和依赖关系维护,交给Spring管理
spring工厂是用于生成bean,spring内部实现了FactoryBean工厂接口,用于创建对象(常见ApplicationContext对象就是该对象的子接口,功能比父接口更为强大)
AOP编程的支持
Spring提供面向切面编程,可以方便的实现对程序进行权限拦截、运行监控等功能
声明式事务的支持
只需要通过配置就可以完成对事务的管理,而无需手动编程
方便程序的测试
Spring对Junit4支持,可以通过注解方便的测试Spring程序
方便集成各种优秀框架
Spring不排斥各种优秀的开源框架,其内部提供了对各种优秀框架(如:Struts、Hibernate、MyBatis、Quartz等)的直接支持
降低JavaEE API的使用难度
Spring 对JavaEE开发中非常难用的一些API(JDBC、JavaMail、远程调用等),都提供了封装,使这些API应用难度大大降低
java源码学习的经典案例
是java面向对象的经典封装和反射技术应用的最佳范例
3.spring中常见的概念
IoC(Inverse of Control):反转控制
直白的讲,在使用spring框架之前,使用对象需要我们自己创建(new对象),使用该矿建后,对象的创建有工厂类,spring容器提供,我们只需要件的xml配置,使用时通过从容器中获取即可,对象创建的方式发生了反转。
DI(Dependency Injection):依赖注入
依赖注入是指,将值赋值给对象的一种技术,常见的依赖注入有set方式注入和构造方式注入。
总结:依赖注入是发展控制的必须条件。
BeanFactory对象和ApplicationContext对象
spring工厂类结构图如下

两者之间的根本区别:BeanFactory对象不会在容器启动时创建对象,而是在对象被调用时,才创建对象的实例
而ApplicationContext则在容器创建时加载创建所有配置的对象,使用时直接获取使用即可
AOP(aspect oriented programming)面向切面编程
AOP思想是spring对反射技术的具体体现,详细总结访问:https://blog.csdn.net/workingman_li/article/details/89484268
4.spring框架的体系结构

入门案例:(IoC)
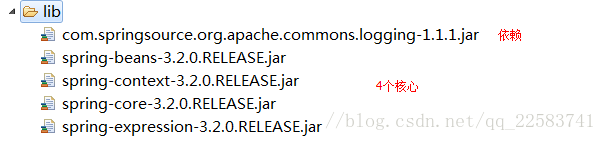
导入jar包
4 + 2: 4个核心(beans、core、context、expression) + 1个依赖(commons-loggins…jar.由于spring框架的维护,4.2.4版本的spring还需要添加log4j日志包)

目标类
提供UserService接口和实现类
获得UserService实现类的实例
之前开发中,直接new一个对象即可。学习spring之后,将由Spring创建对象实例–> IoC 控制反转(Inverse of Control)
之后需要实例对象时,从spring工厂(容器)中获得,需要将实现类的全限定名称配置到xml文件中
public interface UserService {
    public void addUser();
}
public class UserServiceImpl implements UserService {
    @Override
    public void addUser() {
        System.out.println("a_ico add user");
    }
}
配置文件
位置:任意,开发中一般在classpath下(src)
名称:任意,开发中常用applicationContext.xml
内容:添加schema约束
约束文件位置:spring-framework-3.2.0.RELEASE\docs\spring-framework-reference\html\ xsd-config.html
<?xml version="1.0" encoding="UTF-8"?>
<beans xmlns="http://www.springframework.org/schema/beans"
       xmlns:xsi="http://www.w3.org/2001/XMLSchema-instance"
       xsi:schemaLocation="http://www.springframework.org/schema/beans
                           http://www.springframework.org/schema/beans/spring-beans.xsd">
    <!-- 配置service
        <bean> 配置需要创建的对象
            id :用于之后从spring容器获得实例时使用的
            class :需要创建实例的全限定类名
    -->
    <bean id="userServiceId" class="com.itheima.a_ioc.UserServiceImpl"></bean>
</beans>
2.4测试
   @Test
    public void demo02(){
        //从spring容器获得
        //1 获得容器
        String xmlPath = "com/itheima/a_ioc/beans.xml";
        ApplicationContext applicationContext = new ClassPathXmlApplicationContext(xmlPath);
        //2获得内容 --不需要自己new,都是从spring容器获得
        UserService userService = (UserService) applicationContext.getBean("userServiceId");
        userService.addUser();
3 入门案例:DI
例如:
class BookServiceImpl{
    //之前开发:接口 = 实现类  (service和dao耦合)
    //private BookDao bookDao = new BookDaoImpl();
    //spring之后 (解耦:service实现类使用dao接口,不知道具体的实现类)
    private BookDao bookDao;
    setter方法
}
模拟spring执行过程
创建service实例:BookService bookService = new BookServiceImpl() -->IoC
创建dao实例:BookDao bookDao = new BookDaoImple() -->IoC
将dao设置给service:bookService.setBookDao(bookDao); -->DI
目标类
创建BookService接口和实现类
创建BookDao接口和实现类
将dao和service配置 xml文件
使用api测试
dao实现
//接口
public interface BookDao {
    public void save();
}
//实现类
public class BookDaoImpl implements BookDao {

    @Override
    public void save() {
        System.out.println("di  add book");
    }
}
service层
public interface BookService {
    public abstract void addBook();
}
//实现类
public class BookServiceImpl implements BookService {

    // 方式1:之前,接口=实现类(不适用)
//  private BookDao bookDao = new BookDaoImpl();
    // 方式2:接口 + setter
    private BookDao bookDao;
    public void setBookDao(BookDao bookDao) {
        this.bookDao = bookDao;
    }

    @Override
    public void addBook(){
        this.bookDao.save();
    }

}
配置文件
<beans xmlns="http://www.springframework.org/schema/beans"
       xmlns:xsi="http://www.w3.org/2001/XMLSchema-instance"
       xsi:schemaLocation="http://www.springframework.org/schema/beans
                           http://www.springframework.org/schema/beans/spring-beans.xsd">
    <!--
    模拟spring执行过程
        创建service实例:BookService bookService = new BookServiceImpl() IoC  <bean>
        创建dao实例:BookDao bookDao = new BookDaoImpl()         IoC
        将dao设置给service:bookService.setBookDao(bookDao);     DI   <property>

        <property> 用于进行属性注入
            name: bean的属性名,通过setter方法获得
                setBookDao ##> BookDao  ##> bookDao
            ref :另一个bean的id值的引用
     -->

    <!-- 创建service -->
    <bean id="bookServiceId" class="com.itheima.b_di.BookServiceImpl">
        <property name="bookDao" ref="bookDaoId"></property>
    </bean>

    <!-- 创建dao实例 -->
    <bean id="bookDaoId" class="com.itheima.b_di.BookDaoImpl"></bean>
</beans>
3.5 测试
@Test
public void demo01(){
    //从spring容器获得
    String xmlPath = "com/itheima/b_di/beans.xml";
    ApplicationContext applicationContext = new ClassPathXmlApplicationContext(xmlPath);
    BookService bookService = (BookService) applicationContext.getBean("bookServiceId");
    bookService.addBook();
实例来源原文:https://blog.csdn.net/qq_22583741/article/details/79589910
IoC中Bean标签管理对象的实现细节
Bean元素属性详细`
<?xml version="1.0" encoding="UTF-8"?>
<!-- 导入beans约束 -->
<beans xmlns:xsi="http://www.w3.org/2001/XMLSchema-instance"
xmlns="http://www.springframework.org/schema/beans"
xsi:schemaLocation="http://www.springframework.org/schema/beans
http://www.springframework.org/schema/beans/spring-beans-4.2.xsd ">

	<!-- user对象 -->
	<!-- bean元素: 配置需要spring创建|管理的对象
			name属性:给spring管理的对象起个"别名".获得对象时根据该名称获得对象.(可选)
			id属性:给spring管理的对象起个"别名".获得对象时根据该名称获得对象.(可选)
			class属性: 完整类名
			scope属性:指定对象的作用域(生命周期)
				*singleton:(默认值)单例对象.整个spring容器范围内,单例对象只会被创建一次.单例对象会在容器启动时创建
				*prototype:原型的.每次获得对象时都会创建新的对象.
				request: 在web环境下,确保每次请求都会创建一个新的对象
				session: 在web环境下,确保每次会话都会创建一个新的对象
				global-session:在web集群环境下,确保每个集群共享session范围内都会创建一个新的对象
			init-method&destroy-method属性: 指定初始化方法|销毁方法
	  -->
	<bean name="user" class="cn.itcast.domain.User" scope="singleton" init-method="init" destroy-method="destory" >
		<property name="name" value="tom"></property>
		<property name="age" value="18"></property>
	</bean>
	<!-- 引入其他配置 -->
	<import resource=".../di.xml"/>
</beans>
实例化Bean的三种方式
一、构造方法实例化Bean对象(不常用)
在相应的实体类中提供空参构造和有参构造集合
public class User {

    private Integer uid;
    private String username;
    private Integer age;

    public User(Integer uid, String username) {
        super();
        this.uid = uid;
        this.username = username;
    }

    public User(String username, Integer age) {
        super();
        this.username = username;
        this.age = age;
    }
xml配置
   <!-- 构造方法注入
        * <constructor-arg> 用于配置构造方法一个参数argument
            name :参数的名称
            value:设置普通数据
            ref:引用数据,一般是另一个bean id值

            index :参数的索引号,从0开始 。如果只有索引,匹配到了多个构造方法时,默认使用第一个。
            type :确定参数类型
        例如:使用名称name
            <constructor-arg name="username" value="jack"></constructor-arg>
            <constructor-arg name="age" value="18"></constructor-arg>
        例如2:【类型type 和  索引 index】
            <constructor-arg index="0" type="java.lang.String" value="1"></constructor-arg>
            <constructor-arg index="1" type="java.lang.Integer" value="2"></constructor-arg>
    -->
    <bean id="userId" class="com.itheima.f_xml.a_constructor.User" >
        <constructor-arg index="0" type="java.lang.String" value="1"></constructor-arg>
        <constructor-arg index="1" type="java.lang.Integer" value="2"></constructor-arg>
    </bean>
二、调用静态工厂方法和动态工厂创建Bean
创建工厂类
public class UserFactory {
	//动态工厂方法
		public  User getUser2(){
				System.out.println("User动态工厂方法");
				return new User();
		}

	//静态工厂方法
	public static User getUser1(){
		System.out.println("User静态工厂方法");
		return new User();
	}

}
xml配置
<?xml version="1.0" encoding="UTF-8"?>
<beans xmlns:xsi="http://www.w3.org/2001/XMLSchema-instance" xmlns="http://www.springframework.org/schema/beans" xsi:schemaLocation="http://www.springframework.org/schema/beans http://www.springframework.org/schema/beans/spring-beans-4.2.xsd ">

	<!-- 静态工厂方法
			让spring调用com.huawei.factory.UserFactory的getUser1方法创建user1对象
	 -->
	<bean name="user1" class="com.huawei.factory.UserFactory" factory-method="getUser1" >
		<property name="name" value="tom"></property>
		<property name="age" value="18"></property>
	</bean>
	<!-- 动态工厂方法
	 -->
	 <!-- 创建工厂对象 -->
	 <bean name="userFactory" class="com.huawei.factory.UserFactory" ></bean>
	 <!-- 调用userFactory对象的getUser2方法创建user2对象 -->
	<bean name="user2" factory-bean="userFactory" factory-method="getUser2" >
		<property name="name" value="jerry"></property>
		<property name="age" value="16"></property>
	</bean>
</beans>
测试方法
import org.springframework.context.ApplicationContext;
import org.springframework.context.support.ClassPathXmlApplicationContext;

import com.huawei.domain.User;

public class Demo {
	@Test
	public void fun1(){

		ClassPathXmlApplicationContext ac = new ClassPathXmlApplicationContext("com/huawei/factory/factory.xml");

		User bean1 = (User) ac.getBean("user1");
		User bean2 = (User) ac.getBean("user1");

		System.out.println(bean1);
		System.out.println(bean1==bean2);

		ac.close();
	}

	@Test
	public void fun2(){

		ClassPathXmlApplicationContext ac = new ClassPathXmlApplicationContext("com/huawei/factory/factory.xml");

		User bean1 = (User) ac.getBean("user2");
		User bean2 = (User) ac.getBean("user2");

		System.out.println(bean1);
		System.out.println(bean1==bean2);

		ac.close();
	}
}
三、依赖注入
简单属性注入
1.构造方法注入
2.gettersetter方法注入
3.P名称空间
xml配置:
<?xml version="1.0" encoding="UTF-8"?>
<beans xmlns:xsi="http://www.w3.org/2001/XMLSchema-instance"
		xmlns="http://www.springframework.org/schema/beans"
		xmlns:p="http://www.springframework.org/schema/p"
		xsi:schemaLocation="http://www.springframework.org/schema/beans http://www.springframework.org/schema/beans/spring-beans-4.2.xsd ">
    <!-- 构造方法注入 -->
	<bean name="user1" class="com.huawei.domain.User" >
		<!-- constructor-arg : 代表构造方法的一个参数
			  定位属性:
				name属性:参数名
				index属性:指定参数在参数列表中的索引(位置),从0开始(确定构造函数的重载)
				type属性:指定参数的类型
			 赋值属性:
				value属性:参数值
				ref属性:注入对象类型值
		 -->
		<constructor-arg name="name" value="jack" index="0" ></constructor-arg>
		<constructor-arg name="age" value="18" type="java.lang.Integer" ></constructor-arg>
		<constructor-arg name="car" ref="car" ></constructor-arg>
	</bean>
	<!-- ###################################################################### -->
	<!-- set方法注入 -->

	<!-- property标签 -->
	<bean name="user2" class="com.huawei.domain.User" >
		<!-- property标签:代表一个set方法 -->
		<property name="name" value="rose" ></property>
		<property name="age" value="20" ></property>
		<property name="car" ref="car" ></property>
	</bean>
	<!-- ###################################################################### -->
	<!-- p名称空间注入(与property标签注入只有写法的区别)
		准备工作: xmlns:p="http://www.springframework.org/schema/p"
	 -->
	<bean name="user3" class="xom.huawei.domain.User"
			 p:name="tom" p:age="18" p:car-ref="car" ></bean>
<!-- ###################################################################### -->
	<!-- SPEL表达式
			语法: #{表达式}
			作用:使用已有对象的属性值初始化化对象,该表达式获取容器中的对象的属性值
	 -->
	<bean name="user4" class="xom.huawei.domain.User" >
		<property name="name" value="#{user2.name}"></property>
		<property name="age" value="#{user3.age}"></property>
		<!-- 对象类型属性无法使用spel -->
		<property name="car" ref="car" ></property>
	</bean>

	<!-- car对象 -->
	<bean name="car" class="com.huawei.domain.Car" >
		<property name="name" value="兰博基尼" ></property>
	</bean>
</beans>
复杂属性注入
1.注入数组
2.注入 List
3.注入Map
<?xml version="1.0" encoding="UTF-8"?>
<beans xmlns:xsi="http://www.w3.org/2001/XMLSchema-instance"
		xmlns="http://www.springframework.org/schema/beans"
		xmlns:p="http://www.springframework.org/schema/p"
		xsi:schemaLocation="http://www.springframework.org/schema/beans http://www.springframework.org/schema/beans/spring-beans-4.2.xsd ">

	<!-- 复杂类型注入(set方法注入) -->
	<bean name="cb" class="com.huawei.domain.CollectionBean" >
		<!-- 情况1: 数组中只需要注入一个值(对象),直接将数组当做简单类型属性使用
						<property name="arr" ref="car" ></property>
		 	 情况2:数组中需要注入多个值|对象
		 -->
		<property name="arr"  >
			<array>
				<value>tom</value>
				<value>jerry</value>
				<ref bean="car" />
			</array>
		</property>
		<!-- 情况1: List中只需要注入一个值(对象),直接将List当做简单类型属性使用

					 <property name="list" ref="car" ></property>
		 	 	情况2:List中需要注入多个值|对象

		 -->
		 			<property name="list"  >
						<list>
							<value>tom</value>
							<value>jerry</value>
							<ref bean="car" />
						</list>
					</property>
		<!-- map注入 -->
			<property name="map">
				<map>
					<!-- 一个entry代表一个键值对 -->
					<entry key="name" value="tom" ></entry>
					<entry key-ref="car" value="hehe" ></entry>
					<entry key="haha" value-ref="car" ></entry>
				</map>
			</property>
		<!-- properties注入 => 是一个只能存放字符串类型的键值对的容器 -->
		<property name="props">
			<props>
				<!-- 一个prop就代表一个键值对 -->
				<prop key="haha">hehe</prop>
				<prop key="xixi">heihei</prop>
				<prop key="gaga">hiahia</prop>
			</props>
		</property>
	</bean>

	<!-- car对象 -->
	<bean name="car" class="com.huawei.domain.Car" >
		<property name="name" value="兰博基尼" ></property>
	</bean>
</beans>
以上配置的实体类
public class User {

	public User(String name) {
		System.out.println("public User(String name)!");
		this.name = name;
	}

	public User(Integer age) {
		System.out.println("public User(Integer age)!");
		this.age = age;
	}

	public User(String name, Integer age) {
		System.out.println("public User(String name, Integer age)!");
		this.name = name;
		this.age = age;
	}

	public User(String name, Long age) {
		System.out.println("public User(String name, Long age)!");
		this.name = name;
		this.age = age.intValue();
	}
	public User(Integer age,String name) {
		System.out.println("public User(Integer age,String name)!");
		this.name = name;
		this.age = age;
	}
	public User(String name, Integer age, Car car) {
		System.out.println("public User(String name, Integer age, Car car)!");
		this.name = name;
		this.age = age;
		this.car = car;
	}

	public User() {
		System.out.println("user 的空参构造!");
	}

	private String name;

	private Integer age;

	private Car car;

//getter和setter方法

	public void init(){
		System.out.println("我是初始化方法!");
	}
	public void destory(){
		System.out.println("我是销毁方法!");
	}
}
实体类:car类
public class Car {
	private String  name;
	//getter、setter方法
}
实体类:CollectionBean
public class CollectionBean {
	private Object[] arr;
	private List list;
	private Map map;
	private Properties props;

    //get和set方法
}
其他当时的引入
如import标签映入:
//引入其他配置文件中的对象
<import   resource ="com.huawei.Customer" />
IoC注解
导包(4+2)+aop包
spring-aop-4.2.4.RELEASE.jar 该包为aop相关核心包
1.在xml中导入context约束
2.在配置文件中添加组件扫描的标签
相关的约束
<!-- 开启IOC注解开关
			如果需要扫描多个包
				方式1: 包名,包名,包名.......
				方式2: cn.itcast => 包含所有后代包
	-->
 <context:component-scan base-package="com.huawei"></context:component-scan>
基于注解装配Bean(依赖注入)
开发中:使用注解 取代 xml配置文件。前提是配置包扫描器 (组件扫描器)
1.@Component取代
@Component(“id”) 取代
2.web开发,提供3个@Component注解衍生注解(功能一样)代替其表示各层
@Repository :dao层
@Service:service层
@Controller:web层
3.依赖注入,给私有字段设值,也可以给setter方法设值
普通值:@Value(" ")
引用值:
方式1:按照【类型】注入
@Autowired
注意:该方式是对方法属性注入,只按照set方法名注入,与字段无关(开发阅读源码是注意)
方式2:按照【名称】注入1
@Autowired
@Qualifier(“名称”)
方式3:按照【名称】注入2
@Resource(“名称”)
4.生命周期
初始化:@PostConstruct
销毁:@PreDestroy
5.作用域
@Scope(“prototype”) 多例 ,如struts2的action需设置此属性
value取值为prototype/singleton 多列/单例,一般可省略value不写,直接写值
参考文章链接:
Spring框架介绍及使用:https://blog.csdn.net/qq_22583741/article/details/79589910


 1855
1855


 被折叠的 条评论
为什么被折叠?
被折叠的 条评论
为什么被折叠?
 到【灌水乐园】发言


