


转载请注明出处:http://blog.csdn.net/woshizisezise/article/details/52840896
最近做项目的过程中,在设计获取验证码按钮点击获取验证码倒计时的控件的时候,发现以前项目中用的做法太过于繁琐,本来是想直接将原来的代码拷贝过来使用的,但是后来还是在网上搜索了一番,于是乎有了今天的这篇博文,今天我将给大家介绍一下最新的处理倒计时逻辑的方法,那就是我们今天的主人公:CountDownTimer。
首先我们看看它引入的包是package android.os,说明这个类是安卓系统提供给我们使用的,并且[< Android API 24 Platform >] android.os,说明它是在安卓6.X版本推出的,难怪在以前的版本中没见到别人使用这个类呢。这个类很简单,点击进入查看源码发现其实代码很清晰明了,下面我们一起来看看,相信没什么难度,大家都能看懂:
public abstract class CountDownTimer {

    /**
     * Millis since epoch when alarm should stop.
     */
    private final long mMillisInFuture;

    /**
     * The interval in millis that the user receives callbacks
     */
    private final long mCountdownInterval;

    private long mStopTimeInFuture;

    /**
    * boolean representing if the timer was cancelled
    */
    private boolean mCancelled = false;

    /**
     * @param millisInFuture The number of millis in the future from the call
     *   to {@link #start()} until the countdown is done and {@link #onFinish()}
     *   is called.
     * @param countDownInterval The interval along the way to receive
     *   {@link #onTick(long)} callbacks.
     */
    public CountDownTimer(long millisInFuture, long countDownInterval) {
        mMillisInFuture = millisInFuture;
        mCountdownInterval = countDownInterval;
    }

    /**
     * Cancel the countdown.
     */
    public synchronized final void cancel() {
        mCancelled = true;
        mHandler.removeMessages(MSG);
    }

    /**
     * Start the countdown.
     */
    public synchronized final CountDownTimer start() {
        mCancelled = false;
        if (mMillisInFuture <= 0) {
            onFinish();
            return this;
        }
        mStopTimeInFuture = SystemClock.elapsedRealtime() + mMillisInFuture;
        mHandler.sendMessage(mHandler.obtainMessage(MSG));
        return this;
    }


    /**
     * Callback fired on regular interval.
     * @param millisUntilFinished The amount of time until finished.
     */
    public abstract void onTick(long millisUntilFinished);

    /**
     * Callback fired when the time is up.
     */
    public abstract void onFinish();


    private static final int MSG = 1;


    // handles counting down
    private Handler mHandler = new Handler() {

        @Override
        public void handleMessage(Message msg) {

            synchronized (CountDownTimer.this) {
                if (mCancelled) {
                    return;
                }

                final long millisLeft = mStopTimeInFuture - SystemClock.elapsedRealtime();

                if (millisLeft <= 0) {
                    onFinish();
                } else if (millisLeft < mCountdownInterval) {
                    // no tick, just delay until done
                    sendMessageDelayed(obtainMessage(MSG), millisLeft);
                } else {
                    long lastTickStart = SystemClock.elapsedRealtime();
                    onTick(millisLeft);

                    // take into account user's onTick taking time to execute
                    long delay = lastTickStart + mCountdownInterval - SystemClock.elapsedRealtime();

                    // special case: user's onTick took more than interval to
                    // complete, skip to next interval
                    while (delay < 0) delay += mCountdownInterval;

                    sendMessageDelayed(obtainMessage(MSG), delay);
                }
            }
        }
    };
}
* 代码中最重要的几点,第一,是它的构造函数
public CountDownTimer(long millisInFuture, long countDownInterval) {
        mMillisInFuture = millisInFuture;
        mCountdownInterval = countDownInterval;
    }
第一个参数millisInFuture是倒计时时长,比如说我们常用的60秒,那么这里就应该设置为60000毫秒,第二个参数countDownInterval是倒计时间隔,比如说我们的1秒钟为单位,那么这里就应该设置为1000毫秒。
* 代码中还有两个抽象方法:
/**
     * Callback fired on regular interval.
     * @param millisUntilFinished The amount of time until finished.
     */
    public abstract void onTick(long millisUntilFinished);

    /**
     * Callback fired when the time is up.
     */
public abstract void onFinish();- 一个是onTick(long millisUntilFinished),这个就是倒计时中的回调方法,参数millisUntilFinished代表着还剩余的时间长度;
- 另一个是onFinish(),这个就是倒计时结束的回调方法,当我们设置的60s时间倒计时完成了,我们就在这个方法里做我们的处理动作;
上面说了那么多,相信源码大家也能比较容易的看明白,那么结合我自己项目中的一个效果,我对这个控件做了一些封装,写个例子供大家参考,其实这些都很好实现。
- 首先先创建一个drawable资源文件,点击按钮时背景有变化,命名为regist_suc.xml文件
<?xml version="1.0" encoding="utf-8"?>
<selector xmlns:android="http://schemas.android.com/apk/res/android">
     <item android:state_pressed="true">
         <shape>
             <corners android:radius="4dp"/>
             <solid android:color="#fff" />
             <stroke android:width="0.5dp" android:color="#179285"/>
         </shape>
     </item>

    <item>
        <shape>
            <corners android:radius="4dp"/>
            <solid android:color="#fff" />
            <stroke android:width="0.5dp" android:color="#1faa9b"/>
        </shape>
    </item>
</selector>- 创建一个类TimeCount,继承自CountDownTimer:
public class TimeCount extends CountDownTimer {
private TextView tvCode;
/**
* @param millisInFuture The number of millis in the future from the call
* to {@link #start()} until the countdown is done and {@link #onFinish()}
* is called.
* @param countDownInterval The interval along the way to receive
* {@link #onTick(long)} callbacks.
*/
public TimeCount(long millisInFuture, long countDownInterval, TextView tv) {
super(millisInFuture, countDownInterval);
this.tvCode = tv;
}
@Override
public void onTick(long millisUntilFinished) {
tvCode.setBackgroundResource(R.drawable.regist_suc);
tvCode.setTextSize(13);
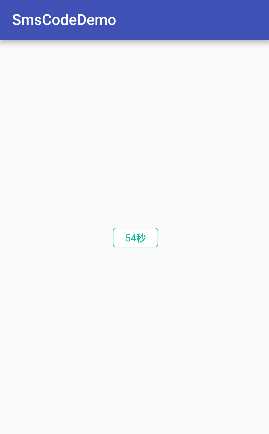
tvCode.setText(millisUntilFinished / 1000 +"秒");
tvCode.setClickable(false);
}
@Override
public void onFinish() {
tvCode.setBackgroundResource(R.drawable.regist_suc);
tvCode.setTextSize(13);
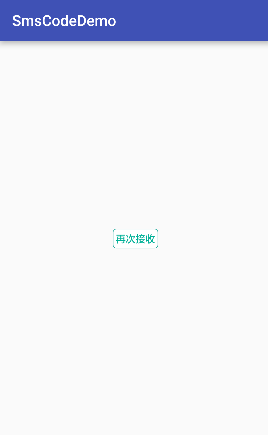
tvCode.setText("再次接收");
tvCode.setClickable(true);
}
这里的构造函数中接收了一个TextView的控件,大家可以根据自己的需要修改。
- 首页Activity的布局文件activity_main.xml文件也很简单:
<RelativeLayout xmlns:android="http://schemas.android.com/apk/res/android"
android:id="@+id/activity_main"
android:layout_width="match_parent"
android:layout_height="match_parent">
<TextView
android:id="@+id/code"
android:layout_width="60dp"
android:layout_height="26dp"
android:gravity="center"
android:textColor="#00b097"
android:textSize="16dp"
android:layout_centerInParent="true"
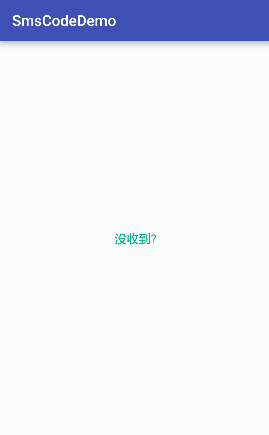
android:text="没收到?" />
</RelativeLayout>- 最后,在MainActivity中获取到TextView控件并且初始化TimeCount控件,代码清晰明了:
public class MainActivity extends AppCompatActivity implements View.OnClickListener {
    private TextView tvCode;
    private TimeCount time;
    @Override
    protected void onCreate(Bundle savedInstanceState) {
        super.onCreate(savedInstanceState);
        setContentView(R.layout.activity_main);
        tvCode = (TextView) findViewById(R.id.code);
        tvCode.setOnClickListener(this);
        time = new TimeCount(60000,1000,tvCode);
    }

    @Override
    public void onClick(View v) {
        switch (v.getId()){
            case R.id.code:
                time.start();
                //在这里请求获取验证码的接口即可
                break;
        }
    }
}
下面是运行时的几张截图,最终效果:
如果你觉得我的文章对你有帮助,并且希望帮助更多人,欢迎分享并关注我的微信公众号“Android开发的奥秘”,或扫描识别下方的二维码,我会不定期的分享给大家更多有用的资讯,谢谢!


 5496
5496


 被折叠的 条评论
为什么被折叠?
被折叠的 条评论
为什么被折叠?
 到【灌水乐园】发言


