


利用Python,我们可以搭建一个简单的Web服务器,这里我参考了:
https://ruslanspivak.com/lsbaws-part1/
https://ruslanspivak.com/lsbaws-part2/
https://ruslanspivak.com/lsbaws-part3/
PART 1
一个简单Python(2.7)代码如下:
import socket

HOST, PORT = "", 8888

listen_socket = socket.socket(socket.AF_INET, socket.SOCK_STREAM)
listen_socket.setsockopt(socket.SOL_SOCKET, socket.SO_REUSEADDR, 1)     #保证服务器的监听socket,即listen_socket在
									#关闭后对应的端口能够立即释放,否则将会在数分钟后才能释放
listen_socket.bind((HOST, PORT))
listen_socket.listen(1)
print "Serving HTTP on port %s ..." % PORT
while True:
    client_connection, client_address = listen_socket.accept()
    request = client_connection.recv(1024)
    print request

    http_response = """\
HTTP/1.1 200 OK

Hello, World!
"""
    client_connection.sendall(http_response)
    client_connection.close()
用浏览器登录 localhost:8888 可以打开一个打印着 "hello world" 的页面。而服务器则打印了如下信息:
GET / HTTP/1.1
Host: localhost:8888
Connection: keep-alive
Upgrade-Insecure-Requests: 1
User-Agent: Mozilla/5.0 (X11; Linux x86_64) AppleWebKit/537.36 (KHTML, like Gecko) Chrome/60.0.3112.113 Safari/537.36
Accept: text/html,application/xhtml+xml,application/xml;q=0.9,image/webp,image/apng,*/*;q=0.8
Accept-Encoding: gzip, deflate, br
Accept-Language: en-US,en;q=0.8


GET /favicon.ico HTTP/1.1
Host: localhost:8888
Connection: keep-alive
User-Agent: Mozilla/5.0 (X11; Linux x86_64) AppleWebKit/537.36 (KHTML, like Gecko) Chrome/60.0.3112.113 Safari/537.36
Accept: image/webp,image/apng,image/*,*/*;q=0.8
Referer: http://localhost:8888/
Accept-Encoding: gzip, deflate, br
Accept-Language: en-US,en;q=0.8
可以发现使用浏览器访问web服务器时,浏览器发送的消息如上。
使用telnet分析:
$ telnet localhost 8888
Trying ::1...
Trying 127.0.0.1...
Connected to localhost.
Escape character is '^]'.
mick
HTTP/1.1 200 OK

Hello, World!
Connection closed by foreign host.
在连接成功后随便输入,例如 mick ,终端的反馈如上。
如果输入:
$ telnet localhost 8888
Trying ::1...
Trying 127.0.0.1...
Connected to localhost.
Escape character is '^]'.
GET / HTTP/1.1
HTTP/1.1 200 OK

Hello, World!
Connection closed by foreign host.
我们的简易web服务器还缺少http消息的解析和处理功能。导致客户端不论发什么,都收到:
HTTP/1.1 200 OK

Hello, World!
的http响应。
PART 2
应用WSGI,方便我们更加自由选择web服务器与web框架。下面是一个简易的WSGI应用:
# Tested with Python 2.7.9, Linux & Mac OS X
import socket
import StringIO
import sys


class WSGIServer(object):

    address_family = socket.AF_INET
    socket_type = socket.SOCK_STREAM
    request_queue_size = 1

    def __init__(self, server_address):
        # Create a listening socket
        self.listen_socket = listen_socket = socket.socket(
            self.address_family,
            self.socket_type
        )
        # Allow to reuse the same address
        listen_socket.setsockopt(socket.SOL_SOCKET, socket.SO_REUSEADDR, 1)
        # Bind
        listen_socket.bind(server_address)
        # Activate
        listen_socket.listen(self.request_queue_size)
        # Get server host name and port
        host, port = self.listen_socket.getsockname()[:2]
        self.server_name = socket.getfqdn(host)
        self.server_port = port
        # Return headers set by Web framework/Web application
        self.headers_set = []

    def set_app(self, application):
        self.application = application

    def serve_forever(self):
        listen_socket = self.listen_socket
        while True:
            # New client connection
            self.client_connection, client_address = listen_socket.accept()
            # Handle one request and close the client connection. Then
            # loop over to wait for another client connection
            self.handle_one_request()

    def handle_one_request(self):
        self.request_data = request_data = self.client_connection.recv(1024)
        # Print formatted request data a la 'curl -v'
        print(''.join(
            '< {line}\n'.format(line=line)
            for line in request_data.splitlines()
        ))

        self.parse_request(request_data)

        # Construct environment dictionary using request data
        env = self.get_environ()

        # It's time to call our application callable and get
        # back a result that will become HTTP response body
        result = self.application(env, self.start_response)

        # Construct a response and send it back to the client
        self.finish_response(result)

    def parse_request(self, text):
        request_line = text.splitlines()[0]
        request_line = request_line.rstrip('\r\n')
        # Break down the request line into components
        (self.request_method,  # GET
         self.path,            # /hello
         self.request_version  # HTTP/1.1
         ) = request_line.split()

    def get_environ(self):
        env = {}
        # The following code snippet does not follow PEP8 conventions
        # but it's formatted the way it is for demonstration purposes
        # to emphasize the required variables and their values
        #
        # Required WSGI variables
        env['wsgi.version']      = (1, 0)
        env['wsgi.url_scheme']   = 'http'
        env['wsgi.input']        = StringIO.StringIO(self.request_data)
        env['wsgi.errors']       = sys.stderr
        env['wsgi.multithread']  = False
        env['wsgi.multiprocess'] = False
        env['wsgi.run_once']     = False
        # Required CGI variables
        env['REQUEST_METHOD']    = self.request_method    # GET
        env['PATH_INFO']         = self.path              # /hello
        env['SERVER_NAME']       = self.server_name       # localhost
        env['SERVER_PORT']       = str(self.server_port)  # 8888
        return env

    def start_response(self, status, response_headers, exc_info=None):
        # Add necessary server headers
        server_headers = [
            ('Date', 'Tue, 31 Mar 2015 12:54:48 GMT'),
            ('Server', 'WSGIServer 0.2'),
        ]
        self.headers_set = [status, response_headers + server_headers]
        # To adhere to WSGI specification the start_response must return
        # a 'write' callable. We simplicity's sake we'll ignore that detail
        # for now.
        # return self.finish_response

    def finish_response(self, result):
        try:
            status, response_headers = self.headers_set
            response = 'HTTP/1.1 {status}\r\n'.format(status=status)
            for header in response_headers:
                response += '{0}: {1}\r\n'.format(*header)
            response += '\r\n'
            for data in result:
                response += data
            # Print formatted response data a la 'curl -v'
            print(''.join(
                '> {line}\n'.format(line=line)
                for line in response.splitlines()
            ))
            self.client_connection.sendall(response)
        finally:
            self.client_connection.close()


SERVER_ADDRESS = (HOST, PORT) = '', 8888


def make_server(server_address, application):
    server = WSGIServer(server_address)
    server.set_app(application)
    return server


if __name__ == '__main__':
    if len(sys.argv) < 2:
        sys.exit('Provide a WSGI application object as module:callable')
    app_path = sys.argv[1]
    module, application = app_path.split(':')
    module = __import__(module)
    application = getattr(module, application)
    httpd = make_server(SERVER_ADDRESS, application)
    print('WSGIServer: Serving HTTP on port {port} ...\n'.format(port=PORT))
    httpd.serve_forever()
相比之前的代码,长了不少,但这已经是一个最轻量的代码了,让你不用陷入细节。使用这段代码,你可以让你的web应用于你喜欢的框架中,例如Pyramid, Flask, Django或其他框架。
为了模拟这些框架,我们推荐使用virtualenv,按照下面的步骤安装并启动一个虚拟环境
1、首先下载并安装 virtualenv,尽量使用1.9及以上的版本(这里我使用了1.9)
2、
$ mkdir ~/envs
$ virtualenv ~/envs/lsbaws/
$ cd ~/envs/lsbaws/
$ ls
bin  include  lib
$ source bin/activate
(lsbaws) $ pip install pyramid
(lsbaws) $ pip install flask
(lsbaws) $ pip install django
from pyramid.config import Configurator
from pyramid.response import Response


def hello_world(request):
    return Response(
        'Hello world from Pyramid!\n',
        content_type='text/plain',
    )

config = Configurator()
config.add_route('hello', '/hello')
config.add_view(hello_world, route_name='hello')
app = config.make_wsgi_app()
4、 最好将你的服务器及应用代码都放在~/envs/lsbaws/,然后用 ./bin 下面的 python 来运行,终端下输入:
~/envs/lsbaws$ bin/python server.py pyramidapp:app
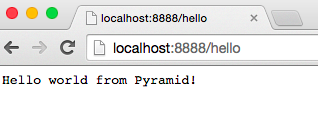
WSGIServer: Serving HTTP on port 8888 ...5、打开浏览器,得到
注意坑:遇到一个坑,在执行了
~/envs/lsbaws$ bin/python server.py pyramidapp:app
Traceback (most recent call last):
  File "pyramidapp.py", line 1, in <module>
    from pyramid.config import Configurator
ImportError: No module named pyramid.config在overstack上看到一个解答:https://stackoverflow.com/questions/17136716/import-configurator-error-for-python-pyramid
1) Make sure you are running the virtualenv
$ env/bin/python helloworld.py (即:使用virtualenv下的python)
2) Make sure you installed pyramid into the virtualenv
$ env/bin/python
>>> import pyramid.config (即:看环境是否配好,这里如果报错就说明环境还有问题,可以重搞一遍)
#ImportError or not?
其他如Flask, Django框架类似。WSGI是粘合Web服务器与Web框架的绝佳工具。
PART 3
还有一个问题,如何让我们的Web更好应对并发?这是一个关乎性能的重要问题。
Version 1.0
import socket

HOST, PORT = "", 8888

def handle_request(client_fd):
    request = client_fd.recv(2048)
    print request
    http_response = """\
HTTP/1.1 200 OK

Hello, World!
"""
    client_fd.sendall(http_response)

def serve_forever():
    listen_socket = socket.socket(socket.AF_INET, socket.SOCK_STREAM)
    listen_socket.setsockopt(socket.SOL_SOCKET, socket.SO_REUSEADDR, 1)

    listen_socket.bind((HOST, PORT))
    listen_socket.listen(5)
    print "Serving HTTP on port %s ..." % PORT

    while True:
        client_fd, client_addr = listen_socket.accept()
        handle_request(client_fd)
        client_fd.close()

if __name__ == '__main__':
    serve_forever()
这种方式下服务器在任意时间下只能处理一个连接,非常之差。
老早在学习C语言下的Socket编程时,我们可以通过fork()或pthread_create()来使用多进程多线程来并行。那么python下应该也是类似的。
Version 1.1
import socket
import os

HOST, PORT = "", 8888

def handle_request(client_fd):
    request = client_fd.recv(2048)
    print request
    http_response = """\
HTTP/1.1 200 OK

Hello, World!
"""
    client_fd.sendall(http_response)


def serve_forever():
    listen_socket = socket.socket(socket.AF_INET, socket.SOCK_STREAM)
    listen_socket.setsockopt(socket.SOL_SOCKET, socket.SO_REUSEADDR, 1)

    listen_socket.bind((HOST, PORT))
    listen_socket.listen(5)
    print "Serving HTTP on port %s ..." % PORT

    while True:
        client_fd, client_addr = listen_socket.accept()
        pid = os.fork()
        if pid == 0:
            listen_socket.close()
            handle_request(client_fd)
            client_fd.close()
            os._exit(0)
        else:
            client_fd.close()

if __name__ == '__main__':
    serve_forever()
果然,这里使用了fork()开启多进程。
关于为什么需要在父进程中关闭 client_fd ,主要是因为如果父进程不关闭 client_fd,那么该 fd 的引用永远不会减到0,该 tcp 连接就不会关闭,一来无故占用fd,当这样的连接过多时服务器的fd会被消耗完,二来该 tcp 连接无法关闭,即使客户端对应的 fd 关闭了,服务器端的 fd 没有关闭,客户端就永远等不到服务器发来的 fin 信息,导致该 tcp 连接一直存在。如果我们使用 curl 指令为例,就会发现在客户端的终端里,该连接关闭不了。
下面演示下当不关闭子进程中的fd:
$ python server.py
Serving HTTP on port 8888 ...
使用netstat -nta 查看所有tcp连接得到:

然后发起连接
$ curl http://localhost:8888/
Hello, World!
得到:

连接没有关闭,强制关闭 curl,发现

参考四次挥手过程可知,现在缺的就是服务器向客户端发送 fin 信息,原因就是服务器这边的 fd 尚未关闭。
僵尸进程:
除了 fd 的问题,以上代码还会产生僵尸进程。僵尸进程是指子进程先于父进程退出,退出后会保留一些进程号,退出状态等子进程信息,本需要父进程回收,但父进程没有回收这些信息,导致了僵尸进程。

Z+就是僵尸进程。大量的僵尸进程同样会占用很多资源,如何处理?常用的方法:
1、kill掉父进程,这样这些僵尸进程会被 init 回收;
2、父进程调用 wait() 主动回收。
方法一太粗暴不可行,方法二将会阻塞父进程,同样不可取。还记得信号吗?让子进程在退出后发送信号给父进程,再由父进程回收,这是一种可行的方法。子进程在退出后会给父进程发送 SIGCHLD 信号,我们可以添加自己处理函数来回收僵尸进程。于是,我们的代码改为:
Version 1.2
import socket
import signal
import os

HOST, PORT = "", 8888


def handle_exit(signum, frame):
    pid, status = os.wait()
    print "get SIGCHLD from: %u" % pid


def handle_request(client_fd):
    request = client_fd.recv(2048)
    print request
    http_response = """\
HTTP/1.1 200 OK

Hello, World!
"""
    client_fd.sendall(http_response)


def serve_forever():
    listen_socket = socket.socket(socket.AF_INET, socket.SOCK_STREAM)
    listen_socket.setsockopt(socket.SOL_SOCKET, socket.SO_REUSEADDR, 1)

    listen_socket.bind((HOST, PORT))
    listen_socket.listen(5)
    print "Serving HTTP on port %s ..." % PORT
    signal.signal(signal.SIGCHLD, handle_exit)

    while True:
        client_fd, client_addr = listen_socket.accept()
        pid = os.fork()
        if pid == 0:
            listen_socket.close()
            handle_request(client_fd)
            client_fd.close()
            os._exit(0)
        else:
            client_fd.close()

if __name__ == '__main__':
    serve_forever()
使用 curl 后居然报错:

到底做错了什么?
稍稍修改一下就能解决:
Version 1.3
import socket
import errno
import signal
import os

HOST, PORT = "", 8888


def handle_exit(signum, frame):
    pid, status = os.wait()
    print "get SIGCHLD from: %u" % pid


def handle_request(client_fd):
    request = client_fd.recv(2048)
    print request
    http_response = """\
HTTP/1.1 200 OK

Hello, World!
"""
    client_fd.sendall(http_response)


def serve_forever():
    listen_socket = socket.socket(socket.AF_INET, socket.SOCK_STREAM)
    listen_socket.setsockopt(socket.SOL_SOCKET, socket.SO_REUSEADDR, 1)

    listen_socket.bind((HOST, PORT))
    listen_socket.listen(5)
    print "Serving HTTP on port %s ..." % PORT
    signal.signal(signal.SIGCHLD, handle_exit)

    while True:
        try:
            client_fd, client_addr = listen_socket.accept()
        except IOError as e:
            code, msg = e.args
            # restart 'accept' if it was interrupted
            if code == errno.EINTR:
                continue
            else:
                raise

        pid = os.fork()
        if pid == 0:
            listen_socket.close()
            handle_request(client_fd)
            client_fd.close()
            os._exit(0)
        else:
            client_fd.close()

if __name__ == '__main__':
    serve_forever()
这回不会中断了,但之前错误的原因我还不清楚,知道的不吝赐教。
以上代码貌似是没有问题了,可是!添加如下客户端代码:
import argparse
import errno
import os
import socket


SERVER_ADDRESS = 'localhost', 8888
REQUEST = """\
GET /hello HTTP/1.1
Host: localhost:8888

"""


def main(max_clients, max_conns):
    socks = []
    for client_num in range(max_clients):
        pid = os.fork()
        if pid == 0:
            for connection_num in range(max_conns):
                sock = socket.socket(socket.AF_INET, socket.SOCK_STREAM)
                sock.connect(SERVER_ADDRESS)
                sock.sendall(REQUEST)
                socks.append(sock)
                os._exit(0)


if __name__ == '__main__':
    parser = argparse.ArgumentParser(
        description='Test client for LSBAWS.',
        formatter_class=argparse.ArgumentDefaultsHelpFormatter,
    )
    parser.add_argument(
        '--max-conns',
        type=int,
        default=1024,
        help='Maximum number of connections per client.'
    )
    parser.add_argument(
        '--max-clients',
        type=int,
        default=1,
        help='Maximum number of clients.'
    )
    args = parser.parse_args()
    main(args.max_clients, args.max_conns)
这段客户端代码可以解析外部参数调整开启的TCP连接数。如:
python client.py --max-clients 128开启了128个客户端。再次查看僵尸进程发现:

又有僵尸进程了,原因是在同一时间过多子进程发送信号,但是并没有很好的管理这些信号,导致有的信号被忽略了。
再次修改得到本文的最终版:
import socket
import errno
import signal
import os

HOST, PORT = "", 8888


def handle_exit(signum, frame):
    while True:
        try:
            pid, status = os.waitpid(
                    -1,         # Wait for any child process
                    os.WNOHANG  # Do not block and return EWOULDBLOCK error
                    )
        except OSError:
            return

        if pid == 0:    # no more zombies
            return

    print "get SIGCHLD from: %u" % pid


def handle_request(client_fd):
    request = client_fd.recv(2048)
    print request
    http_response = """\
HTTP/1.1 200 OK

Hello, World!
"""
    client_fd.sendall(http_response)


def serve_forever():
    listen_socket = socket.socket(socket.AF_INET, socket.SOCK_STREAM)
    listen_socket.setsockopt(socket.SOL_SOCKET, socket.SO_REUSEADDR, 1)

    listen_socket.bind((HOST, PORT))
    listen_socket.listen(5)
    print "Serving HTTP on port %s ..." % PORT
    signal.signal(signal.SIGCHLD, handle_exit)

    while True:
        try:
            client_fd, client_addr = listen_socket.accept()
        except IOError as e:
            code, msg = e.args
            # restart 'accept' if it was interrupted
            if code == errno.EINTR:
                continue
            else:
                raise

        pid = os.fork()
        if pid == 0:
            listen_socket.close()
            handle_request(client_fd)
            client_fd.close()
            os._exit(0)
        else:
            client_fd.close()

if __name__ == '__main__':
    serve_forever()
这回是真的没问题了。


 1万+
1万+


 被折叠的 条评论
为什么被折叠?
被折叠的 条评论
为什么被折叠?
 到【灌水乐园】发言


