


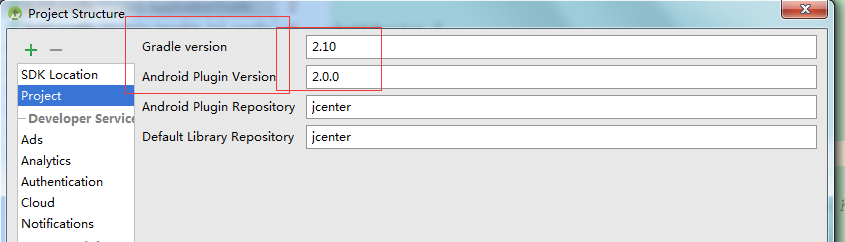
- gradle 版本和android 插件版本如下如图,Ctrl+Alt+Shift+S 快捷打开
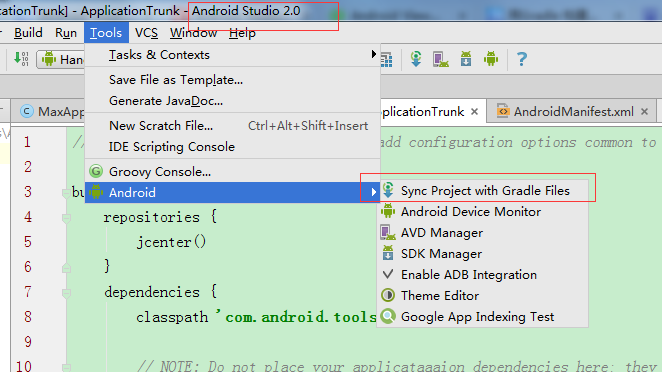
2.如何异步下载gradle文件如下图
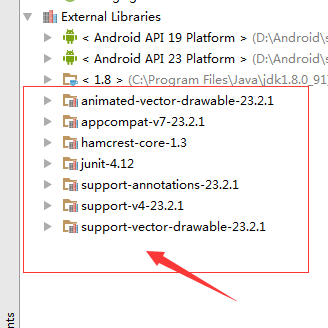
异步之后多的部分文件
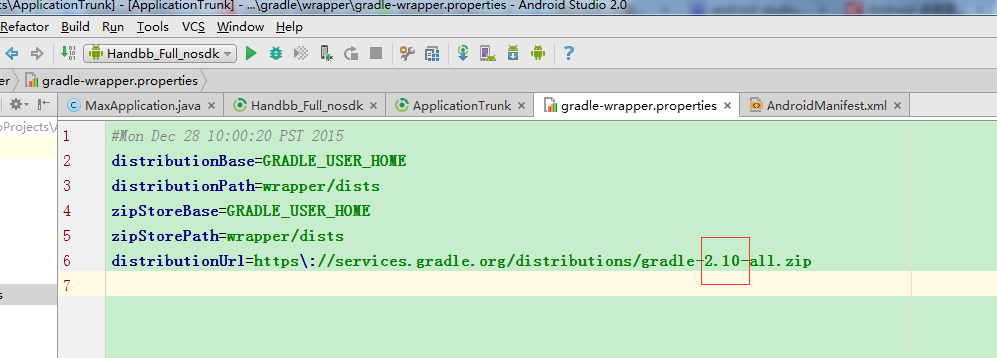
3.在gradle-wrapper.properties 中看gradle版本
4.gradle的多种表示形式
 dependencies {
        classpath 'com.android.tools.build:gradle:2.0.0'

        // NOTE: Do not place your applicataaaion dependencies here; they belong
        // in the individual module build.gradle files
    }
dependencies {
classpath 'com.android.tools.build:gradle:2.0.+'
}打成Jar
此部分来源:链接
我们新建的module可能是一个library,需要编译成jar包提供给项目使用,而gradle默认没有编译成jar文件而是aar文件。我们知道,jar是不包含资源文件例如图片,xml文件等。而相比较jar,aar能够将资源文件一同打包进去。
1.其实构建的时候已经产生了jar文件了,只不过藏得比较深而已。使用以下代码,将jar拷贝到libs文件夹下:
task makeJar(type: Copy) {
delete 'build/libs/name.jar'
from('build/intermediates/bundles/release/')
into('build/libs/')
include('classes.jar')
rename ('classes.jar', 'name.jar')
}
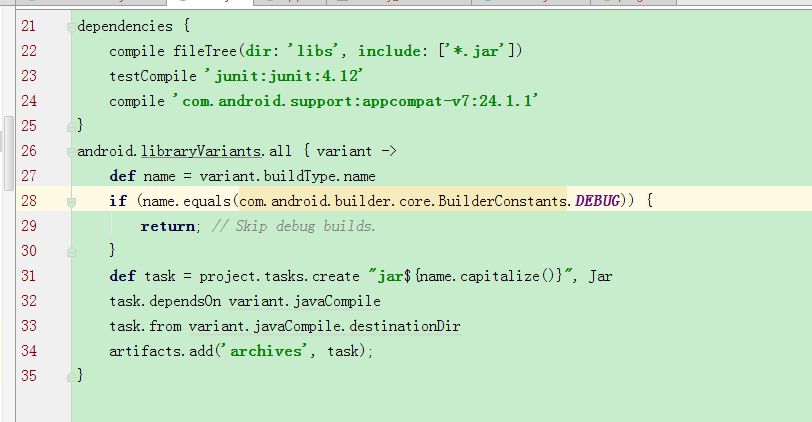
makeJar.dependsOn(build)2.可以直接用下面的代码,将class文件打包成jar
 android.libraryVariants.all { variant ->
     def name = variant.buildType.name
     def task = project.tasks.create "jar${name.capitalize()}", Jar
     task.dependsOn variant.javaCompile
         task.from variant.javaCompile.destinationDir
     artifacts.add('archives', task);
 }
Android Studio 命令打个jar包 (win7下的)
创建
创建一个接口
public interface TestInterface {
    /**
     * 定义方法: 将时间戳转换成日期
     * @param dateFormat    日期格式
     * @param timeStamp     时间戳,单位为ms
     */
    String getDateFromTimeStamp(String dateFormat, long timeStamp);
}
执行

结果
生成

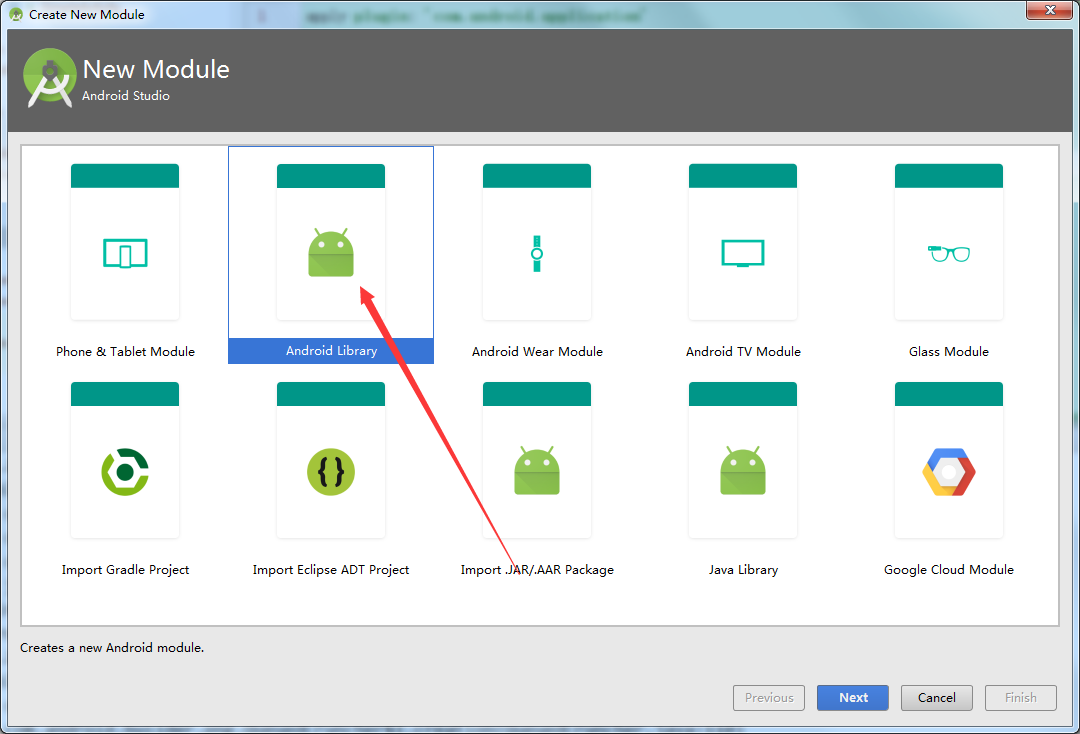
创建一个modle 名为plugin
把jar包放在lib文件下
创建一个类实现接口
/**
 * project_name:YinYangApplication
 * Date: 2016/10/17 10:59
 * Email: xiaoxilong5201314@163.com
 * Author: Aaron Empire
 * Description: 测试插件包含的工具类
 *
 */
public class TestUtil implements TestInterface {
    @Override
    public String getDateFromTimeStamp(String dateFormat, long timeStamp) {

        DateFormat  format1 = new SimpleDateFormat(dateFormat);
        Date date = new Date(timeStamp);
        return format1.format(date);
    }
}
在gradle中配置
apply plugin: 'com.android.application'

android {
    compileSdkVersion 24
    buildToolsVersion "24.0.2"

    defaultConfig {
        applicationId "com.example.yinyangapplication"
        minSdkVersion 15
        targetSdkVersion 24
        versionCode 1
        versionName "1.0"
    }
    buildTypes {
        release {
            minifyEnabled false
            proguardFiles getDefaultProguardFile('proguard-android.txt'), 'proguard-rules.pro'

            applicationVariants.all { variant ->
                variant.outputs.each { output ->
                    def apkName = "plugin.apk"
                    output.outputFile = file("$rootProject.projectDir/app/src/main/assets/plugin/" + apkName)
                }
            }
        }
    }
}

dependencies {
    compile fileTree(include: ['*.jar'], dir: 'libs')
    testCompile 'junit:junit:4.12'
    compile files('libs/library.jar')
}
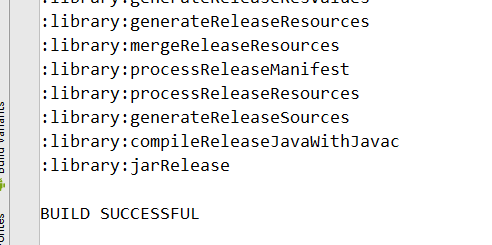
在Terminal中执行命令gradlew (一个空格):plugin:assembleRelease
gradlew :plugin:assembleRelease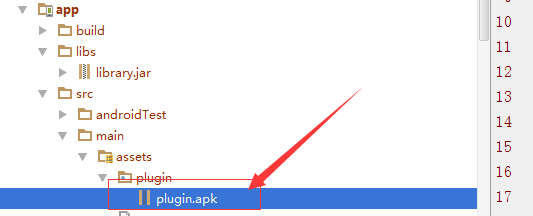
此时插件已经写好了
接下来就是加载插件了
1.
public class PluginLoader {
    private static final String TAG = "PluginLog";
    private DexClassLoader mDexClassLoader;

    public void loadPluginAPK(String pluginName) {
        mDexClassLoader = createDexClassLoader(pluginName);
    }

    /**
     * 插件apk名称
     */
    private DexClassLoader createDexClassLoader(String pluginName) {

        boolean saved = savePluginApkToStorage(pluginName);
        if (!saved) {
            return null;
        }
        DexClassLoader classLoader = null;
        try {
            String apkPath = getPluginApkDirectory() + pluginName;
            File dexOutputDir = TestApplication.getmInstance().getDir("dex", 0);
            String dexoutputDirPath = dexOutputDir.getAbsolutePath();

            ClassLoader c1 = TestApplication.getmInstance().getClassLoader();
            classLoader = new DexClassLoader(apkPath, dexoutputDirPath, null, c1);
        } catch (Throwable e) {
        }


        return classLoader;
    }

    public Object newInstance(String className) {
        if (mDexClassLoader == null) {
            return null;
        }
        try {
            Class<?> clazz = mDexClassLoader.loadClass(className);
            Object instance = clazz.newInstance();
            return instance;
        } catch (Exception e) {

            Log.e(TAG, "newInstance className = " + className + " failed" + " exception = " + e.getMessage());
        }

        return null;
    }

    private String getPluginApkDirectory() {
        File pluginPath = TestApplication.getmInstance().getDir("apk", 0);

        return pluginPath.getAbsolutePath() + "/";

    }

    /**
     * 将插件apk保存在sd卡
     */

    private boolean savePluginApkToStorage(String pluginName) {
        String pluginApkPath = this.getPluginApkDirectory() + pluginName;
        File pluginApkFile = new File(pluginApkPath);
        if (pluginApkFile.exists()) {

            try {
                pluginApkFile.delete();
            } catch (Throwable e) {

            }
        }

        BufferedInputStream in = null;
        BufferedOutputStream out = null;

        try {
            InputStream is = TestApplication.getmInstance().getAssets().open("plugin/" + pluginName);
            in = new BufferedInputStream(is);
            out = new BufferedOutputStream(new FileOutputStream(pluginApkPath));

            final int BUF_SIZE = 4096;
            byte[] buf = new byte[BUF_SIZE];

            while (true) {
                int readCount = in.read(buf, 0, BUF_SIZE);
                if (readCount == -1) {
                    break;
                }
                out.write(buf, 0, readCount);
            }

        } catch (Exception e) {
            return false;

        } finally {
            if (in != null) {
                try {
                    in.close();
                } catch (IOException e) {
                    in = null;
                    e.printStackTrace();
                }
            }

            if (out != null) {
                try {
                    out.close();
                } catch (IOException e) {
                    out = null;
                    e.printStackTrace();
                }
            }
        }

        return true;
    }


}
2.
public class TestApplication extends Application {

    public static TestApplication mInstance;

    @Override
    public void onCreate() {
        super.onCreate();
        mInstance = this;
        PluginManager.getInstance().loadPluginApk();
    }


    /**
     * 获取Application的实例
     */

    public static TestApplication getmInstance() {
        return mInstance;
    }
}
3.
public class PluginManager {
    public static final String PLUGIN_NAME = "plugin.apk";
    private PluginLoader mPluginLoader;

    public static final class PluginManagerHolder {
        public static final PluginManager INSTANCE = new PluginManager();

    }

    public static PluginManager getInstance() {
        return PluginManagerHolder.INSTANCE;
    }

    /**
     * go
     * Load the LoadDtPluginApk
     */
    public void loadPluginApk() {
        if (mPluginLoader == null) {
            mPluginLoader = new PluginLoader();
            mPluginLoader.loadPluginAPK(PLUGIN_NAME);
        }
    }

    public TestInterface createTestPluginInstance() {
        if (mPluginLoader == null) {
            Log.e("PluginLog", "createTestPluginInstance: plugin loader is null");
            return null;
        }

        TestInterface testManager = (TestInterface) mPluginLoader.newInstance("com.example.yinyangapplication.TestUtil");
        return testManager;


    }
}
4.
public class Main2Activity extends Activity {
    private TextView mMainTextView;
    @Override
    protected void onCreate(Bundle savedInstanceState) {
        super.onCreate(savedInstanceState);
        setContentView(R.layout.activity_main2);
        mMainTextView = (TextView) findViewById(R.id.textView3);
        TestInterface testPlugin = PluginManager.getInstance().createTestPluginInstance();
        mMainTextView.setText(testPlugin.getDateFromTimeStamp("yyyy-MM-dd", System.currentTimeMillis()));
    }
}
执行

如图所示,构建的简要过程如下:
Asset打包工具-aapt将所有的资源文件,例如AndroidManifest和其他xml文件编译,并且生成R.java提供给java编译器
aidl工具将aidl接口转换为java接口
java编译器将R.java,源码和aidl转换后的接口编译成 .class文件
dex工具将编译后的 .class文件和第三方的一些库一起转换为Dalvik字节码
apkbuilder工具将 .dex文件、编译好的资源文件及图片等不需要编译的资源文件打包成apk
jarsigner将apk文件签名
最后zipalign工具优化apk,zipalign工具主要是用来保证未压缩的数据相对于文件初始位置从一个特定的位置开始读取。所有的未压缩数据例如图片和raw文件,都会对齐到4-byte边界。
2017-06-08
配置gradle 环境变量
win
在环境变量中配置 系统变量新建 GRADLE_HOME 值为gradle文件位置
C:\Users\zzcx.gradle\wrapper\dists\gradle-3.3-all\55gk2rcmfc6p2dg9u9ohc3hw9\gradle-3.3
在系统变量中PATH 中 配置gradle 下bin目录;
C:\Users\zzcx.gradle\wrapper\dists\gradle-3.3-all\55gk2rcmfc6p2dg9u9ohc3hw9\gradle-3.3\bin
配置好验证


 3万+
3万+

 被折叠的 条评论
为什么被折叠?
被折叠的 条评论
为什么被折叠?
 到【灌水乐园】发言


