


采用MVVM模式,实现前后台分离的MessageBox,可移植性更高!
当我们已经拥有一套精美绝伦的系统皮肤时,可能因为消息弹框的效果不尽人意,而影响了整个系统的一丝丝美感。于是自己实现一个消息框的想法便油然而生。
这篇文章主旨不在于怎样设计个美观的消息框界面,而是注重底层功能的实现。毕竟WPF可以充分实现UI与后台的分离,我们先抛开浮华的外表,关注心灵、关注骨骼的发育和成长。
============================= 我是一条长长的分割线 ============================
在此之前,我们先总结一下,一个消息弹框需要有哪些部件的支撑:
1、基础展示信息:
标题(Caption)、消息内容(MessageBoxText)、消息图标(Image)、消息按钮(Button)
2、交互控制:
1)消息类型:
事实上,每种消息类型对应唯一的消息图标,因此借用系统的枚举类MessageBoxImage来表示消息类型
2)显示按钮组合:
事实上,常用的消息按钮只有4个:OK(确定)、Yes(是)、No(否)、Cancel(取消),面对不同的场景有不同的按钮组合。这里仍然使用系统提供的枚举类MessageBoxButton。
(尽管消息类型与显示按钮没有必然的联系,但通常我们在软件开发时会把一些消息类型与按钮组合进行固定搭配,通过不同的接口来调用,这样不仅使用方便也保证了系统的统一性)
3)消息图标控制:
由于消息图标与消息类型是一对一的关系,故可以给每个消息类型匹配一套样式模板或者一个Image资源,视个人喜好而定。
4)消息按钮显示控制:
采用MVVM模式,按钮通过绑定命令与后台交互,后台通过控制ICommand的CanExecute属性来控制按钮使能,前台通过将Visibility绑定到IsEnabled,以此来实现显示与使能的统一。
有了以上基础,我们就可以搭建一个比较完善且与前台分离的消息辅助类了!Let’s go!
在进入正题之前,先说明几个问题:
1)为什么要用MVVM模式来写消息辅助类,而不是直接在MessageBox的窗体后台代码里写?
主要原因是不同的项目,设计风格会有所不同,比如触摸屏产品可能更多的是平板风格,那么弹窗就显得不是很应景,会采用嵌入遮罩层的方式来提示消息,那这个时候前台就不是继承窗体类了,你会需要再把消息后台代码Copy过来,这样很不爽
2)本项目中使用的是自主开发的MVVM框架,但基本上和其他一些现成框架类似,所以不会对此次项目的功能带来影响,请放心阅读。
下面先附上本项目的核心代码,也就是消息框辅助类
using MVVM;
using System;
using System.Collections.Generic;
using System.Linq;
using System.Text;
using System.Threading.Tasks;
using System.Windows;
using System.Windows.Input;

namespace Demo_MessageBox.ViewModels
{
    public class MessageBoxViewModel : BaseViewModel
    {
        #region 私有变量
        private bool _showOk = false;

        private bool _showCancel = false;

        private bool _showYes = false;

        private bool _showNo = false;

        private string _iconString = null;

        private Action _onCloseAction = null;

        private MessageBoxButton _messageBoxButton = MessageBoxButton.OK;

        private MessageBoxImage _messageBoxImage = MessageBoxImage.Information;
        #endregion

        #region 属性
        private string m_Caption;
        public string Caption
        {
            get { return m_Caption; }
            set
            {
                if (m_Caption != value)
                {
                    m_Caption = value;
                    OnPropertyChanged("Caption");
                }
            }
        }

        private string m_Message;
        public string Message
        {
            get { return m_Message; }
            set
            {
                if (m_Message != value)
                {
                    m_Message = value;
                    OnPropertyChanged("Message");
                }
            }
        }

        private Style m_ImageStyle;
        public Style ImageStyle
        {
            get { return m_ImageStyle; }
            set
            {
                if (m_ImageStyle != value)
                {
                    m_ImageStyle = value;
                    OnPropertyChanged("ImageStyle");
                }
            }
        }

        #endregion

        #region 公共变量
        public MessageBoxResult MessageBoxResult = MessageBoxResult.Cancel;
        #endregion

        /// <summary>
        /// 构造函数
        /// </summary>
        /// <param name="messageBoxButton">指定显示按钮</param>
        /// <param name="messageBoxImage">指定显示图标</param>
        /// <param name="closeAction">点击按钮时触发的方法</param>
        public MessageBoxViewModel(MessageBoxButton messageBoxButton, MessageBoxImage messageBoxImage, Action onClose)
        {
            _messageBoxButton = messageBoxButton;
            _messageBoxImage = messageBoxImage;
            _onCloseAction = onClose;
            SetDisplayButton();
            SetDisplayIcon();

            HitOK = new SimpleCommand(a => { return _showOk; }, OnHitOK);
            HitCancel = new SimpleCommand(a => { return _showCancel; }, OnHitCancel);
            HitYes = new SimpleCommand(a => { return _showYes; }, OnHitYes);
            HitNo = new SimpleCommand(a => { return _showNo; }, OnHitNo);
        }
        public ICommand HitOK { get; private set; }
        private void OnHitOK(object obj)
        {
            MessageBoxResult = MessageBoxResult.OK;
            _onCloseAction?.Invoke();
        }
        public ICommand HitCancel { get; private set; }
        private void OnHitCancel(object obj)
        {
            MessageBoxResult = MessageBoxResult.Cancel;
            _onCloseAction?.Invoke();
        }
        public ICommand HitYes { get; private set; }
        private void OnHitYes(object obj)
        {
            MessageBoxResult = MessageBoxResult.Yes;
            _onCloseAction?.Invoke();
        }
        public ICommand HitNo { get; private set; }
        private void OnHitNo(object obj)
        {
            MessageBoxResult = MessageBoxResult.No;
            _onCloseAction?.Invoke();
        }
        private void SetDisplayButton()
        {
            switch (_messageBoxButton)
            {
                case MessageBoxButton.OK:
                    _showOk = true;
                    break;
                case MessageBoxButton.OKCancel:
                    _showOk = true;
                    _showCancel = true;
                    break;
                case MessageBoxButton.YesNo:
                    _showYes = true;
                    _showNo = true;
                    break;
                case MessageBoxButton.YesNoCancel:
                    _showYes = true;
                    _showNo = true;
                    _showCancel = true;
                    break;
            }
        }
        private void SetDisplayIcon()
        {
            switch (_messageBoxImage)
            {
                case MessageBoxImage.Information:
                    _iconString = nameof(MessageBoxImage.Information);
                    break;
                case MessageBoxImage.Warning:
                    _iconString = nameof(MessageBoxImage.Warning);
                    break;
                case MessageBoxImage.Question:
                    _iconString = nameof(MessageBoxImage.Question);
                    break;
                case MessageBoxImage.Error:
                    _iconString = nameof(MessageBoxImage.Error);
                    break;
            }

            if (!string.IsNullOrEmpty(_iconString))
            {
                ImageStyle = GetResource<Style>();
            }
        }
        private T GetResource<T>()
        {
            if (Application.Current.TryFindResource(_iconString) is T resource)
            {
                return resource;
            }
            return default;
        }
    }
}
以上代码也比较简单,没什么好讲的,唯一不明的可能就是两个名称,也就多说两句:
1)SimpleCommand是实现了ICommand接口的类
2)BaseViewModel是实现了INotifyPropertyChanged接口的类
好了,作为MessageBox的ViewModel已经搭建完成,假如我们已经有了一个设计好的View,那么就可以进行绑定操作了。这里选择Window作为它的View进行演示,同时,为了使用方便,将绑定操作放在单独的功能类中进行。
using Demo_MessageBox.ViewModels;
using System;
using System.Collections.Generic;
using System.Linq;
using System.Media;
using System.Text;
using System.Threading.Tasks;
using System.Windows;

namespace Demo_MessageBox.Helpers
{
    public class MessageBoxHelper
    {
        private static Views.MessageBox CreateMessageBox(Window owner,string messageBoxText,string caption,MessageBoxButton messageBoxButton,MessageBoxImage messageBoxImage,MessageBoxResult defaultResult)
        {
            Views.MessageBox messageBox = new Views.MessageBox();
            if (messageBox.WindowStartupLocation == WindowStartupLocation.CenterOwner)
            {
                var ownerWindow = owner ?? Application.Current.Windows.OfType<Window>().SingleOrDefault(x => x.IsActive);
                messageBox.Owner = ownerWindow;
                messageBox.Topmost = ownerWindow is null;
            }
            MessageBoxViewModel messageBoxHelper = new MessageBoxViewModel(messageBoxButton, messageBoxImage, () => { messageBox.Close(); })
            {
                Message = messageBoxText,
                Caption = caption ?? "系统消息",
                MessageBoxResult = defaultResult
            };
            messageBox.DataContext = messageBoxHelper;
            return messageBox;
        }

        public static MessageBoxResult ShowInfo(string messageBoxText, string caption = null)
        {
            return Show(messageBoxText, caption, MessageBoxButton.OK, MessageBoxImage.Information, MessageBoxResult.OK);
        }

        public static MessageBoxResult ShowAsk(string messageBoxText, string caption = null)
        {
            return Show(messageBoxText, caption, MessageBoxButton.YesNo, MessageBoxImage.Question, MessageBoxResult.No);
        }

        public static MessageBoxResult ShowAskWithCancel(string messageBoxText, string caption = null)
        {
            return Show(messageBoxText, caption, MessageBoxButton.YesNoCancel, MessageBoxImage.Question, MessageBoxResult.Cancel);
        }

        public static MessageBoxResult ShowError(string messageBoxText, string caption = null)
        {
            return Show(messageBoxText, caption, MessageBoxButton.OK, MessageBoxImage.Error, MessageBoxResult.OK);
        }

        public static MessageBoxResult ShowWarning(string messageBoxText, string caption = null)
        {
            return Show(messageBoxText,caption,MessageBoxButton.OK,MessageBoxImage.Warning,MessageBoxResult.OK);
        }

        public static MessageBoxResult Show(string messageBoxText, string caption = null, MessageBoxButton messageBoxButton = MessageBoxButton.OK, MessageBoxImage messageBoxImage = MessageBoxImage.None, MessageBoxResult defaultResult = MessageBoxResult.None)
        {
            Views.MessageBox messageBox = null;
            MessageBoxViewModel messageBoxHelper = null;
            Application.Current.Dispatcher.Invoke(() =>
            {
                messageBox = CreateMessageBox(null, messageBoxText, caption, messageBoxButton, messageBoxImage, defaultResult);
                messageBoxHelper = messageBox.DataContext as MessageBoxViewModel;
                switch (messageBoxImage)
                {
                    case MessageBoxImage.Information:
                        SystemSounds.Asterisk.Play();
                        break;
                    case MessageBoxImage.Warning:
                        SystemSounds.Exclamation.Play();
                        break;
                    case MessageBoxImage.Question:
                        SystemSounds.Question.Play();
                        break;
                    case MessageBoxImage.Error:
                        SystemSounds.Hand.Play();
                        break;
                    default:
                        SystemSounds.Asterisk.Play();
                        break;
                }
                messageBox.ShowDialog();
            });
            return messageBoxHelper.MessageBoxResult;
        }
    }
}
如此一来,一个通用的MessageBox后台便建立好了,我们不需要过多的关注前台被设计成什么样子。
最后,也把此次设计的MessageBox前台代码贴出来
<Window x:Class="Demo_MessageBox.Views.MessageBox"
        xmlns="http://schemas.microsoft.com/winfx/2006/xaml/presentation"
        xmlns:x="http://schemas.microsoft.com/winfx/2006/xaml"
        xmlns:d="http://schemas.microsoft.com/expression/blend/2008"
        xmlns:mc="http://schemas.openxmlformats.org/markup-compatibility/2006"
        xmlns:local="clr-namespace:Demo_MessageBox.Views"
        xmlns:viewModel="clr-namespace:Demo_MessageBox.ViewModels"
        mc:Ignorable="d"
        d:DataContext="{d:DesignInstance viewModel:MessageBoxViewModel,IsDesignTimeCreatable=False}"
        Title="{Binding Caption}" Height="Auto" Width="Auto" MinHeight="168" MinWidth="334" MaxWidth="500" SizeToContent="WidthAndHeight"
        x:Name="window" WindowStyle="None" AllowsTransparency="True" BorderThickness="5" WindowStartupLocation="CenterOwner">
    <Window.Effect>
        <DropShadowEffect BlurRadius="5" ShadowDepth="0"/>
    </Window.Effect>
    <Grid Background="AliceBlue">
        <Grid.RowDefinitions>
            <RowDefinition Height="30"/>
            <RowDefinition Height="*"/>
            <RowDefinition Height="50"/>
        </Grid.RowDefinitions>

        <Grid Background="{StaticResource SystemColorBrush}" MouseDown="Grid_MouseDown">
            <TextBlock Text="{Binding ElementName=window,Path=Title}" HorizontalAlignment="Left" VerticalAlignment="Center" Margin="10,0,0,0" Foreground="White" FontFamily="微软雅黑"/>
            <Button x:Name="closeBtn" Width="40" Height="30" HorizontalAlignment="Right" Click="Close_Click">
                <Button.Template>
                    <ControlTemplate TargetType="Button">
                        <Grid x:Name="grid" Background="Transparent">
                            <Path x:Name="path" Data="M1,1 L13,13 M1,13 L13,1" FlowDirection="LeftToRight" Width="14" Height="14" Stretch="None" UseLayoutRounding="True" VerticalAlignment="Center" HorizontalAlignment="Center" Stroke="#FFF" StrokeThickness="2" />
                        </Grid>
                        <ControlTemplate.Triggers>
                            <Trigger Property="IsMouseOver" Value="True">
                                <Setter TargetName="grid" Property="Background" Value="#CCFF0000"/>
                                <Setter TargetName="path" Property="Stroke" Value="White"/>
                            </Trigger>
                            <Trigger Property="IsPressed" Value="True">
                                <Setter TargetName="grid" Property="Background" Value="#AAFF0000"/>
                                <Setter TargetName="path" Property="Stroke" Value="White"/>
                            </Trigger>
                        </ControlTemplate.Triggers>
                    </ControlTemplate>
                </Button.Template>
            </Button>
        </Grid>
        <Grid Grid.Row="1" Margin="20,0">
            <Grid.ColumnDefinitions>
                <ColumnDefinition Width="50"/>
                <ColumnDefinition Width="*"/>
            </Grid.ColumnDefinitions>
            <Path Width="30" Height="30" Stretch="Uniform" Style="{Binding ImageStyle}" />
            <TextBlock Text="{Binding Message}" VerticalAlignment="Center" Grid.Column="1" TextWrapping="WrapWithOverflow" />
        </Grid>
        <StackPanel FlowDirection="RightToLeft" Orientation="Horizontal" Grid.Row="2" Margin="10,0">
            <Button x:Name="btnCancel" Style="{StaticResource simpleButtonStyle}" Content="取消" Width="70" Height="30" Margin="10" Command="{Binding HitCancel}" Visibility="{Binding ElementName=btnCancel,Path=IsEnabled,Converter={StaticResource booleanToVisibilityConverter}}"/>
            <Button x:Name="btnOK" Style="{StaticResource commonButtonStyle}" Content="确定" Width="70" Height="30" Margin="10" Command="{Binding HitOK}" Visibility="{Binding ElementName=btnOK,Path=IsEnabled,Converter={StaticResource booleanToVisibilityConverter}}"/>
            <Button x:Name="btnNO" Style="{StaticResource simpleButtonStyle}" Content="否" Width="70" Height="30" Margin="10" Command="{Binding HitNo}" Visibility="{Binding ElementName=btnNO,Path=IsEnabled,Converter={StaticResource booleanToVisibilityConverter}}"/>
            <Button x:Name="btnYES" Style="{StaticResource commonButtonStyle}" Content="是" Width="70" Height="30" Margin="10" Command="{Binding HitYes}" Visibility="{Binding ElementName=btnYES,Path=IsEnabled,Converter={StaticResource booleanToVisibilityConverter}}"/>
        </StackPanel>

        <Rectangle Grid.RowSpan="3" Stroke="Gray" StrokeThickness="1"/>
    </Grid>
</Window>
效果图如下:
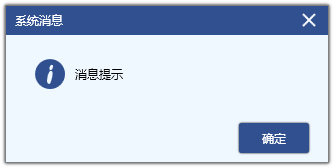
由于资源文件比较多,这里不一一贴出来了,有兴趣的童靴自行下载。
下载地址


 538
538


 被折叠的 条评论
为什么被折叠?
被折叠的 条评论
为什么被折叠?
 到【灌水乐园】发言


