


1、安装samba服务器
rpm -ivh /mnt/packages/samba-3.5.10-125.el6.i686.rpmPS:安装该包出现问题
1)挂载路径不一致
2)安装包无法安装
解决方案:
像我一样的小白可以使用双击该包安装,前提条件,将ios镜像挂载至虚拟机下
安装过程中缺少什么依赖包便安装什么依赖包
2、添加用户并修改密码
samba安装好服务需要添加用户,以便于实现对该设备中的文件操作
命令如下:
useradd MySmb  ###添加用户名
passwd MySmb   ###设置smb用户密码
3、设置该用户登录samba服务的密码
smbpasswd -a MySmbPS:这里出现了两个密码,最好是使用完全一样的密码,付出了一周的代价来搞好这一部分强调内容
配置samba服务
vim /etc/samba/smb.comfig ###配置如下smb.config文件内容:
# This is the main Samba configuration file. You should read the
# smb.conf(5) manual page in order to understand the options listed
# here. Samba has a huge number of configurable options (perhaps too
# many!) most of which are not shown in this example
#
# For a step to step guide on installing, configuring and using samba,
# read the Samba-HOWTO-Collection. This may be obtained from:
#  http://www.samba.org/samba/docs/Samba-HOWTO-Collection.pdf
#
# Many working examples of smb.conf files can be found in the
# Samba-Guide which is generated daily and can be downloaded from:
#  http://www.samba.org/samba/docs/Samba-Guide.pdf
#
# Any line which starts with a ; (semi-colon) or a # (hash)
# is a comment and is ignored. In this example we will use a #
# for commentry and a ; for parts of the config file that you
# may wish to enable
#
# NOTE: Whenever you modify this file you should run the command "testparm"
# to check that you have not made any basic syntactic errors.
#
#---------------
# SELINUX NOTES:
#
# If you want to use the useradd/groupadd family of binaries please run:
# setsebool -P samba_domain_controller on
#
# If you want to share home directories via samba please run:
# setsebool -P samba_enable_home_dirs on
#
# If you create a new directory you want to share you should mark it as
# "samba_share_t" so that selinux will let you write into it.
# Make sure not to do that on system directories as they may already have
# been marked with othe SELinux labels.
#
# Use ls -ldZ /path to see which context a directory has
#
# Set labels only on directories you created!
# To set a label use the following: chcon -t samba_share_t /path
#
# If you need to share a system created directory you can use one of the
# following (read-only/read-write):
# setsebool -P samba_export_all_ro on
# or
# setsebool -P samba_export_all_rw on
#
# If you want to run scripts (preexec/root prexec/print command/...) please
# put them into the /var/lib/samba/scripts directory so that smbd will be
# allowed to run them.
# Make sure you COPY them and not MOVE them so that the right SELinux context
# is applied, to check all is ok use restorecon -R -v /var/lib/samba/scripts
#
#--------------
#
#======================= Global Settings =====================================

[global]

# ----------------------- Network Related Options -------------------------
#
# workgroup = NT-Domain-Name or Workgroup-Name, eg: MIDEARTH
#
# server string is the equivalent of the NT Description field
#
# netbios name can be used to specify a server name not tied to the hostname
#
# Interfaces lets you configure Samba to use multiple interfaces
# If you have multiple network interfaces then you can list the ones
# you want to listen on (never omit localhost)
#
# Hosts Allow/Hosts Deny lets you restrict who can connect, and you can
# specifiy it as a per share option as well
#
    workgroup = MYGROUP
    server string = Samba Server Version %v

;   netbios name = MYSERVER

;   interfaces = lo eth0 192.168.12.2/24 192.168.13.2/24
;   hosts allow = 127. 192.168.12. 192.168.13.

# --------------------------- Logging Options -----------------------------
#
# Log File let you specify where to put logs and how to split them up.
#
# Max Log Size let you specify the max size log files should reach

    # logs split per machine
    log file = /var/log/samba/log.%m
    # max 50KB per log file, then rotate
    max log size = 50

# ----------------------- Standalone Server Options ------------------------
#
# Scurity can be set to user, share(deprecated) or server(deprecated)
#
# Backend to store user information in. New installations should
# use either tdbsam or ldapsam. smbpasswd is available for backwards
# compatibility. tdbsam requires no further configuration.

    security = user
    passdb backend = tdbsam


# ----------------------- Domain Members Options ------------------------
#
# Security must be set to domain or ads
#
# Use the realm option only with security = ads
# Specifies the Active Directory realm the host is part of
#
# Backend to store user information in. New installations should
# use either tdbsam or ldapsam. smbpasswd is available for backwards
# compatibility. tdbsam requires no further configuration.
#
# Use password server option only with security = server or if you can't
# use the DNS to locate Domain Controllers
# The argument list may include:
#   password server = My_PDC_Name [My_BDC_Name] [My_Next_BDC_Name]
# or to auto-locate the domain controller/s
#   password server = *


;   security = domain
;   passdb backend = tdbsam
;   realm = MY_REALM

;   password server = <NT-Server-Name>

# ----------------------- Domain Controller Options ------------------------
#
# Security must be set to user for domain controllers
#
# Backend to store user information in. New installations should
# use either tdbsam or ldapsam. smbpasswd is available for backwards
# compatibility. tdbsam requires no further configuration.
#
# Domain Master specifies Samba to be the Domain Master Browser. This
# allows Samba to collate browse lists between subnets. Don't use this
# if you already have a Windows NT domain controller doing this job
#
# Domain Logons let Samba be a domain logon server for Windows workstations.
#
# Logon Scrpit let yuou specify a script to be run at login time on the client
# You need to provide it in a share called NETLOGON
#
# Logon Path let you specify where user profiles are stored (UNC path)
#
# Various scripts can be used on a domain controller or stand-alone
# machine to add or delete corresponding unix accounts
#
;   security = user
;   passdb backend = tdbsam

;   domain master = yes
;   domain logons = yes

    # the login script name depends on the machine name
;   logon script = %m.bat
    # the login script name depends on the unix user used
;   logon script = %u.bat
;   logon path = \\%L\Profiles\%u
    # disables profiles support by specifing an empty path
;   logon path =

;   add user script = /usr/sbin/useradd "%u" -n -g users
;   add group script = /usr/sbin/groupadd "%g"
;   add machine script = /usr/sbin/useradd -n -c "Workstation (%u)" -M -d /nohome -s /bin/false "%u"
;   delete user script = /usr/sbin/userdel "%u"
;   delete user from group script = /usr/sbin/userdel "%u" "%g"
;   delete group script = /usr/sbin/groupdel "%g"


# ----------------------- Browser Control Options ----------------------------
#
# set local master to no if you don't want Samba to become a master
# browser on your network. Otherwise the normal election rules apply
#
# OS Level determines the precedence of this server in master browser
# elections. The default value should be reasonable
#
# Preferred Master causes Samba to force a local browser election on startup
# and gives it a slightly higher chance of winning the election
;   local master = no
;   os level = 33
;   preferred master = yes

#----------------------------- Name Resolution -------------------------------
# Windows Internet Name Serving Support Section:
# Note: Samba can be either a WINS Server, or a WINS Client, but NOT both
#
# - WINS Support: Tells the NMBD component of Samba to enable it's WINS Server
#
# - WINS Server: Tells the NMBD components of Samba to be a WINS Client
#
# - WINS Proxy: Tells Samba to answer name resolution queries on
#   behalf of a non WINS capable client, for this to work there must be
#   at least one    WINS Server on the network. The default is NO.
#
# DNS Proxy - tells Samba whether or not to try to resolve NetBIOS names
# via DNS nslookups.

;   wins support = yes
;   wins server = w.x.y.z
;   wins proxy = yes

;   dns proxy = yes

# --------------------------- Printing Options -----------------------------
#
# Load Printers let you load automatically the list of printers rather
# than setting them up individually
#
# Cups Options let you pass the cups libs custom options, setting it to raw
# for example will let you use drivers on your Windows clients
#
# Printcap Name let you specify an alternative printcap file
#
# You can choose a non default printing system using the Printing option

    load printers = yes
    cups options = raw

;   printcap name = /etc/printcap
    #obtain list of printers automatically on SystemV
;   printcap name = lpstat
;   printing = cups

# --------------------------- Filesystem Options ---------------------------
#
# The following options can be uncommented if the filesystem supports
# Extended Attributes and they are enabled (usually by the mount option
# user_xattr). Thess options will let the admin store the DOS attributes
# in an EA and make samba not mess with the permission bits.
#
# Note: these options can also be set just per share, setting them in global
# makes them the default for all shares

;   map archive = no
;   map hidden = no
;   map read only = no
;   map system = no
;   store dos attributes = yes


#============================ Share Definitions ==============================
[root]
    comment  = Root Directories
    path = /
    browseable = yes
    writable = yes
    valid users = smb
****[homes]
    comment = Home Directories
    browseable = no
    writable = yes
;   valid users = %S
;   valid users = MYDOMAIN\%S****

[printers]
    comment = All Printers
    path = /var/spool/samba
    browseable = no
    guest ok = no
    writable = no
    printable = yes

# Un-comment the following and create the netlogon directory for Domain Logons
;   [netlogon]
;   comment = Network Logon Service
;   path = /var/lib/samba/netlogon
;   guest ok = yes
;   writable = no
;   share modes = no


# Un-comment the following to provide a specific roving profile share
# the default is to use the user's home directory
;   [Profiles]
;   path = /var/lib/samba/profiles
;   browseable = no
;   guest ok = yes


# A publicly accessible directory, but read only, except for people in
# the "staff" group
;   [public]
;   comment = Public Stuff
;   path = /home/samba
;   public = yes
;   writable = yes
;   printable = no
;   write list = +staff
4、好了,前期工作准备完毕,下面该启动samba服务咯
/etc/init.d/smb reatsrt5、来个详细的启动服务的流程吧
/etc/init.d/smb reatsrt   ##重启smb服务器         /etc/init.d/iptable stop  ##关闭防火墙
setenface 0 ##关闭selinux
遇到的问题如下:
1)登录后只显示root用户,没有所添加的用户
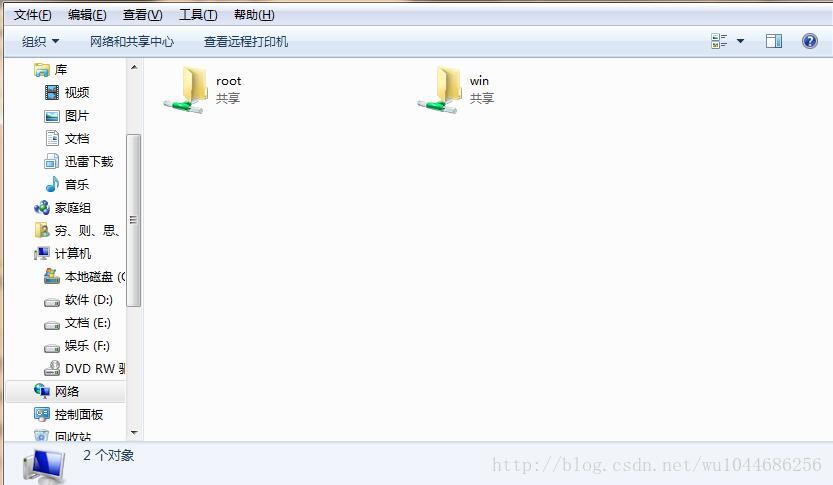
[homes]        ###少个S
    comment = Home Directories
    browseable = no
    writable = yes
;   valid users = %S
;   valid users = MYDOMAIN\%S
2)无法访问目标机

访问目标机Ip地址错误,这里需要检查该目标机Ip,
ifconfig3)打开该路径比较慢

关闭如下:
setenforce 0


 2364
2364


 被折叠的 条评论
为什么被折叠?
被折叠的 条评论
为什么被折叠?
 到【灌水乐园】发言


