from : http://blog.csdn.net/wulianghuan/article/details/41549189/
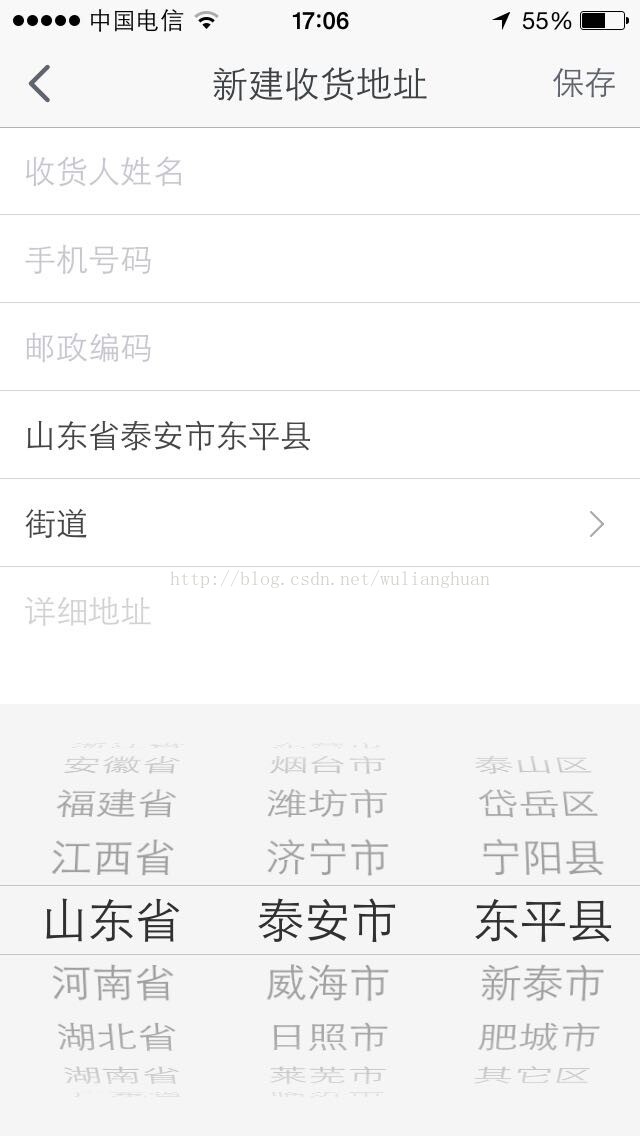
最近项目要做一个,类似淘宝手机客户端的,选择收货地址的三级联动滚动选择组件,下面是它的大致界面截图:
在IOS中有个叫UIPickerView的选择器,并且在dataSource中定义了UIPickerView的数据源和定制内容,所以用只要熟悉它的基本用法,要实现这么个三级联动滑动选择是挺简单的。
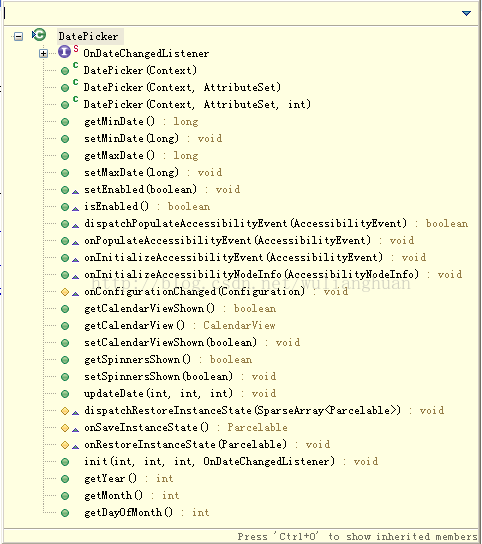
言归正传,今天讨论的是在Android里面如何来实现这么个效果,那么如何实现呢??? 相信部分童鞋首先想到的是android.widget.DatePicker和android.widget. TimePicker,因为它们的样子长得很像,事实就是它们仅仅是长得相而已,Google在设计这个两个widget的时候,并没有提供对外的数据源适配接口,带来的问题就是,我们只能通过它们来选择日期和时间,至于为什么这样设计,如果有童鞋知道,请给我留言,Thanks~
DatePicker.class包含的方法截图:
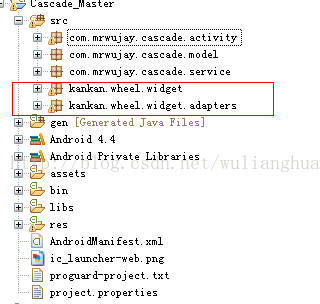
好了,既然在Android中没办法偷懒的用一个系统widget搞定,那么只能自己来自定义view来实现了,这篇就围绕这个来展开分享一下,我在项目中实现这个的全过程。首先是做了下开源代码调研,在github上面有一个叫做 android-wheel 的开源控件, 代码地址https://github.com/maarek/android-wheel
是一个非常好用的组件,对于数据适配接口的抽取和事件的回调都做了抽取,代码的耦合度低,唯一不足就是在界面的定制这块,如果你需要做更改,需要去动源代码的。我这里在界面的代码做了改动,放在我的项目src目录下了:
在此次项目中,省市区及邮编的数据是放在了assets/province_data.xml里面,是产品经理花了好几天时间整理的,绝对是最齐全和完善了,辛苦辛苦!!!
关于XML的解析,一共有SAX、PULL、DOM三种解析方式,这里就不讲了,可以看我的前面的几篇学习的文章:
Android解析XML方式(一)使用SAX解析
Android解析XML方式(二)使用PULL解析XML
Android解析XML方式(三)使用DOM解析XML
此次项目中使用的是SAX解析方式,因为它占用内存少,并且速度快,数据解析代码写在了 com.mrwujay.cascade.service/XmlParserHandler.java中,代码如下:
package com.mrwujay.cascade.service; import java.util.ArrayList; import java.util.List; import org.xml.sax.Attributes; import org.xml.sax.SAXException; import org.xml.sax.helpers.DefaultHandler; import com.mrwujay.cascade.model.CityModel; import com.mrwujay.cascade.model.DistrictModel; import com.mrwujay.cascade.model.ProvinceModel; public class XmlParserHandler extends DefaultHandler { private List<ProvinceModel> provinceList = new ArrayList<ProvinceModel>(); public XmlParserHandler() { } public List<ProvinceModel> getDataList() { return provinceList; } @Override public void startDocument() throws SAXException { } ProvinceModel provinceModel = new ProvinceModel(); CityModel cityModel = new CityModel(); DistrictModel districtModel = new DistrictModel(); @Override public void startElement(String uri, String localName, String qName, Attributes attributes) throws SAXException { if (qName.equals( "province" )) { provinceModel = new ProvinceModel(); provinceModel.setName(attributes.getValue(0 )); provinceModel.setCityList(new ArrayList<CityModel>()); } else if (qName.equals( "city" )) { cityModel = new CityModel(); cityModel.setName(attributes.getValue(0 )); cityModel.setDistrictList(new ArrayList<DistrictModel>()); } else if (qName.equals( "district" )) { districtModel = new DistrictModel(); districtModel.setName(attributes.getValue(0 )); districtModel.setZipcode(attributes.getValue(1 )); } } @Override public void endElement(String uri, String localName, String qName) throws SAXException { if (qName.equals( "district" )) { cityModel.getDistrictList().add(districtModel); } else if (qName.equals( "city" )) { provinceModel.getCityList().add(cityModel); } else if (qName.equals( "province" )) { provinceList.add(provinceModel); } } @Override public void characters( char [] ch, int start, int length) throws SAXException { } }
通过XmlParserHandler.java提供的getDataList()方法获取得到,之后再进行拆分放到省、市、区不同的HashMap里面方便做数据适配。
这里是它的具体实现代码:
protected void initProvinceDatas() { List<ProvinceModel> provinceList = null ; AssetManager asset = getAssets(); try { InputStream input = asset.open("province_data.xml" ); SAXParserFactory spf = SAXParserFactory.newInstance(); SAXParser parser = spf.newSAXParser(); XmlParserHandler handler = new XmlParserHandler(); parser.parse(input, handler); input.close(); provinceList = handler.getDataList(); if (provinceList!= null && !provinceList.isEmpty()) { mCurrentProviceName = provinceList.get(0 ).getName(); List<CityModel> cityList = provinceList.get(0 ).getCityList(); if (cityList!= null && !cityList.isEmpty()) { mCurrentCityName = cityList.get(0 ).getName(); List<DistrictModel> districtList = cityList.get(0 ).getDistrictList(); mCurrentDistrictName = districtList.get(0 ).getName(); mCurrentZipCode = districtList.get(0 ).getZipcode(); } } mProvinceDatas = new String[provinceList.size()]; for ( int i= 0 ; i< provinceList.size(); i++) { mProvinceDatas[i] = provinceList.get(i).getName(); List<CityModel> cityList = provinceList.get(i).getCityList(); String[] cityNames = new String[cityList.size()]; for ( int j= 0 ; j< cityList.size(); j++) { cityNames[j] = cityList.get(j).getName(); List<DistrictModel> districtList = cityList.get(j).getDistrictList(); String[] distrinctNameArray = new String[districtList.size()]; DistrictModel[] distrinctArray = new DistrictModel[districtList.size()]; for ( int k= 0 ; k<districtList.size(); k++) { DistrictModel districtModel = new DistrictModel(districtList.get(k).getName(), districtList.get(k).getZipcode()); mZipcodeDatasMap.put(districtList.get(k).getName(), districtList.get(k).getZipcode()); distrinctArray[k] = districtModel; distrinctNameArray[k] = districtModel.getName(); } mDistrictDatasMap.put(cityNames[j], distrinctNameArray); } mCitisDatasMap.put(provinceList.get(i).getName(), cityNames); } } catch (Throwable e) { e.printStackTrace(); } finally { } }
在使用wheel组件时,数据适配起来也很方便,只需要做些数据、显示数量的配置即可,我这边设置了一行显示7条数据
initProvinceDatas(); mViewProvince.setViewAdapter(new ArrayWheelAdapter<String>(MainActivity. this , mProvinceDatas)); mViewProvince.setVisibleItems(7 ); mViewCity.setVisibleItems(7 ); mViewDistrict.setVisibleItems(7 ); updateCities(); updateAreas();
要监听wheel组件的滑动、点击、选中改变事件,可以通过实现它的三个事件监听接口来实现,分别是:
1、OnWheelScrollListener 滑动事件:
public interface OnWheelScrollListener { void onScrollingStarted(WheelView wheel); void onScrollingFinished(WheelView wheel); }
2、OnWheelClickedListener 条目点击事件:
public interface OnWheelClickedListener { void onItemClicked(WheelView wheel, int itemIndex); }
3、OnWheelChangedListener 被选中项的positon变化事件:
public interface OnWheelChangedListener { void onChanged(WheelView wheel, int oldValue, int newValue); }
这里只要知道哪个省、市、区被选中了,实现第三个接口就行,在方法回调时去作同步和更新数据,比如省级条目滑动的时候,市级和县级数据都要做对应的适配、市级滑动时需要去改变县级(区)的数据,这样才能实现级联的效果,至于如何改变,需要三个HashMap来分别保存他们的对应关系:
protected Map<String, String[]> mCitisDatasMap = new HashMap<String, String[]>(); protected Map<String, String[]> mDistrictDatasMap = new HashMap<String, String[]>(); protected Map<String, String> mZipcodeDatasMap = new HashMap<String, String>();
在onChanged()回调方法中,对于省、市、区/县的滑动,分别做数据的适配,代码如下:
@Override public void onChanged(WheelView wheel, int oldValue, int newValue) { if (wheel == mViewProvince) { updateCities(); } else if (wheel == mViewCity) { updateAreas(); } else if (wheel == mViewDistrict) { mCurrentDistrictName = mDistrictDatasMap.get(mCurrentCityName)[newValue]; mCurrentZipCode = mZipcodeDatasMap.get(mCurrentDistrictName); } } private void updateAreas() { int pCurrent = mViewCity.getCurrentItem(); mCurrentCityName = mCitisDatasMap.get(mCurrentProviceName)[pCurrent]; String[] areas = mDistrictDatasMap.get(mCurrentCityName); if (areas == null ) { areas = new String[] { "" }; } mViewDistrict.setViewAdapter(new ArrayWheelAdapter<String>( this , areas)); mViewDistrict.setCurrentItem(0 ); } private void updateCities() { int pCurrent = mViewProvince.getCurrentItem(); mCurrentProviceName = mProvinceDatas[pCurrent]; String[] cities = mCitisDatasMap.get(mCurrentProviceName); if (cities == null ) { cities = new String[] { "" }; } mViewCity.setViewAdapter(new ArrayWheelAdapter<String>( this , cities)); mViewCity.setCurrentItem(0 ); updateAreas(); }
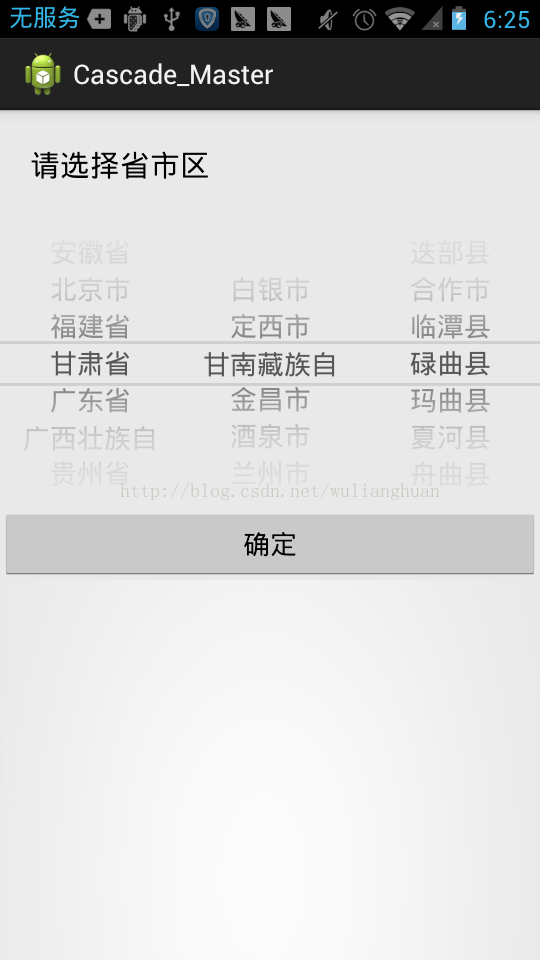
综上代码,最终实现的界面截图:
源码下载地址:http://download.csdn.net/detail/wulianghuan/8205211


 196
196

 被折叠的 条评论
为什么被折叠?
被折叠的 条评论
为什么被折叠?
 到【灌水乐园】发言


