


6.Canal
canal可以用来监控MySQL数据库数据的变化,从而获得新增数据,或者修改的数据。
canal是应阿里巴巴存在杭州和美国的双机房部署,存在跨机房同步的业务需求而提出的。
阿里系公司开始逐步的尝试基于数据库的日志解析,获取增量变更进行同步,由此衍生出了增量订阅&消费的业务。
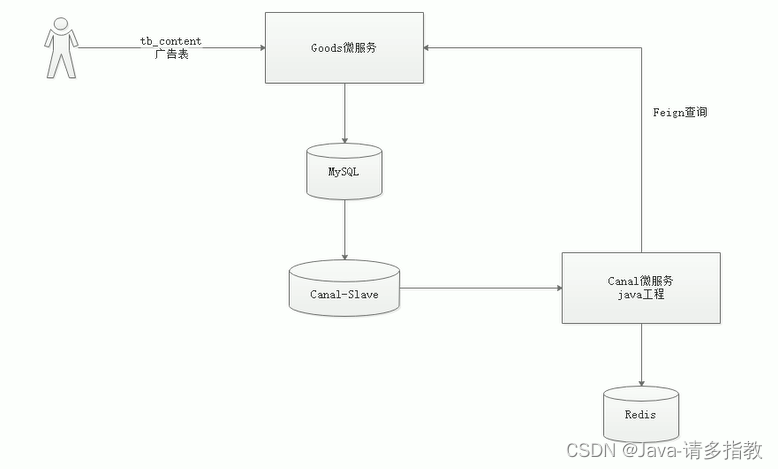
当监控到MySQL数据库发送变化的时候,会从增删改日志中读取,调用canal微服务对redis进行同步。可能不完整,还需要feign去查一下。
6.1 Canal工作原理

原理相对比较简单:
- canal模拟mysql slave的交互协议,伪装自己为mysql slave,向mysql master发送dump协议
- mysql master收到dump请求,开始推送binary log给slave(也就是canal)
- canal解析binary log对象(原始为byte流)
canal需要使用到mysql,所以虚拟机中需要安好mysql,但canal是基于mysql的主从模式实现的,所以必须先开启binlog.
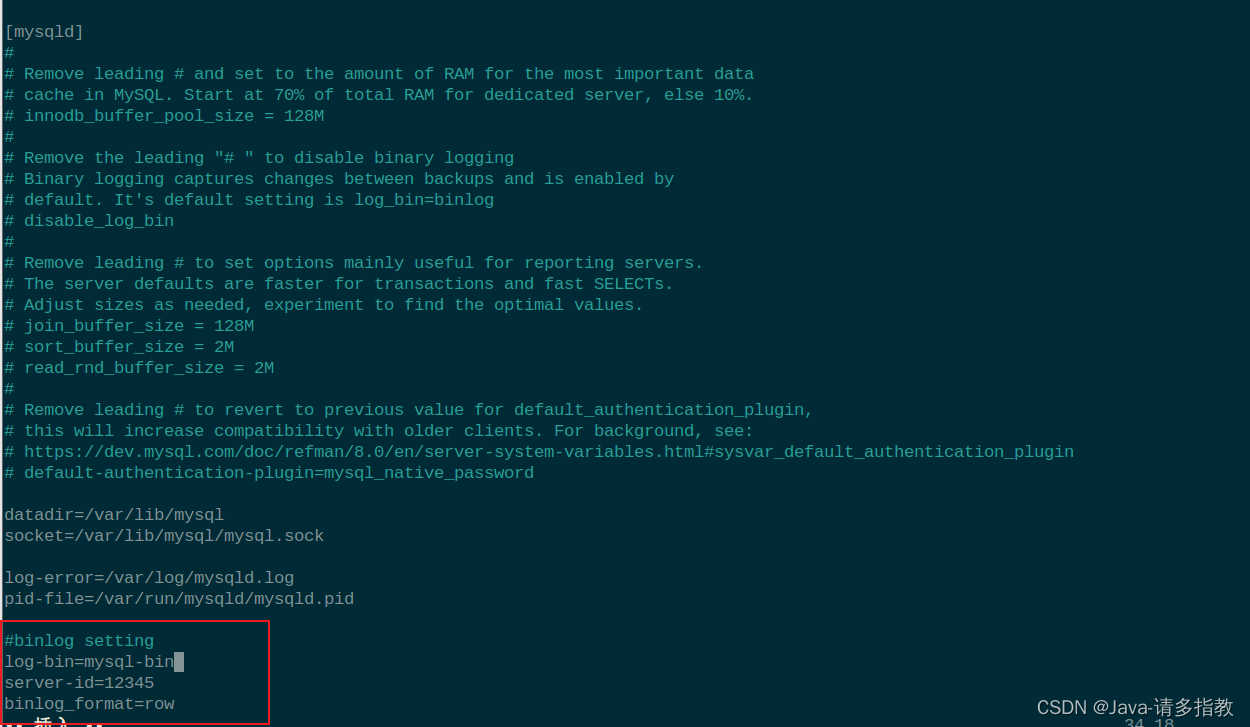
6.2 开启binlog模式
(1) 连接到mysql中,并修改/etc/my.cnf需要开启主 从模式,开启binlog模式。
执行如下命令,编辑mysql配置文件
vim my.cnf
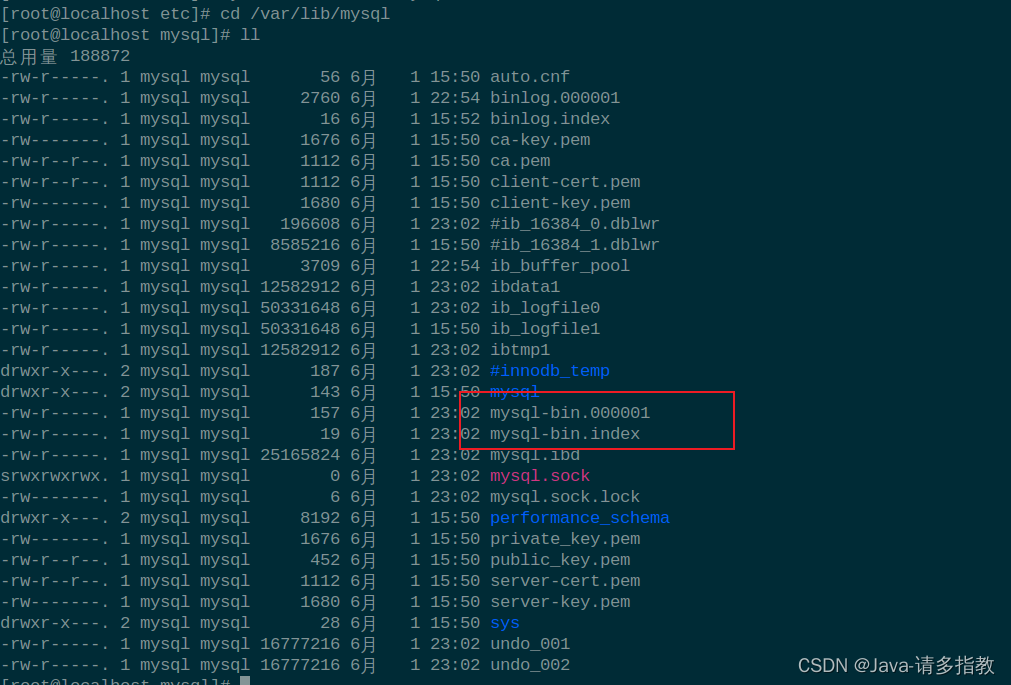
重启mysql服务
systemctl restart mysqld确定mysqlbinLog已经开启
出现两个文件即可!!!
6.3 安装Canal
下载地址:
Releases · alibaba/canal (github.com)![]() https://github.com/alibaba/canal/releases
https://github.com/alibaba/canal/releases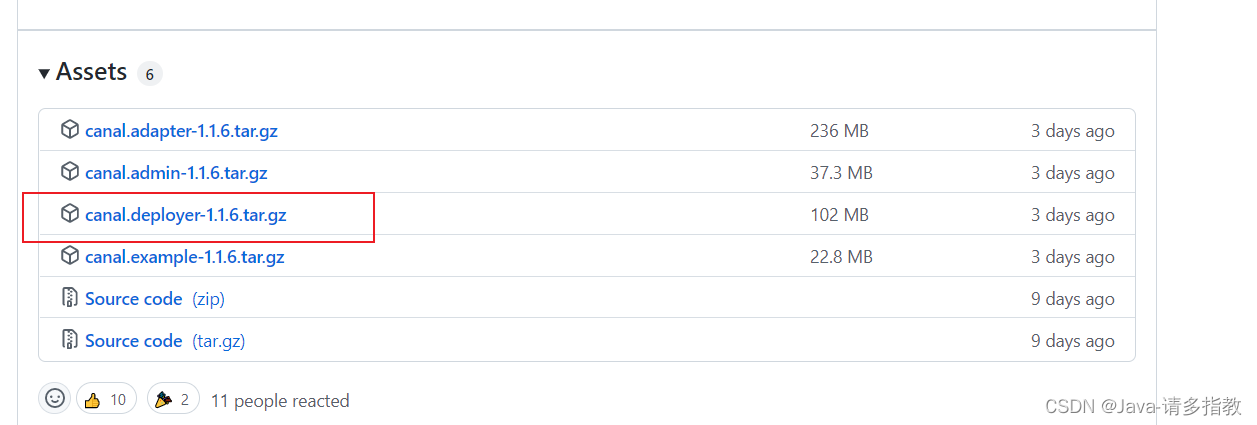
传到Linux系统然后解压到/root/canal/
配置Canal

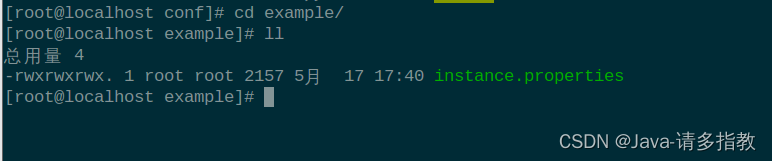
修改核心配置canal.properties 和instance.properties,canal.properties 是canal自身的配置,instance.properties是需要同步数据的数据库连接配置。
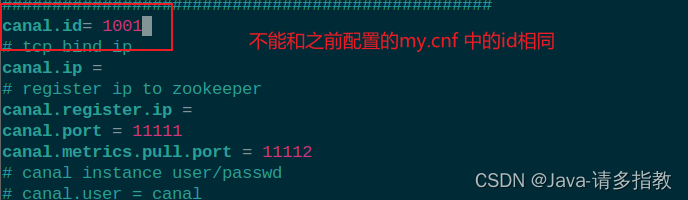
(1)修改canal.properties的id,不能和mysql的server-id重复,如下图:
(2)修改instance.properties,配置数据库连接地址
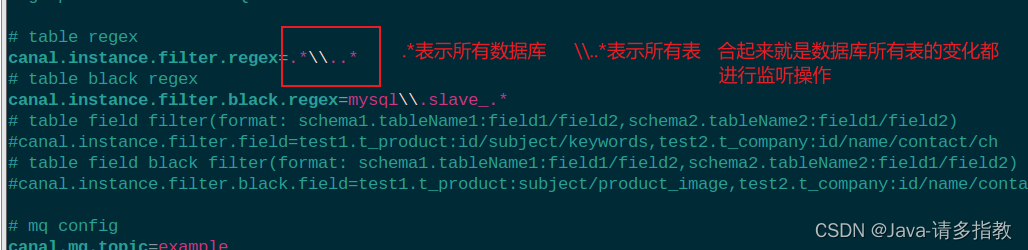
这里的canal.instance.filter.regex有多种配置,如下:
可以参考地址如下:
https://github.com/alibaba/canal/wiki/AdminGuide![]() https://github.com/alibaba/canal/wiki/AdminGuide
https://github.com/alibaba/canal/wiki/AdminGuide
mysql 数据解析关注的表,Perl正则表达式.
多个正则之间以逗号(,)分隔,转义符需要双斜杠(\\)
常见例子:
1.  所有表:.*   or  .*\\..*
2.  canal schema下所有表: canal\\..*
3.  canal下的以canal打头的表:canal\\.canal.*
4.  canal schema下的一张表:canal.test1
5.  多个规则组合使用:canal\\..*,mysql.test1,mysql.test2 (逗号分隔)
注意:此过滤条件只针对row模式的数据有效(ps. mixed/statement因为不解析sql,所以无法准确提取tableName进行过滤)
配置完成后,设置开机启动,并记得重启canal。
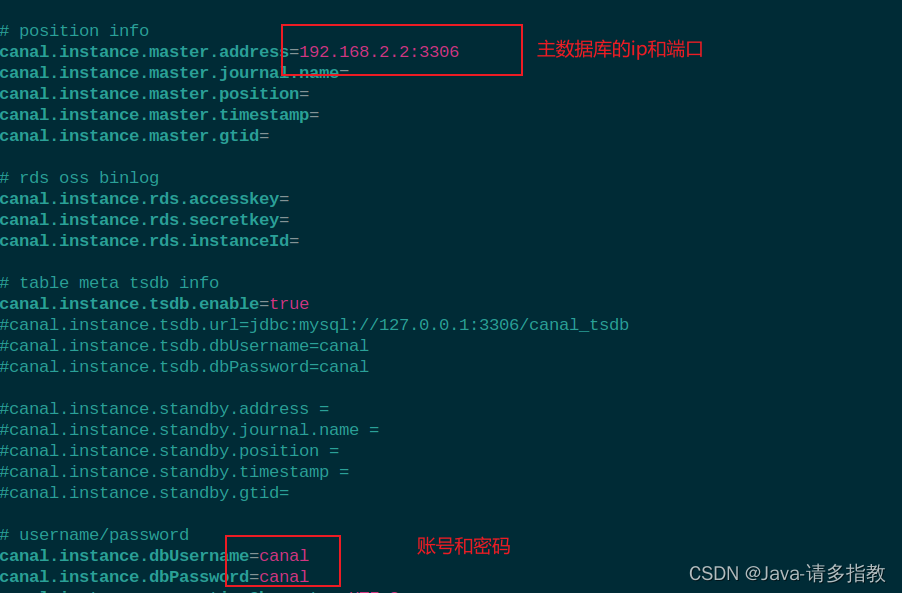
记得给虚拟机数据库添加canal账户和开放所有权限!!!
(3) 配置完成后,启动canal
cd到bin目录下使用如下命令启动canal
./startup.sh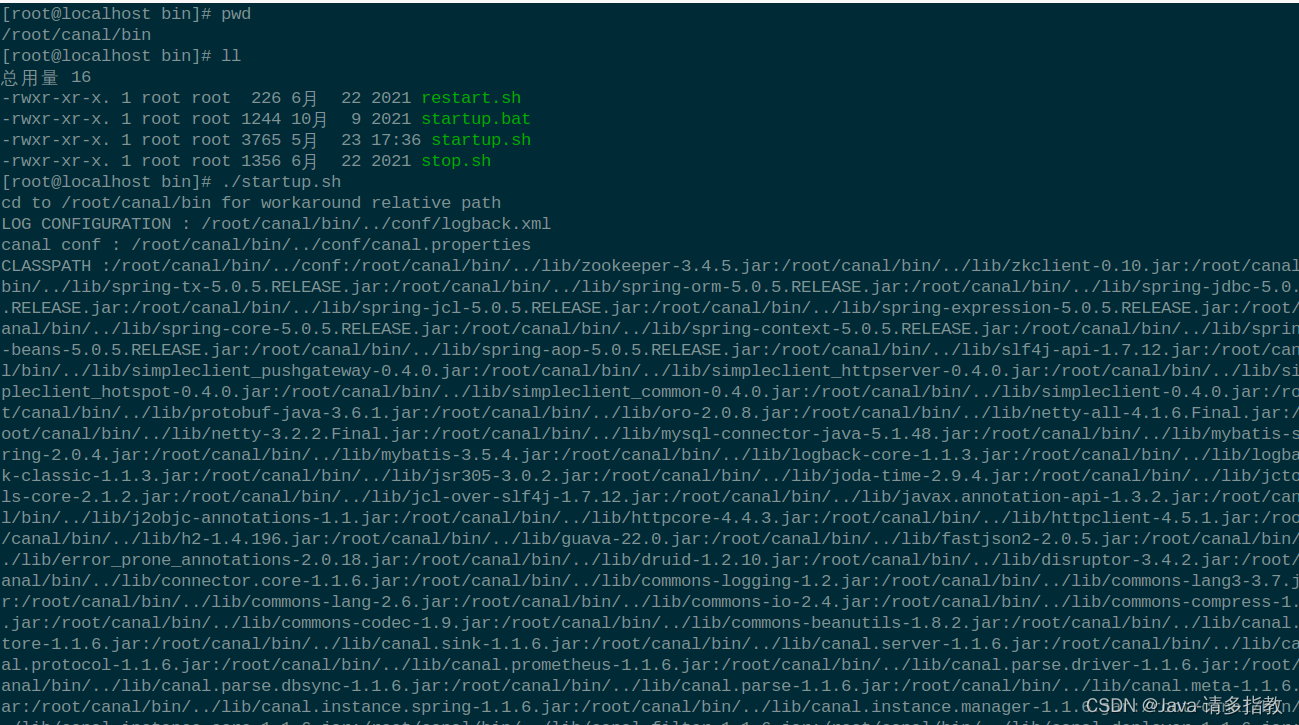
启动后,使用以下命令查看是否启动成功
ps -ef | grep canal6.4 canal微服务搭建
当用户执行 数据库的操作的时候,binlog 日志会被canal捕获到,并解析出数据。我们就可以将解析出来的数据进行同步到redis中即可。
思路:创建一个独立的程序,并监控canal服务器,获取binlog日志,解析数据,将数据更新到redis中。这样广告的数据就更新了。
(1)在changgou-service下创建changgou-service-canal工程,并引入相关配置。
pom.xml
    <dependencies>
        <dependency>
            <groupId>org.springframework.boot</groupId>
            <artifactId>spring-boot-starter</artifactId>
        </dependency>
        <!--canal依赖-->
        <dependency>
            <groupId>com.xpand</groupId>
            <artifactId>starter-canal</artifactId>
            <version>0.0.1-SNAPSHOT</version>
        </dependency>
    </dependencies>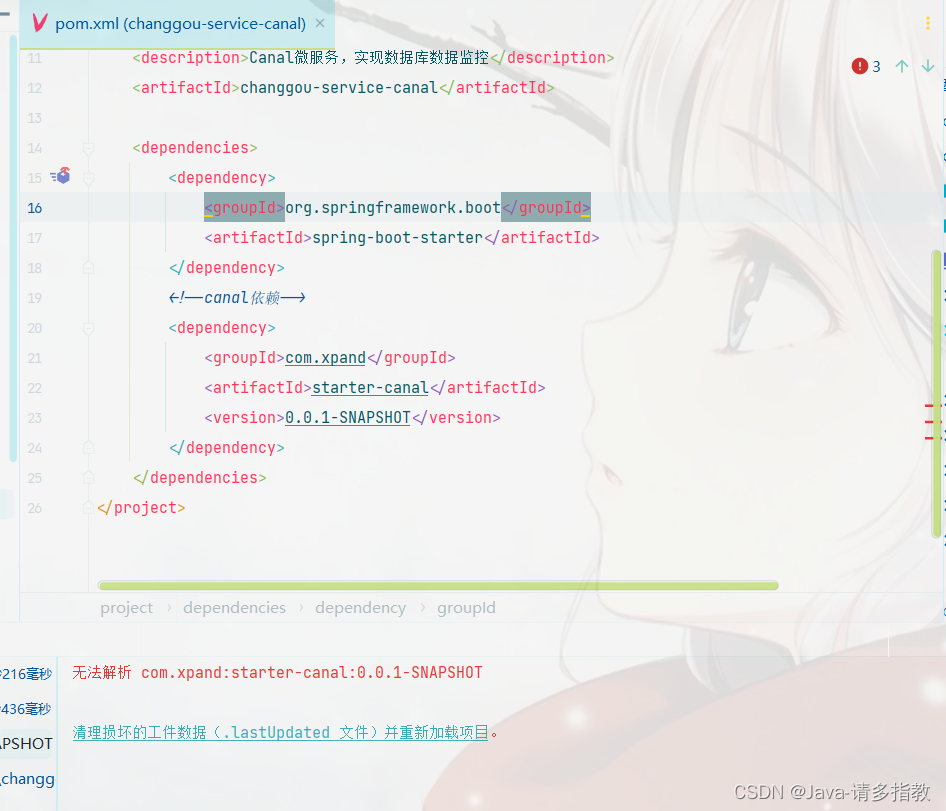
会报错,引入不了第三方依赖,因此需要下载
第一步:前往https://gitee.com/rengm/spring-boot-starter-canal下载代码zip包
第二步:下载完成进入项目根目录starter-canal 中 ,在文件管理器地址栏输入cmd,进入到cmd窗口,输入命令行如下:
mvn install然后返回IDEA可以发现依赖可以导入
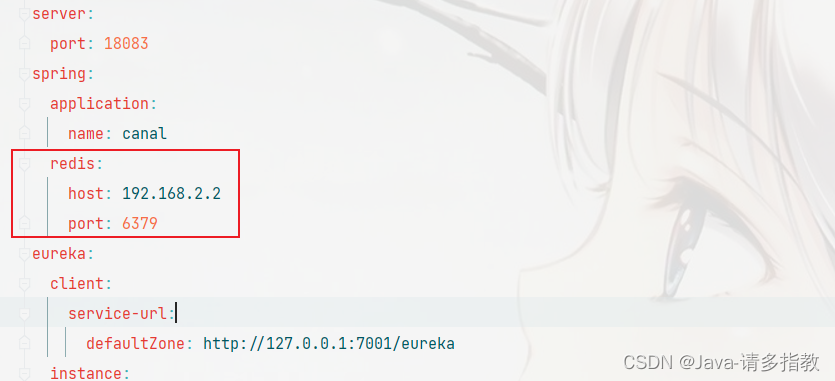
(2)application.yml配置
server:
  port: 18083
spring:
  application:
    name: canal
eureka:
  client:
    service-url:
      defaultZone: http://127.0.0.1:7001/eureka
  instance:
    prefer-ip-address: true
feign:
  hystrix:
    enabled: true
#hystrix 配置
hystrix:
  command:
    default:
      execution:
        timeout:
          #如果enabled设置为false,则请求超时交给ribbon控制
          enabled: true
        isolation:
          strategy: SEMAPHORE
#canal配置
canal:
  client:
    instances:
      example:
        host: 192.168.2.2
        port: 11111
(3)启动类:
package comchanggou;

import com.xpand.starter.canal.annotation.EnableCanalClient;
import org.springframework.boot.SpringApplication;
import org.springframework.boot.autoconfigure.SpringBootApplication;
import org.springframework.cloud.netflix.eureka.EnableEurekaClient;

@SpringBootApplication(exclude={DataSourceAutoConfiguration.class})
@EnableEurekaClient
@EnableCanalClient
public class CanalApplication {
    public static void main(String[] args) {
        SpringApplication.run(CanalApplication.class,args);
    }
}
(4)监听创建
创建一个CanalDataEventListener类,实现对表增删改操作的监听,代码如下
package comchanggou.canal;

import com.alibaba.otter.canal.protocol.CanalEntry;
import com.xpand.starter.canal.annotation.*;

@CanalEventListener
public class CanalDataEventListener {
    /***
     * 增加数据监听
     * @param eventType :当前操作的类型  增加数据
     * @param rowData  :发生变更的一行数据
     */
    @InsertListenPoint
    public void onEventInsert(CanalEntry.EventType eventType, CanalEntry.RowData rowData) {
        //获取增加后的数据
        for (CanalEntry.Column column:rowData.getAfterColumnsList()) {
            System.out.println("列名:"+column.getName()+"---------增加的数据:  "+column.getValue());
        }
    }

    /***
     * 修改数据监听
     * @param rowData
     */
    @UpdateListenPoint
    public void onEventUpdate(CanalEntry.RowData rowData) {
        //获取修改前的数据
        for (CanalEntry.Column column:rowData.getBeforeColumnsList()) {
            System.out.println("列名:"+column.getName()+"---------修改前的数据:  "+column.getValue());
        }
        //获取修改后的数据
        for (CanalEntry.Column column:rowData.getAfterColumnsList()) {
            System.out.println("列名:"+column.getName()+"---------修改后的数据:  "+column.getValue());
        }
    }

    /***
     * 删除数据监听
     * @param eventType
     */
    @DeleteListenPoint
    public void onEventDelete(CanalEntry.EventType eventType,CanalEntry.RowData rowData) {
        //获取删除前的数据
        for (CanalEntry.Column column:rowData.getBeforeColumnsList()) {
            System.out.println("列名:"+column.getName()+"---------删除前的数据:  "+column.getValue());
        }
    }

    /***
     * 自定义数据修改监听
     * @param eventType
     * @param rowData
     */
    @ListenPoint(destination = "example",//指定实例的地址
                     schema = "changgou", //指定监听的数据库
                 table = {"tb_content_category", "tb_content"},//指定监听的表
            eventType = CanalEntry.EventType.DELETE)//指定监听的类型
    public void onEventCustomUpdate(CanalEntry.EventType eventType, CanalEntry.RowData rowData) {
        System.err.println("DeleteListenPoint");
        rowData.getAfterColumnsList().forEach((c) -> System.out.println("自定义: " + c.getName() + " ::   " + c.getValue()));
    }
}
测试在数据库增加一行数据
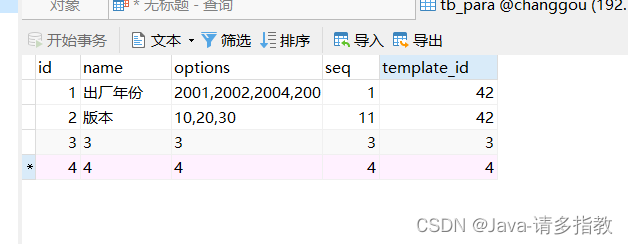

程序会自动监听到发生的变化!
6.5广告同步
6.5.1 content微服务搭建
在changgou-service中搭建changgou-service-content微服务
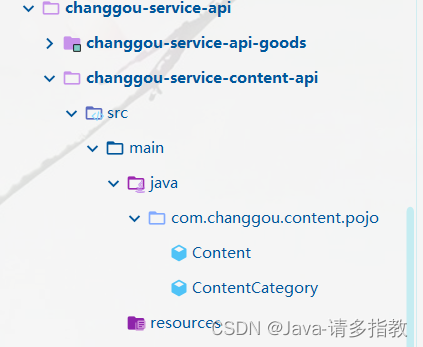
首先在changgou-service-api中创建changgou-service-content-api,将pojo拷贝到API工程中,如下图:
package com.changgou.content.pojo;

import lombok.Data;

import javax.persistence.*;
import java.io.Serializable;

@Data
@Table(name="tb_content")
public class Content implements Serializable{

	@Id
    @GeneratedValue(strategy = GenerationType.IDENTITY)
    @Column(name = "id")
	private Long id;//

    @Column(name = "category_id")
	private Long categoryId;//内容类目ID

    @Column(name = "title")
	private String title;//内容标题

    @Column(name = "url")
	private String url;//链接

    @Column(name = "pic")
	private String pic;//图片绝对路径

    @Column(name = "status")
	private String status;//状态,0无效,1有效

    @Column(name = "sort_order")
	private Integer sortOrder;//排序


}
package com.changgou.content.pojo;

import lombok.Data;

import javax.persistence.*;
import java.io.Serializable;

@Data
@Table(name="tb_content_category")
public class ContentCategory implements Serializable{

	@Id
    @GeneratedValue(strategy = GenerationType.IDENTITY)
    @Column(name = "id")
	private Long id;//类目ID

    @Column(name = "name")
	private String name;//分类名称
}
changgou-service-content 的pom.xml配置
    <dependencies>
        <dependency>
            <groupId>com.changgou</groupId>
            <artifactId>changgou-common</artifactId>
            <version>1.0-SNAPSHOT</version>
        </dependency>
        <dependency>
            <groupId>com.changgou</groupId>
            <artifactId>changgou-service-content-api</artifactId>
            <version>1.0-SNAPSHOT</version>
        </dependency>
    </dependencies>
application.yml配置
server:
  port: 18084
spring:
  application:
    name: content
  datasource:
    driver-class-name: com.mysql.jdbc.Driver
    url: jdbc:mysql://192.168.2.2:3306/changgou?useUnicode=true&characterEncoding=UTF-8&serverTimezone=UTC
    username: root
    password: 123456
eureka:
  client:
    service-url:
      defaultZone: http://127.0.0.1:7001/eureka
  instance:
    prefer-ip-address: true
feign:
  hystrix:
    enabled: true
mybatis:
  configuration:
    map-underscore-to-camel-case: true  #开启驼峰功能

#hystrix 配置
hystrix:
  command:
    default:
      execution:
        timeout:
          #如果enabled设置为false,则请求超时交给ribbon控制
          enabled: true
        isolation:
          strategy: SEMAPHORE
启动类创建
package com.changgou;

import org.springframework.boot.SpringApplication;
import org.springframework.boot.autoconfigure.SpringBootApplication;
import org.springframework.cloud.netflix.eureka.EnableEurekaClient;
import tk.mybatis.spring.annotation.MapperScan;

@SpringBootApplication
@EnableEurekaClient
@MapperScan(basePackages = {"com.changgou.dao"})
public class ContentApplication {

    public static void main(String[] args) {
        SpringApplication.run(ContentApplication.class);
    }
}
Dao层
package com.changgou.dao;

import com.changgou.content.pojo.Content;
import tk.mybatis.mapper.common.Mapper;

public interface ContentMapper extends Mapper<Content> {
}
6.5.2 广告查询
在content微服务中,添加根据分类查询广告。
(1)业务层
package com.changgou.service;

import com.changgou.content.pojo.Content;

import java.util.List;

public interface ContentService {

    /**
     * 根据categoryId查询广告集合
     * @param id
     * @return
     */
    List<Content> findByCategory(Long id);
}
业务实现层
package com.changgou.service.impl;

import com.changgou.content.pojo.Content;
import com.changgou.dao.ContentMapper;
import com.changgou.service.ContentService;
import org.springframework.stereotype.Service;

import javax.annotation.Resource;
import java.util.List;

@Service
public class ContentServiceImpl implements ContentService {
    @Resource
    private ContentMapper contentMapper;

    @Override
    public List<Content> findByCategory(Long id) {
        Content content = new Content();
        content.setCategoryId(id);
        content.setStatus("1");
        return contentMapper.select(content);
    }
}
控制层
package com.changgou.controller;

import com.changgou.content.pojo.Content;
import com.changgou.entity.Result;
import com.changgou.entity.StatusCode;
import com.changgou.service.ContentService;
import org.springframework.beans.factory.annotation.Autowired;
import org.springframework.web.bind.annotation.*;

import java.util.List;

@RestController
@CrossOrigin
@RequestMapping("/content")
public class ContentController {
    @Autowired
    private ContentService contentService;
    /***
     * 根据categoryId查询广告集合
     */
    @GetMapping(value = "/list/category/{id}")
    public Result<List<Content>> findByCategory(@PathVariable Long id){
        //根据分类ID查询广告集合
        List<Content> contents = contentService.findByCategory(id);
        return new Result<List<Content>>(true, StatusCode.OK,"查询成功!",contents);
    }
}
feign配置
package com.changgou.content.feign;

import com.changgou.content.pojo.Content;
import com.changgou.entity.Result;
import org.springframework.cloud.openfeign.FeignClient;
import org.springframework.web.bind.annotation.GetMapping;
import org.springframework.web.bind.annotation.PathVariable;
import org.springframework.web.bind.annotation.RequestMapping;

import java.util.List;

@FeignClient(name="content")
@RequestMapping(value = "/content")
public interface ContentFeign {

    /***
     * 根据分类ID查询所有广告
     */
    @GetMapping(value = "/list/category/{id}")
    Result<List<Content>> findByCategory(@PathVariable Long id);
}
6.5.3 同步实现
在canal微服务中修改如下:
(1)配置redis
修改application.yml配置文件,添加redis配置,如下代码:
(2)启动类中开启feign
修改CanalApplication,添加@EnableFeignClients注解
@EnableFeignClients(basePackages = "com.changgou.content.feign")(3)同步实现
修改监听类CanalDataEventListener,实现监听广告的增删改,并根据增删改的数据使用feign查询对应分类的所有广告,将广告存入到Redis中,代码如下:
package comchanggou.canal;
import com.alibaba.fastjson.JSON;
import com.alibaba.otter.canal.protocol.CanalEntry;
import com.changgou.content.feign.ContentFeign;
import com.changgou.content.pojo.Content;
import com.changgou.entity.Result;
import com.xpand.starter.canal.annotation.*;
import org.springframework.beans.factory.annotation.Autowired;
import org.springframework.data.redis.core.StringRedisTemplate;
import java.util.List;
@CanalEventListener
public class CanalDataEventListener {
// /***
// * 增加数据监听
// * @param eventType :当前操作的类型 增加数据
// * @param rowData :发生变更的一行数据
// */
// @InsertListenPoint
// public void onEventInsert(CanalEntry.EventType eventType, CanalEntry.RowData rowData) {
// //获取增加后的数据
// for (CanalEntry.Column column:rowData.getAfterColumnsList()) {
// System.out.println("列名:"+column.getName()+"---------增加的数据: "+column.getValue());
// }
// }
//
// /***
// * 修改数据监听
// * @param rowData
// */
// @UpdateListenPoint
// public void onEventUpdate(CanalEntry.RowData rowData) {
// //获取修改前的数据
// for (CanalEntry.Column column:rowData.getBeforeColumnsList()) {
// System.out.println("列名:"+column.getName()+"---------修改前的数据: "+column.getValue());
// }
// //获取修改后的数据
// for (CanalEntry.Column column:rowData.getAfterColumnsList()) {
// System.out.println("列名:"+column.getName()+"---------修改后的数据: "+column.getValue());
// }
// }
//
// /***
// * 删除数据监听
// * @param eventType
// */
// @DeleteListenPoint
// public void onEventDelete(CanalEntry.EventType eventType,CanalEntry.RowData rowData) {
// //获取删除前的数据
// for (CanalEntry.Column column:rowData.getBeforeColumnsList()) {
// System.out.println("列名:"+column.getName()+"---------删除前的数据: "+column.getValue());
// }
// }
//
// /***
// * 自定义数据修改监听
// * @param eventType
// * @param rowData
// */
// @ListenPoint(destination = "example",//指定实例的地址
// schema = "changgou", //指定监听的数据库
// table = {"tb_content_category", "tb_content"},//指定监听的表
// eventType = CanalEntry.EventType.DELETE)//指定监听的类型
// public void onEventCustomUpdate(CanalEntry.EventType eventType, CanalEntry.RowData rowData) {
// System.err.println("DeleteListenPoint");
// rowData.getAfterColumnsList().forEach((c) -> System.out.println("自定义: " + c.getName() + " :: " + c.getValue()));
// }
@Autowired
private ContentFeign contentFeign;
//字符串
@Autowired
private StringRedisTemplate stringRedisTemplate;
//自定义数据库的 操作来监听
//destination = "example"
@ListenPoint(destination = "example", schema = "changgou", table = {"tb_content", "tb_content_category"},
eventType = {CanalEntry.EventType.UPDATE, CanalEntry.EventType.DELETE, CanalEntry.EventType.INSERT})
public void onEventCustomUpdate(CanalEntry.EventType eventType, CanalEntry.RowData rowData) {
//1.获取列名 为category_id的值
String categoryId = getColumnValue(eventType, rowData);
//2.调用feign 获取该分类下的所有的广告集合
Result<List<Content>> categoryresut = contentFeign.findByCategory(Long.valueOf(categoryId));
List<Content> data = categoryresut.getData();
//3.使用redisTemplate存储到redis中
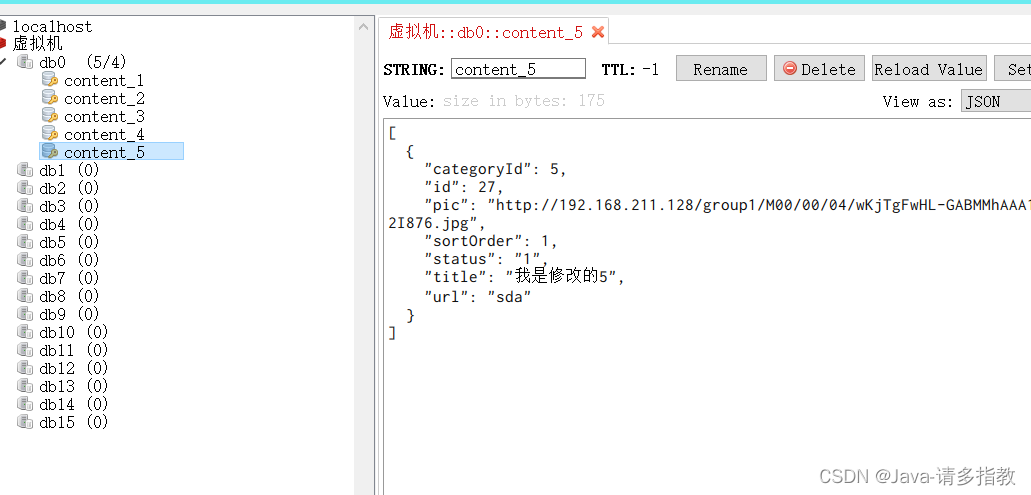
stringRedisTemplate.boundValueOps("content_" + categoryId).set(JSON.toJSONString(data));
}
private String getColumnValue(CanalEntry.EventType eventType, CanalEntry.RowData rowData) {
String categoryId = "";
//判断 如果是删除 则获取beforlist
if (eventType == CanalEntry.EventType.DELETE) {
for (CanalEntry.Column column : rowData.getBeforeColumnsList()) {
if (column.getName().equalsIgnoreCase("category_id")) {
categoryId = column.getValue();
return categoryId;
}
}
} else {
//判断 如果是添加 或者是更新 获取afterlist
for (CanalEntry.Column column : rowData.getAfterColumnsList()) {
if (column.getName().equalsIgnoreCase("category_id")) {
categoryId = column.getValue();
return categoryId;
}
}
}
return categoryId;
}
}
(4)测试:
修改数据库数据,可以看到Redis中的缓存跟着一起变化
对数据库进行添加修改删除都可以
测试添加
未添加之前:
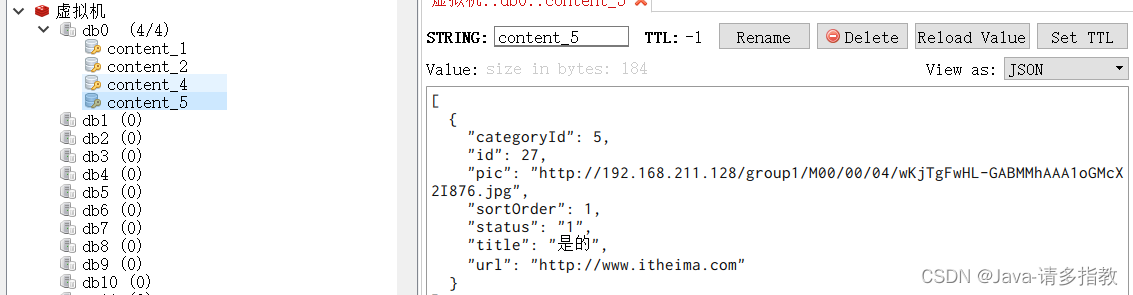
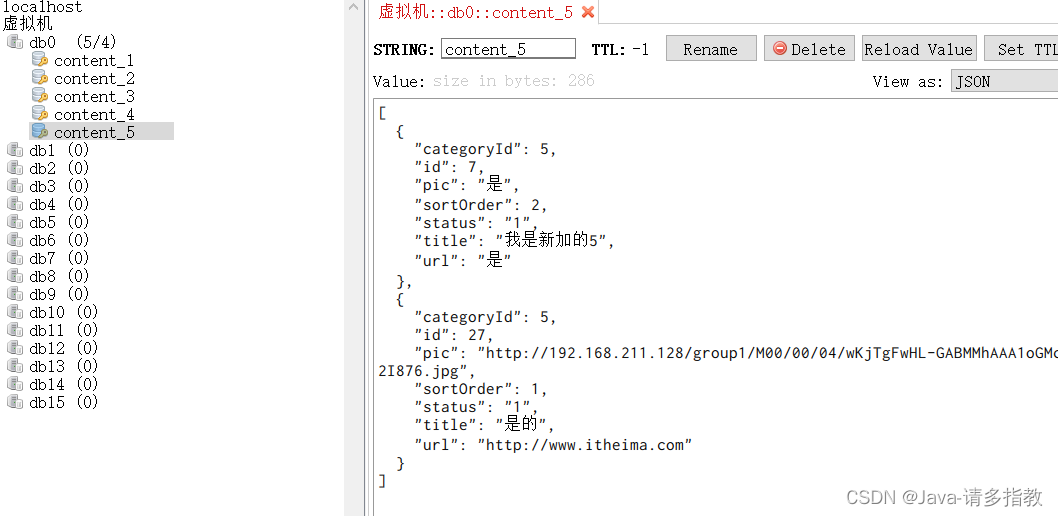
数据库添加两行数据:

查看redis

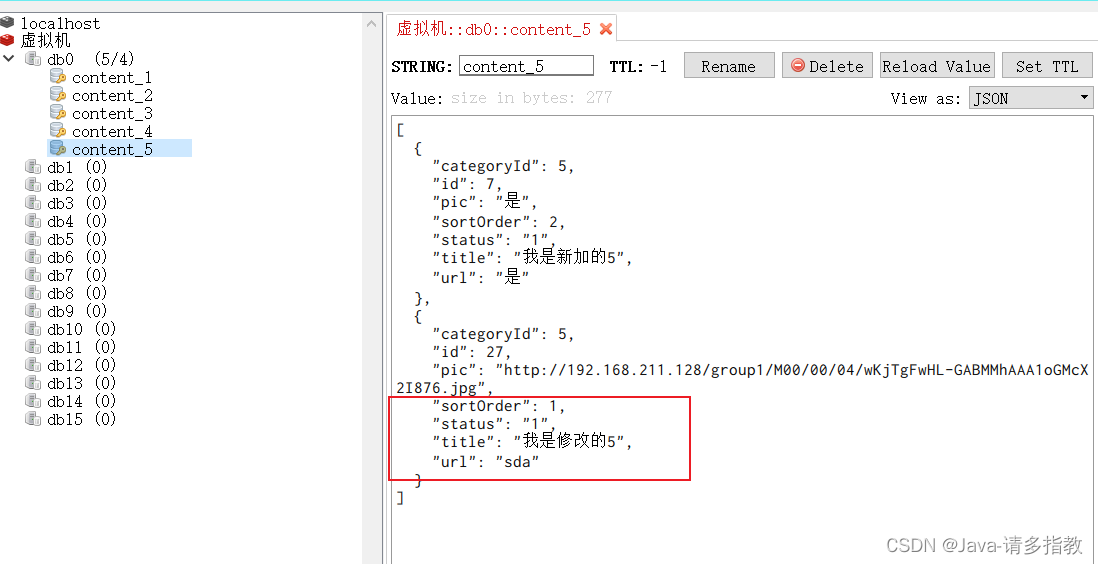
测试修改:
对5进行修改

测试删除:
对新加的5进行删除


 292
292


 被折叠的 条评论
为什么被折叠?
被折叠的 条评论
为什么被折叠?
 到【灌水乐园】发言


