


一、http协议补充
1.1 URL与URI
URL:统一资源定位符(网址)
URI:统一资源标识符(范围更广)

1.2 http协议的返回常见状态码
| 状态 | 含义 |
|---|---|
| 200 | 成功请求 |
| 301 | 永久跳转 |
| 302 | 临时跳转 |
| 304 | 没有修改,走浏览器缓存 |
| 403 | 请求不到首页或权限被拒绝 |
| 404 | 请求的资源不存在 |
| 500 | 服务器内部错误,程序代码错误 |
| 502 | 找不到后端的资源 |
| 503 | 服务不可用,如停机维护时,可以显示这个 |
| 504 | 请求超时 |
Http状态码301和302概念简单区别及企业应用案例
https://blog.51cto.com/oldboy/1774260
生产环境常见HTTP状态码的博客文章见
http://oldboy.blog.51cto.com/2561410/716294。
1.3 静态页面和动态页面
静态页面
   网站只进行请求与响应
   客户端浏览器进行处理
   web服务器自己能处理:nginx
   搜索引擎容易收入
动态页面
   交互信息 评论 上传
   URL包含& ?一般为动态页面
   需要服务器进行处理,把处理后的结果发给你
   动态:nginx+php/java
   搜索引擎不容易收入

1.4 衡量网站访问量单位(IP、PV、UV)
ip:独立IP数量
PV:page view页面访问量
UV:uniq Visitor独立的访客数(有多少人访问)
统计:
    通过三剑客实现
    在网站中加入第三方统计工具(百度统计、谷歌统计)
    http://alexa.chinaz.com
[root@web01 ~]# curl -L www.oldboyedu.com|grep baidu.com
  % Total    % Received % Xferd  Average Speed   Time    Time     Time  Current
                                 Dload  Upload   Total   Spent    Left  Speed
100   178  100   178    0     0   2241      0 --:--:-- --:--:-- --:--:--  2253
  0     0    0  103k    0     0   225k      0 --:--:-- --:--:-- --:--:--  225k
              hm.src = "https://hm.baidu.com/hm.js?9aa800f882f575237396648643111698";
[root@web01 ~]#
二、Nginx基础※※※
2.1 功能
web服务器(http请求、http响应)
nginx负载均衡
nginx缓存
有相同功能的有:nginx、apache、tengine(淘宝基于nginx3次开发)web服务器
2.2 nginx与apache的区别
nginx:异步模型 epoll
apache:同步模型 select
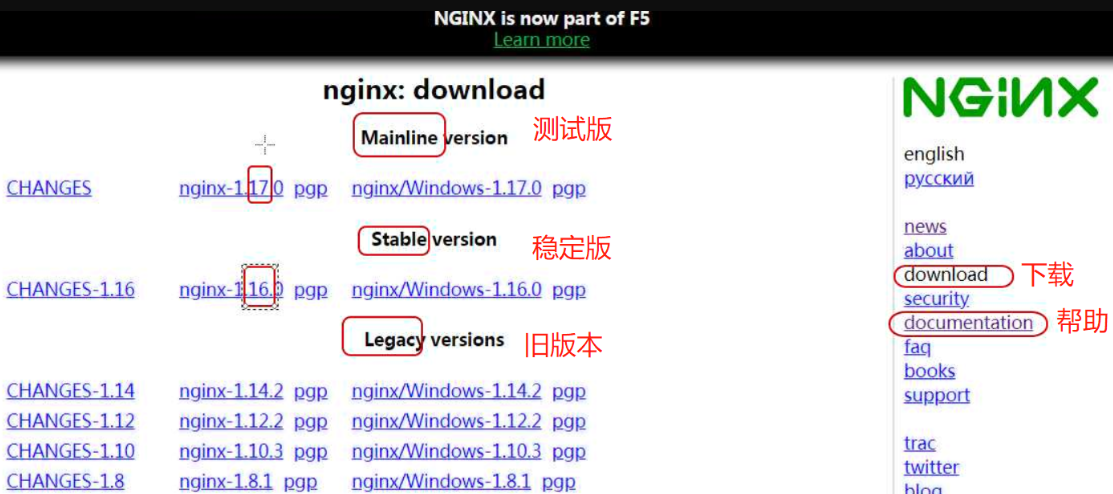
2.3 nginx安装方式
官网:http://nginx.org/en/download.html
yum安装:
epel源
nginx官方源
rpm包:
编译安装:
2.4 nginx安装
1>安装依赖软件包:yum install -y gcc gcc-c++ autoconf pcre pcre-devel make automake wget httpd-tools vim tree
2>配置nginx的yum源:
[root@web ~]# vim /etc/yum.repos.d/nginx.repo
[nginx]
name=nginx repo
baseurl=http://nginx.org/packages/centos/7/$basearch/
gpgcheck=0
enabled=1
3>安装nginx:yum install -y nginx
4>检查
检查yum源:yum repolist
检查软件包的内容:rpm -ql nginx
检查是否安装:rpm -qa|grep nginx
5>启动nginx,并设置开机自启动
systemctl start nginx
systemctl enable nginx注:启动nginx服务之前,先检查nginx语法:nginx -t
类似的开启 关闭 平滑重启命令:
systemctl start nginx ===== nginx(centos6)
systemctl reload nginx ===== nginx -s reload
systemctl stop nginx ===== nginx -s stop
6>查看nginx的版本
[root@web01 ~]# nginx -v
nginx version: nginx/1.16.0
[root@web01 ~]#
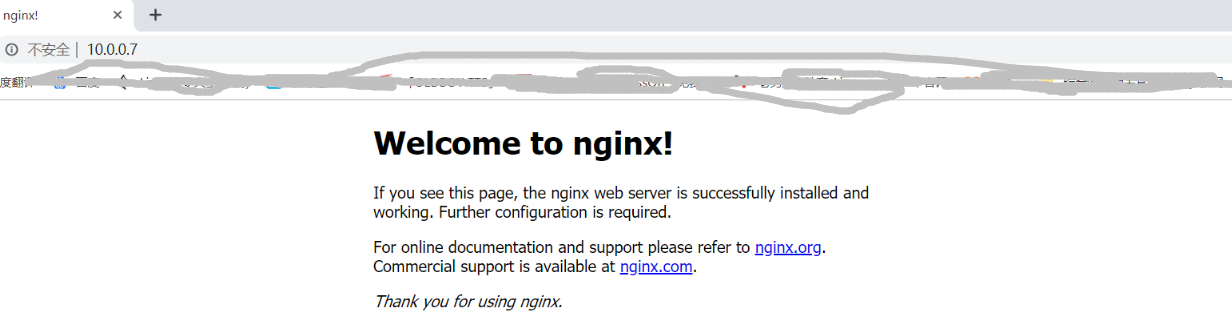
7>在浏览器输入IP地址,显示下面页面,表示nginx安装成功
2.5 nginx配置文件
[root@web01 ~]# rpm -ql nginx
/etc/logrotate.d/nginx                     \\\nginx日志切割的配置文件
    /etc/nginx
        /etc/nginx/nginx.conf              \\\nginx主配置文件
        /etc/nginx/conf.d
        /etc/nginx/conf.d/default.conf     \\\nginx.conf一样
        /etc/nginx/mime.types             \\\媒体类型 (http协议中的文件类型)
        /etc/nginx/fastcgi_params
        /etc/nginx/koi-utf
        /etc/nginx/koi-win
        /etc/nginx/modules
        /etc/nginx/scgi_params
        /etc/nginx/uwsgi_params
        /etc/nginx/win-utf
/etc/sysconfig/nginx                       \\\systemctl 管理 nginx的使用的文件

/usr/lib/systemd/system/nginx.service      \\\systemctl 管理nginx(开 关 重启 reload) 配置文件

/usr/sbin/nginx                            \\\nginx命令
/usr/sbin/nginx-debug

/usr/share/nginx/html                      \\\站点目录 网站的根目录 www.oldboyedu.com/oldboy.jpg
/usr/share/nginx/html/50x.html
/usr/share/nginx/html/index.html
/var/cache/nginx
/var/log/nginx                             \\\nginx日志 access.log 访问日志
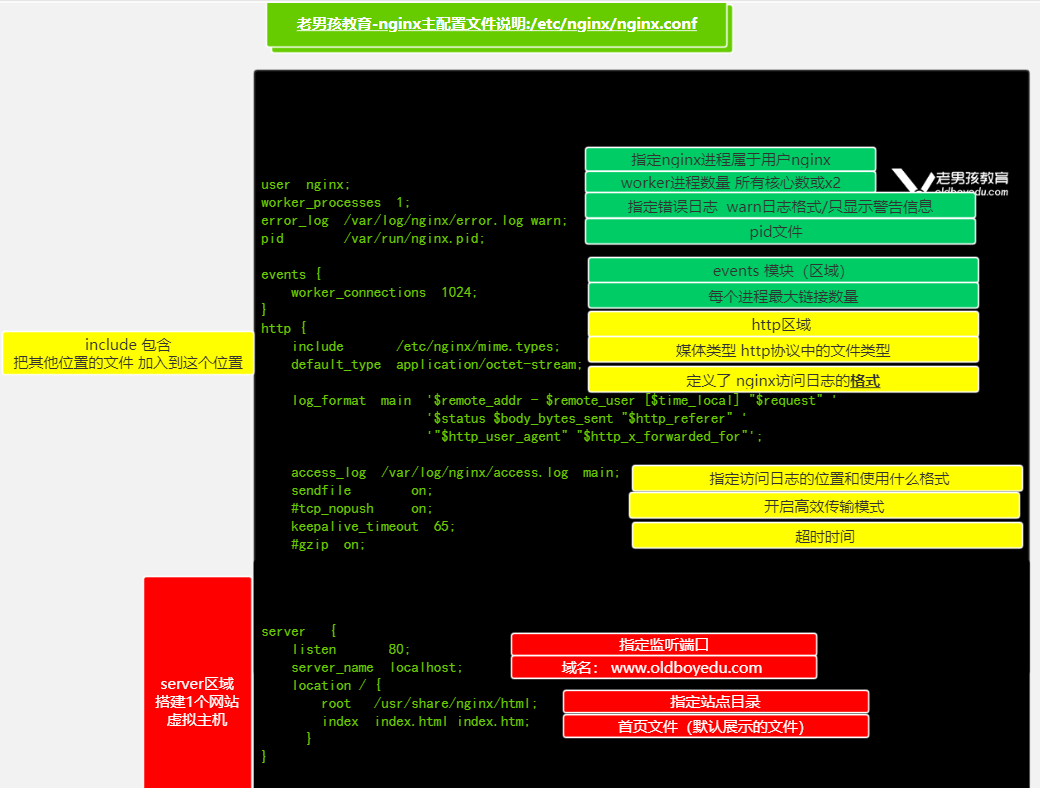
2.6 /etc/nginx/nginx.conf配置的详解
https://www.processon.com/view/link/5cf5e2cae4b0bc8329e71aad
2.7给/etc/nginx/nginx.conf添加server区域,进行配置
1> 在 include文件类型下添加server区域,将include注释,添加域名www.oldboy.com
[ root@web01 ~]# vim /etc/nginx/nginx.conf
.....
# include /etc/nginx/conf.d/*.conf;
     server   {
     listen       80;
     server_name  www.oldboy.com;

     location / {
        root   /usr/share/nginx/html;
        index  index.html index.htm;
                }
              }
}
2>在/etc/hosts里添加www.oldboy.com的本地域名解析
[root@web01 ~]# vim /etc/hosts
……
172.16.1.7      web01  www.oldboy.com
……
3>nginx -t检查语法,没有问题重启nginx
4>虚拟机中检查解析是否成功
[root@web01 /etc/nginx]# ping www.oldboy.com
PING web01 (172.16.1.7) 56(84) bytes of data.
64 bytes from web01 (172.16.1.7): icmp_seq=1 ttl=64 time=0.036 ms
64 bytes from web01 (172.16.1.7): icmp_seq=2 ttl=64 time=0.055 ms
^C
--- web01 ping statistics ---
2 packets transmitted, 2 received, 0% packet loss, time 999ms
rtt min/avg/max/mdev = 0.036/0.045/0.055/0.011 ms
[root@web01 /etc/nginx]# echo www.oldboy.com  >/usr/share/nginx/html/index.html
[root@web01 /etc/nginx]#
[root@web01 /etc/nginx]# curl  www.oldboy.com
www.oldboy.com
[root@web01 /etc/nginx]# curl -v  www.oldboy.com
* About to connect() to www.oldboy.com port 80 (#0)
*   Trying 172.16.1.7...
* Connected to www.oldboy.com (172.16.1.7) port 80 (#0)
> GET / HTTP/1.1
> User-Agent: curl/7.29.0
> Host: www.oldboy.com
> Accept: */*
>
< HTTP/1.1 200 OK
< Server: nginx/1.16.0
< Date: Tue, 04 Jun 2019 04:09:23 GMT
< Content-Type: text/html
< Content-Length: 15
< Last-Modified: Tue, 04 Jun 2019 04:09:09 GMT
< Connection: keep-alive
< ETag: "5cf5eee5-f"
< Accept-Ranges: bytes
<
www.oldboy.com
* Connection #0 to host www.oldboy.com left intact
到此为止Linux命令行测试ok,下面测试windows浏览器访问
5>在windows里添加本地域名解析

用Notepad++打开桌面hosts文件,写入要解析的ip和域名并保存

在浏览器中输入 www.oldboy.com


 2514
2514

 被折叠的 条评论
为什么被折叠?
被折叠的 条评论
为什么被折叠?
 到【灌水乐园】发言


