


前言
最近使用HttpURLConnection发送带basic验证的http请求时关注到Authenticator验证非常的有意思。看着同事也在使用,一行简单代码Authenticator.setDefault就能进行用户名和密码验证,虽然它简单,但也有不少坑需要注意。
一、怎么使用Authenticator
java.net.Authenticator是net包下的验证器,它是个抽象类,需要实现getPasswordAuthentication()方法返回一个PasswordAuthentication对象。一般通过 Authenticator.setDefault(Authenticator a)设置默认的权限验证器。 当使用HttpURLConnection发送http请求时,会来读取Authenticator获取默认验证器。
//自定义Authenticator 实现类
static class MyAuthenticator extends Authenticator {

        String username;
        String password;

        MyAuthenticator(String username, String password) {
            this.username = username;
            this.password = password;
        }

        /**
         * 实现Authenticator类 重写getPasswordAuthentication 用户名和密码 会在HttpURLConnection进行basic验证的时候调用
         * */
        public PasswordAuthentication getPasswordAuthentication() {
            return (new PasswordAuthentication(username, password.toCharArray()));
        }
    }
		try {
            String content = JSON.toJSONString(params);

            Authenticator.setDefault(new MyAuthenticator(USER_NAME, PASSWORD));

            URL requestUrl = new URL(this.getUrl());
            //返回一个URLConnection对象,它表示到URL所引用的远程对象的连接
            HttpURLConnection conn = (HttpURLConnection) requestUrl.openConnection();
            conn.setConnectTimeout(3000);
            conn.setRequestMethod("POST");
            conn.setDoOutput(true);
            conn.setDoInput(true);
            conn.setRequestProperty("Content-Type", "application/json;");
            conn.connect();

            OutputStreamWriter osw = null;
            if (content != null && content.length() > 0) {
                osw = new OutputStreamWriter(conn.getOutputStream(), StandardCharsets.UTF_8);
                osw.write(content);
                osw.flush();
                osw.close();
            }

            //返回打开连接读取的输入流
            BufferedReader br = new BufferedReader(new InputStreamReader(conn.getInputStream(), StandardCharsets.UTF_8));
            StringBuilder json = new StringBuilder();
            String str = null;
            while ((str = br.readLine()) != null) {
                json.append(str);
            }
            br.close();
            conn.disconnect();

            System.out.println(json);

        } catch (Exception e) {
            log.error("异常:{}", e.getMessage());
        }
上述代码我们创建了一个Authenticator的实现类MyAuthenticator并把它设置到Authenticator.setDefault中,而后使用的HttpURLConnection发起的http请求会默认建立basic验证,会调用getPasswordAuthentication()方法
二、分析
Authenticator.setDefault(new MyAuthenticator(USER_NAME, PASSWORD));
Authenticator.setDefault(new MyAuthenticator(USER_NAME, PASSWORD));是一句单独的代码,没回返回值,看起来很割裂。它向静态变量theAuthenticator中设置了MyAuthenticator,后续会在验证的时候通过自己的静态方法requestPasswordAuthentication调用到MyAuthenticator重写的getPasswordAuthentication()实现验证。请注意这个方法的权限是public,也就是允许覆盖theAuthenticator
public synchronized static void setDefault(Authenticator a) {
        SecurityManager sm = System.getSecurityManager();
        if (sm != null) {
            NetPermission setDefaultPermission
                = new NetPermission("setDefaultAuthenticator");
            sm.checkPermission(setDefaultPermission);
        }

        theAuthenticator = a;
    }
赋值theAuthenticator 为MyAuthenticator
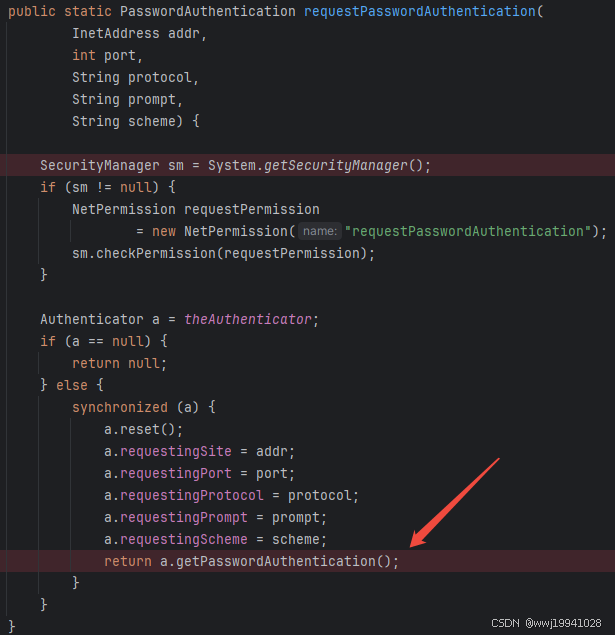
这里需要注意的是requestPasswordAuthentication方法的修饰符是public static,那就证明可以在代码中的任何地方访问到这个theAuthenticator。
在HttpURLConnection发起http请求的代码中conn.getInputStream()方法会触发验证,会跟踪到HttpURLConnection.getServerAuthentication方法并返回AuthenticationInfo,如果AuthenticationInfo类型是BasicAuthentication类型那么会通过addToCache()添加到缓存中去(内存维护了一个cache),这个类就是验证的信息类。

getServerAuthentication方法中会先查询缓存(内部维护了一个cache),如果不存在则访问privilegedRequestPasswordAuthentication获取

构建key
static String getServerAuthKey(URL var0, String var1, AuthScheme var2) {
        int var3 = var0.getPort();
        if (var3 == -1) {
            var3 = var0.getDefaultPort();
        }

        String var4 = "s:" + var2 + ":" + var0.getProtocol().toLowerCase() + ":" + var0.getHost().toLowerCase() + ":" + var3 + ":" + var1;
        return var4;
    }
查询缓存
//从缓存中查询是从cache中查询
static AuthenticationInfo getAuth(String var0, URL var1) {
        return var1 == null ? (AuthenticationInfo)cache.get(var0, (String)null) : (AuthenticationInfo)cache.get(var0, var1.getPath());
    }
如果缓存不存在则调用privilegedRequestPasswordAuthentication方法
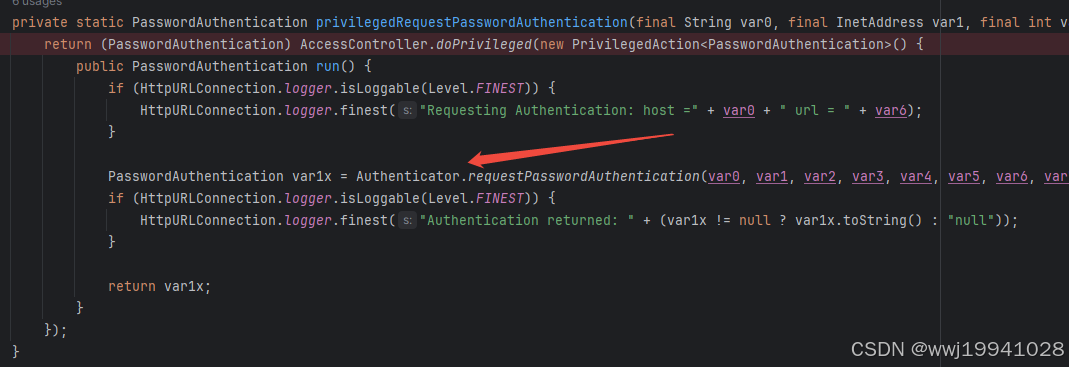 bingo!调用的是
Authenticator.requestPasswordAuthentication方法,也就是访问我们MyAuthenticator类返回的PasswordAuthentication
总结
Authenticator.setDefault(new MyAuthenticator(USER_NAME, PASSWORD));只需要一句代码就可以为当前的http请求设置默认用户名和密码,并且设置了缓存,缓存命中的前提是协议(如http) + host + 端口,如果命中会取默认这是的用户名和密码进行验证。但是由于它这么设计也带来了一些问题
1、Authenticator.setDefault(new MyAuthenticator(USER_NAME, PASSWORD));只需要设置一次,不需要反复设置。当然这个的前提是协议(如http) + host + 端口是一样的情况下。比如我调用的URL是http://127.0.0.1:8080/a/b,那么我只需要调用一遍Authenticator.setDefault(new MyAuthenticator(USER_NAME, PASSWORD));它就能生效,后续我调用http://127.0.0.1:8080/a/c也能适用之前设置的用户名和密码,因为缓存的key是没有变化的。但是对于http://127.0.0.2:8080/a/b就要重新设置,因为host发生了改变。
2、如果在同一个协议(如http) + host + 端口你有多个用户名和密码想要切换,那么这种方式不适合你,因为缓存的关系只有一个能成功,后续不变。
3、Authenticator.setDefault可以不断的改变theAuthenticator的值,有些时候可能得不到你想要的结果,比如在线程竞争的情况下,可能导致获取到其他URL的用户名和密码。
4、鉴于上述的问题,也有替换方案。比如设置HttpURLConnection的请求头Authorization,值为"Basic " + username:password"来为每一次的请求设置单独的验证避免上述问题。


 919
919

 被折叠的 条评论
为什么被折叠?
被折叠的 条评论
为什么被折叠?
 到【灌水乐园】发言


