


继续坚持,努力学习!
App中的页面切换必不可少,我们用Fragment和Radiobutton实现这一切换效果!首先放上效果图:
那么我们如何试下这种效果呢,
1,布局文件
1),主界面的布局XML
<?xml version="1.0" encoding="utf-8"?>
<RelativeLayout xmlns:android="http://schemas.android.com/apk/res/android"
    android:layout_width="match_parent"
    android:layout_height="match_parent">
    <RelativeLayout
        android:layout_alignParentTop="true"
        android:id="@+id/main_relative_title"
        android:background="@color/colorPrimary"
        android:orientation="horizontal"
        android:layout_width="match_parent"
        android:layout_height="45dp">
        <ImageView
            android:layout_marginLeft="10dp"
            android:id="@+id/main_action_left"
            android:src="@drawable/main_back"
            android:layout_width="wrap_content"
            android:layout_height="match_parent" />
        <TextView
            android:id="@+id/main_action_text"
            android:layout_centerInParent="true"
            android:text="hh"
            android:textSize="16sp"
            android:gravity="center"
            android:textColor="@android:color/white"
            android:layout_width="wrap_content"
            android:layout_height="match_parent" />
        <ImageView
            android:layout_marginRight="10dp"
            android:id="@+id/main_action_right"
            android:src="@drawable/main_back"
            android:layout_alignParentRight="true"
            android:layout_width="wrap_content"
            android:layout_height="match_parent" />
    </RelativeLayout>
    <LinearLayout
        android:layout_alignParentBottom="true"
        android:id="@+id/main_group_layout"
        android:orientation="vertical"
        android:layout_width="match_parent"
        android:layout_height="wrap_content">
        <View
            android:layout_width="match_parent"
            android:layout_height="1dp"
            android:background="#CCCCCC"/>
    <RadioGroup
        android:orientation="horizontal"
        android:id="@+id/main_group_btn"
        android:layout_width="match_parent"
        android:layout_height="45dp">
        <RadioButton
            android:padding="5dp"
            android:layout_margin="5dp"
            android:background="@drawable/first_selcotor"
            android:layout_weight="1"
            android:checked="true"
            android:button="@null"
            android:id="@+id/main_first"
            android:layout_width="wrap_content"
            android:layout_height="match_parent" />
        <RadioButton
            android:padding="5dp"
            android:layout_margin="5dp"
            android:background="@drawable/second_slector"
            android:layout_weight="1"
            android:button="@null"
            android:id="@+id/main_second"
            android:layout_width="wrap_content"
            android:layout_height="match_parent" />
        <RadioButton
            android:padding="5dp"
            android:layout_margin="5dp"
            android:background="@drawable/third_selector"
            android:layout_weight="1"
            android:button="@null"
            android:id="@+id/main_third"
            android:layout_width="wrap_content"
            android:layout_height="match_parent" />
        <RadioButton
            android:padding="5dp"
            android:layout_margin="5dp"
            android:background="@drawable/fourth_slector"
            android:layout_weight="1"
            android:button="@null"
            android:id="@+id/main_fourth"
            android:layout_width="wrap_content"
            android:layout_height="match_parent" />
    </RadioGroup>
    </LinearLayout>
    <FrameLayout
        android:layout_below="@id/main_relative_title"
        android:layout_above="@id/main_group_layout"
        android:id="@+id/main_fragment_content"
        android:layout_width="match_parent"
        android:layout_height="match_parent">
    </FrameLayout>
</RelativeLayout>
2),Fragment中的Layout文件我就写了一个,为了节省资源(懒省事,哈哈!)如下:
<?xml version="1.0" encoding="utf-8"?>
<RelativeLayout xmlns:android="http://schemas.android.com/apk/res/android"
android:orientation="vertical" android:layout_width="match_parent"
android:layout_height="match_parent">
<TextView
android:textSize="18sp"
android:layout_centerInParent="true"
android:id="@+id/common_text"
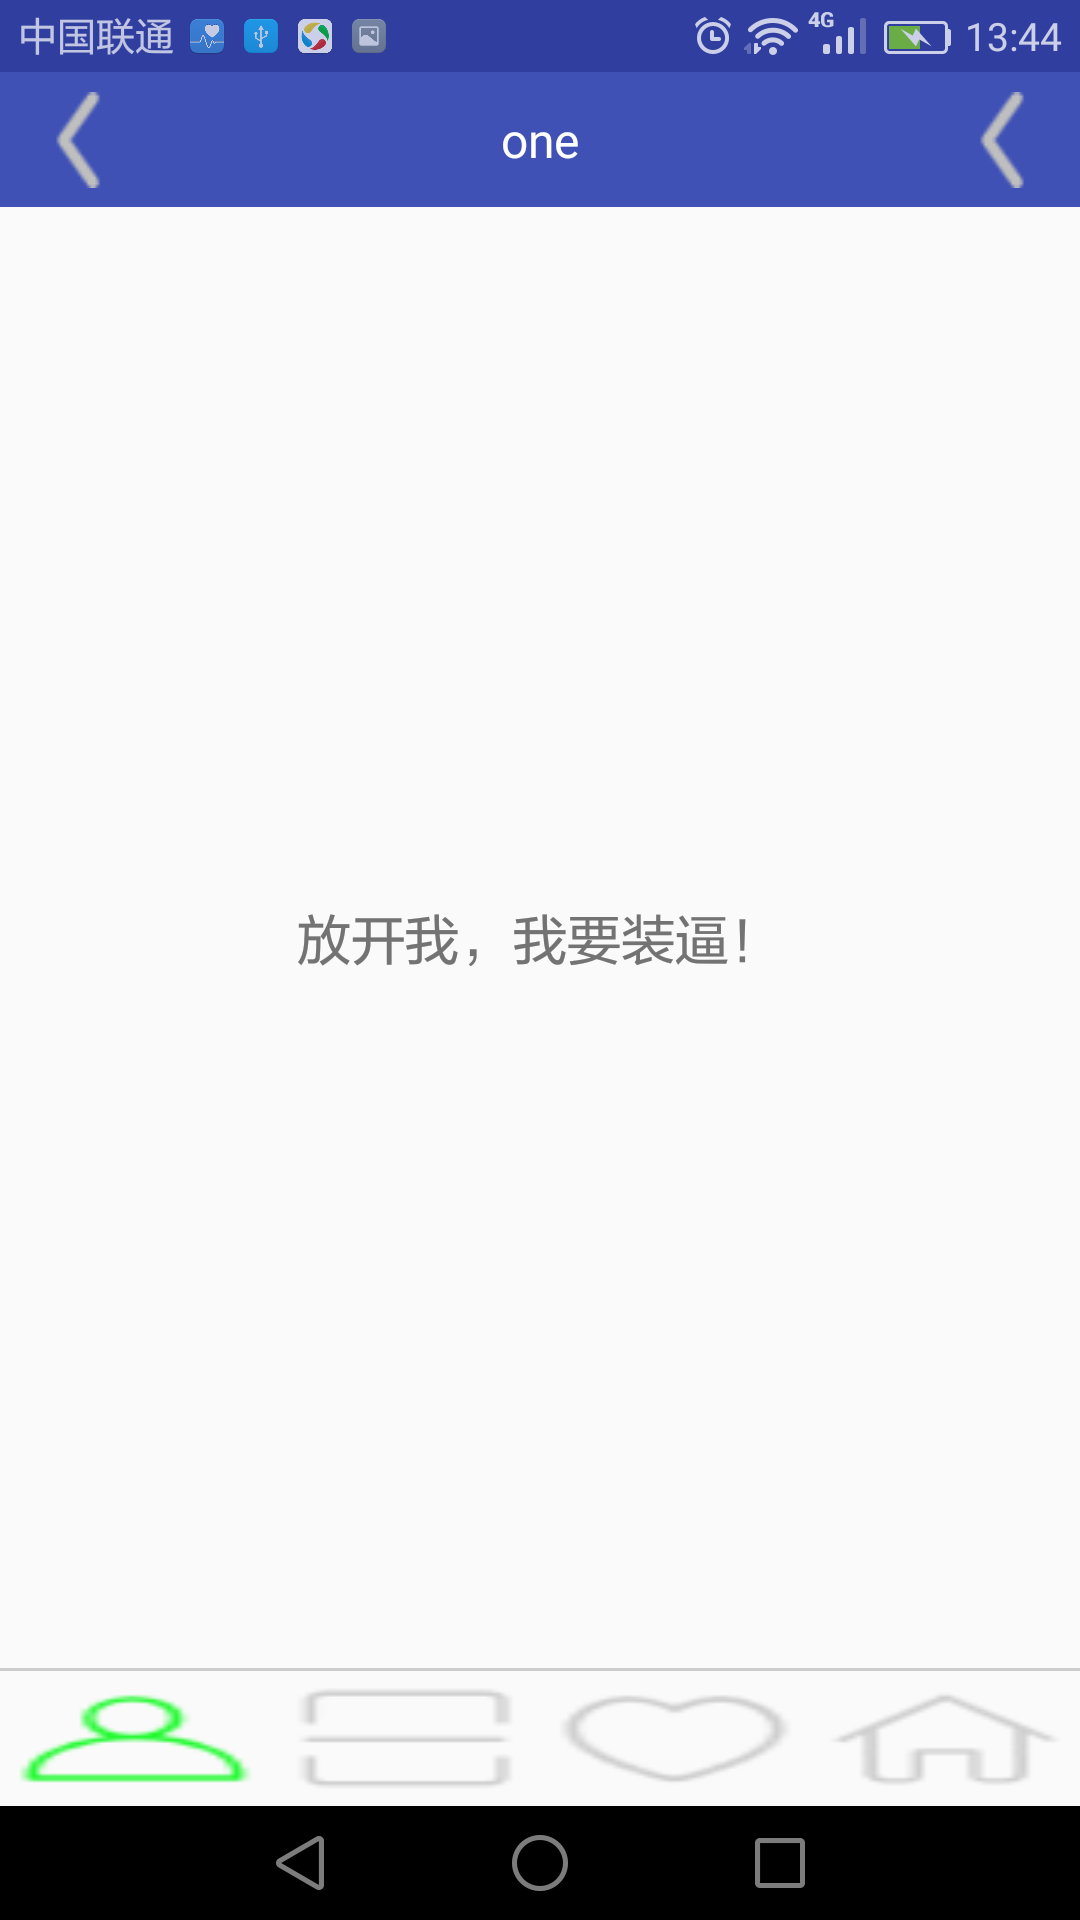
android:text="放开我,我要装逼!"
android:layout_width="wrap_content"
android:layout_height="wrap_content" />
</RelativeLayout>2.其中的Drawable文件中,有按钮点击图片的变化,如下:
1,first_selcotor
<?xml version="1.0" encoding="utf-8"?>
<selector xmlns:android="http://schemas.android.com/apk/res/android">
    <item android:state_checked="true"  android:drawable="@drawable/first_"/>
    <item android:drawable="@drawable/first_s" android:state_checked="false"/>

</selector>
2,second_slector
<?xml version="1.0" encoding="utf-8"?>
<selector xmlns:android="http://schemas.android.com/apk/res/android">
    <item android:state_checked="true"  android:drawable="@drawable/second_"/>
    <item android:drawable="@drawable/second_s" android:state_checked="false"/>
</selector>
3,third_selector
<?xml version="1.0" encoding="utf-8"?>
<selector xmlns:android="http://schemas.android.com/apk/res/android">
    <item android:state_checked="true"  android:drawable="@drawable/third_"/>
    <item android:drawable="@drawable/third_s" android:state_checked="false"/>
</selector>
4,fourth_slector
<?xml version="1.0" encoding="utf-8"?>
<selector xmlns:android="http://schemas.android.com/apk/res/android">
    <item android:state_checked="true"  android:drawable="@drawable/fourth_"/>
    <item android:drawable="@drawable/fourth_s" android:state_checked="false"/>
</selector>
图片我就不贴了,自己下载就好了,可以百度 :阿里巴巴矢量图
3.接下来就是Fragment。java代码了!这里我贴上第一个和第四个Fragment的代码,为了区分不同的Fragment
package btzh.com.myedittext.Fragment;

import android.app.Fragment;
import android.os.Bundle;
import android.support.annotation.Nullable;

import android.view.LayoutInflater;
import android.view.View;
import android.view.ViewGroup;

import btzh.com.myedittext.R;

/**
 * Created by IBM on 2016/11/25.
 */
public class Fragment_first extends Fragment {
    @Nullable
    @Override
    public View onCreateView(LayoutInflater inflater, @Nullable ViewGroup container, @Nullable Bundle savedInstanceState) {
        View view = inflater.inflate(R.layout.fragment_layout_common,container,false);
        return view;
    }
}
接下来是第四个Fragment代码
package btzh.com.myedittext.Fragment;
import android.app.Fragment;
import android.os.Bundle;
import android.support.annotation.Nullable;
import android.view.LayoutInflater;
import android.view.View;
import android.view.ViewGroup;
import android.widget.TextView;
import btzh.com.myedittext.R;
/**
* Created by IBM on 2016/11/25.
*/
public class Fragment_fourth extends Fragment {
private TextView common_text;
private View fourth;
@Nullable
@Override
public View onCreateView(LayoutInflater inflater, @Nullable ViewGroup container, @Nullable Bundle savedInstanceState) {
fourth = inflater.inflate(R.layout.fragment_layout_common,container,false);
initViews();
return fourth;
}
/**
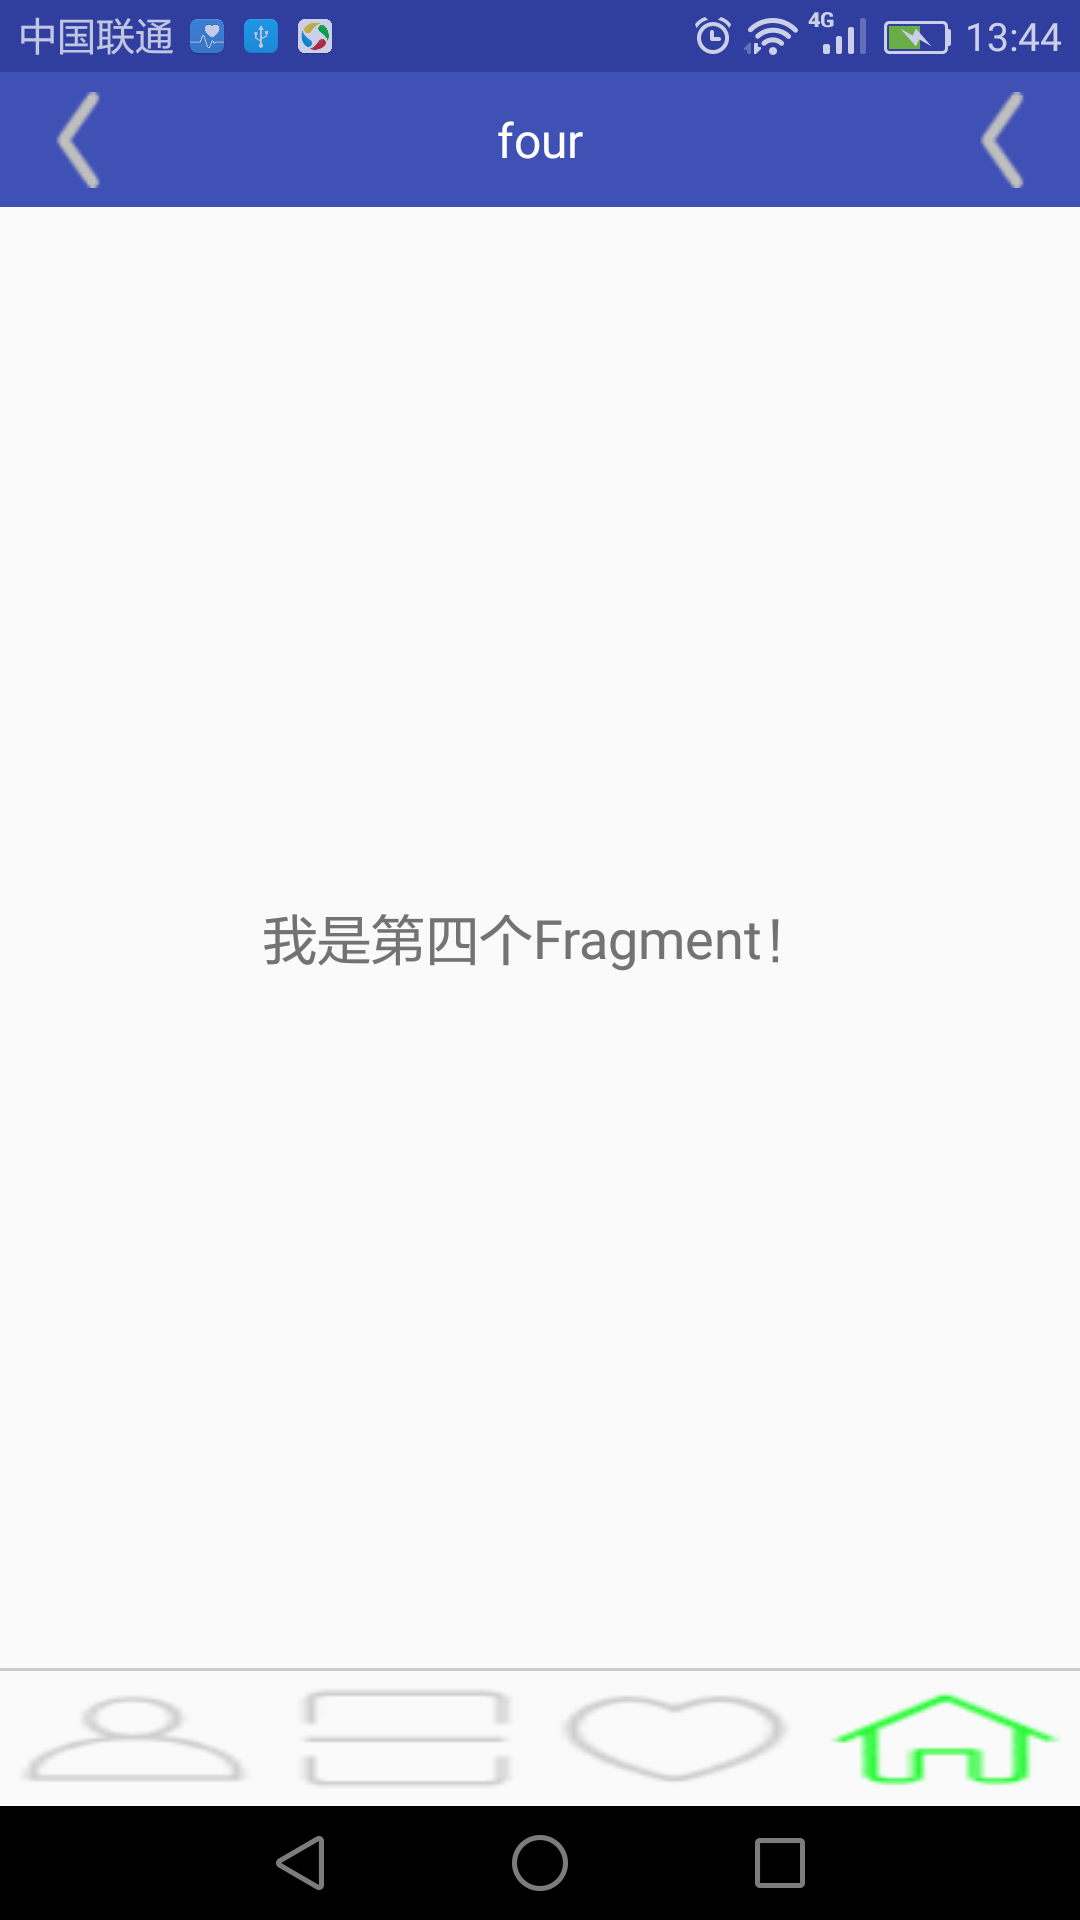
* 因为自己就写了一个Fragment布局,为了区分不同的Fragment就在这里改变其中的显示内容,
* 其中第一个Fragment是默认显示的,这个方法就不用写了!
**/
private void initViews(){
common_text = (TextView)fourth.findViewById(R.id.common_text);
common_text.setText("我是第四个Fragment!");
}
}
3,最后就是我们要在Activity中处理Fragment的切换问题了代码如下,注释很详细,应该能看懂吧!
package btzh.com.myedittext.Fragment;

import android.app.Activity;
import android.app.FragmentManager;
import android.app.FragmentTransaction;
import android.os.Bundle;
import android.os.PersistableBundle;
import android.view.View;
import android.view.Window;
import android.widget.CompoundButton;
import android.widget.ImageView;
import android.widget.RadioButton;
import android.widget.RadioGroup;
import android.widget.TextView;

import btzh.com.myedittext.R;

/**
 * Created by IBM on 2016/11/25.
 */
public class FragmentActivity extends Activity implements   RadioGroup.OnCheckedChangeListener, View.OnClickListener {
    private RadioGroup main_radioGroup; //声明radiogroup
    private ImageView main_iv_left,main_iv_right;
    private TextView main_tv;
    private Fragment_first fragment_first; //声明fragment
    private Fragment_second fragment_second;
    private Fragment_third fragment_third;
    private Fragment_fourth fragmentFourth;

    @Override
    protected void onCreate(Bundle savedInstanceState) {
        super.onCreate(savedInstanceState);
        //取消系统原始标题栏
        requestWindowFeature(Window.FEATURE_NO_TITLE);
        setContentView(R.layout.fragmentactivity_layout);
        initViews();
        setDefaultFragment();
    }
    //初始化控件
    private void initViews(){
        main_radioGroup = (RadioGroup)findViewById(R.id.main_group_btn);
        main_radioGroup.setOnCheckedChangeListener(this);
        main_tv = (TextView)findViewById(R.id.main_action_text);
        main_iv_left = (ImageView)findViewById(R.id.main_action_left);
        main_iv_left.setOnClickListener(this);
        main_iv_right = (ImageView)findViewById(R.id.main_action_right);
        main_iv_right.setOnClickListener(this);
    }
    //默认选中第一个Fragment
    private void setDefaultFragment()
    {
        FragmentManager fm = getFragmentManager();
        FragmentTransaction transaction = fm.beginTransaction();
        fragment_first= new Fragment_first();
        transaction.replace(R.id.main_fragment_content, fragment_first);
        main_tv.setText("我是第一个Fragment");
        transaction.commit();
    }
    @Override
    public void onCheckedChanged(RadioGroup group, int checkedId) {
        //获取fragment 的管理器
        FragmentManager fm = getFragmentManager();
        //开启管理的事务
        FragmentTransaction transaction = fm.beginTransaction();
        switch (checkedId){  //通过判断选中的ID来切换不同的fragment
            case R.id.main_first:
                main_tv.setText("one");
                if (null == fragment_first){ //判断是否存在,如果已经存在,就不用new了,直接执行下一句
                    fragment_first= new Fragment_first();
                }
                //事务中要处理的事情
                transaction.replace(R.id.main_fragment_content, fragment_first);
                break;
            case R.id.main_second:
                main_tv.setText("two");
                if (null == fragment_second){
                    fragment_second = new Fragment_second();
                }
                transaction.replace(R.id.main_fragment_content,fragment_second);
                break;
            case R.id.main_third:
                main_tv.setText("three");
                if (null == fragment_third){
                    fragment_third = new Fragment_third();
                }
                transaction.replace(R.id.main_fragment_content,fragment_third);
                break;
            case R.id.main_fourth:
                main_tv.setText("four");
                if (null == fragmentFourth){
                    fragmentFourth = new Fragment_fourth();
                }
                transaction.replace(R.id.main_fragment_content,fragmentFourth);
                break;
            default:
                break;
        }
        transaction.commit(); //提交事务
    }
    @Override
    public void onClick(View v) {
        switch (v.getId()){
            case R.id.main_action_left:
                //退出Activity
                this.finish();
                break;
            case R.id.main_action_right:
                //弹出对话框
//                showDialog();
                break;
            default:
                break;
        }

    }
   //   private void showDialog(){}
}
总结:transaction.replace();这种方法,每次执行时都会重新创建fragment,也就是说,原来的fragment都会被销毁,等需要再一次显示时,会被重新创建!(亲身试验,毕竟fragment的生命周期才是我们要特别重视的问题,亲身体会!)


 350
350

 被折叠的 条评论
为什么被折叠?
被折叠的 条评论
为什么被折叠?
 到【灌水乐园】发言


