


接口要求:
接口1:添加学生数据,url: localhost:3000/api/student,method: post,参数格式:普通键值对,name: 字符串,age: 数值,测试:postman来测试
接口2:获取所有的学生数据,url: localhost:3000/api/student,method: get,参数:无,测试:postman来测试
准备工作:在终端初始化项目文件npm init,安装express及mysql包npm install express mysql
文件路径: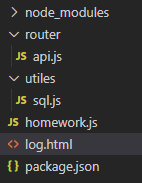
模块化封装:由于node.js操作mysql数据库使用的基本语法格式是一致的,只是要执行的sql语句不同而已,所以,我们可以对它们进行一个简单的封装。放在utiles文件夹下的sql.js文件里:
// 加载mysql模块
var mysql = require('mysql');
// 创建 MySQL 连接对象
var connection = mysql.createConnection({
  host: 'localhost',   // 你要连接的数据库服务器的地址
  port: 3306,// 端口号
  user: 'root',        // 连接数据库服务器需要的用户名
  password: 'root',        // 连接数据库服务器需要的密码
  database: 'node136'      //你要连接的数据库的名字
});
// 连接 MySQL 服务器
connection.connect((err) => {
  // 如果有错误对象,表示连接失败
  if (err) return console.log('数据库连接失败')
  // 没有错误对象提示连接成功
  console.log('mysql数据库连接成功')
});
// 通过module.exports来导出模块
module.exports = connection
采用restful风格写接口文档 ,并将其封装在router文件夹下的api.js文件内:
// 加载express模块
const express = require('express')
const router = express.Router()
//路由中间件
//router.use(express.urlencoded())
//express().use(express.urlencoded())
// 引入封装好的自定义模块connection
const connection = require('../utiles/sql')

router.post('/student', (req, res) => {
  let { age, name } = req.query
  console.log(age, name);
  // MySQL的添加数据语句
  let sql = `insert into student(age,name) values(${age},'${name}')`
  connection.query(sql, (err, result) => {
    if (err) {
      res.json({ msg: "添加数据失败", code: 1 })
    } else {
      res.json({ msg: "添加数据成功", code: 0 })
    }
  })
})
router.get('/student', (req, res) => {
  // MySQL的查询数据语句
  let sql = 'select id,name,age from student'
  connection.query(sql, (err, result) => {
    if (err) {
      res.json({ msg: '查询数据失败', code: 1 })
    } else {
      res.json({ msg: '查询数据成功', code: 0, data: result })
    }
  })
})
// 通过module.exports来导出模块
module.exports = router
const express = require('express')
const fs = require('fs')
const app = express()
app.use(express.urlencoded())
// 获取IP地址
function getClientIp(req) {
  return req.headers['x-forwarded-for'] ||
    req.connection.remoteAddress ||
    req.socket.remoteAddress ||
    req.connection.socket.remoteAddress;
}
app.use((req, res, next) => {
  // console.log('现在是', new Date());
  // console.log('访问的地址是', req.url)
  // console.log('ip是', getClientIp(req))
  let date = new Date()
  // 使用fs核心模块在log.html文件内记录每次访问的时间、接口、IP地址
  fs.appendFile('./log.html', `现在是${date.toLocaleString()},访问的地址是 ${req.url},ip是 ${getClientIp(req)}</br>`, 'utf8', err => { if (err) { console.log(err); } })
  next()
})
// 引入自定义模块
const apiRouter = require('./router/api')
app.use('/api', apiRouter)
// 启动服务器
app.listen(8000, () => {
  console.log('8000端口已开启');
})
postman添加数据测试结果
postman查看所有数据测试结果 
MySQL数据库查看结果


 2627
2627


 被折叠的 条评论
为什么被折叠?
被折叠的 条评论
为什么被折叠?
 到【灌水乐园】发言


