


之前看了很多文章,都是部署后一直报错,百度解决后下次又忘了,这次决定把从头到尾的过程记录下来方便下次再看![]() ,部署参考文章尚硅谷Kubernetes(k8s)视频学习笔记_尚硅谷k8s笔记_溯光旅者的博客-CSDN博客
,部署参考文章尚硅谷Kubernetes(k8s)视频学习笔记_尚硅谷k8s笔记_溯光旅者的博客-CSDN博客
1、先去下载vmware虚拟机安装,我安装的是这个版本VMware Workstation 16 Player
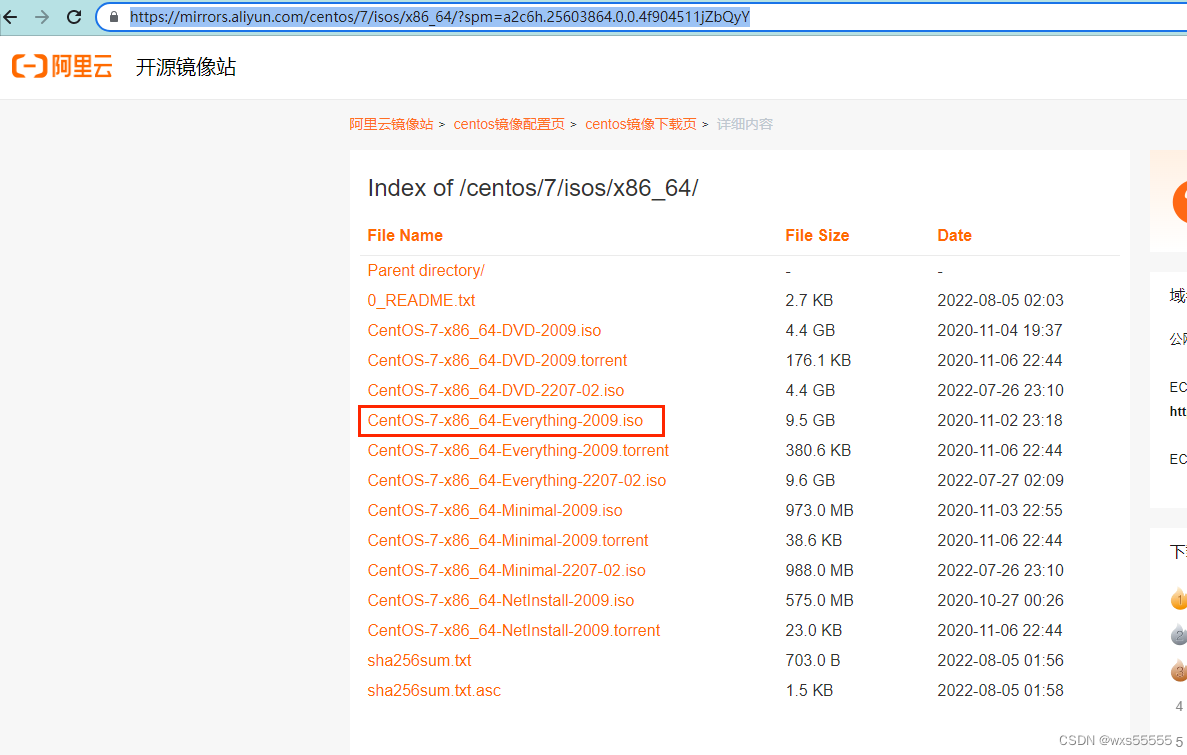
2、去阿里云网站下载centos7镜像
centos-7-isos-x86_64安装包下载_开源镜像站-阿里云
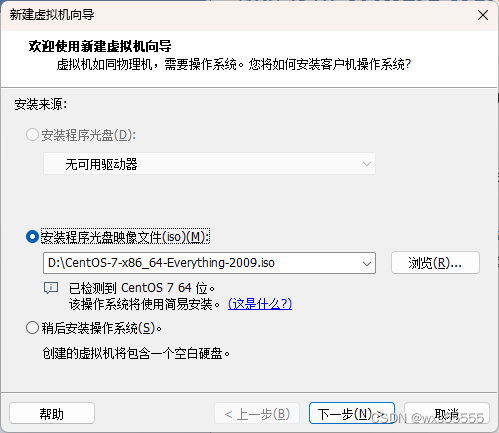
3、新增两台虚拟机用来部署,创建步骤都是一样的
wxsmaster 4G 4核 30G
wxsnode1 4G 4核 30G

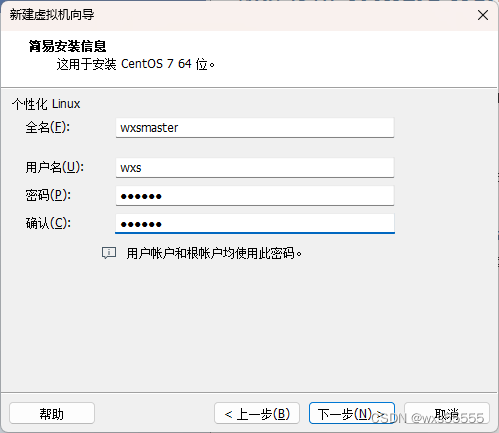
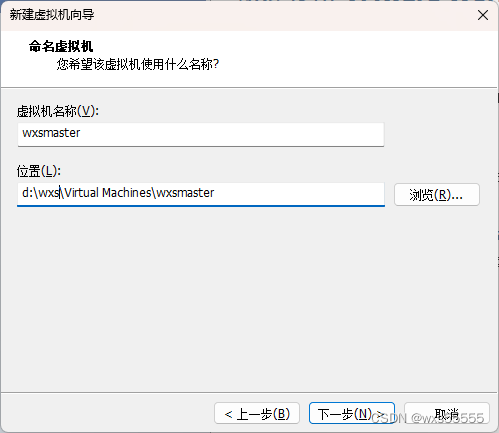

 这里点完成之后一直等待,直到系统创建成功
4、ifconfig命令查看ip后开始按顺序执行下面步骤,都整理好了
#设置主机名分别在wxsmaster执行和wxsnode1执行,设置完后用hostname可以查看名称
hostnamectl set-hostname wxsmaster
hostnamectl set-hostname wxsnode1

#关闭防火墙,用systemctl status firewalld查看是否关闭
systemctl stop firewalld
systemctl disable firewalld

#关闭 selinux
sed -i 's/enforcing/disabled/' /etc/selinux/config # 永久
setenforce 0 # 临时

#关闭 swap,关闭后用free -m命令查看是否关闭
swapoff -a # 临时
sed -ri 's/.*swap.*/#&/' /etc/fstab    # 永久

#时间同步,同步后可用date查看
yum install ntpdate -y
ntpdate time.windows.com

#在 master 添加 hosts
cat >> /etc/hosts << EOF
192.168.254.135 wxsmaster
192.168.254.136 wxsnode1
EOF

#将桥接的 IPv4 流量传递到 iptables 的链
cat > /etc/sysctl.d/k8s.conf << EOF
net.bridge.bridge-nf-call-ip6tables = 1
net.bridge.bridge-nf-call-iptables = 1
EOF
sysctl --system # 生效

#安装docker
wget https://mirrors.aliyun.com/docker-ce/linux/centos/docker-ce.repo -O /etc/yum.repos.d/docker-ce.repo
yum -y install docker-ce-18.06.1.ce-3.el7
systemctl enable docker && systemctl start docker
docker --version

#配置docker的驱动和阿里云加速器
cat > /etc/docker/daemon.json << EOF
{
  "exec-opts": ["native.cgroupdriver=systemd"],
  "registry-mirrors": ["https://b9pmyelo.mirror.aliyuncs.com"]
}
EOF

#重新加载配置参数,重新启动docker服务,启动后用docker info | grep Cgrou 查看docker驱动是否为systemd
systemctl daemon-reload
systemctl restart docker

#添加阿里云 YUM 软件源
cat > /etc/yum.repos.d/kubernetes.repo << EOF
[kubernetes]
name=Kubernetes
baseurl=https://mirrors.aliyun.com/kubernetes/yum/repos/kubernetes-el7-x86_64
enabled=1
gpgcheck=0
repo_gpgcheck=0
gpgkey=https://mirrors.aliyun.com/kubernetes/yum/doc/yum-key.gpg https://mirrors.aliyun.com/kubernetes/yum/doc/rpm-package-key.gpg
EOF

#安装 kubeadm, kubelet 和 kubectl
yum install -y kubelet-1.18.0 kubeadm-1.18.0 kubectl-1.18.0
systemctl enable kubelet
5、初始化,只有wxsmaster执行这个命令,下面的apiserver-advertise-address值要改成master节点的ip
kubeadm init \
  --apiserver-advertise-address=192.168.254.135 \
  --image-repository registry.aliyuncs.com/google_containers \
  --kubernetes-version v1.18.0 \
  --service-cidr=10.96.0.0/12 \
  --pod-network-cidr=10.244.0.0/16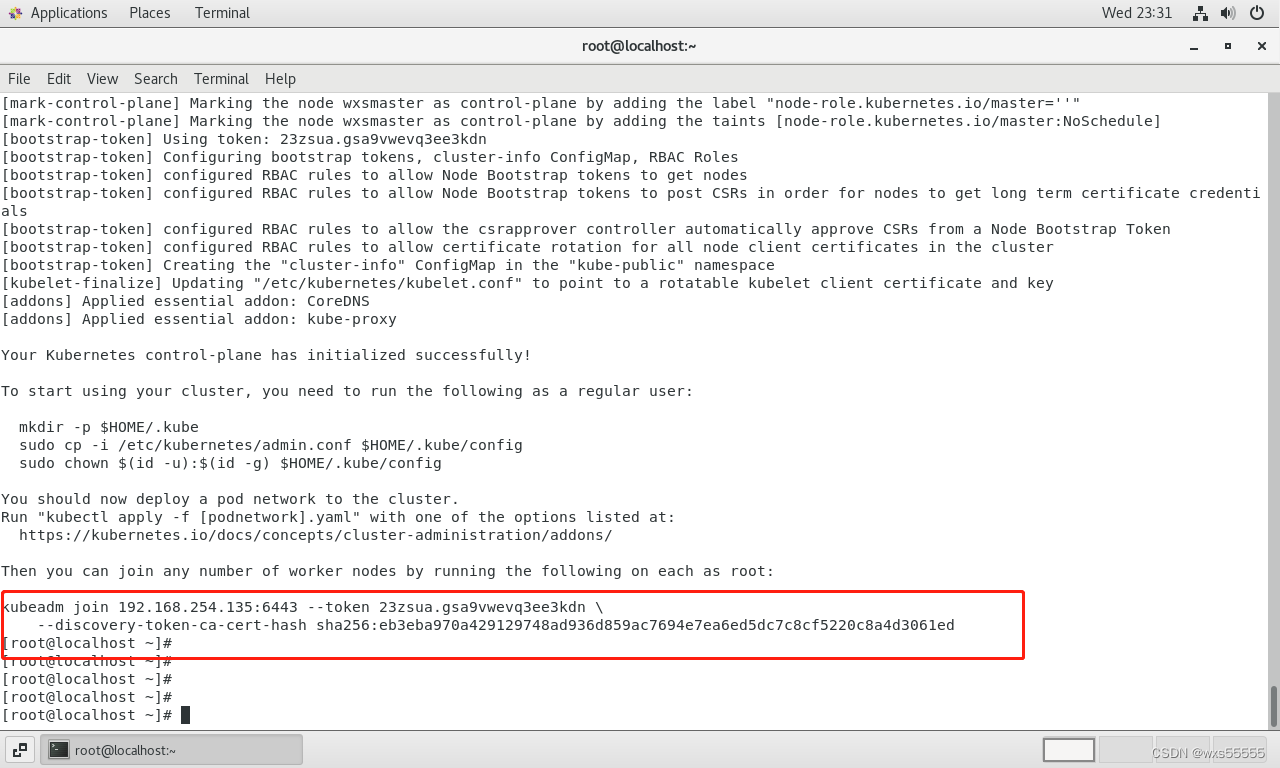
6、初始化完成后,拷贝出图片里面的命令,在wxsnode1节点执行
kubeadm join 192.168.254.135:6443 --token 23zsua.gsa9vwevq3ee3kdn \
    --discovery-token-ca-cert-hash sha256:eb3eba970a429129748ad936d859ac7694e7ea6ed5dc7c8cf5220c8a4d3061ed
7、kubectl get nodes查看节点发现报错了 ,两台机器加入环境变量解决
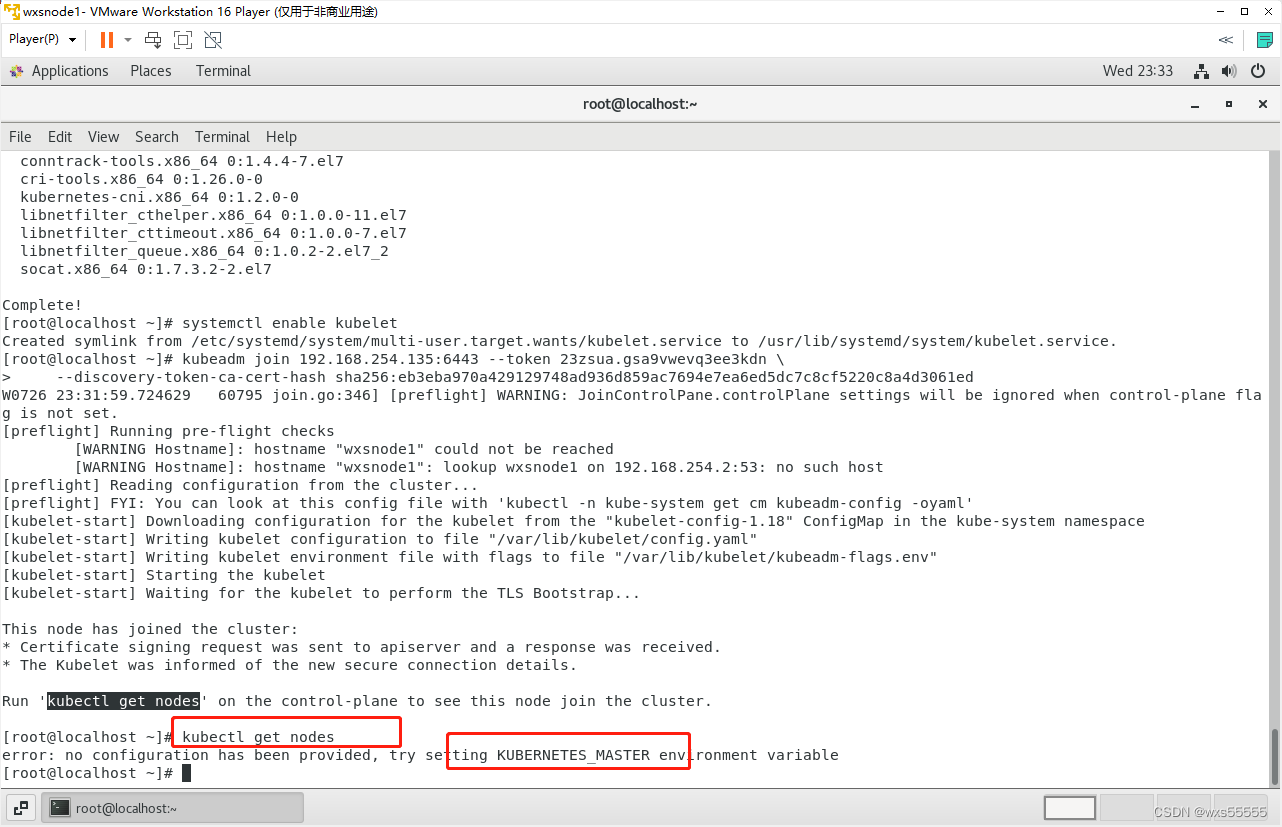
#两台机器都加入环境变量
vim /etc/profile
export KUBECONFIG=/etc/kubernetes/admin.conf
source /etc/profile

#wxsnode1节点加入后还是报错,缺少文件,需要从wxsmaster节点拷贝过来
scp root@192.168.254.135:/etc/kubernetes/admin.conf /etc/kubernetes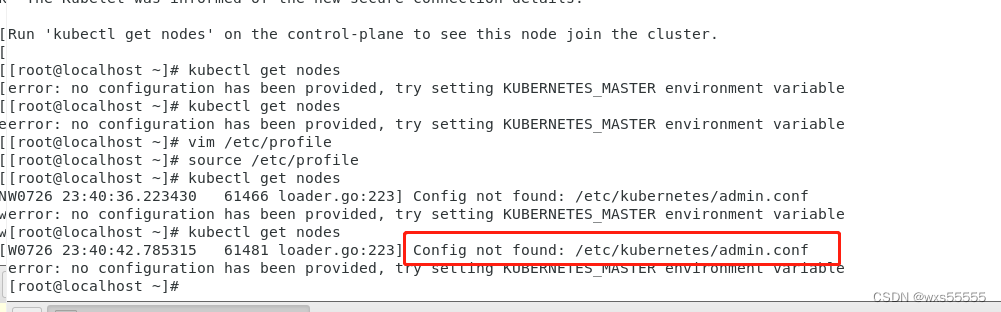

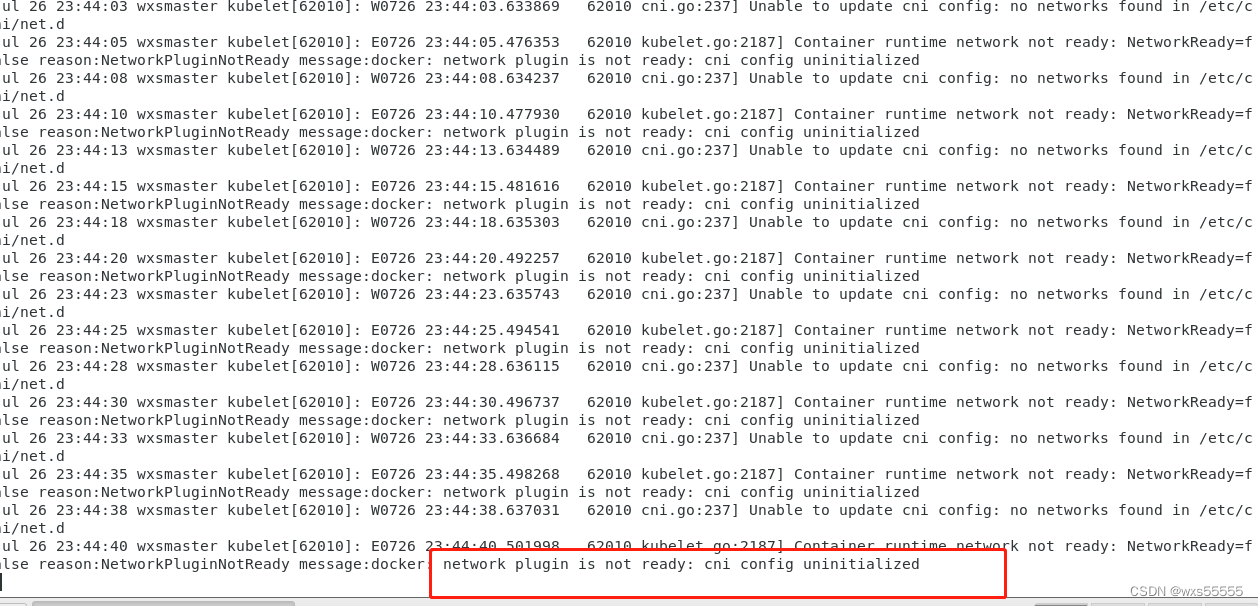
8、kubectl get nodes查看节点状态NotReady,用journalctl -xefu kubelet查看运行状态,发现报错了,需要安装Pod 网络插件( CNI)(只有wxsmaster主机安装)
本地新增一个文件kube-flannel.yaml,贴入一下内容,或者去这个网址下载https://github.com/flannel-io/flannel/blob/master/Documentation/kube-flannel.yml
---
kind: Namespace
apiVersion: v1
metadata:
  name: kube-flannel
  labels:
    pod-security.kubernetes.io/enforce: privileged
---
kind: ClusterRole
apiVersion: rbac.authorization.k8s.io/v1
metadata:
  name: flannel
rules:
- apiGroups:
  - ""
  resources:
  - pods
  verbs:
  - get
- apiGroups:
  - ""
  resources:
  - nodes
  verbs:
  - list
  - watch
- apiGroups:
  - ""
  resources:
  - nodes/status
  verbs:
  - patch
---
kind: ClusterRoleBinding
apiVersion: rbac.authorization.k8s.io/v1
metadata:
  name: flannel
roleRef:
  apiGroup: rbac.authorization.k8s.io
  kind: ClusterRole
  name: flannel
subjects:
- kind: ServiceAccount
  name: flannel
  namespace: kube-flannel
---
apiVersion: v1
kind: ServiceAccount
metadata:
  name: flannel
  namespace: kube-flannel
---
kind: ConfigMap
apiVersion: v1
metadata:
  name: kube-flannel-cfg
  namespace: kube-flannel
  labels:
    tier: node
    app: flannel
data:
  cni-conf.json: |
    {
      "name": "cbr0",
      "cniVersion": "0.3.1",
      "plugins": [
        {
          "type": "flannel",
          "delegate": {
            "hairpinMode": true,
            "isDefaultGateway": true
          }
        },
        {
          "type": "portmap",
          "capabilities": {
            "portMappings": true
          }
        }
      ]
    }
  net-conf.json: |
    {
      "Network": "10.244.0.0/16",
      "Backend": {
        "Type": "vxlan"
      }
    }
---
apiVersion: apps/v1
kind: DaemonSet
metadata:
  name: kube-flannel-ds
  namespace: kube-flannel
  labels:
    tier: node
    app: flannel
spec:
  selector:
    matchLabels:
      app: flannel
  template:
    metadata:
      labels:
        tier: node
        app: flannel
    spec:
      affinity:
        nodeAffinity:
          requiredDuringSchedulingIgnoredDuringExecution:
            nodeSelectorTerms:
            - matchExpressions:
              - key: kubernetes.io/os
                operator: In
                values:
                - linux
      hostNetwork: true
      priorityClassName: system-node-critical
      tolerations:
      - operator: Exists
        effect: NoSchedule
      serviceAccountName: flannel
      initContainers:
      - name: install-cni-plugin
       #image: flannelcni/flannel-cni-plugin:v1.1.0 for ppc64le and mips64le (dockerhub limitations may apply)
        image: docker.io/rancher/mirrored-flannelcni-flannel-cni-plugin:v1.1.0
        command:
        - cp
        args:
        - -f
        - /flannel
        - /opt/cni/bin/flannel
        volumeMounts:
        - name: cni-plugin
          mountPath: /opt/cni/bin
      - name: install-cni
       #image: flannelcni/flannel:v0.20.0 for ppc64le and mips64le (dockerhub limitations may apply)
        image: docker.io/rancher/mirrored-flannelcni-flannel:v0.20.0
        command:
        - cp
        args:
        - -f
        - /etc/kube-flannel/cni-conf.json
        - /etc/cni/net.d/10-flannel.conflist
        volumeMounts:
        - name: cni
          mountPath: /etc/cni/net.d
        - name: flannel-cfg
          mountPath: /etc/kube-flannel/
      containers:
      - name: kube-flannel
       #image: flannelcni/flannel:v0.20.0 for ppc64le and mips64le (dockerhub limitations may apply)
        image: docker.io/rancher/mirrored-flannelcni-flannel:v0.20.0
        command:
        - /opt/bin/flanneld
        args:
        - --ip-masq
        - --kube-subnet-mgr
        resources:
          requests:
            cpu: "100m"
            memory: "50Mi"
          limits:
            cpu: "100m"
            memory: "50Mi"
        securityContext:
          privileged: false
          capabilities:
            add: ["NET_ADMIN", "NET_RAW"]
        env:
        - name: POD_NAME
          valueFrom:
            fieldRef:
              fieldPath: metadata.name
        - name: POD_NAMESPACE
          valueFrom:
            fieldRef:
              fieldPath: metadata.namespace
        - name: EVENT_QUEUE_DEPTH
          value: "5000"
        volumeMounts:
        - name: run
          mountPath: /run/flannel
        - name: flannel-cfg
          mountPath: /etc/kube-flannel/
        - name: xtables-lock
          mountPath: /run/xtables.lock
      volumes:
      - name: run
        hostPath:
          path: /run/flannel
      - name: cni-plugin
        hostPath:
          path: /opt/cni/bin
      - name: cni
        hostPath:
          path: /etc/cni/net.d
      - name: flannel-cfg
        configMap:
          name: kube-flannel-cfg
      - name: xtables-lock
        hostPath:
          path: /run/xtables.lock
          type: FileOrCreate
用xftp将这个文件传入master某个目录,我是这个
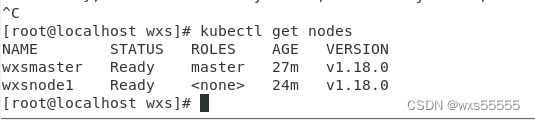
安装命令:kubectl apply -f kube-flannel.yaml,安装完后状态变ready了
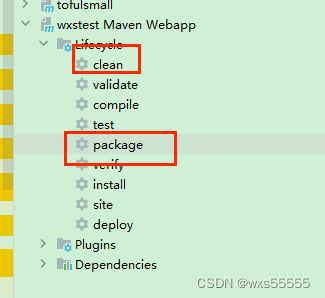
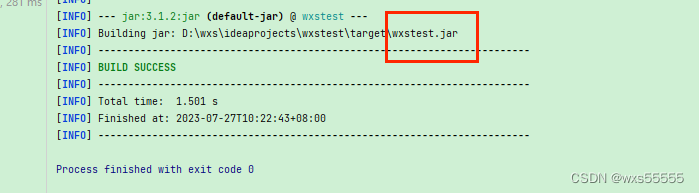
9、本地打包springboot的jar包,本地最好java -jar启动一下看是否能成功,不然后面报错找问题找半天(经验之谈![]() )
)
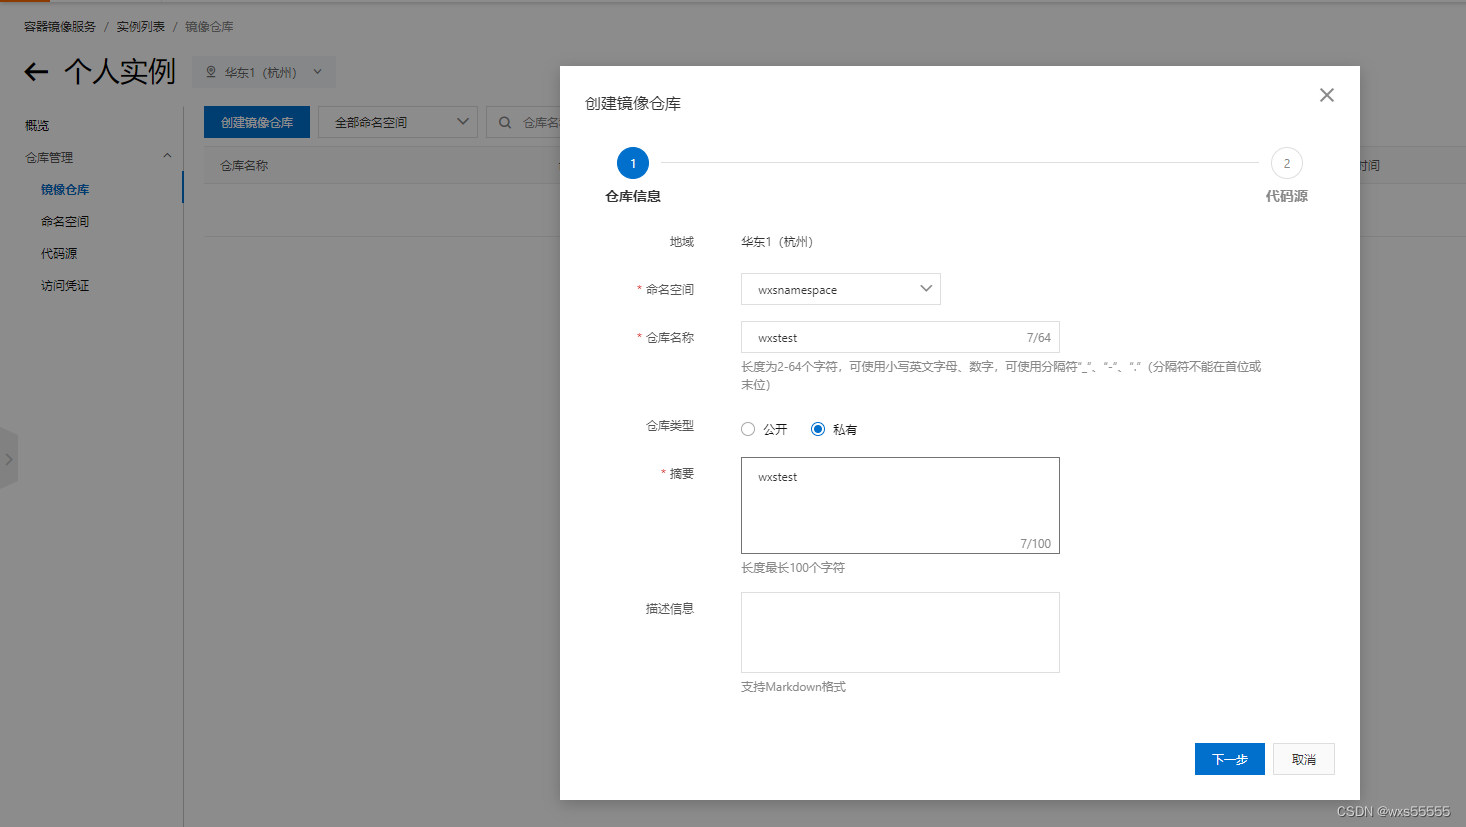
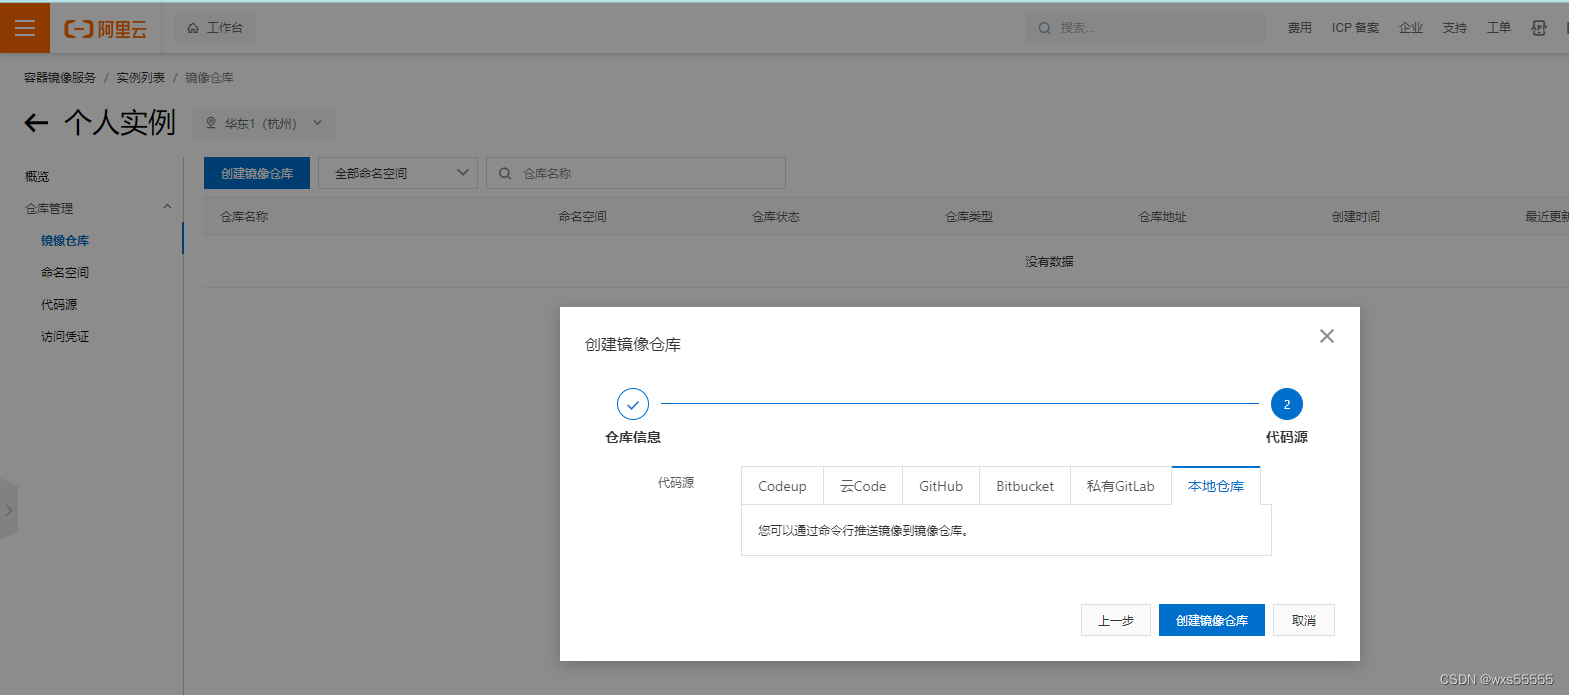
10、去阿里云服务器新增命名空间和镜像仓库


11、创建完后上传jar包到虚拟机,用上图第3步骤将docker生成的镜像上传到阿里云服务器
#创建Dockerfile,并上传jar包到里面配置目录
vim Dockerfile
#输入下面内容
FROM openjdk:8-jdk-alpine
ADD wxstest.jar /home/wxs/wxstest/wxstest.jar
ENTRYPOINT ["java", "-jar", "/home/wxs/wxstest/wxstest.jar"]


#制作镜像
docker build -t wxstest:1.0.0 .

#查看镜像
docker images

#重命名镜像
docker tag 30a9f619627f registry.cn-hangzhou.aliyuncs.com/wxsnamespace/wxstest:1.0.0

#推送到阿里云仓库
docker push registry.cn-hangzhou.aliyuncs.com/wxsnamespace/wxstest:1.0.0

#拉取镜像
docker pull registry.cn-hangzhou.aliyuncs.com/wxsnamespace/wxstest:1.0.0

#先用docker部署下看看是否成功,不然后面报错要重搞好久
docker run -d -p 8088:8088 registry.cn-hangzhou.aliyuncs.com/wxsnamespace/wxstest:1.0.0 -t 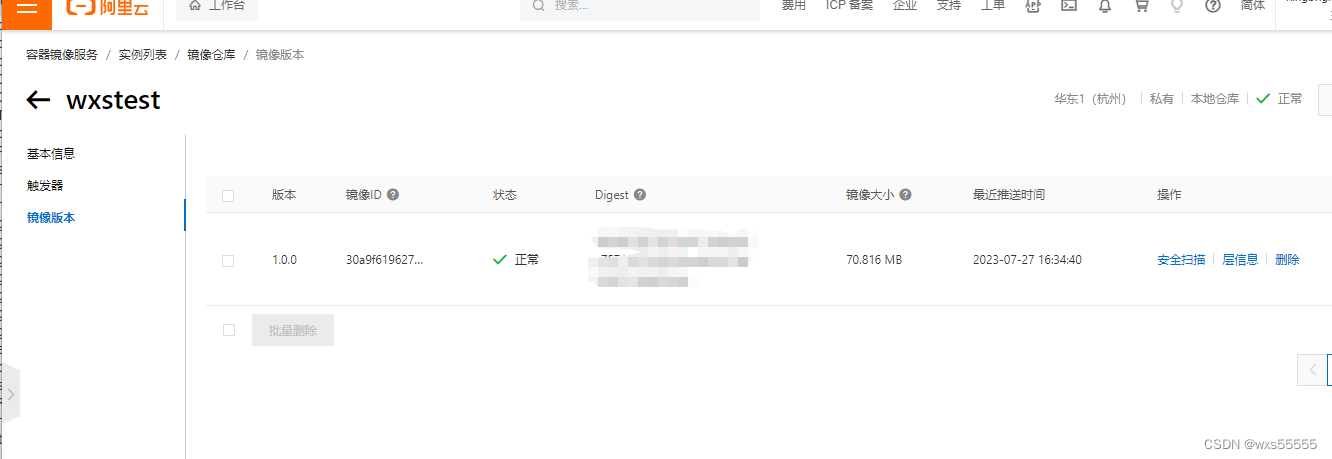
12、创建应用,我的目录是/home/wxs/wxstest
#创建应用
kubectl create deployment wxstest --image=registry.cn-hangzhou.aliyuncs.com/wxsnamespace/wxstest:1.0.0
#删除命令kubectl delete deployment wxstest
#把上面打印出来的内容保存到 wxstest.yaml中,并执行下面命令,执行完后用这个命令看是否成功kubectl get deployments
kubectl expose deployment wxstest --port=8088 --target-port=8088 --type=NodePort
#删除命令kubectl delete svc wxstest
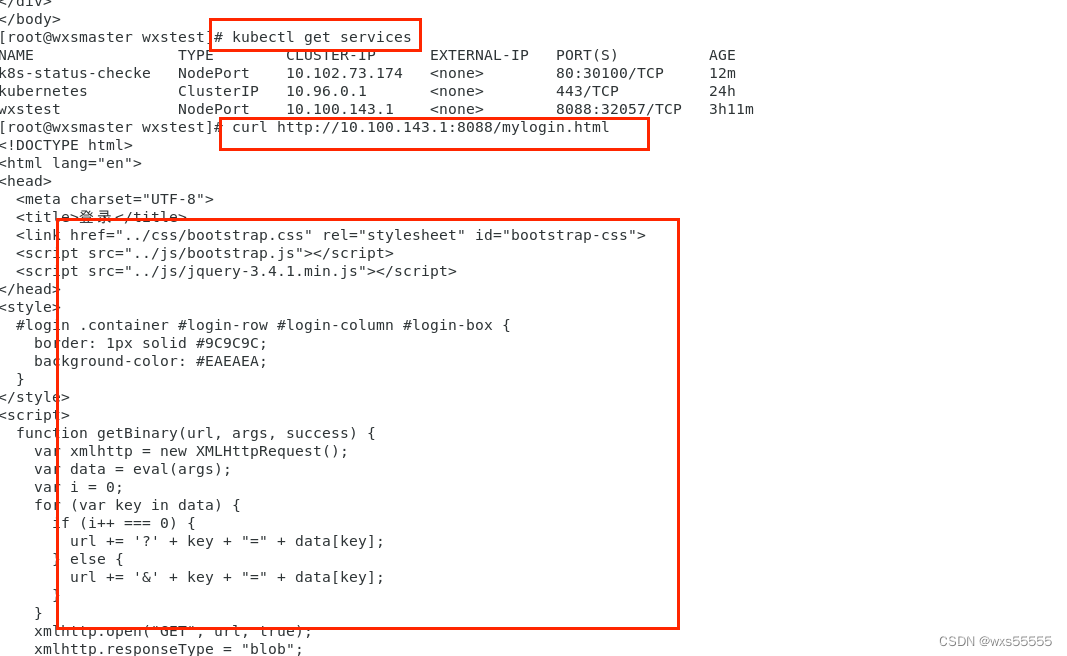
#查看应用
kubectl get services
#本机访问看是否能正常返回页面
curl http://10.100.143.1:8088/mylogin.html
#查看容器名称
kubectl get pods -o wide
#查看容器日志
kubectl logs -f wxstest-64686ddd65-dhvtc
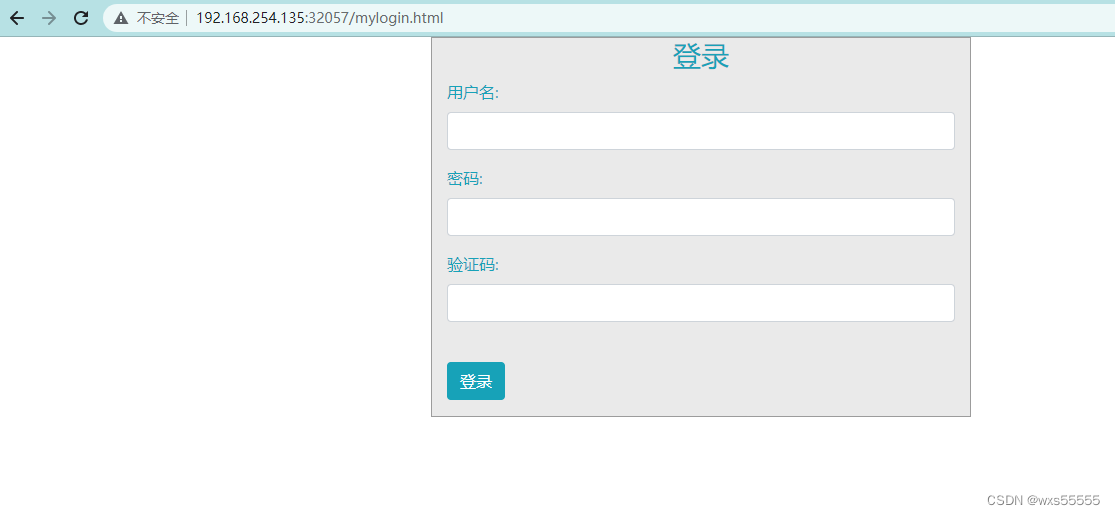
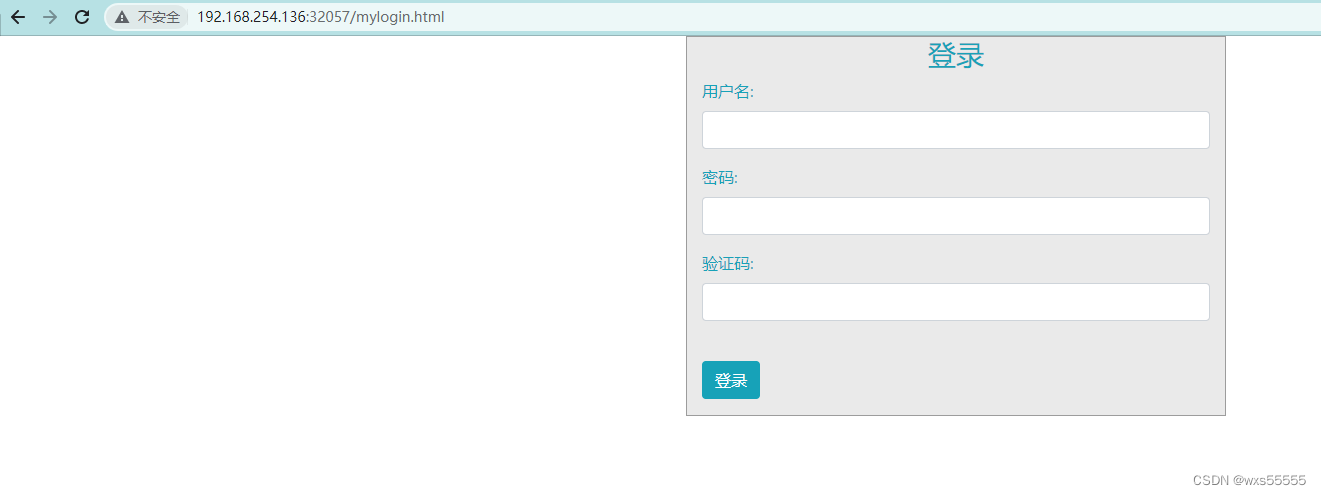
13、外网请求虚拟机地址看看
http://192.168.254.135:32057/mylogin.html
http://192.168.254.136:32057/mylogin.html
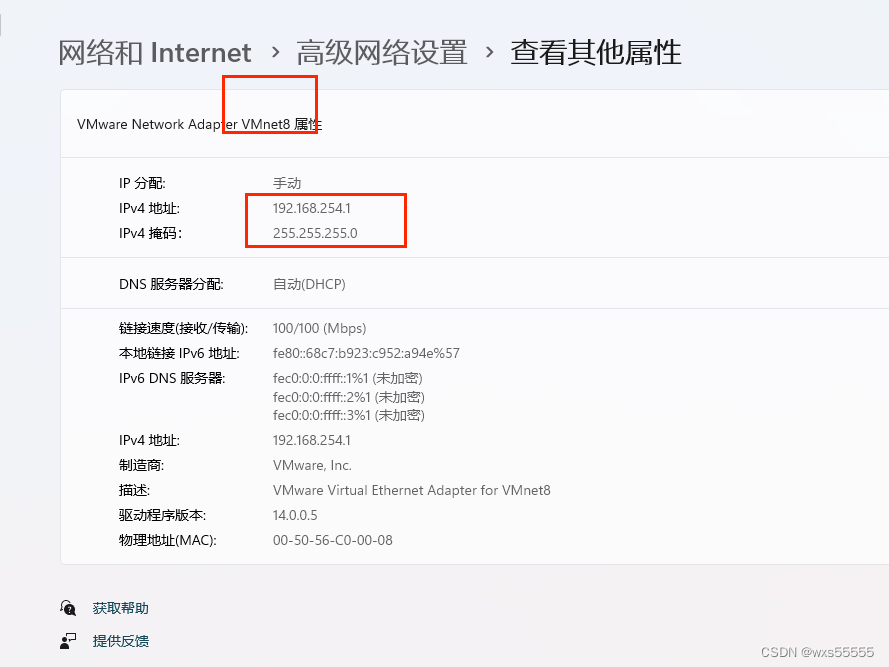
14、重启了虚拟机后发现两台机器ip地址变了,需要改成静态ip,配置从本机拿
#进入配置文件
vi /etc/sysconfig/network-scripts/ifcfg-ens33

#改成如下配置,有的不需要改
TYPE="Ethernet"
PROXY_METHOD="none"
BROWSER_ONLY="no"
BOOTPROTO="static"
DEFROUTE="yes"
IPV4_FAILURE_FATAL="no"
IPV6INIT="yes"
IPV6_AUTOCONF="yes"
IPV6_DEFROUTE="yes"
IPV6_FAILURE_FATAL="no"
IPV6_ADDR_GEN_MODE="stable-privacy"
NAME="ens33"
UUID="285c38d7-6392-478d-ba1d-131066ba5e4d"
DEVICE="ens33"
ONBOOT="yes"

IPADDR="192.168.254.135"
NETMASK="255.255.255.0"
GATEWAY="192.168.254.2"
DNS1="8.8.8.8"

#重启
reboot
15、完事了~~


 1637
1637


 被折叠的 条评论
为什么被折叠?
被折叠的 条评论
为什么被折叠?
 到【灌水乐园】发言


