


目录
5.InputStream & Reader 和 OutputStream & Writer
一、File 类的使用
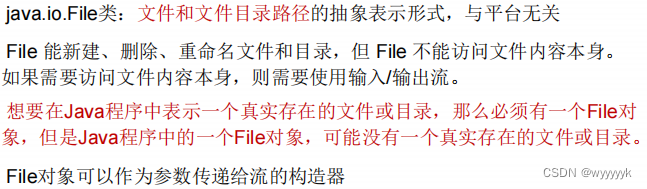
1.File类的常用构造器
public File(String pathname)
以pathname
为路径创建
File
对象,可以是
绝对路径或者相对路径
,如果
pathname是相对路径,则默认的当前路径在系统属性
user.dir
中存储。
绝对路径:是一个固定的路径,从盘符开始
相对路径:是相对于某个位置开始
public File(String parent,String child)
以parent
为父路径,
child
为子路径创建
File
对象。
public File(File parent,String child)
根据一个父File
对象和子文件路径创建
File
对象
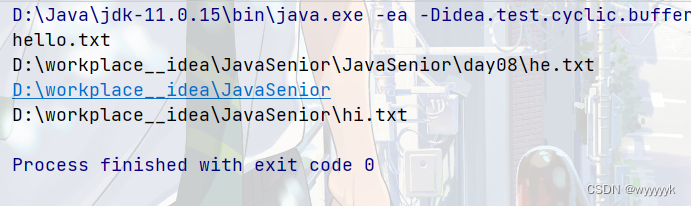
 @Test
    public void test1(){
        //构造器1:
        File file1 = new File("hello.txt");//相对于当前的module
        File file2 = new File("D:\\workplace__idea\\JavaSenior\\JavaSenior\\day08\\he.txt");

        System.out.println(file1);
        System.out.println(file2);

        //构造器2:
        File file3 = new File("D:\\workplace__idea","JavaSenior");
        System.out.println(file3);

        //构造器3:
        File file4 = new File(file3,"hi.txt");
        System.out.println(file4);

    }
2.路径分隔符
*路径中的每级目录之间用一个
路径分隔符
隔开。
*路径分隔符和系统有关:
windows和
DOS
系统默认使用“\”来表示
UNIX和
URL
使用“/”来表示
*Java
程序支持跨平台运行,因此路径分隔符要慎用。
*为了解决这个隐患,
File
类提供了一个常量:
public static final String separator
。根据操作系统,动态的提供分隔符。
举例:
File
file1
=
new
File(
"d:\\atguigu\\info.txt"
);
File
file2
=
new
File(
"d:"
+ File.
separator
+
"atguigu"
+ File.
separator
+
"info.txt"
);
File
file3
=
new
File(
"d:/atguigu"
);
3.常用方法
获取功能:
public String getAbsolutePath()
:
获取绝对路径
public String getPath()
:获取路径
public String getName()
:获取名称
public String getParent()
:
获取上层文件目录路径。若无,返回
null
public long length()
:获取文件长度(即:字节数)。不能获取目录的长度。
public long lastModified()
:获取最后一次的修改时间,毫秒值
public String[] list()
:获取指定目录下的所有文件或者文件目录的名称数组
public File[] listFiles()
:获取指定目录下的所有文件或者文件目录的
File
数组
File
类的重命名功能
public boolean renameTo(File dest):
把文件重命名为指定的文件路径
@Test
public void test2(){
File file1 = new File("hello.txt");
File file2 = new File("d:\\io\\hi.txt");
System.out.println(file1.getAbsoluteFile());
System.out.println(file1.getPath());
System.out.println(file1.getName());
System.out.println(file1.getParent());
System.out.println(file1.length());
System.out.println(new Date(file1.lastModified()));
System.out.println();
System.out.println(file2.getAbsoluteFile());
System.out.println(file2.getPath());
System.out.println(file2.getName());
System.out.println(file2.getParent());
System.out.println(file2.length());
System.out.println(file2.lastModified());
}
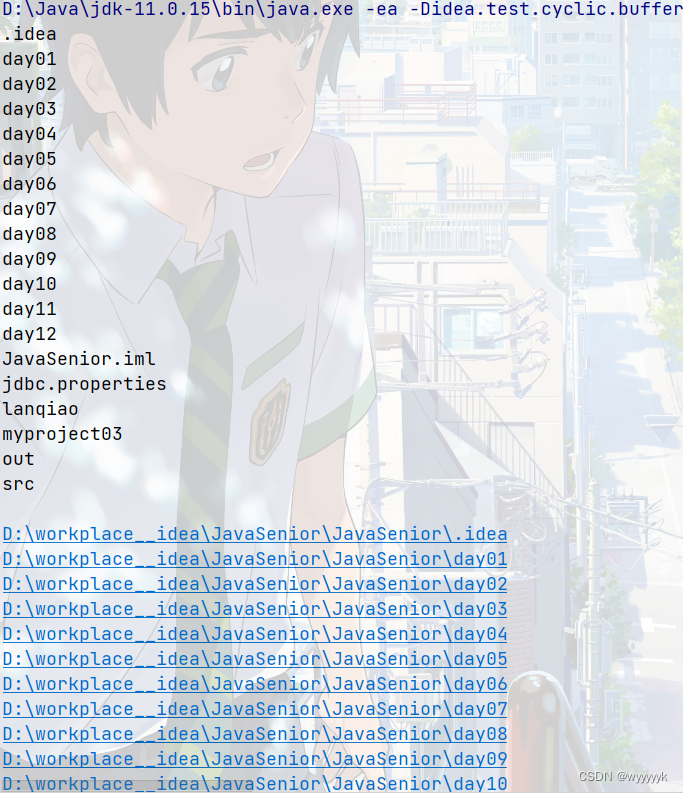
@Test
public void test3(){
File file = new File("D:\\workplace__idea\\JavaSenior\\JavaSenior");
String[] list = file.list();
for (String s : list){
System.out.println(s);
}
System.out.println();
File[] files = file.listFiles();
for (File f : files){
System.out.println(f);
}
}
/*
public boolean renameTo(File dest):把文件重命名为指定的文件路径
比如:file1.removeTo(file2)为例:
要想返回true,需要file1在硬盘中是存在的,file2是不存在的
*/
@Test
public void test4(){
File file1 = new File("hello.txt");
File file2 = new File("D:\\io\\hi.txt");
boolean renameTo = file2.renameTo(file1);
System.out.println(renameTo);
}
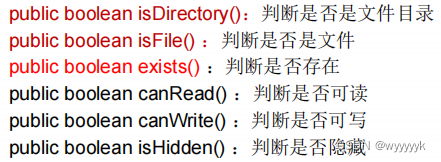
判断功能:
创建功能:
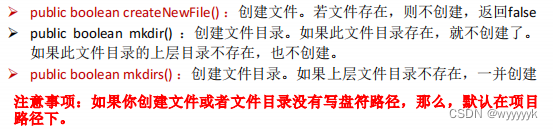
删除功能:

File dir1 = new File("D:/IOTest/dir1");
if (!dir1.exists()) { // 如果D:/IOTest/dir1不存在,就创建为目录
dir1.mkdir();
}
// 创建以dir1为父目录,名为"dir2"的File对象
File dir2 = new File(dir1, "dir2");
if (!dir2.exists()) { // 如果还不存在,就创建为目录
dir2.mkdirs();
}
File dir4 = new File(dir1, "dir3/dir4");
if (!dir4.exists()) {
dir4.mkdirs();
}
// 创建以dir2为父目录,名为"test.txt"的File对象
File file = new File(dir2, "test.txt");
if (!file.exists()) { // 如果还不存在,就创建为文件
file.createNewFile();
}二、IO流原理及流的分类
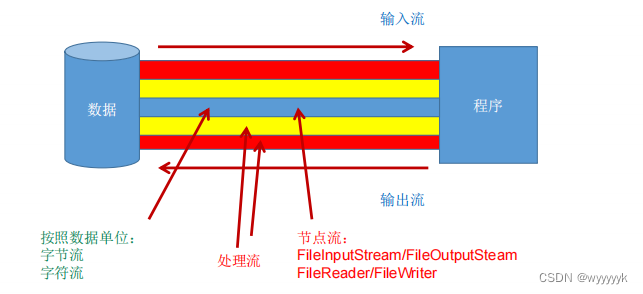
1.Java IO原理
①I/O
是
Input/Output
的缩写,
I/O
技术是非常实用的技术,用于
处理设备之间的数据传输
。如读
/
写文件,网络通讯等。
②Java
程序中,对于数据的输入
/
输出操作以
“流
(stream)
”
的方式进行。
③java.io
包下提供了各种“流”类和接口,用以获取不同种类的数据,并通过
标准的方法
输入或输出数据。
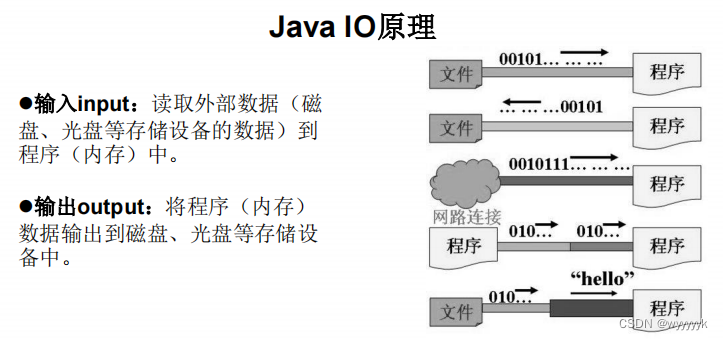
即输入输出都是基于程序(内存)
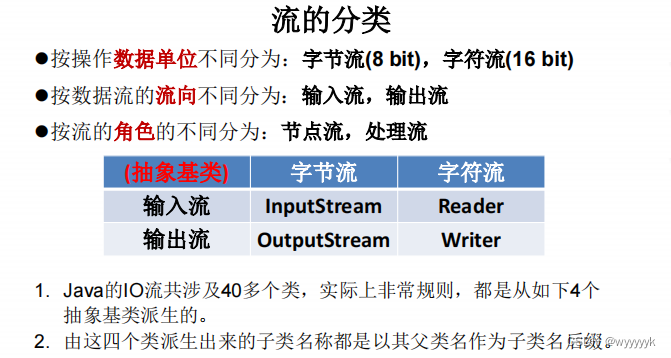
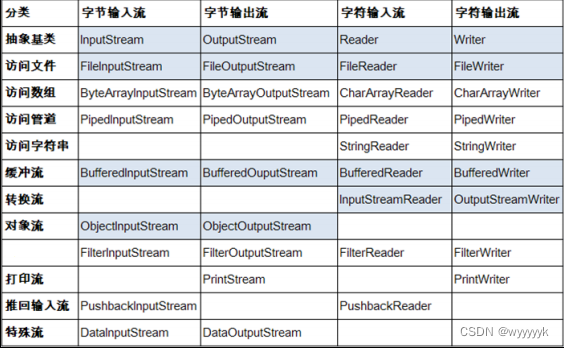
2.流的分类
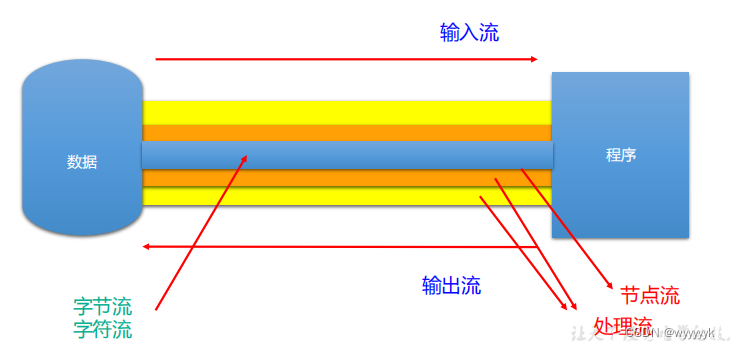
3.IO 流体系
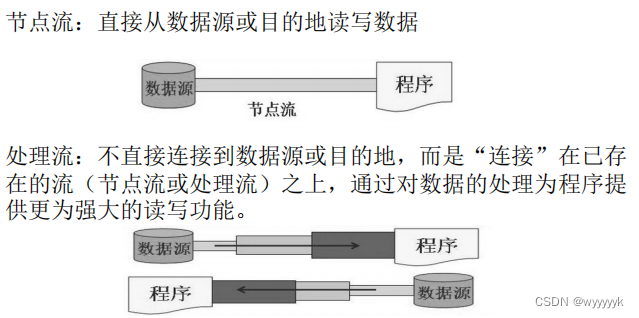
4.节点流和处理流
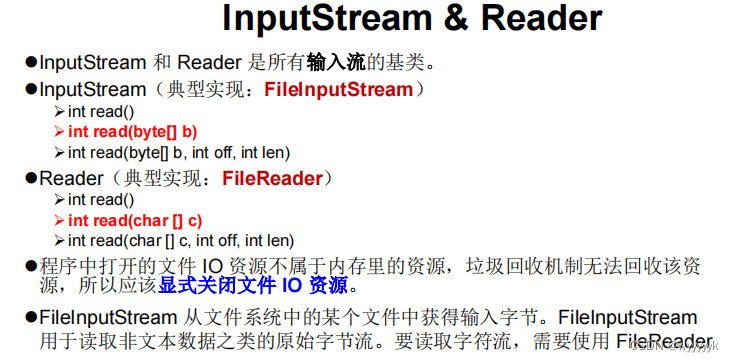
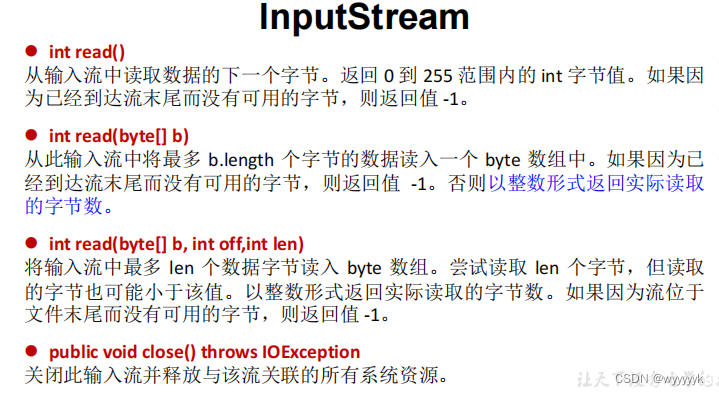
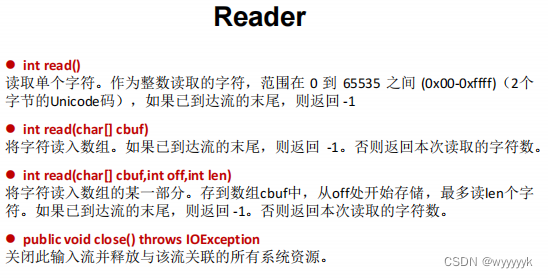
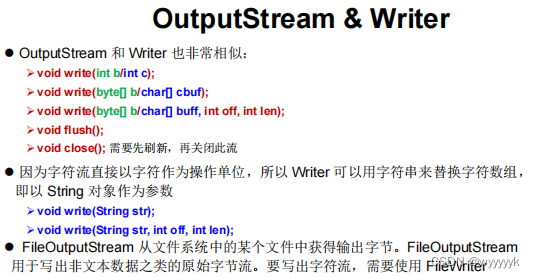
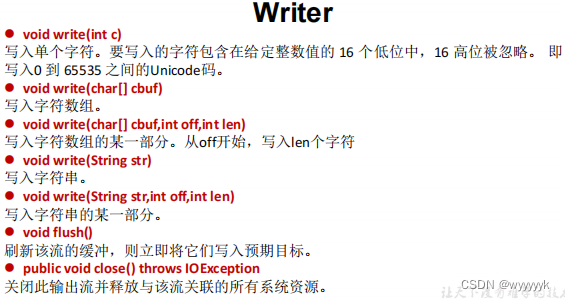
5.InputStream & Reader 和 OutputStream & Writer
流的体系结构
* 抽象基类             节点流(或文件流)           缓冲流(处理流的一种)
* InputStream          FileInputStream         BufferedInputStream
* OutputStream         FileOutputStream        BufferedOutputStream
* Reader               FileReader              BufferedReader
* Writer               FileWriter              BufferedWriter

测试FileInputStream和FileOutputStream的使用
/**
 * 测试FileInputStream和FileOutputStream的使用
 *
 * 结论:
 * 1.对于文本文件(.txt,.java,.c,.cpp),使用字符流处理
 * 2.对于非文本文件(.jpg,.mp3,.mp4,.avi,.doc,.ppt.........),使用字节流处理
 *
 *
 *
 * @author wyyyyyk
 * @create 2022-08-12 11:551
 */
public class FileInputOutputStreamTest {

    //使用字节流FileInputStream处理文本文件,可能出现乱码。
    @Test
    public void test1()  {
        FileInputStream fis = null;
        try {
            //1.造文件
            File file = new File("hello.txt");

            //2.造流
            fis = new FileInputStream(file);

            //3.读数据
            byte[] buffer = new byte[5];
            int len;//记录每次读取的字结的个数
            while ((len = fis.read(buffer)) != -1){

                String str = new String(buffer,0,len);
                System.out.print(str);

            }
        } catch (IOException e) {
            throw new RuntimeException(e);
        } finally {
            //4.关闭资源
            try {
                if (fis != null)
                    fis.close();
            } catch (IOException e) {
                throw new RuntimeException(e);
            }
        }

    }

    /*
    实现对图片的复制操作
     */
    @Test
    public void testFileInputOutputStream() {
        FileInputStream fis = null;
        FileOutputStream fos = null;
        try {
            //造文件
            File srcFile = new File("pucture.jpg");
            File destFile = new File("pucture5.jpg");

            //造流
            fis = new FileInputStream(srcFile);
            fos = new FileOutputStream(destFile);

            //复制的过程
            byte[] buffer = new byte[5];
            int len;
            while ((len = fis.read(buffer)) != -1){
                fos.write(buffer,0,len);
            }
        } catch (IOException e) {
            throw new RuntimeException(e);
        } finally {
            if (fos != null){
                try {
                    fos.close();
                } catch (IOException e) {
                    throw new RuntimeException(e);
                }
            }

            if (fis != null){
                try {
                    fis.close();
                } catch (IOException e) {
                    throw new RuntimeException(e);
                }
            }
        }

    }

}
测试FileReader和FileWriter的使用
 /*

    说明点:
    1.read()的理解:返回读入的一个字符。如果达到文件末尾,返回-1
    2.异常的处理:为例保证流资源一定可以执行关闭操作。需要使用try-catch-finally处理
    3.读入的文件一定要存在,否则就会报FileNotFoundException

     */
    @Test
    public void test1(){
        FileReader fr = null;
        try {
            //1.实例化File类的对象,指明要操作的文件
            File file  = new File("hello.txt");//相较于当前Module
            //2.提供具体的流
            fr = new FileReader(file);

            //3.数据的读入
            //read():返回读入的一个字符。如果达到文件末尾,返回-1
            //方式一:
//        int data = fr.read();
//        while (data != -1){
//            System.out.print((char)data);
//            data = fr.read();
//        }

            //方式二:语法上针对方式一的修改
            int data;
            while ((data = fr.read()) != -1){
                System.out.print((char)data);
            }
        } catch (IOException e) {
            throw new RuntimeException(e);
        } finally {
        //4.流的关闭操作
            try {
                if (fr != null)
                    fr.close();
            } catch (IOException e) {
                e.printStackTrace();
            }
        }


    }


    //对read()操作升级:使用read的重载方法
    @Test
    public void test2() {
        FileReader fr = null;
        try {
            //1.File类的实例化
            File file = new File("hello.txt");

            //2.流的实例化
            fr = new FileReader(file);

            //3.读入的操作
            //char(char[] cbuf):返回每次读入cbuf数组中的字符个数。如果达到文件末尾,返回-1
            char[] cbuf = new char[5];
            int len;
            while ((len = fr.read(cbuf)) != -1){
                //方式一:
//                for (int i = 0; i < len; i++) {
//                    System.out.print(cbuf[i]);
//                }

                //方式二:
                String str = new String(cbuf,0,len);
                System.out.print(str);
            }
        } catch (IOException e) {
            e.printStackTrace();
        } finally {
        //4.资源的关闭
            try {
                fr.close();
            } catch (IOException e) {
                e.printStackTrace();
            }
        }

    }
注意!!!:
从内存写出数据到硬盘文件里
说明:
1.输出操作,对应的File可以不存在,并不会报异常
2.File对应的硬盘中的文件如果不存在,在输出的过程中,会自动创建此文件
  File对应的硬盘中的文件如果存在:
         如果流使用的构造器是:FileWriter(file,false)/FileWriter(file):对原有文件的覆盖
         如果流使用的构造器是:FileWriter(file,true):不会对原有文件覆盖,而是在原有文件基础上追加内容
@Test
public void test3() {
FileWriter fw = null;
try {
//1.提供File类的对象,指明写出到的文件
File file = new File("hello1.txt");
//2.提供FileWriter的对象,用于数据的写出
fw = new FileWriter(file,false);
//3.写出的操作
fw.write("I have a dream!\n");
fw.write("you need to have a dream!");
} catch (IOException e) {
throw new RuntimeException(e);
} finally {
//4.流资源的关闭
if (fw != null){
try {
fw.close();
} catch (IOException e) {
throw new RuntimeException(e);
}
}
}
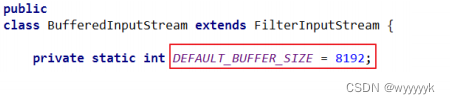
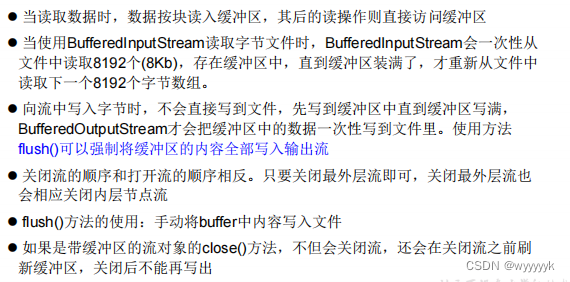
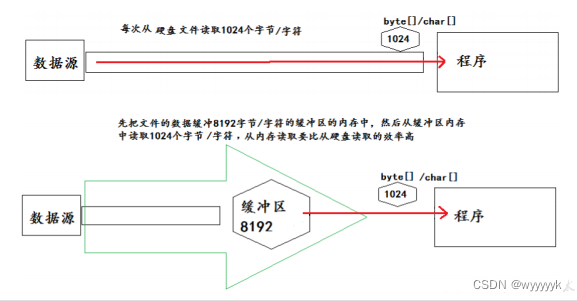
}3.缓冲流
*
为了提高数据读写的速度
,
Java API
提供了带缓冲功能的流类,在使用这些流类 时,会创建一个内部缓冲区数组,缺省使用
8192
个字节
(8Kb)
的缓冲区
。
*缓冲流要“套接”在相应的节点流之上,根据数据操作单位可以把缓冲流分为:
BufferedInputStream
和
BufferedOutputStream
BufferedReader
和
BufferedWriter
/*
实现非文本文件的复制
使用BufferedInputStream,BufferedOutputStream
*/
@Test
public void BufferedStreamTest() {
BufferedInputStream bis = null;
BufferedOutputStream bos = null;
try {
//1.造文件
File srcFile = new File("pucture.jpg");
File destFile = new File("pucture3.jpg");
//2.造流
//2.1造节点流
FileInputStream fis = new FileInputStream(srcFile);
FileOutputStream fos = new FileOutputStream(destFile);
//2.2造缓冲流
bis = new BufferedInputStream(fis);
bos = new BufferedOutputStream(fos);
//3.复制的细节:读取、写入
byte[] buffer = new byte[10];
int len;
while ((len = bis.read(buffer)) != -1) {
bos.write(buffer, 0, len);
}
} catch (IOException e) {
throw new RuntimeException(e);
} finally {
if (bos != null) {
try {
bos.close();
} catch (IOException e) {
throw new RuntimeException(e);
}
}
if (bis != null) {
try {
bis.close();
} catch (IOException e) {
throw new RuntimeException(e);
}
}
//4.资源关闭
//要求:先关闭外层的流,再关闭内层的流
//说明:关闭外层流的同时,内层流也会自动的进行关闭
// fos.close();
// fis.close();
}
}
//********************************************
/*
使用BufferedReader和BufferedWriter
*/
@Test
public void testBufferedReaderBufferedWriter(){
BufferedReader br = null;
BufferedWriter bw = null;
try {
//创建文件和对应的流
br = new BufferedReader(new FileReader(new File("hello.txt")));
bw = new BufferedWriter(new FileWriter(new File("hello3.txt")));
//读写操作
//方式一:使用char[]数组
// char[] cbuf = new char[1024];
// int len;
// while ((len = br.read(cbuf)) != -1){
// bw.write(cbuf,0,len);
// //bw.flush();
// }
//方式二:使用String
String data;
while ((data = br.readLine()) != null){
//方法一:
// bw.write(data + "\n");//data不包含换行符
//方法二:
bw.write(data);;//data不包含换行符
bw.newLine();
}
} catch (IOException e) {
throw new RuntimeException(e);
} finally {
//关闭资源
if (bw != null){
try {
bw.close();
} catch (IOException e) {
throw new RuntimeException(e);
}
}
if (br != null){
try {
br.close();
} catch (IOException e) {
throw new RuntimeException(e);
}
}
}
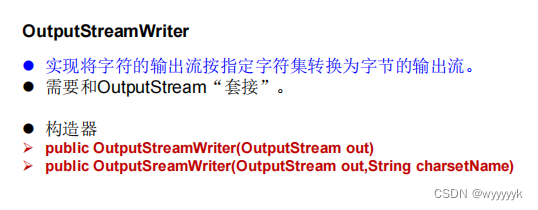
}4.转换流
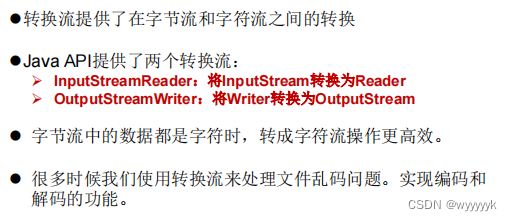
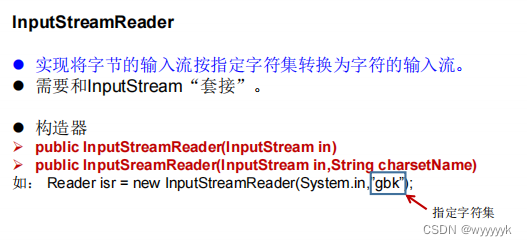

/*
此时处理异常仍然应该使用try-catch-finally
InputStreamReader的使用,实现字节的输入流到字符输入与流的转换
将字符集为utf-8的txt文件,改成字符集为gbk的txt文件
*/
@Test
public void test2() throws IOException {
//1.造文件、造流
File file1 = new File("dbcp.txt");
File file2 = new File("dbcp_gbk.txt");
FileInputStream fis = new FileInputStream(file1);
FileOutputStream fos = new FileOutputStream(file2);
InputStreamReader isr = new InputStreamReader(fis,"UTF-8");
OutputStreamWriter osw = new OutputStreamWriter(fos,"gbk");
//2.读写过程
char[] cbuf = new char[20];
int len;
while ((len = isr.read(cbuf)) != -1){
osw.write(cbuf,0,len);
}
//3.关闭资源
isr.close();
osw.close();
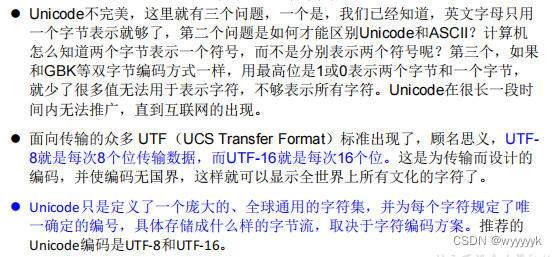
}补充:字符编码的说明

5.其他流的使用
1.标准的输入、输出流
2.打印流
3.数据流
①输入输出流
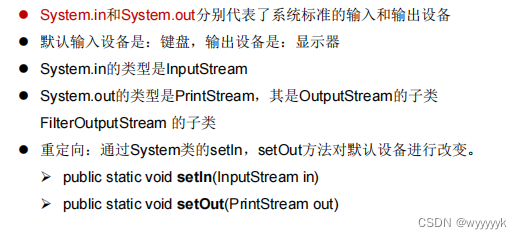
 /*
    1.标准的输入、输出流
    1.1
    System.in:标准的输入流,默认从键盘输入(字节流)
    System.out:标准的输出流,默认从控制台输出
    1.2
    System类的setIn(InputStream is) / setOut(printStream)方式指定输入和输出的流

    1.3练习
    从键盘输入字符串,要求将读取到的整行字符串转成大写输出。然后继续
    进行输入操作,直至当输入“e”或者“exit”时,退出程序。

   方法一:使用Scanner实现,调用next()返回一个字符串
   方法二:使用System.in实现 ----->  转换流 -------> bufferedReader的readLine()

     */
    public static void main(String[] args) {

        BufferedReader br = null;
        try {
            InputStreamReader isr = new InputStreamReader(System.in);
            br = new BufferedReader(isr);

            while (true){
                System.out.println("请输入字符串:");
                String data = br.readLine();
                if ("e".equalsIgnoreCase(data) || "exit".equalsIgnoreCase(data)){
                    System.out.println("程序结束");
                    break;
                }

                String upperCase = data.toUpperCase();
                System.out.println(upperCase);

            }
        } catch (IOException e) {
            throw new RuntimeException(e);
        } finally {
            if (br != null){
                try {
                    br.close();
                } catch (IOException e) {
                    throw new RuntimeException(e);
                }
            }
        }


    }
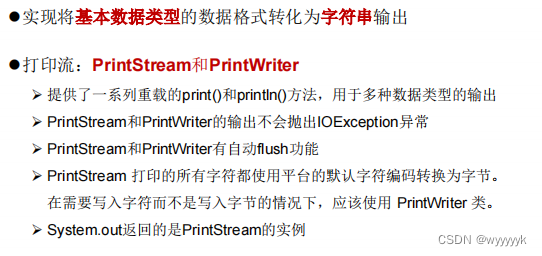
②打印流
 /*
    2.打印流:PrintStream和PrintWriter

    2.1提供了一系列重载的print()和println()
    2.2练习:
     */

    @Test
    public void test2(){
        PrintStream ps = null;
        try {
            FileOutputStream fos = new FileOutputStream(new File("D:\\IO\\text.txt"));
// 创建打印输出流,设置为自动刷新模式(写入换行符或字节 '\n' 时都会刷新输出缓冲区)
            ps = new PrintStream(fos, true);
            if (ps != null) {// 把标准输出流(控制台输出)改成文件
                System.setOut(ps);
            }
            for (int i = 0; i <= 255; i++) { // 输出ASCII字符
                System.out.print((char) i);
                if (i % 50 == 0) { // 每50个数据一行
                    System.out.println(); // 换行
                }
            }
        } catch (FileNotFoundException e) {
            e.printStackTrace();
        } finally {
            if (ps != null) {
                ps.close();
            }
        }
    }
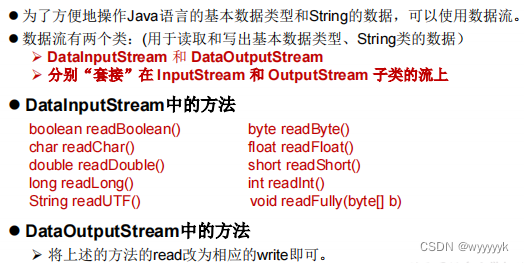
③数据流
DataOutputStream dos = null;
try { // 创建连接到指定文件的数据输出流对象
dos = new DataOutputStream(new FileOutputStream("destData.dat"));
dos.writeUTF("我爱北京天安门"); // 写UTF字符串
dos.writeBoolean(false); // 写入布尔值
dos.writeLong(1234567890L); // 写入长整数
System.out.println("写文件成功!");
} catch (IOException e) {
e.printStackTrace();
} finally { // 关闭流对象
try {
if (dos != null) {
// 关闭过滤流时,会自动关闭它包装的底层节点流
dos.close();
}
} catch (IOException e) {
e.printStackTrace();
}
}
6.对象流
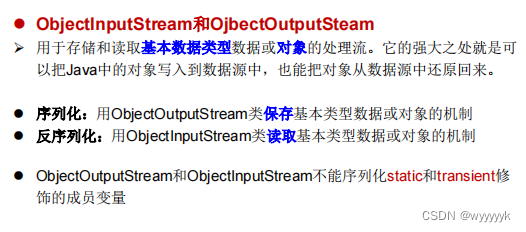
注意:
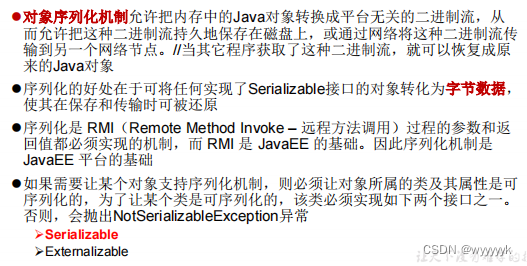
①序列化的过程:将内存中的java对象保存到磁盘中或通过网络传输出去
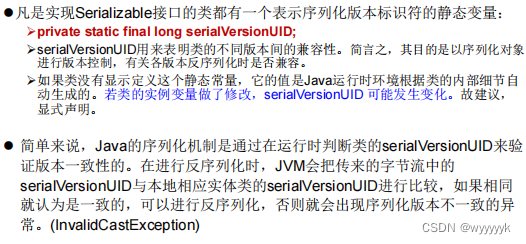
②一个类可序列化的前提
1.需要实现接口Serializable
2.需要当前类提供一个全局常量:serialVersionUID
3.除了当前的类需要实现Serializable接口之外,还必须保证其内部所有属性也必须是可序列化的。         (默认情况下,基本数据和String类型是可序列化的)
ObjectOutputStream oos = new ObjectOutputStream(new FileOutputStream(“data.txt"));
Person p = new Person("韩梅梅", 18, "中华大街", new Pet());
oos.writeObject(p);
oos.flush();
oos.close();
ObjectInputStream ois = new ObjectInputStream(new FileInputStream(“data.txt"));
Person p1 = (Person)ois.readObject();
System.out.println(p1.toString());
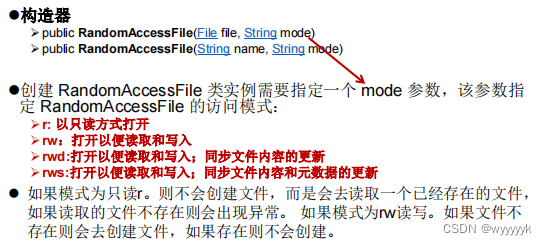
ois.close();7.随机存取文件流
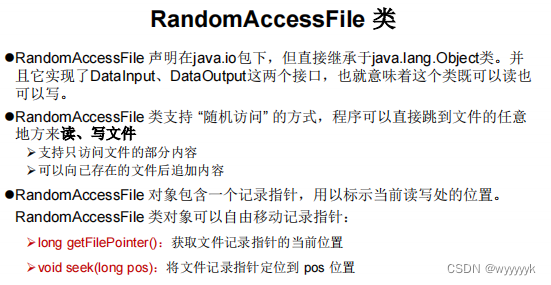
我们可以用
RandomAccessFile
这个类,来实现一个
多线程断点下载
的功能,
用过下载工具的朋友们都知道,下载前都会建立
两个临时文件
,一个是与
被下载文件大小相同的空文件,另一个是记录文件指针的位置文件,每次
暂停的时候,都会保存上一次的指针,然后断点下载的时候,会继续从上
一次的地方下载,从而实现断点下载或上传的功能,有兴趣的朋友们可以
自己实现下。
@Test
public void test1(){
RandomAccessFile raf1 = null;
RandomAccessFile raf2 = null;
try {
raf1 = new RandomAccessFile(new File("pucture.jpg"),"r");
raf2 = new RandomAccessFile(new File("pucture1.jpg"),"rw");
byte[] buffer = new byte[1024];
int len;
while ((len = raf1.read(buffer)) != -1) {
raf2.write(buffer,0,len);
}
} catch (IOException e) {
throw new RuntimeException(e);
} finally {
if (raf1 != null){
try {
raf1.close();
} catch (IOException e) {
throw new RuntimeException(e);
}
}
if (raf2 != null){
try {
raf2.close();
} catch (IOException e) {
throw new RuntimeException(e);
}
}
}
}
@Test
public void test2() throws IOException {
RandomAccessFile raf1 = new RandomAccessFile("hello.txt","rw");
raf1.seek(3);//将指针调到角标为3的位置
raf1.write("xyz".getBytes());
raf1.close();
}
/*
使用RandomAccessFile实现数据插入效果
*/
@Test
public void test3() throws IOException {
RandomAccessFile raf1 = new RandomAccessFile("hello.txt","rw");
raf1.seek(3);//将指针调到角标为3的位置
//保存指针3后面的所有数据到StringBuilder中
StringBuilder builder = new StringBuilder((int) new File("hello.txt").length());
byte[] buffer = new byte[20];
int len;
while ((len = raf1.read(buffer)) != -1){
builder.append(new String(buffer,0,len));
}
raf1.seek(3);//调回指针写入xyz
raf1.write("xyz".getBytes());
//将StringBuilder中的数据写入到文件中
raf1.write(builder.toString().getBytes());
raf1.close();
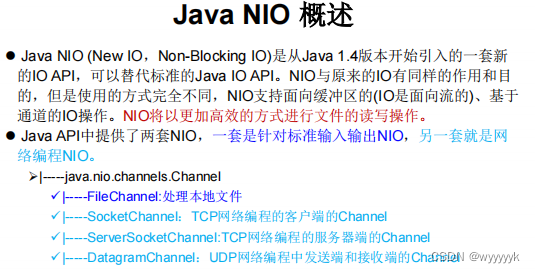
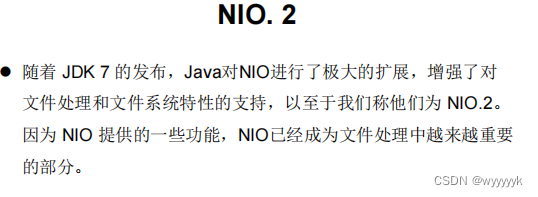
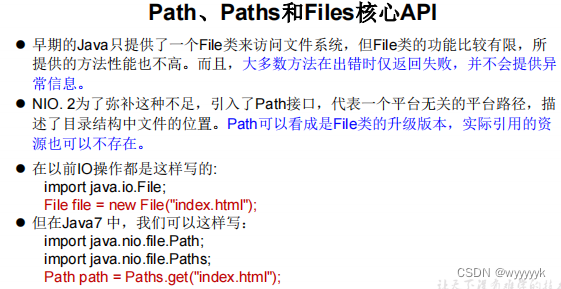
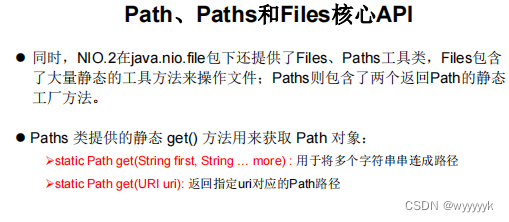
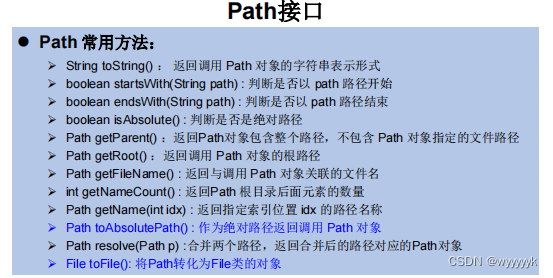
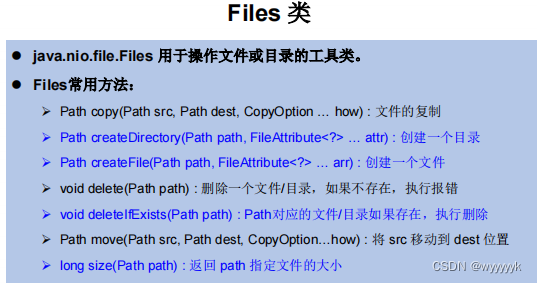
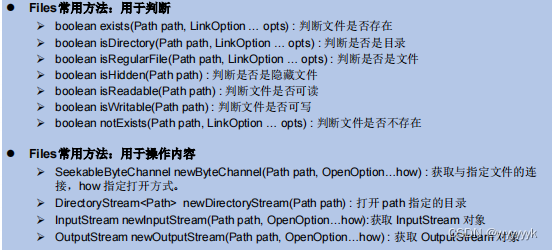
}8.NIO.2中Path、Paths、Files类的使用


 349
349


 被折叠的 条评论
为什么被折叠?
被折叠的 条评论
为什么被折叠?
 到【灌水乐园】发言


