


1.整合redis
1.引入spring-boot-starter-data-redis
        <dependency>
            <groupId>org.springframework.boot</groupId>
            <artifactId>spring-boot-starter-data-redis</artifactId>
            <exclusions>
                <exclusion>
                    <groupId>io.lettuce</groupId>
                    <artifactId>lettuce-core</artifactId>
                </exclusion>
            </exclusions>
        </dependency>

        <dependency>
            <groupId>redis.clients</groupId>
            <artifactId>jedis</artifactId>
        </dependency>
2.简单配置redis的host信息
spring:
    redis:
        host: 127.0.0.1
        port: 6379
3.使用springboot自动配置好的stringRedisTemplate来操作redis
    @Autowired
    StringRedisTemplate redisTemplate;

    @Test
    public void testRedis(){
        ValueOperations<String, String> ops = redisTemplate.opsForValue();
        //保存
        ops.set("hello","world_"+ UUID.randomUUID());
        //查询
        String hello = ops.get("hello");
        System.out.println("之前保存的数据是:"+hello);
    }
2.整合SpringCache简化缓存开发
1.引入依赖spring-boot-starter-cache
        <dependency>
            <groupId>org.springframework.boot</groupId>
            <artifactId>spring-boot-starter-cache</artifactId>
        </dependency>
2.写配置
首先要知道引入spring-boot-starter-cache后SpringBoot为我们自动配置了哪些?
首先是CacheAutoConfiguration,CacheAutoConfiguration会导入RedisCacheConfiguration,自动配置好了缓存管理器RedisCacheManager
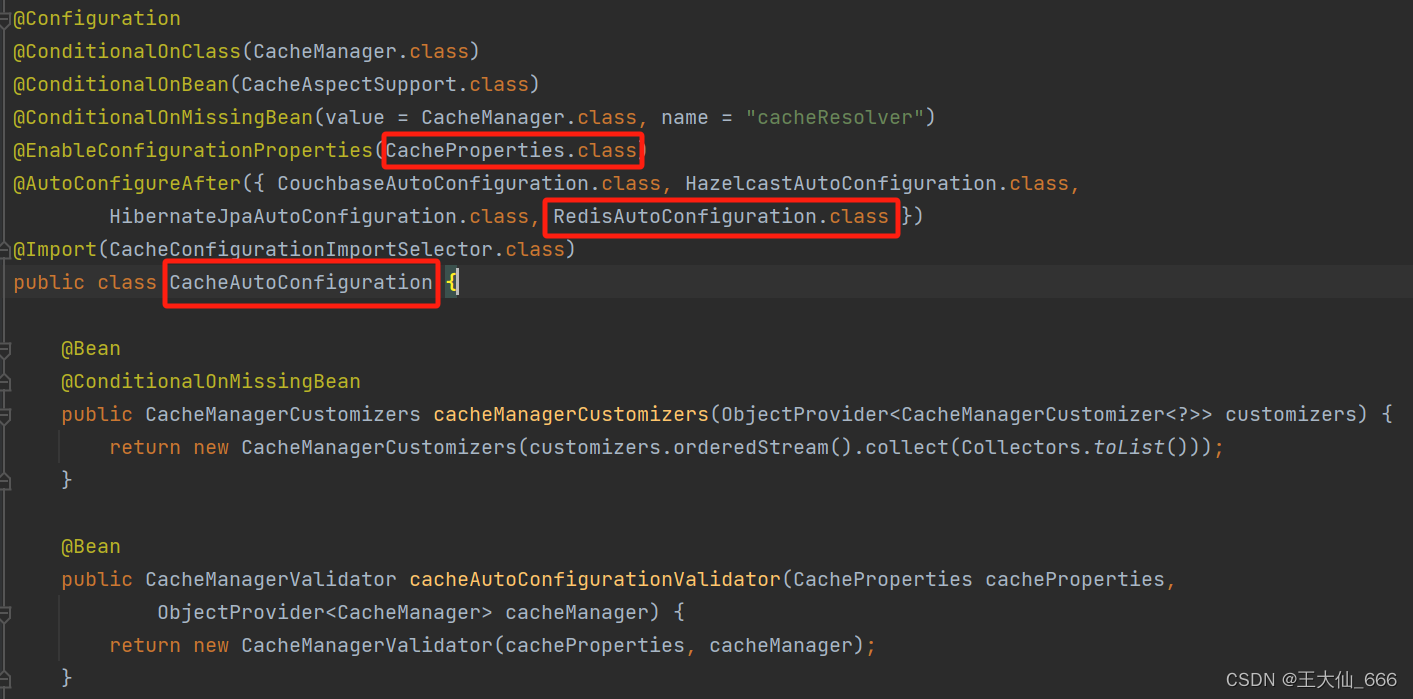
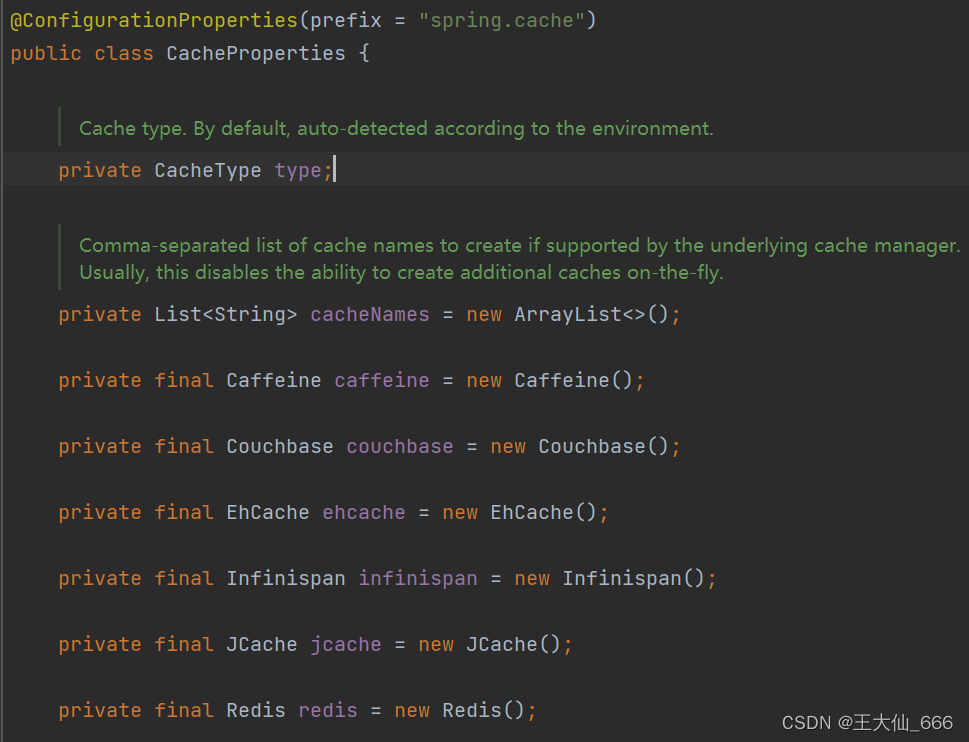
CacheProties.class告诉我们可以配置springCache的哪些信息
在配置文件中配置SpringCache使用的缓存类型等信息
spring.cache.type=redis
#spring.cache.cache-names=xx
spring.cache.redis.time-to-live=3600000
# 如果指定了前缀,就用指定的  如果没有就用缓存的名字作为前缀
#spring.cache.redis.key-prefix=CACHE_
spring.cache.redis.use-key-prefix=true
#是否缓存空值。防止缓存穿透
spring.cache.redis.cache-null-values=true
设置SpringCache存入redis的键值类型及将配置文件中设置的配置全都生效
    @Bean
    RedisCacheConfiguration redisCacheConfiguration(CacheProperties cacheProperties){
        RedisCacheConfiguration config = RedisCacheConfiguration.defaultCacheConfig();
        //config = config.entryTtl();
        config = config.serializeKeysWith(RedisSerializationContext.SerializationPair.fromSerializer(new StringRedisSerializer()));
        config = config.serializeValuesWith(RedisSerializationContext.SerializationPair.fromSerializer(new GenericJackson2JsonRedisSerializer()));

        CacheProperties.Redis redisProperties = cacheProperties.getRedis();
        //将配置文件中的所有配置都生效
        if (redisProperties.getTimeToLive() != null) {
            config = config.entryTtl(redisProperties.getTimeToLive());
        }
        if (redisProperties.getKeyPrefix() != null) {
            config = config.prefixKeysWith(redisProperties.getKeyPrefix());
        }
        if (!redisProperties.isCacheNullValues()) {
            config = config.disableCachingNullValues();
        }
        if (!redisProperties.isUseKeyPrefix()) {
            config = config.disableKeyPrefix();
        }
        return config;
    }
3.测试使用缓存
1).开启缓存功能 @EnableCaching

2).只需要使用注解就能完成缓存操作
@Cacheable: Triggers cache population. 触发将数据保存到缓存的操作
@CacheEvict: Triggers cache eviction.  触发将数据从缓存删除的操作
@CachePut: Updates the cache without interfering with the method execution.不影响方法执行更新缓存
@Caching: Regroups multiple cache operations to be applied on a method.组合以上多个操作
@CacheConfig: Shares some common cache-related settings at class-level.在类级别共享缓存的相同配置
4.原理
CacheAutoConfiguration -> RedisCacheConfiguration ->
自动配置RedisCacheManager-> 初始化所有的缓存 -> 每个缓存决定使用什么配置
-> 如果RedisCacheConfiguration有就用已有的,没有就用默认配置
-> 想改缓存的配置,只需要给容器中放一个RedisCacheConfiguration即可
-> 就会应用到当前RedisCacheManager管理的所有缓存分区中


 9516
9516

 被折叠的 条评论
为什么被折叠?
被折叠的 条评论
为什么被折叠?
 到【灌水乐园】发言


