


部署nginx+appache动静分离
虚拟机配置到vm1网卡 地址192.168.1.100
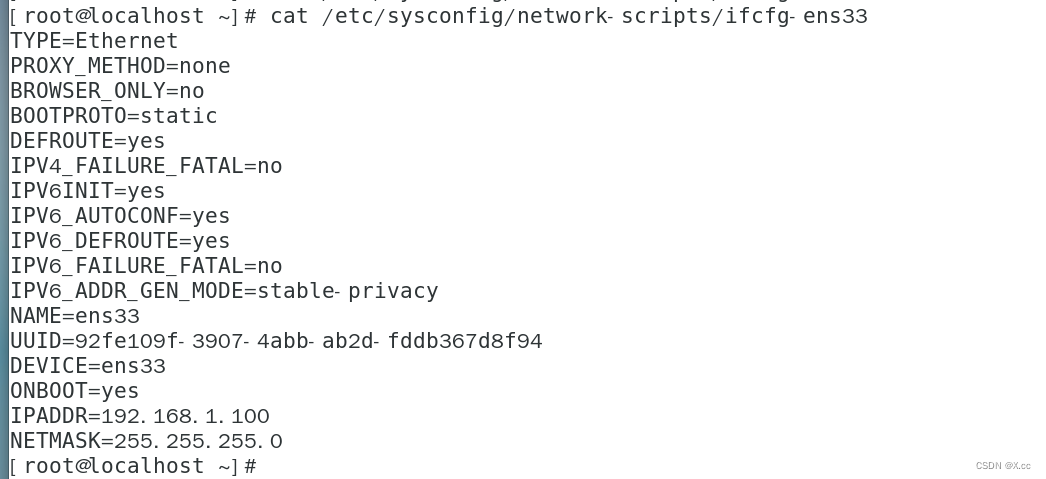
重启网卡 关闭安全linux 关闭防火墙、
挂载磁盘 配置yum源

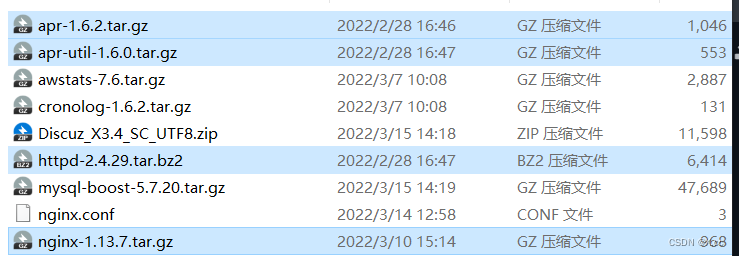
上传软件包 nginx和appache
配置appache服务
tar xf apr-1.6.2.tar.gz
tar xf apr-util-1.6.0.tar.gz
tar -xjf httpd-2.4.29.tar.bz2
mv apr-1.6.2 httpd-2.4.29/srclib/apr
mv apr-util-1.6.0 httpd-2.4.29/srclib/apr-util
安装服务
yum -y install \
gcc \
gcc-c++ \
make \
pcre-devel \
expat-devel \
perl \
zlib-devel \
zlib
cd httpd-2.4.29
./configure \
--prefix=/usr/local/httpd \
--enable-so \
--enable-rewrite \
--enable-charset-lite \
--enable-cgi
编译安装
make && make install
cp /usr/local/httpd/bin/apachectl /etc/init.d/httpd
vi /etc/init.d/httpd
# chkconfig: 35 85 21 //35级别自动运行 第85个启动 第21个关闭
# description: Apache is a World Wide Web server

chkconfig --add httpd
编辑配置文件
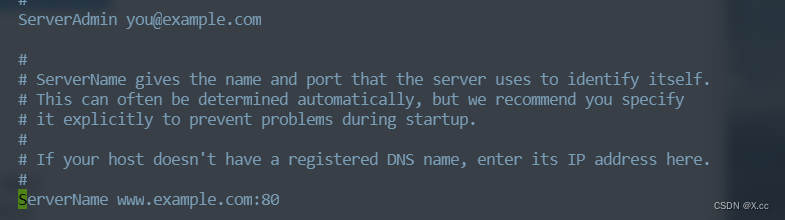
vi /usr/local/httpd/conf/httpd.conf
ServerName
ln -s /usr/local/httpd/conf/httpd.conf /etc/
ln -s /usr/local/httpd/bin/* /usr/local/bin/
systemctl stop firewalld.service
setenforce 0
service httpd start
netstat -anpt | grep 80
访问
安装nginx服务
yum -y install \
pcre-devel \
zlib-devel \
gcc \
gcc-c++
添加用户
useradd -M -s /sbin/nologin nginx
解压
tar xzvf nginx-1.13.7.tar.gz -C /usr/src/
进入目录
cd /usr/src/nginx-1.13.7
安装服务
./configure \
--prefix=/usr/local/nginx \
--user=nginx \
--group=nginx \
--with-http_stub_status_module
编译安装
make -j 4 && make install
软连接
ln -s /usr/local/nginx/sbin/nginx /usr/local/sbin/
检查nginx状态

编辑配置文件
vim /usr/local/httpd/conf/httpd.conf
找到这个位置

修改

修改监听地址

搜索server模块 按小n向下找

修改

重启服务
systemctl start httpd
nginx
查看状态

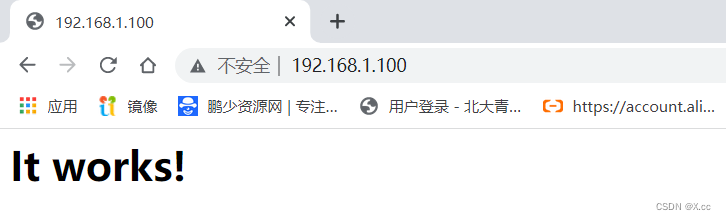
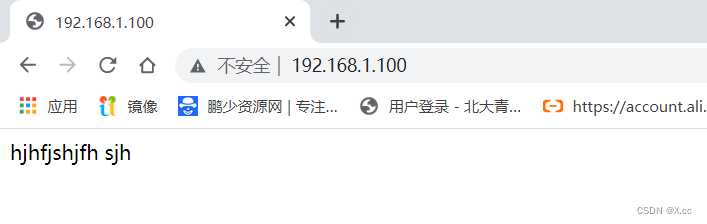
测试访问 192.168.1.100

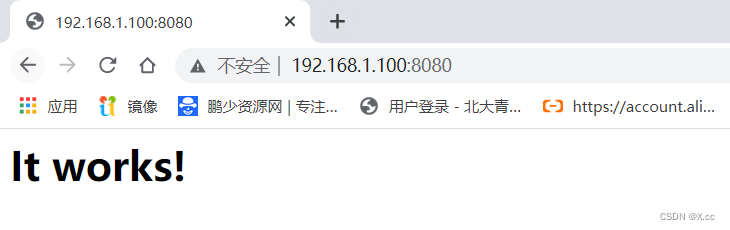
测试访问 192.168.1.100:8080
修改nginx配置文件
cd /usr/local/nginx/conf
备份一份
cp -p nginx.conf nginx.conf.bak
先测试php
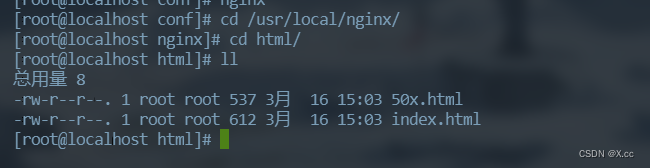
cd /usr/local/httpd/htdocs/
ll查看
删除文件
编辑配置文件
vim index.php

修改配置文件
vim /usr/local/httpd/conf/httpd.conf
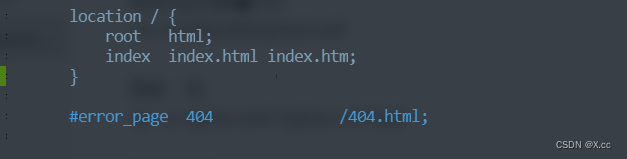
搜索index.html

修改

重启服务
systemctl start httpd
访问 192.168.1.100:8080

编辑配置文件
cd /usr/local/nginx/conf/
vim nginx.conf
找到这个位置
-------在location /下新增--------
location ~ \.php {
proxy_pass http://192.168.1.100:8080;
} //把PHP动态请求转给192.168.1.100

访问 http://192.168.1.100/index.php

修改nginx静态页面
vim index.html
重新插入

访问静态页面 192.168.1.100
访问动态页面 192.168.1.100/index.php

-------以上是动态分离配置------
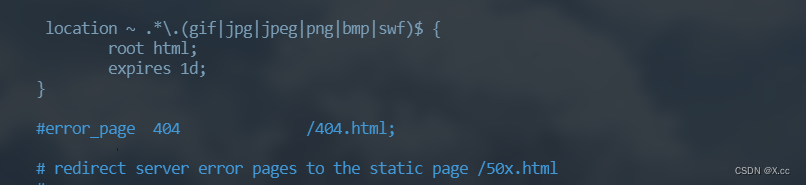
location ~ .*\.(gif|jpg|jpeg|png|bmp|swf)$ {
root html;
expires 1d;
} //这些静态内容从本地读取
修改配置文件
vim /usr/local/nginx/conf/nginx.conf
找到这个位置 在404上面插入

重启服务

上传图片

将图片复制到/usr/local/nginx/conf/

切换目录


编辑配置文件
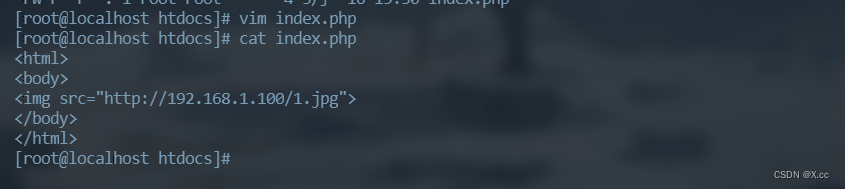
vim index.php
--------在动态服务器上的index.php中加入下面内容测试-----
<html>
<body>
<img src="http://192.168.1.100/1.jpg">
</body>
</html>

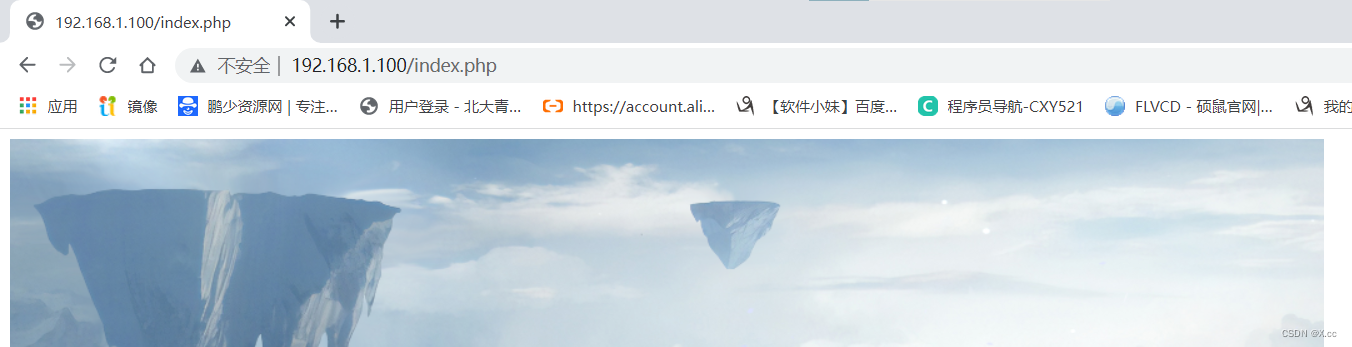
访问 192.168.1.100/index.php


 被折叠的 条评论
为什么被折叠?
被折叠的 条评论
为什么被折叠?
 到【灌水乐园】发言


