


前言
学习Java后端有一段时间了,最近实验室的官网需要重构,我搭了一个springboot+maven架子给给新入坑的同学使用,包括常见的shiro权限控制,验证码生成与使用,异常处理。跨域处理)。
1创建一个springboot项目
创建一个springboot项目,建立如下结构

2导入需要的依赖
我们先导入需要的依赖,让maven帮助我们导包,因为项目后期打算引入swagger,所以我把swagger的依赖也引入了。
    <dependency>
        <groupId>mysql</groupId>
        <artifactId>mysql-connector-java</artifactId>
        <version>8.0.15</version>
    </dependency>
    <dependency>
        <groupId>com.mchange</groupId>
        <artifactId>c3p0</artifactId>
        <version>0.9.5.4</version>
    </dependency>

    <dependency>
        <groupId>com.alibaba</groupId>
        <artifactId>druid</artifactId>
        <version>1.1.10</version>
    </dependency>

    <dependency>
        <groupId>org.springframework.boot</groupId>
        <artifactId>spring-boot-starter-jdbc</artifactId>
    </dependency>

    <!-- 日志-->
    <dependency>
        <groupId>org.slf4j</groupId>
        <artifactId>slf4j-api</artifactId>
        <version>1.7.12</version>
    </dependency>

    <!-- lombok -->
    <dependency>
        <groupId>org.projectlombok</groupId>
        <artifactId>lombok</artifactId>
    </dependency>

    <!-- 测试-->
    <dependency>
        <groupId>org.jmock</groupId>
        <artifactId>jmock-junit4</artifactId>
        <version>2.8.2</version>
    </dependency>
    <dependency>
        <groupId>junit</groupId>
        <artifactId>junit</artifactId>
        <scope>test</scope>
    </dependency>
    <dependency>
        <groupId>org.apache.commons</groupId>
        <artifactId>commons-lang3</artifactId>
        <version>3.0</version>
    </dependency>

    <!-- swagger-->
    <dependency>
        <groupId>io.springfox</groupId>
        <artifactId>springfox-swagger-ui</artifactId>
        <version>2.8.0</version>
    </dependency>
    <dependency>
        <groupId>io.springfox</groupId>
        <artifactId>springfox-swagger2</artifactId>
        <version>2.8.0</version>
    </dependency>
    <dependency>
        <groupId>com.github.xiaoymin</groupId>
        <artifactId>swagger-bootstrap-ui</artifactId>
        <version>1.9.5</version>
    </dependency>

    <!-- kaptcha -->
    <dependency>
        <groupId>com.github.penggle</groupId>
        <artifactId>kaptcha</artifactId>
        <version>2.3.2</version>
    </dependency>

    <!--shiro-->
    <dependency>
        <groupId>org.apache.shiro</groupId>
        <artifactId>shiro-core</artifactId>
        <version>1.2.3</version>
    </dependency>
    <dependency>
        <groupId>org.apache.shiro</groupId>
        <artifactId>shiro-spring</artifactId>
        <version>1.2.3</version>
    </dependency>
    <dependency>
        <groupId>org.apache.shiro</groupId>
        <artifactId>shiro-ehcache</artifactId>
        <version>1.4.0</version>
    </dependency>

    <dependency>
        <groupId>com.google.guava</groupId>
        <artifactId>guava</artifactId>
        <version>28.0-jre</version>
    </dependency>
</dependencies>
3配置yml文件
springboot新建的项目里面是application.properties文件但是我个人更喜欢yml文件,把properties的后缀改为yml即可
spring:
  datasource:
    url: jdbc:mysql://127.0.0.1:3306/weily?useUnicode=true&charactorEncoding=utf8&useSSL=false&zeroDateTimeBehavior=convertToNull&serverTimezone=GMT%2B8
    username:
    password:
    type: com.alibaba.druid.pool.DruidDataSource

#图形验证码
kaptcha:
  border: "yes"
  border.color: 105,179,90
  textproducer:
    font:
      color: blue
      size: 30
      names: 宋体,楷体,微软雅黑
    char:
      length: 4
  image:
    width: 120
    height: 67
  session:
    key: code
    date: 10

server:
  port: 8080
  servlet:
    context-path: /weily

#mybatis
mybatis:
  type-aliases-package: com.website.weily.dao
  mapper-locations: classpath:mapper/*.xml
  config-location: classpath:mybatis-config.xml


#shiro
shiro:
  hashedCredentialsMatcher:
    hashAlgorithmName: md5
    hashIterations: 2
  shiroFilter:
    loginUrl: /user/authc
    unauthorizedUrl: /user/authc
    filterChainDefinitionMap:
      anon:
        image: /img/**
        login: /user/login
        static: /static/
        html: /doc.html
        resources: /swagger-resources
        docs: /v2/api-docs
        ext: /v2/api-docs-ext
        webjars: /webjars/**
      authc:
        other: /**
把mybatis和数据库相关的配置写在配置文件里面,把验证码和shiro需要用到的数据也写在里面,其中mybatis的config文件写在mybatis-config.xml文件中,内容如下
<?xml version="1.0" encoding="UTF-8" ?>
<!DOCTYPE configuration
        PUBLIC "-//mybatis.org//DTD Config 3.0//EN"
        "http://mybatis.org/dtd/mybatis-3-config.dtd">
<configuration>

    <!--配置全局属性-->
    <settings>
        <!--使用jdbc的getGeneratedKeys获取数据库自增主键值-->
        <setting name="useGeneratedKeys" value="true"/>

        <!--使用列标签替换列别名 默认true-->
        <setting name="useColumnLabel" value="true"/>

        <!--开启驼峰命名转换-->
        <setting name="mapUnderscoreToCamelCase" value="true"/>
    </settings>
</configuration>
我们现在可以测试一下连接是否正常,在dao层写一个getbyName的方法,测试一下,数据库加上一条数据,这里只是做测试用,随便写几个字段就好

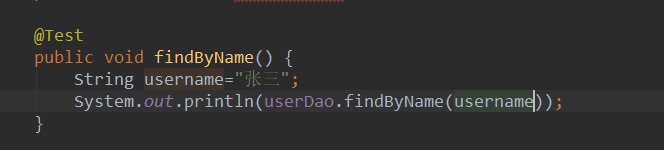
测试类写一个测试方法运行

我们可以看到查出了名为张三的user信息,证明连接数据库成功了,这里需要注意的是要在dao层对应的接口上@Mapper注解扫描这个dao或者在Application中使用@MapperScan(“com.website.weily.dao”)注解扫描整个dao层
4vo类,util类,异常处理类,异常码,常量等的编写
这一步主要是看项目用到什么,不同项目的差异比较大,这里就不做赘述了,只展示下数据返回类的和异常处理,其它部分有兴趣的可以去看源代码。
ap返回数据工具类
public final class ResultUtil {

    public static ResultVo success(Object data) {
        ResultVo result = new ResultVo();
        result.setCode(ErrorCodeEnum.SUCCESS.getCode());
        result.setMsg(ErrorCodeEnum.SUCCESS.getMsg());
        result.setData(data);
        return result;
    }

    public static ResultVo success() {
        return success(null);
    }

    public static ResultVo error(String code, String msg) {
        ResultVo result = new ResultVo();
        result.setCode(code);
        result.setMsg(msg);
        result.setData(null);
        return result;
    }

    public static ResultVo error(ErrorCodeEnum errorCodeEnum) {
        ResultVo result = new ResultVo();
        result.setCode(errorCodeEnum.getCode());
        result.setMsg(errorCodeEnum.getMsg());
        result.setData(null);
        return result;
    }
}
写这个类主要是为了让我们得到的数据都是规范的格式,消息码,信息和数据。
全局异常捕捉
@Slf4j
@ControllerAdvice
public class ExceptionHandle {


    /**
     * 自定义异常
     * @param baseException
     * @return
     */
    @ExceptionHandler(value = BusinessException.class)
    @ResponseBody
    public ResultVo handle(BusinessException baseException) {
        log.error("ExceptionHandle#handle(BusinessException) : code={}, msg={}, e={}",
                baseException.getCode(), baseException.getMessage(), baseException);
        return ResultUtil.error(baseException.getCode(),baseException.getMessage());
    }


    /**
     * 未授权异常
     * @param unauthenticatedException
     * @return
     */
    @ExceptionHandler(value = UnauthenticatedException.class)
    @ResponseBody
    public ResultVo handle(UnauthenticatedException unauthenticatedException) {
        log.error("ExceptionHandle#handle(UnauthorizedException) : msg={}, e={}",
                unauthenticatedException.getMessage(),unauthenticatedException);

        return ResultUtil.error(ErrorCodeEnum.NOT_HAVE_PERMISSION);
    }


    /**
     * 其它异常处理
     * @param e
     * @return
     */
    @ExceptionHandler(value = Exception.class)
    @ResponseBody
    public ResultVo handle(Exception e) {
        log.error("【系统异常】{}", e);
        return ResultUtil.error(ErrorCodeEnum.UNKNOWN_ERROR);
    }
}
5验证码的生成与使用
我们使用@Value注解读取之前写在yml文件中的验证码配置
验证码生成类
@Component
public class KaptchaConfiguration {

    @Value("${kaptcha.border}")
    private String border;

    @Value("${kaptcha.border.color}")
    private String borderColor;

    @Value("${kaptcha.textproducer.font.color}")
    private String textproducerFontColor;

    @Value("${kaptcha.textproducer.font.size}")
    private String textproducerFontSize;

    @Value("${kaptcha.textproducer.font.names}")
    private String textproducerFontNames;

    @Value("${kaptcha.textproducer.char.length}")
    private String textproducerCharLength;

    @Value("${kaptcha.image.width}")
    private String imageWidth;

    @Value("${kaptcha.image.height}")
    private String imageHeight;

    @Value("${kaptcha.session.key}")
    private String sessionKey;

    @Value("${kaptcha.session.date}")
    private String sessionDate;


    @Bean
    public DefaultKaptcha getDefaultKapcha() {
        DefaultKaptcha defaultKaptcha = new DefaultKaptcha();
        Properties properties = new Properties();
        properties.setProperty("kaptcha.border", border);
        properties.setProperty("kaptcha.border.color", borderColor);
        properties.setProperty("kaptcha.textproducer.font.color", textproducerFontColor);
        properties.setProperty("kaptcha.textproducer.font.size", textproducerFontSize);
        properties.setProperty("kaptcha.textproducer.font.names", textproducerFontNames);
        properties.setProperty("kaptcha.textproducer.char.length", textproducerCharLength);
        properties.setProperty("kaptcha.image.width", imageWidth);
        properties.setProperty("kaptcha.image.height", imageHeight);
        properties.setProperty("kaptcha.session.key", sessionKey);
        properties.setProperty("kaptcha.session.date",sessionDate);

        Config config = new Config(properties);
        defaultKaptcha.setConfig(config);
        return defaultKaptcha;
    }
}
我们再在controller中写一个获取验证码的api接口
@Slf4j
@RestController
@RequestMapping(value = "/img")
public class ImageController {

    @Autowired
    private DefaultKaptcha defaultKaptcha;

    @GetMapping(value = "/code",produces = "image/jpg")
    public void setDefaultKaptcha(HttpServletRequest request, HttpServletResponse response){
        // 定义字节数组
        byte[] captchaChallengeAsJpeg;
        // 定义字节输出流
        ByteArrayOutputStream jpegOutputStream = new ByteArrayOutputStream();

        // 生成四位的验证码
        String createText = defaultKaptcha.createText();
        HttpSession session = request.getSession();
        // 将验证码保存到session中
        session.setAttribute(SessionConstant.IMAGE,createText);
        // 生成图形验证码
        BufferedImage challenge = defaultKaptcha.createImage(createText);
        // 转为byte并放在字节输出数组
        try {
            ImageIO.write(challenge,"jpg",jpegOutputStream);
        } catch (IOException e){
            log.error("ImageController#setDefaultKaptcha: image create error,e={}",e);
        }

        /**
         * 定义response输出类型为image/jpeg类型,使用response输出流输出图片的byte数组
         */
        captchaChallengeAsJpeg = jpegOutputStream.toByteArray();
        response.setHeader("Cache-Control", "no-store");
        response.setHeader("Pragma", "no-cache");
        response.setDateHeader("Expires", 0);
        response.setContentType("image/jpeg");
        try {
            ServletOutputStream servletOutputStream = response.getOutputStream();
            servletOutputStream.write(captchaChallengeAsJpeg);
            servletOutputStream.flush();
            servletOutputStream.close();
        } catch (IOException e) {
            log.error("ImageController#defaultKaptcha: 输出验证码失败, e={}. ", e);
        }
    }


}
启动项目,打开postman,输入url地址
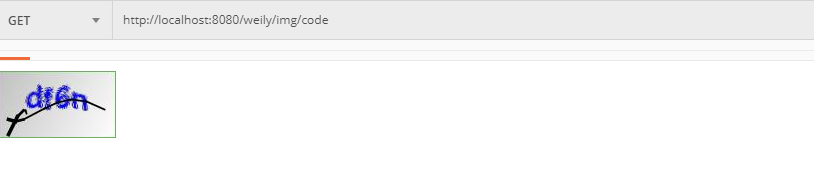
我们可以看到已经生成验证码了
6shiro的配置
创建一个AuthRealm类用来自定义realm,认证,授权,缓存清理
public class AuthRealm extends AuthorizingRealm {

    @Autowired
    private UserDao userDao;


    /**
     * 为用户授权
     * @param principals
     * @return
     */
    @Override
    protected AuthorizationInfo doGetAuthorizationInfo(PrincipalCollection principals) {

        //根据前端传入的用户信息封装未user对象
        User user = (User) principals.getPrimaryPrincipal();
        //获取前端传入的用户名
        String username = user.getUsername();
        //根据用户名查询数据库中对应的记录
        User user1 = userDao.findByName(username);
        //如果数据库中有该用户名对应的记录,就进行授权操作
        SimpleAuthorizationInfo info = new SimpleAuthorizationInfo();
        if (user1 != null) {
            UserRole userRole = user.getUserRole();
            Role role = null;
            if (userRole != null) {
                role = userRole.getRole();
            }
            if (role != null) {
                //为用户授予角色
                info.addRole(role.getName());

                //用户授予权限
                Set<String> permissionCollection = new HashSet<>();
                List<RolePermission> rolePermissionList = role.getRolePermissionList();
                if (rolePermissionList != null) {
                    for (RolePermission rolePermission : rolePermissionList) {
                        if (rolePermission != null) {
                            Permission permission = rolePermission.getPermission();
                            if (permission != null) {
                                permissionCollection.add(permission.getName());
                            }
                        }
                    }
                    info.addStringPermissions(permissionCollection);
                }
            }
            return info;
        } else {
            return info;
        }
    }

    @Override
    protected AuthenticationInfo doGetAuthenticationInfo(AuthenticationToken token) throws AuthenticationException {
        //token携带用户信息
        UsernamePasswordToken usernamePasswordToken = (UsernamePasswordToken) token;
        //获取用户名
        String username = usernamePasswordToken.getUsername();
        //根据用户名查询数据库中对应记录
        User user = userDao.findByName(username);
        if (user == null){
            throw new AuthenticationException();
        }

        //当前realm对象
        String realmName = getName();
        //封装用户信息,构建AuthenticationInfo对象并返回
        AuthenticationInfo authenticationInfo = new SimpleAuthenticationInfo(user,user.getPassword(),ByteSource.Util.bytes(user.getSalt()),realmName);
        return authenticationInfo;
    }

    /**
     * 重写方法,清除当前用户的的 授权缓存
     *
     * @param principals
     */
    @Override
    public void clearCachedAuthorizationInfo(PrincipalCollection principals) {
        super.clearCachedAuthorizationInfo(principals);
    }

    /**
     * 重写方法,清除当前用户的 认证缓存
     *
     * @param principals
     */
    @Override
    public void clearCachedAuthenticationInfo(PrincipalCollection principals) {
        super.clearCachedAuthenticationInfo(principals);
    }

    @Override
    public void clearCache(PrincipalCollection principals) {
        super.clearCache(principals);
    }
}
shiro的配置
@Configuration
public class ShiroConfiguration {

    /**
     * 加密方式
     */
    @Value("${shiro.hashedCredentialsMatcher.hashAlgorithmName}")
    private String hashAlgorithmName;

    /**
     * 加密迭代次数
     */
    @Value("${shiro.hashedCredentialsMatcher.hashIterations}")
    private int hashIterations;

    /**
     * 登陆url
     */
    @Value("${shiro.shiroFilter.loginUrl}")
    private String loginUrl;

    /**
     * 认证失败的url
     */
    @Value("${shiro.shiroFilter.unauthorizedUrl}")
    private String unauthorizedUrl;

    /**
     * 放行image验证码
     */
    @Value("${shiro.shiroFilter.filterChainDefinitionMap.anon.image}")
    private String image;


    /**
     * 放行登陆方法
     */
    @Value("${shiro.shiroFilter.filterChainDefinitionMap.anon.login}")
    private String login;

    /**
     * 放行静态资源
     */
    @Value("${shiro.shiroFilter.filterChainDefinitionMap.anon.static}")
    private String staticStr;

    /**
     * 需要认证的资源
     */
    @Value("${shiro.shiroFilter.filterChainDefinitionMap.authc.other}")
    private String other;

    /**
     * 放行swagger
     */
    @Value("${shiro.shiroFilter.filterChainDefinitionMap.anon.html}")
    private String html;

    @Value("${shiro.shiroFilter.filterChainDefinitionMap.anon.resources}")
    private String resources;

    @Value("${shiro.shiroFilter.filterChainDefinitionMap.anon.docs}")
    private String docs;

    @Value("${shiro.shiroFilter.filterChainDefinitionMap.anon.ext}")
    private String ext;

    @Value("${shiro.shiroFilter.filterChainDefinitionMap.anon.webjars}")
    private String webjars;


    /**
     * 密码校验规则HashedCredentialsMatcher
     * 这个类是为了对密码进行编码的 ,
     * 防止密码在数据库里明码保存 , 当然在登陆认证的时候 ,
     * 这个类也负责对form里输入的密码进行编码
     * 处理认证匹配处理器:如果自定义需要实现继承HashedCredentialsMatcher
     */
    @Bean("hashedCredentialsMatcher")
    public HashedCredentialsMatcher hashedCredentialsMatcher() {
        HashedCredentialsMatcher credentialsMatcher = new HashedCredentialsMatcher();
        //指定加密方式为MD5
        credentialsMatcher.setHashAlgorithmName(hashAlgorithmName);
        //加密次数
        credentialsMatcher.setHashIterations(hashIterations);
        credentialsMatcher.setStoredCredentialsHexEncoded(true);
        return credentialsMatcher;
    }


    /**
     * @param matcher
     * @return
     */
    @Bean("authRealm")
    @DependsOn("lifecycleBeanPostProcessor")
    public AuthRealm authRealm(@Qualifier("hashedCredentialsMatcher") HashedCredentialsMatcher matcher) {
        AuthRealm authRealm = new AuthRealm();
        authRealm.setCredentialsMatcher(matcher);
        authRealm.setCachingEnabled(true);
        //启用授权缓存,即缓存AuthorizationInfo信息,默认false
        authRealm.setAuthorizationCachingEnabled(true);
        //缓存AuthorizationInfo信息的缓存名称  在ehcache-shiro.xml中有对应缓存的配置
        authRealm.setAuthorizationCacheName("authorizationCache");
        return authRealm;
    }


    /**
     * 定义安全管理器securityManager,注入自定义的realm
     * @param authRealm
     * @return
     */
    @Bean("securityManager")
    public SecurityManager securityManager(@Qualifier("authRealm") AuthRealm authRealm) {
        DefaultWebSecurityManager manager = new DefaultWebSecurityManager();
        //配置 ehcache缓存管理器
        manager.setCacheManager(ehCacheManager());
        manager.setRealm(authRealm);
        return manager;
    }

    /**
     * 定义shiroFilter过滤器并注入securityManager
     * @param manager
     * @return
     */
    @Bean("shiroFilter")
    public ShiroFilterFactoryBean shiroFilter(@Qualifier("securityManager") SecurityManager manager) {
        ShiroFilterFactoryBean bean = new ShiroFilterFactoryBean();
        //设置securityManager
        bean.setSecurityManager(manager);
        //设置登录页面
        bean.setLoginUrl(loginUrl);
        //设置未授权跳转的页面
        bean.setUnauthorizedUrl(unauthorizedUrl);


        //定义过滤器
        LinkedHashMap<String, String> filterChainDefinitionMap = new LinkedHashMap<>();
        filterChainDefinitionMap.put(image, "anon");
        filterChainDefinitionMap.put(login, "anon");
        filterChainDefinitionMap.put(staticStr, "anon");
        //放行测试数据
        filterChainDefinitionMap.put("/test/**", "anon");

        // 放行swagger
        filterChainDefinitionMap.put(html, "anon");
        filterChainDefinitionMap.put(resources, "anon");
        filterChainDefinitionMap.put(docs, "anon");
        filterChainDefinitionMap.put(ext, "anon");
        filterChainDefinitionMap.put(webjars, "anon");

        //需要登录访问的资源 , 一般将/**放在最下边
        filterChainDefinitionMap.put(other, "authc");

        bean.setFilterChainDefinitionMap(filterChainDefinitionMap);
        return bean;
    }

    /**
     * Spring的一个bean , 由Advisor决定对哪些类的方法进行AOP代理 .
     * @return
     */
    @Bean
    public DefaultAdvisorAutoProxyCreator defaultAdvisorAutoProxyCreator() {
        DefaultAdvisorAutoProxyCreator creator = new DefaultAdvisorAutoProxyCreator();
        creator.setProxyTargetClass(true);
        return creator;
    }

    /**
     * 配置shiro跟spring的关联
     * @param securityManager
     * @return
     */
    @Bean
    public AuthorizationAttributeSourceAdvisor authorizationAttributeSourceAdvisor(@Qualifier("securityManager") SecurityManager securityManager) {
        AuthorizationAttributeSourceAdvisor advisor = new AuthorizationAttributeSourceAdvisor();
        advisor.setSecurityManager(securityManager);
        return advisor;
    }

    /**
     * lifecycleBeanPostProcessor是负责生命周期的 , 初始化和销毁的类
     * (可选)
     */
    @Bean("lifecycleBeanPostProcessor")
    public static LifecycleBeanPostProcessor lifecycleBeanPostProcessor() {
        return new LifecycleBeanPostProcessor();
    }

    /**
     * shiro缓存管理器;
     * 需要添加到securityManager中
     * @return
     */
    @Bean
    public EhCacheManager ehCacheManager(){
        EhCacheManager cacheManager = new EhCacheManager();
        cacheManager.setCacheManagerConfigFile("classpath:ehcache-shiro.xml");
        return cacheManager;
    }
}
usercontroler
@RestController
@RequestMapping(value = "/user")
@Slf4j
public class UserController {

    @Autowired
    private UserDao userDao;
    /**
     * 用户未登录授权提示
     */
    @GetMapping(value = "/authc")
    public ResultVo authc() {
        throw new BusinessException(ErrorCodeEnum.USER_NOT_LOGIN);
    }

    /**
     * 登录
     */
    @PostMapping(value = "/login")
    public ResultVo login(@RequestParam(value = "username") String username,
                          @RequestParam(value = "password") String password,
                          @RequestParam(value = "imageCode") String imageCode,
                          HttpServletRequest request) {
        if (StringUtils.isBlank(username) || StringUtils.isBlank(password) || StringUtils.isBlank(imageCode)) {
            log.error("UserController#login: param is null. username={},imageCode={}, request={}. ",
                    username, imageCode, request);
            throw new BusinessException(ErrorCodeEnum.DATA_NULL);
        }

        boolean checkCode = SessionUtil.checkImageCode(imageCode,request);
        if (!checkCode) {
            log.error("UserController#login: param is null. username={},imageCode={}, request={}. ",
                    username, imageCode, request);
            throw new BusinessException(ErrorCodeEnum.IMAGE_CODE_ERROR);
        }

        LoginVo loginVo = new LoginVo();

        //用户基本信息
        Subject subject = SecurityUtils.getSubject();
        UsernamePasswordToken usernamePasswordToken = new UsernamePasswordToken(username,password);
        User user = null;

        try {
            //登录,即身份验证
            subject.login(usernamePasswordToken);
            if (subject.isAuthenticated()) {
                user = (User) subject.getPrincipal();
                request.getSession().setAttribute(SessionConstant.USER,user);
            }
        } catch (UnknownAccountException e) {
            throw new BusinessException(ErrorCodeEnum.NO_USER);
        } catch (IncorrectCredentialsException e) {
            throw new BusinessException(ErrorCodeEnum.PASSWORD_ERROR);
        } catch (AuthenticationException e) {
            log.error("其它错误");
            throw new BusinessException(ErrorCodeEnum.NO_USER);
        }
        loginVo.setUser(user);

        return ResultUtil.success(user);
    }

    /**
     * 此方法用来测试shiro是否配置成功
     * @param id
     * @return
     */
    @PostMapping(value = "/update")
    @RequiresRoles(value = {ShiroConstant.ADMINISTRATOR},logical = Logical.OR)
    public ResultVo update(@RequestParam(value = "id")Long id) {
        boolean flag = userDao.update(id);
        return ResultUtil.success(flag);
    }
}
在usescontroller中写下这几个方法就可以开始测试了,需要注意的是登录是由shiro帮助我们完成的不需要在dao层和service层写对应方法,测试的update方法只是为了从简所以也没写service层,各位自己开发的时候驾驶应该严格按照mvc模式,好了打开postman我们开始测试。
首先不登陆,不登陆shiro会为我们转到use/authc这个方法,我们可以看到未登录提示,

然后验证码错误,我们可以看到验证码验证是正常的。

正常登录,我们可以看到张三这条数据的权限是组长,当然用户的密码和salt值因为只是测试的关系我没去管它,实际中应该忽略掉返回的。update这个方法是需要administrator也就是管理员才有权限的,我们用张三的账号访问试一试。


我们可以看到权限不足的提示,我们在数据库中将张三改为管理员

请求成功,证明我们的shiro配置是成功的。
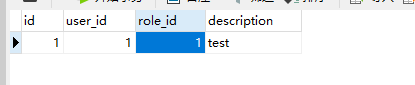
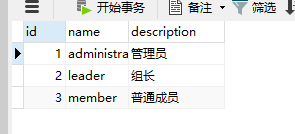
附:数据库权限表(这些表仅做测试用,所以有些不规范。)
user_role
role
role_permission

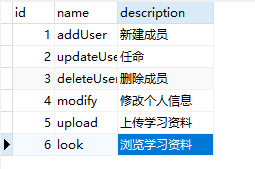
permission
7跨域
在每个api前加上
@CrossOrigin(allowCredentials = "true",maxAge = 3600)
即可解决跨域问题,当然也可以自己写跨域处理类。
最后附上代码链接
源码地址:https://github.com/yjzxianyu/weilywebsite


 1078
1078


 被折叠的 条评论
为什么被折叠?
被折叠的 条评论
为什么被折叠?
 到【灌水乐园】发言


