


final boolean logSlowDispatch = (slowDispatchThresholdMs > 0);
final boolean needStartTime = logSlowDelivery || logSlowDispatch;
final boolean needEndTime = logSlowDispatch;
if (traceTag != 0 && Trace.isTagEnabled(traceTag)) {
Trace.traceBegin(traceTag, msg.target.getTraceName(msg));
}
final long dispatchStart = needStartTime ? SystemClock.uptimeMillis() : 0;
final long dispatchEnd;
try {
msg.target.dispatchMessage(msg);
dispatchEnd = needEndTime ? SystemClock.uptimeMillis() : 0;
} finally {
if (traceTag != 0) {
Trace.traceEnd(traceTag);
}
}
if (logSlowDelivery) {
if (slowDeliveryDetected) {
if ((dispatchStart - msg.when) <= 10) {
Slog.w(TAG, “Drained”);
slowDeliveryDetected = false;
}
} else {
if (showSlowLog(slowDeliveryThresholdMs, msg.when, dispatchStart, “delivery”,
msg)) {
// Once we write a slow delivery log, suppress until the queue drains.
slowDeliveryDetected = true;
}
}
}
if (logSlowDispatch) {
showSlowLog(slowDispatchThresholdMs, dispatchStart, dispatchEnd, “dispatch”, msg);
}
if (logging != null) {
logging.println("<<<<< Finished to " + msg.target + " " + msg.callback);
}
// Make sure that during the course of dispatching the
// identity of the thread wasn’t corrupted.
final long newIdent = Binder.clearCallingIdentity();
if (ident != newIdent) {
Log.wtf(TAG, “Thread identity changed from 0x”
-
Long.toHexString(ident) + " to 0x"
-
Long.toHexString(newIdent) + " while dispatching to "
-
msg.target.getClass().getName() + " "
-
msg.callback + " what=" + msg.what);
}
msg.recycleUnchecked();
}
}
…
MessageQueue.java的next方法
…
Message next() {
// Return here if the message loop has already quit and been disposed.
// This can happen if the application tries to restart a looper after quit
// which is not supported.
final long ptr = mPtr;
if (ptr == 0) {
return null;
}
int pendingIdleHandlerCount = -1; // -1 only during first iteration
int nextPollTimeoutMillis = 0;
for (;😉 {
if (nextPollTimeoutMillis != 0) {
Binder.flushPendingCommands();
}
nativePollOnce(ptr, nextPollTimeoutMillis);
synchronized (this) {
// Try to retrieve the next message. Return if found.
final long now = SystemClock.uptimeMillis();
Message prevMsg = null;
Message msg = mMessages;
if (msg != null && msg.target == null) {
// Stalled by a barrier. Find the next asynchronous message in the queue.
do {
prevMsg = msg;
msg = msg.next;
} while (msg != null && !msg.isAsynchronous());
}
if (msg != null) {
if (now < msg.when) {
// Next message is not ready. Set a timeout to wake up when it is ready.
nextPollTimeoutMillis = (int) Math.min(msg.when - now, Integer.MAX_VALUE);
} else {
// Got a message.
mBlocked = false;
if (prevMsg != null) {
prevMsg.next = msg.next;
} else {
mMessages = msg.next;
}
msg.next = null;
if (DEBUG) Log.v(TAG, "Returning message: " + msg);
msg.markInUse();
return msg;
}
} else {
// No more messages.
nextPollTimeoutMillis = -1;
}
// Process the quit message now that all pending messages have been handled.
if (mQuitting) {
dispose();
return null;
}
// If first time idle, then get the number of idlers to run.
// Idle handles only run if the queue is empty or if the first message
// in the queue (possibly a barrier) is due to be handled in the future.
if (pendingIdleHandlerCount < 0
&& (mMessages == null || now < mMessages.when)) {
pendingIdleHandlerCount = mIdleHandlers.size();
}
if (pendingIdleHandlerCount <= 0) {
// No idle handlers to run. Loop and wait some more.
mBlocked = true;
continue;
}
if (mPendingIdleHandlers == null) {
mPendingIdleHandlers = new IdleHandler[Math.max(pendingIdleHandlerCount, 4)];
}
mPendingIdleHandlers = mIdleHandlers.toArray(mPendingIdleHandlers);
}
// Run the idle handlers.
// We only ever reach this code block during the first iteration.
for (int i = 0; i < pendingIdleHandlerCount; i++) {
final IdleHandler idler = mPendingIdleHandlers[i];
mPendingIdleHandlers[i] = null; // release the reference to the handler
boolean keep = false;
try {
keep = idler.queueIdle();
} catch (Throwable t) {
Log.wtf(TAG, “IdleHandler threw exception”, t);
}
if (!keep) {
synchronized (this) {
mIdleHandlers.remove(idler);
}
}
}
// Reset the idle handler count to 0 so we do not run them again.
pendingIdleHandlerCount = 0;
// While calling an idle handler, a new message could have been delivered
// so go back and look again for a pending message without waiting.
nextPollTimeoutMillis = 0;
}
}
…
回答二:主线程的消息循环机制是什么?
事实上,会在进入死循环之前便创建了新binder线程,在代码ActivityThread.main()中:
public static void main(String[] args) {
//创建Looper和MessageQueue对象,用于处理主线程的消息
Looper.prepareMainLooper();
//创建ActivityThread对象
ActivityThread thread = new ActivityThread();
//建立Binder通道 (创建新线程)
thread.attach(false);
Looper.loop(); //消息循环运行
throw new RuntimeException(“Main thread loop unexpectedly exited”);
}
Activity的生命周期都是依靠主线程的Looper.loop,当收到不同Message时则采用相应措施:一旦退出消息循环,那么你的程序也就可以退出了。 从消息队列中取消息可能会阻塞,取到消息会做出相应的处理。如果某个消息处理时间过长,就可能会影响UI线程的刷新速率,造成卡顿的现象。
thread.attach(false)方法函数中便会创建一个Binder线程(具体是指ApplicationThread,Binder的服务端,用于接收系统服务AMS发送来的事件),该Binder线程通过Handler将Message发送给主线程。「Activity 启动过程」
比如收到msg=H.LAUNCH_ACTIVITY,则调用ActivityThread.handleLaunchActivity()方法,最终会通过反射机制,创建Activity实例,然后再执行Activity.onCreate()等方法;
再比如收到msg=H.PAUSE_ACTIVITY,则调用ActivityThread.handlePauseActivity()方法,最终会执行Activity.onPause()等方法。
主线程的消息又是哪来的呢?当然是App进程中的其他线程通过Handler发送给主线程
system_server进程
system_server进程是系统进程,java framework框架的核心载体,里面运行了大量的系统服务,比如这里提供ApplicationThreadProxy(简称ATP),ActivityManagerService(简称AMS),这个两个服务都运行在system_server进程的不同线程中,由于ATP和AMS都是基于IBinder接口,都是binder线程,binder线程的创建与销毁都是由binder驱动来决定的。
App进程
App进程则是我们常说的应用程序,主线程主要负责Activity/Service等组件的生命周期以及UI相关操作都运行在这个线程; 另外,每个App进程中至少会有两个binder线程 ApplicationThread(简称AT)和ActivityManagerProxy(简称AMP),除了图中画的线程,其中还有很多线程
Binder
Binder用于不同进程之间通信,由一个进程的Binder客户端向另一个进程的服务端发送事务,比如图中线程2向线程4发送事务;而handler用于同一个进程中不同线程的通信,比如图中线程4向主线程发送消息。

image
结合图说说Activity生命周期,比如暂停Activity,流程如下:
1.线程1的AMS中调用线程2的ATP;(由于同一个进程的线程间资源共享,可以相互直接调用,但需要注意多线程并发问题)
2.线程2通过binder传输到App进程的线程4;
3.线程4通过handler消息机制,将暂停Activity的消息发送给主线程;
4.主线程在looper.loop()中循环遍历消息,当收到暂停Activity的消息时,便将消息分发给 ActivityThread.H.handleMessage()方法,再经过方法的调用,
5.最后便会调用到Activity.onPause(),当onPause()处理完后,继续循环loop下去。
补充:
ActivityThread的main方法主要就是做消息循环,一旦退出消息循环,那么你的程序也就可以退出了。
从消息队列中取消息可能会阻塞,取到消息会做出相应的处理。如果某个消息处理时间过长,就可能会影响UI线程的刷新速率,造成卡顿的现象。
最后通过《Android开发艺术探索》的一段话总结 :
ActivityThread通过ApplicationThread和AMS进行进程间通讯,AMS以进程间通信的方式完成ActivityThread的请求后会回调ApplicationThread中的Binder方法,然后ApplicationThread会向H发送消息,H收到消息后会将ApplicationThread中的逻辑切换到ActivityThread中去执行,即切换到主线程中去执行,这个过程就是。主线程的消息循环模型
另外,ActivityThread实际上并非线程,不像HandlerThread类,ActivityThread并没有真正继承Thread类
那么问题又来了,既然ActivityThread不是一个线程,那么ActivityThread中Looper绑定的是哪个Thread,也可以说它的动力是什么?
回答三:ActivityThread 的动力是什么?
进程每个app运行时前首先创建一个进程,该进程是由Zygote fork出来的,用于承载App上运行的各种Activity/Service等组件。进程对于上层应用来说是完全透明的,这也是google有意为之,让App程序都是运行在Android Runtime。大多数情况一个App就运行在一个进程中,除非在AndroidManifest.xml中配置Android:process属性,或通过native代码fork进程。
线程 线程对应用来说非常常见,比如每次new Thread().start都会创建一个新的线程。该线程与App所在进程之间资源共享,从Linux角度来说进程与线程除了是否共享资源外,并没有本质的区别,都是一个task_struct结构体,在CPU看来进程或线程无非就是一段可执行的代码,CPU采用CFS调度算法,保证每个task都尽可能公平的享有CPU时间片。
其实承载ActivityThread的主线程就是由Zygote fork而创建的进程。
回答四:Handler 是如何能够线程切换
其实看完上面我们大致也清楚线程间是共享资源的。所以Handler处理不同线程问题就只要注意异步情况即可。
这里再引申出Handler的一些小知识点。 Handler创建的时候会采用当前线程的Looper来构造消息循环系统,Looper在哪个线程创建,就跟哪个线程绑定**,并且Handler是在他关联的Looper对应的线程中处理消息的。(敲黑板)
那么Handler内部如何获取到当前线程的Looper呢—–ThreadLocal。ThreadLocal可以在不同的线程中互不干扰的存储并提供数据,通过ThreadLocal可以轻松获取每个线程的Looper。当然需要注意的是①线程是默认没有Looper的,如果需要使用Handler,就必须为线程创建Looper。我们经常提到的主线程,也叫UI线程,它就是ActivityThread,②ActivityThread被创建时就会初始化Looper,这也是在主线程中默认可以使用Handler的原因。
系统为什么不允许在子线程中访问UI?(摘自《Android开发艺术探索》) 这是因为Android的UI控件不是线程安全的,如果在多线程中并发访问可能会导致UI控件处于不可预期的状态,那么为什么系统不对UI控件的访问加上锁机制呢?缺点有两个: ①首先加上锁机制会让UI访问的逻辑变得复杂 ②锁机制会降低UI访问的效率,因为锁机制会阻塞某些线程的执行。 所以最简单且高效的方法就是采用单线程模型来处理UI操作。
那么问题又来了,子线程一定不能更新UI?
看到这里,又留下两个知识点等待下篇详解:View的绘制机制与Android Window内部机制。
回答五:子线程有哪些更新UI的方法
主线程中定义Handler,子线程通过mHandler发送消息,主线程Handler的handleMessage更新UI。 用Activity对象的runOnUiThread方法。 创建Handler,传入getMainLooper。 View.post(Runnable r) 。
runOnUiThread 第一种咱们就不分析了,我们来看看第二种比较常用的写法。
先重新温习一下上面说的
Looper在哪个线程创建,就跟哪个线程绑定,并且Handler是在他关联的Looper对应的线程中处理消息的。(敲黑板)
new Thread(new Runnable() {
@Override
public void run() {
runOnUiThread(new Runnable() {
@Override
public void run() {
//DO UI method
}
});
}
}).start();
final Handler mHandler = new Handler();
public final void runOnUiThread(Runnable action) {
if (Thread.currentThread() != mUiThread) {
mHandler.post(action);//子线程(非UI线程)
} else {
action.run();
}
}
进入Activity类里面,可以看到如果是在子线程中,通过mHandler发送的更新UI消息。 而这个Handler是在Activity中创建的,也就是说在主线程中创建,所以便和我们在主线程中使用Handler更新UI没有差别。 因为这个Looper,就是ActivityThread中创建的Looper(Looper.prepareMainLooper())。
创建Handler,传入getMainLooper 那么同理,我们在子线程中,是否也可以创建一个Handler,并获取MainLooper,从而在子线程中更新UI呢? 首先我们看到,在Looper类中有静态对象sMainLooper,并且这个sMainLooper就是在ActivityThread中创建的MainLooper。
private static Looper sMainLooper; // guarded by Looper.class
public static void prepareMainLooper() {
prepare(false);
synchronized (Looper.class) {
if (sMainLooper != null) {
throw new IllegalStateException(“The main Looper has already been prepared.”);
}
sMainLooper = myLooper();
}
}
所以不用多说,我们就可以通过这个sMainLooper来进行更新UI操作。
new Thread(new Runnable() {
@Override
public void run() {
Log.e(“qdx”, "step 1 "+Thread.currentThread().getName());
Handler handler=new Handler(getMainLooper());
handler.post(new Runnable() {
@Override
public void run() {
//Do Ui method
Log.e(“qdx”, "step 2 "+Thread.currentThread().getName());
}
});
}
}).start();
View.post(Runnable r) 老样子,我们点入源码
//View
/**
-
Causes the Runnable to be added to the message queue.
-
The runnable will be run on the user interface thread.
-
@param action The Runnable that will be executed.
-
@return Returns true if the Runnable was successfully placed in to the
-
message queue. Returns false on failure, usually because the -
looper processing the message queue is exiting.
*/
public boolean post(Runnable action) {
final AttachInfo attachInfo = mAttachInfo;
if (attachInfo != null) {
return attachInfo.mHandler.post(action); //一般情况走这里
}
// Postpone the runnable until we know on which thread it needs to run.
// Assume that the runnable will be successfully placed after attach.
getRunQueue().post(action);
return true;
}
/**
-
A Handler supplied by a view’s {@link android.view.ViewRootImpl}. This
-
handler can be used to pump events in the UI events queue.
*/
final Handler mHandler;
居然也是Handler从中作祟,根据Handler的注释,也可以清楚该Handler可以处理UI事件,也就是说它的Looper也是主线程的sMainLooper。这就是说我们常用的更新UI都是通过Handler实现的。
另外更新UI 也可以通过AsyncTask来实现,难道这个AsyncTask的线程切换也是通过 Handler 吗? 没错,也是通过Handler……
Handler实在是…
回答六:子线程中Toast,showDialog,的方法
可能有些人看到这个问题,就会想: 子线程本来就不可以更新UI的啊 而且上面也说了更新UI的方法
兄台且慢,且听我把话写完
new Thread(new Runnable() {
@Override
public void run() {
Toast.makeText(MainActivity.this, “run on thread”, Toast.LENGTH_SHORT).show();//崩溃无疑
}
}).start();
看到这个崩溃日志,是否有些疑惑,因为一般如果子线程不能更新UI控件是会报如下错误的(子线程不能更新UI)
所以子线程不能更新Toast的原因就和Handler有关了,据我们了解,每一个Handler都要有对应的Looper对象,那么。 满足你。
new Thread(new Runnable() {
@Override
public void run() {
Looper.prepare();
Toast.makeText(MainActivity.this, “run on thread”, Toast.LENGTH_SHORT).show();
Looper.loop();
}
}).start();
这样便能在子线程中Toast,不是说子线程…? 老样子,我们追根到底看一下Toast内部执行方式。
//Toast
/**
- Show the view for the specified duration.
*/
public void show() {
INotificationManager service = getService();//从SMgr中获取名为notification的服务
String pkg = mContext.getOpPackageName();
TN tn = mTN;
tn.mNextView = mNextView;
try {
service.enqueueToast(pkg, tn, mDuration);//enqueue? 难不成和Handler的队列有关?
} catch (RemoteException e) {
// Empty
}
}
在show方法中,我们看到Toast的show方法和普通UI 控件不太一样,并且也是通过Binder进程间通讯方法执行Toast绘制。这其中的过程就不在多讨论了,有兴趣的可以在NotificationManagerService类中分析。
现在把目光放在TN 这个类上(难道越重要的类命名就越简洁,如H类),通过TN 类,可以了解到它是Binder的本地类。在Toast的show方法中,将这个TN对象传给NotificationManagerService就是为了通讯!并且我们也在TN中发现了它的show方法。
private static class TN extends ITransientNotification.Stub {//Binder服务端的具体实现类
/**
- schedule handleShow into the right thread
*/
@Override
public void show(IBinder windowToken) {
mHandler.obtainMessage(0, windowToken).sendToTarget();
}
final Handler mHandler = new Handler() {
@Override
public void handleMessage(Message msg) {
IBinder token = (IBinder) msg.obj;
handleShow(token);
}
};
}
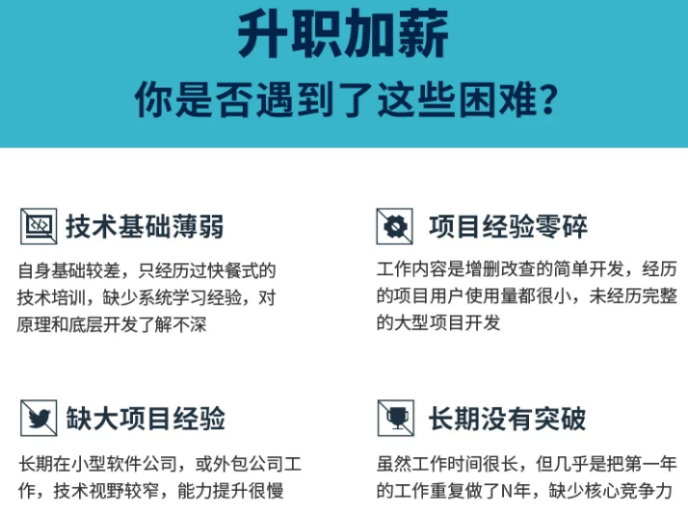
自我介绍一下,小编13年上海交大毕业,曾经在小公司待过,也去过华为、OPPO等大厂,18年进入阿里一直到现在。
深知大多数初中级Android工程师,想要提升技能,往往是自己摸索成长或者是报班学习,但对于培训机构动则近万的学费,着实压力不小。自己不成体系的自学效果低效又漫长,而且极易碰到天花板技术停滞不前!
因此收集整理了一份《2024年Android移动开发全套学习资料》,初衷也很简单,就是希望能够帮助到想自学提升又不知道该从何学起的朋友,同时减轻大家的负担。
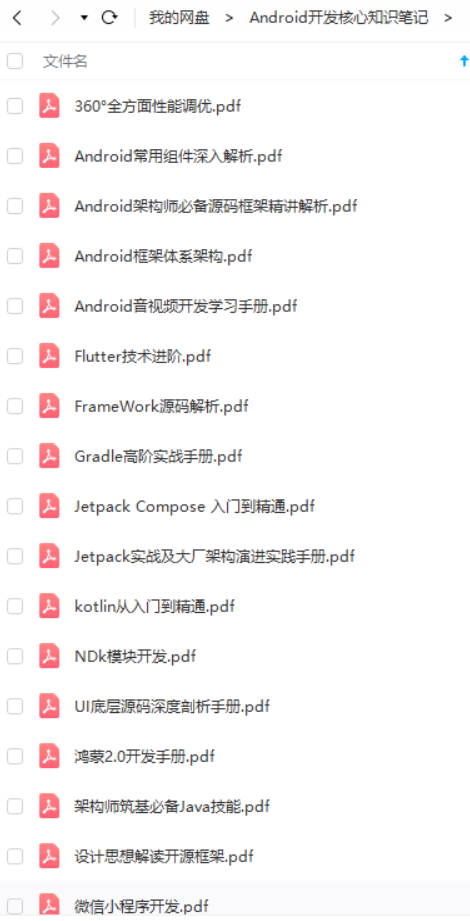
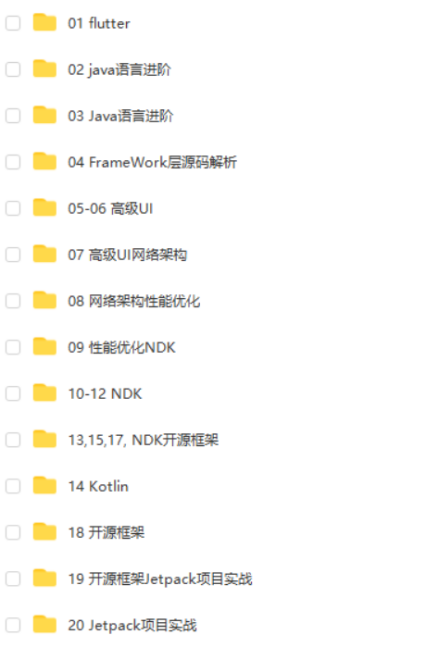
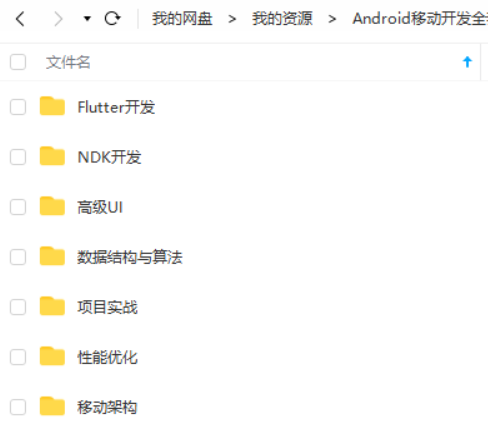

既有适合小白学习的零基础资料,也有适合3年以上经验的小伙伴深入学习提升的进阶课程,基本涵盖了95%以上Android开发知识点,真正体系化!
由于文件比较大,这里只是将部分目录截图出来,每个节点里面都包含大厂面经、学习笔记、源码讲义、实战项目、讲解视频,并且会持续更新!
如果你觉得这些内容对你有帮助,可以扫码获取!!(备注:Android)

Android核心知识点
面试成功其实是必然的,因为我做足了充分的准备工作,包括刷题啊,看一些Android核心的知识点,看一些面试的博客吸取大家面试的一些经验。
下面这份PDF是我翻阅了差不多3个月左右一些Android大博主的博客从他们那里取其精华去其糟泊所整理出来的一些Android的核心知识点,全部都是精华中的精华,我能面试到现在2-2资深开发人员跟我整理的这本Android核心知识点有密不可分的关系,在这里本着共赢的心态分享给各位朋友。

不管是Android基础还是Java基础以及常见的数据结构,这些是无原则地必须要熟练掌握的,尤其是非计算机专业的同学,面试官一上来肯定是问你基础,要是基础表现不好很容易被扣上基础不扎实的帽子,常见的就那些,只要你平时认真思考过基本上面试是没太大问题的。
最后为了帮助大家深刻理解Android相关知识点的原理以及面试相关知识,这里放上我搜集整理的2019-2021BAT 面试真题解析,我把大厂面试中常被问到的技术点整理成了PDF,包知识脉络 + 诸多细节。
节省大家在网上搜索资料的时间来学习,也可以分享给身边好友一起学习。
《Android学习笔记总结+移动架构视频+大厂面试真题+项目实战源码》,点击传送门即可获取!
31)]
[外链图片转存中…(img-ETmkESgr-1712277346031)]
既有适合小白学习的零基础资料,也有适合3年以上经验的小伙伴深入学习提升的进阶课程,基本涵盖了95%以上Android开发知识点,真正体系化!
由于文件比较大,这里只是将部分目录截图出来,每个节点里面都包含大厂面经、学习笔记、源码讲义、实战项目、讲解视频,并且会持续更新!
如果你觉得这些内容对你有帮助,可以扫码获取!!(备注:Android)
Android核心知识点
面试成功其实是必然的,因为我做足了充分的准备工作,包括刷题啊,看一些Android核心的知识点,看一些面试的博客吸取大家面试的一些经验。
下面这份PDF是我翻阅了差不多3个月左右一些Android大博主的博客从他们那里取其精华去其糟泊所整理出来的一些Android的核心知识点,全部都是精华中的精华,我能面试到现在2-2资深开发人员跟我整理的这本Android核心知识点有密不可分的关系,在这里本着共赢的心态分享给各位朋友。
[外链图片转存中…(img-UoECoi2i-1712277346031)]
不管是Android基础还是Java基础以及常见的数据结构,这些是无原则地必须要熟练掌握的,尤其是非计算机专业的同学,面试官一上来肯定是问你基础,要是基础表现不好很容易被扣上基础不扎实的帽子,常见的就那些,只要你平时认真思考过基本上面试是没太大问题的。
最后为了帮助大家深刻理解Android相关知识点的原理以及面试相关知识,这里放上我搜集整理的2019-2021BAT 面试真题解析,我把大厂面试中常被问到的技术点整理成了PDF,包知识脉络 + 诸多细节。
节省大家在网上搜索资料的时间来学习,也可以分享给身边好友一起学习。


 1034
1034


 被折叠的 条评论
为什么被折叠?
被折叠的 条评论
为什么被折叠?
 到【灌水乐园】发言


