


1.前言
首先OpenLayers本身是支持旋转、平移、缩放的。olext 只是在 OpenLayers 的基础上又做了一层封装,使得看起来比较好看,用起来也比较好用。当然,olext 里的功能可不止旋转、平移缩放,还有很多,比如样式、动画、过滤器、控制器、各类要素交互、重做撤销、图例、搜索、路径规划、等高线以及移动端适配等等。官方示例地址为 GitHub ,ES6版本可以参考 olext4.0.14 ,ES5及以下版本可以参考 olext3.1.5
2.olext官方示例
olext 的使用很简单,只需要引入olext,初始化一下就 ok 了。
import ExtTransform from 'ol-ext/interaction/Transform'
import {always} from 'ol/events/condition'
const transform = new ExtTransform({
    hitTolerance: 2,//点选容差,即将鼠标所在位置扩大2px进行选择
    translate: false, // 平移-点击要素的中心触发
    translateFeature: true,//平移-点击要素任意位置触发
    stretch: false, // 拉伸
    scale: true, // 缩放
    rotate: true, // 旋转
    noFlip: true,//禁止翻转
    keepRectangle:true,//保持包围框为矩形状态
    keepAspectRation:always //保持要素宽高比(缩放时)
 })
this.map.addInteraction(transform)

3.重写Transform.js
现在我们知道了是 Transform 这个类在控制这图形的变换。那我们就来看下源码就知道是怎么回事了。
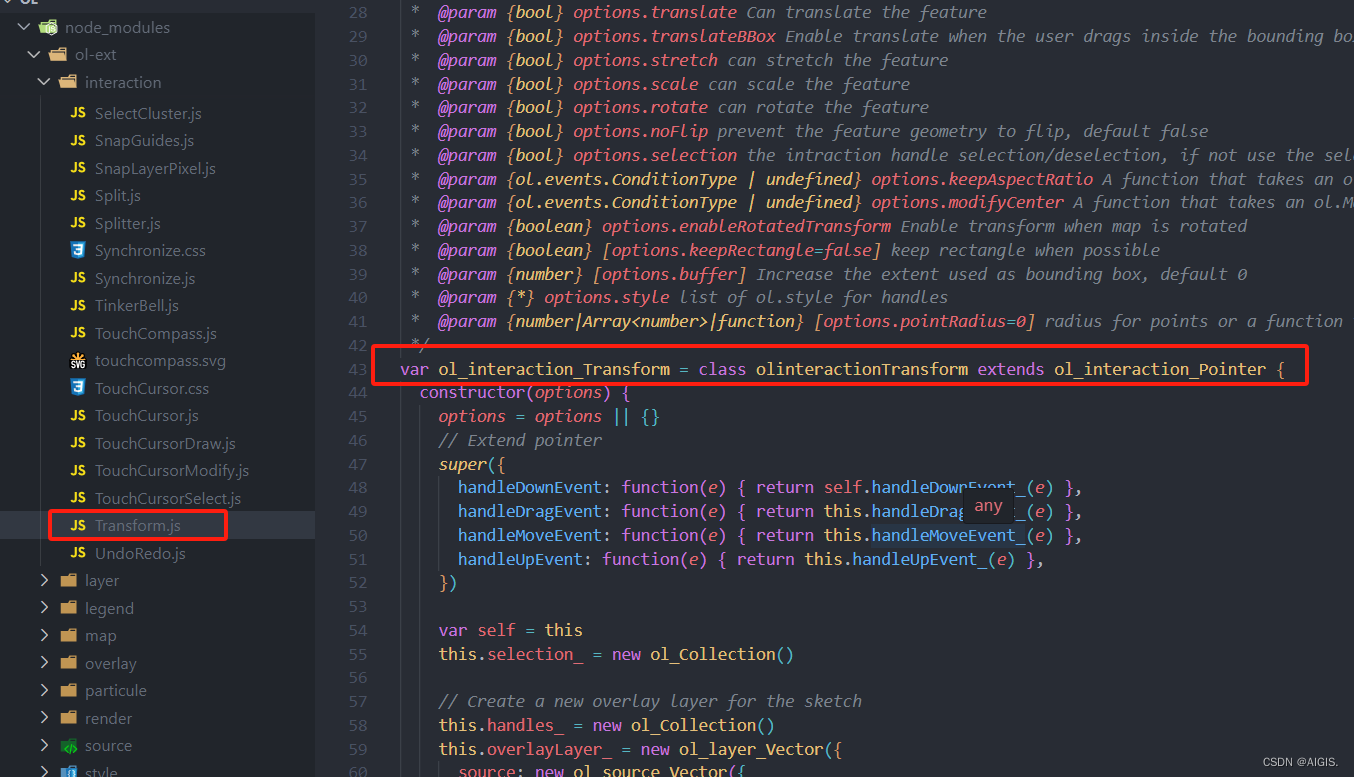
原来是重写了ol/interaction/Pointer.js这个类。那我们怎么重写这个类呢?抄呗!不会写还不会抄么?代码原封不动,我们自己写个类,把它的代码复制过去。文件就叫olPaintingTransform.js,然后引入我们自己的文件, new 的时候就 new 我们自己的类,然后加上事件的监听。
// import ExtTransform from 'ol-ext/interaction/Transform'
import olPaintTransfrom from './olPaintTransform'
const transform = new olPaintTransfrom({
    hitTolerance: 2,//点选容差,即将鼠标所在位置扩大2px进行选择
    translate: false, // 平移-点击要素的中心触发
    translateFeature: true,//平移-点击要素任意位置触发
    stretch: true, // 拉伸
    scale: true, // 缩放
    rotate: true, // 旋转
    noFlip: true,//禁止翻转
    keepRectangle:true,//保持包围框为矩形状态
    keepAspectRation:always //保持要素宽高比(缩放时)
})
 map.addInteraction(transform)
 //开始事件
 transform.on(['rotatestart','translatestart'], function(e){
   // Rotation
   let startangle = e.feature.get('angle')||0;
   // Translation
   console.log(xxx);
   console.log(startangle);
 });
  //旋转
  transform.on('rotating', function (e){
    console.log(xxx);
    console.log("rotate: "+((e.angle*180/Math.PI -180)%360+180).toFixed(2));
    console.log(e);
  });
 //移动
 transform.on('translating', function (e){
   console.log(xxx);
   console.log(e.delta);
   console.log(e);

 });
 //拖拽事件
 transform.on('scaling', function (e){
   console.log(xxx);
   console.log(e.scale);
   console.log(e);
 });
  //事件结束
 transform.on(['rotateend', 'translateend', 'scaleend'], function (e) {
   console.log(xxx);
 });
4.自定义样式
现在我觉的这个样式不好看,缩放和拉伸我不想要方框了,我要改成实心圆,并且加上颜色来区分功能,修改 setDefaultStyle方法中bigpt 和 samllpt的样式即可。

setDefaultStyle(options) {
    options = options || {}
    // Style
    var stroke = options.pointStroke || new ol_style_Stroke({ color: [255, 0, 0, 1], width: 1 })
    var strokedash = options.stroke || new ol_style_Stroke({ color: [255, 0, 0, 1], width: 1, lineDash: [4, 4] })
    var fill0 = options.fill || new ol_style_Fill({ color: [255, 0, 0, 0.01] })
    var fillScale = options.pointFill || new ol_style_Fill({ color: [255, 255, 255, 0.8] })
    var fill = options.pointFill || new ol_style_Fill({ color: [255, 255, 255, 0.8] })
    var circle = new ol_style_RegularShape({
      fill: fill,
      stroke: stroke,
      radius: this.isTouch ? 12 : 6,
      displacement: this.isTouch ? [24, -24] : [12, -12],
      points: 15
    })
    // Old version with no displacement
    if (!circle.setDisplacement)
      circle.getAnchor()[0] = this.isTouch ? -10 : -5
    var bigpt = new ol_style_RegularShape({
      fill: new ol_style_Fill({ color: '#0029f3' }),
      stroke: new ol_style_Stroke({ color: '#0029f3' , width: 1 }),
      radius: this.isTouch ? 12 : 6,
      points: 18,
      angle: Math.PI / 4
    })
    var smallpt = new ol_style_RegularShape({
      fill: new ol_style_Fill({ color: '#00f31e' }),
      stroke: new ol_style_Stroke({ color: '#00f31e' , width: 1 }),
      radius: this.isTouch ? 12 : 6,
      points: 18,
      angle: Math.PI / 4
    })
    function createStyle(img, stroke, fill) {
      return [new ol_style_Style({ image: img, stroke: stroke, fill: fill })]
    }
    /** Style for handles */
    this.style = {
      'default': createStyle(bigpt, strokedash, fill0),
      'translate': createStyle(bigpt, stroke, fill),
      'rotate': createStyle(circle, stroke, fill),
      'rotate0': createStyle(bigpt, stroke, fill),
      'scale': createStyle(bigpt, stroke, fill),
      'scale1': createStyle(bigpt, stroke, fill),
      'scale2': createStyle(bigpt, stroke, fill),
      'scale3': createStyle(bigpt, stroke, fill),
      'scalev': createStyle(smallpt, stroke, fill),
      'scaleh1': createStyle(smallpt, stroke, fill),
      'scalev2': createStyle(smallpt, stroke, fill),
      'scaleh3': createStyle(smallpt, stroke, fill),
    }
    this.drawSketch_()
  }
这个旋转点位置也看起来怪怪的,移动正上方去吧,修改画草图方法drawSketch_中的Rotate的计算方式和setDefaultStyle中的circle 的样式

// Rotate
if (!this.iscircle_ && this.get('rotate')) {
  f = new ol_Feature({ geometry: new ol_geom_Point([(g[0][0]+g[2][0])/2,g[2][1]]), handle: 'rotate' })
  features.push(f)
}
var circle = new ol_style_RegularShape({
  fill: fill,
  stroke: stroke,
  radius: this.isTouch ? 12 : 6,
  //displacement: this.isTouch ? [24, -24] : [12, -12],
  displacement: [0, 30],
  points: 15
})
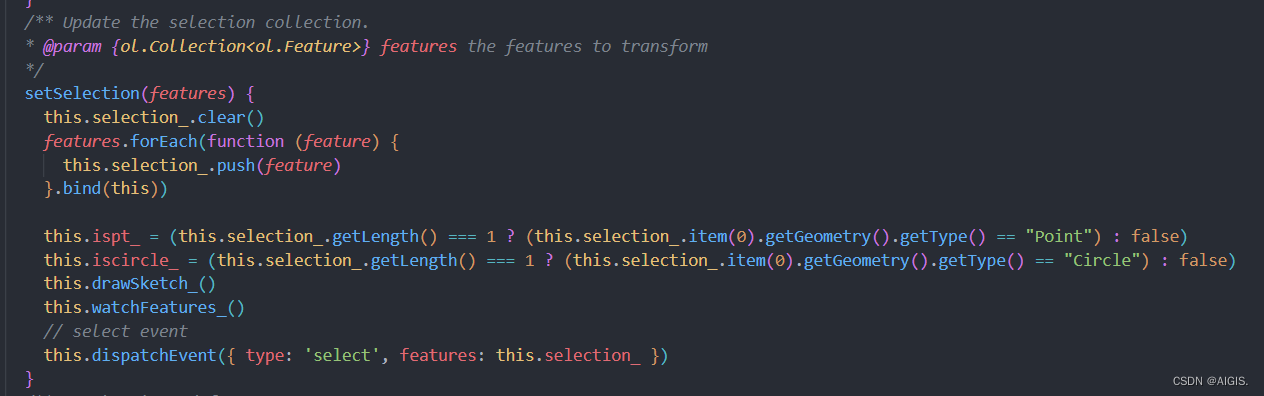
5.自定义选中机制
现在我们已经改完样式了,接下要做的是我不想通过鼠标点选来设置。为什么?因为鼠标点选只能选择一个,我们要做的是,通过代码设置,想设置选中多少个就设置选中多少个。首先设置多个选中在olext里是提供了方法的,叫做setSelection。
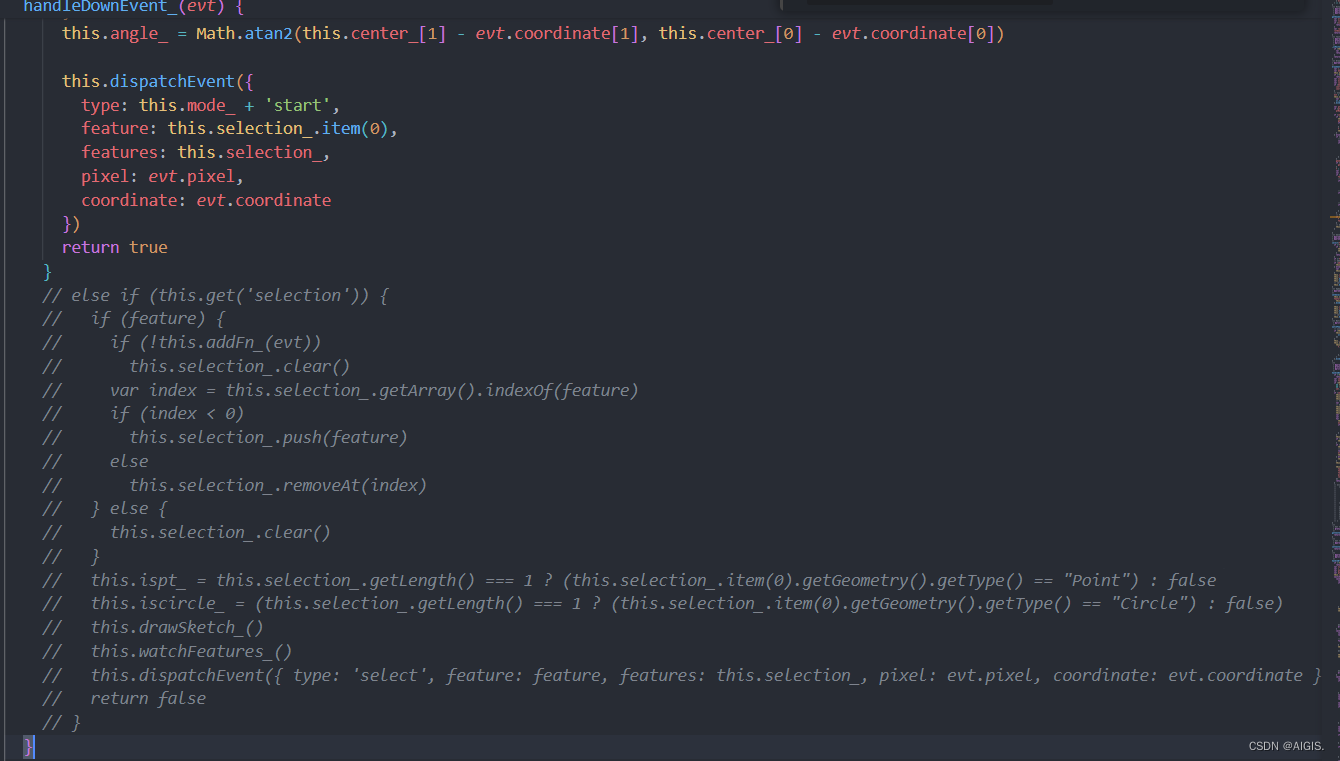
那么我们要做的就是取消olext默认的选中事件就行了。而默认选中事件的逻辑是在handleDownEvent中处理,我们只需要注销掉最后一个else if就可以了。
6.拓展思考
6.1包围框的角度问题
当我的要素旋转了以后,我希望olext画出来的包围框角度也跟着变化一下该怎么做呢?
答:当前也是在画草图方法drawSketch_中找到new Polygon的地方,设置角度即可。
6.2不选中要素如何平移
olext唯一不好的地方就是不选中就不能进行旋转、平移、缩放。但是一些情况下需要不选中也能平移要素。这种应该怎么实现?
答:自然也是用ol/interaction/Pointer类来实现,因为这里能处理mouseDown事件,具体可以参考OpenLayers官网的不选中平移例子
7总结
本篇中我们深刻的剖析了olext中的Transform类,修改了默认的样式,默认的选中事件等等。还提出了拓展思考及对应的解决方案,希望能对后来者有所启发,回见~。


 被折叠的 条评论
为什么被折叠?
被折叠的 条评论
为什么被折叠?
 到【灌水乐园】发言


