Registry
#启动私有仓库
docker run -d -p 5000:5000  --restart=always --name registry -v /opt/myregistry:/var/lib/reegistry registry

#上传一个镜像到私有仓库:
`1: 给镜像打标签:
docker tag alpine:latest  10.0.0.11:5000/test/alpine:latest
`2: 上传镜像
docker push 10.0.0.11:5000/test/alpine:latest
如果使用v2版本访问私有仓库,需要配置https协议tls证书.
vim /etc/docker/daemon.json  在所有节点配置
新加一行:
"insecure-registries": ["10.0.0.11:5000"]
`3: 重启docker服务
systemctl restart docker
`4: 下载镜像
docker pull 10.0.0.11:5000/test/alpine:latest
上传镜像到官方仓库
docker login 本机ip (登录本地仓库)

docker login  登录官方仓库
docker tag 10.0.0.11:5000/test/alpine:latest  dockertest/alpine:latase
docker push dockertest/alpine:latase
Harbor私有仓库
基于registry扩展了很多功能,但需要2G内存.
与registry有冲突
依赖docker-ce版,17.06以上,并且docker-compose1.18以上
搭建Harbor
`安装docker和docker-compose

`下载harbor-offline-installer-v1.3.0.tgz

`上传到/opt,并解压

`修改harbor.cfg配置文件
hostname = 10.0.0.11
harbor_admin_password = 123456

`执行install.sh

#harbor配置https:
hostname = blog.qstack.com.cn
ui_url_protocol = https
ssl_cert = /opt/certs/Nginx/1_blog.qstack.com.cn_bundle.crt
ssl_cert_key = /opt/certs/Nginx/2_blog.qstack.com.cn.key

`登录10.0.0.12测试 admin  123456

`修改/etx/docker/daemon.json,使用http协议
"insecure-registries": ["10.0.0.11:5000","10.0.0.12"]

`上传镜像
docker tag alpine:latest 10.0.0.12/library/alpine:latest
docker push 10.0.0.12/library/alpine:latest
为harbor配置https证书
`注释掉harbor.yml中80端口,打开443端口.
https:
  port: 443
  certificate: /opt/nginx/1_xxxxx.crt
  private_key: /opt/nginx/2_xxxxx.key
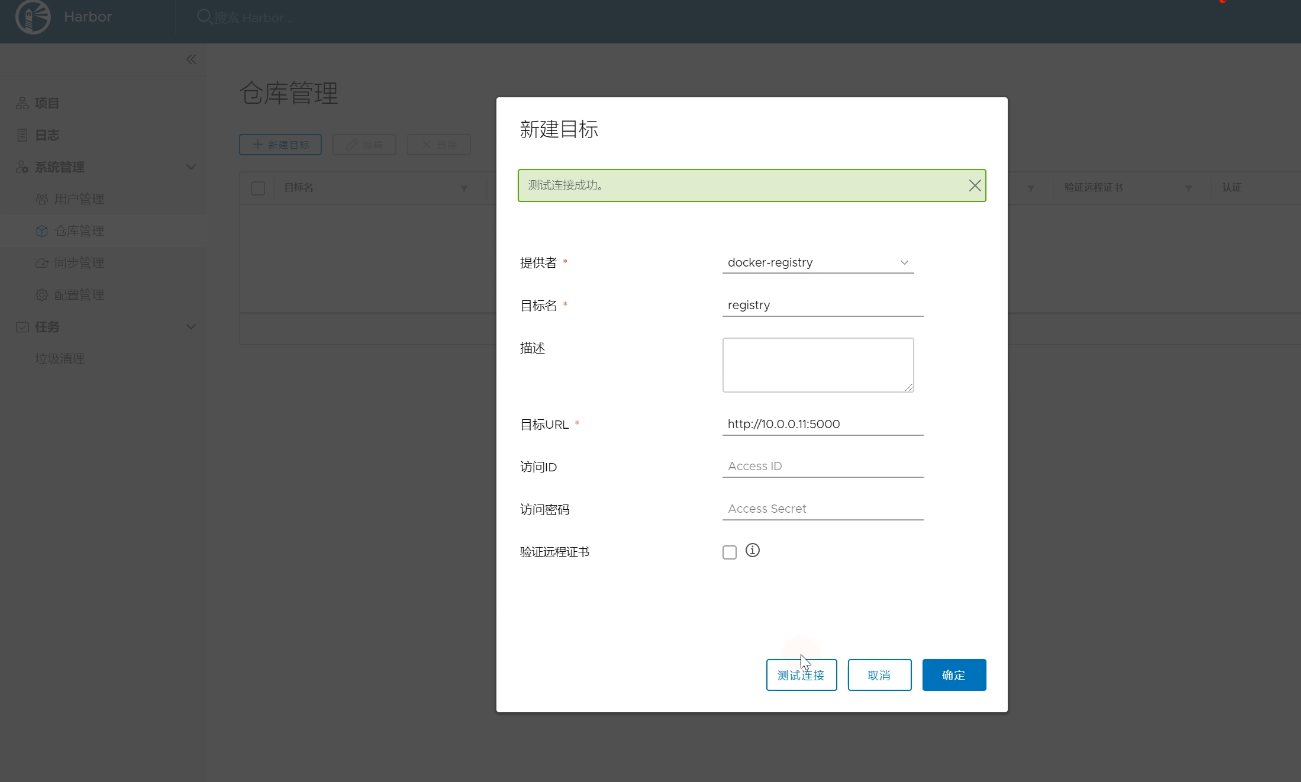
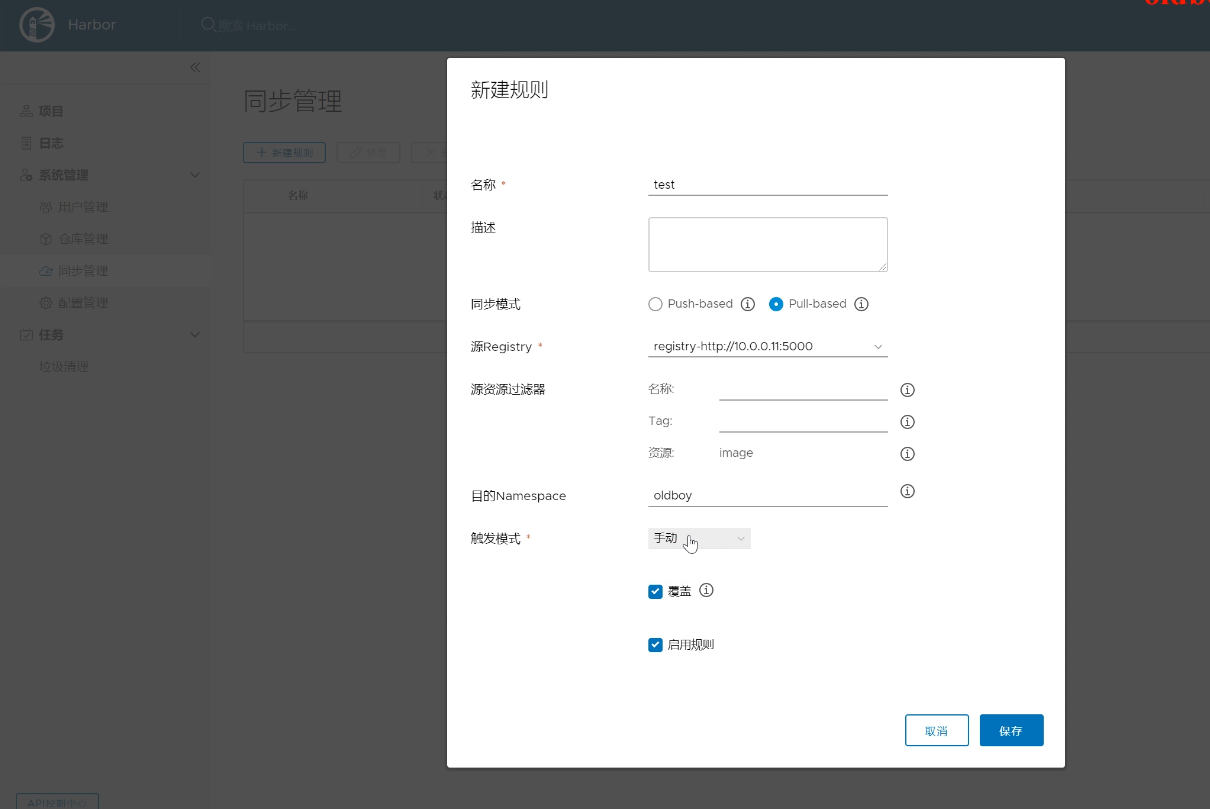
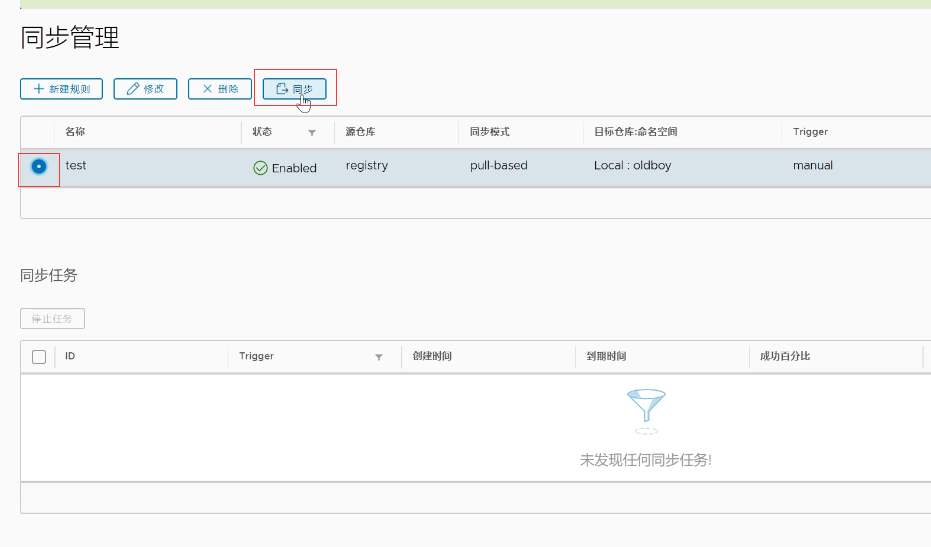
Docker-Registry迁移到Harbor


 416
416

 被折叠的 条评论
为什么被折叠?
被折叠的 条评论
为什么被折叠?
 到【灌水乐园】发言


