


JavaScript
模板引擎
+ 什么是模板引擎?
  => 帮助我们快速渲染页面
  => 三体分离(结构 样式 行为 分开)
  => 一般都是第三方文件引入使用

+ 常见的模板引擎?
  => art-template, 前后端都可以用
  => underscroll, 后端 JS 不能用
  => e.js, 后端 JS 不能用
  => template, 后端 JS 不能用

+ art-template模板引擎的特点
  => html 结构 和 JS 代码分离
  => 有自己独立的语法,但是也可以使用原生 JS 的语法
  => 有自己独立的渲染机制

+ 使用:
  1. 官网下载一个第三方文件
  2. 引入第三方文件
  3. 按照官方规则来使用
语法
1. 自己写一个模板
=> script 标签来定义模板
  -> 因为从来不会给 script 添加样式
  -> script 标签里面书写的内容本身在页面上就不会显示
=> 需要加一个 type 属性,值是 text/html 或者 text/template
  -> 只要值不写成text/javascript,script里面的内容不会当作 js 代码来执行
  -> 写成 text/html 或者 text/template 是为了有 html 代码提示
=> 在这个 script 标签内书写你的 html 模板就可以了
2. 在 JS 里面使用模板
=> 导入第三方文件
=> 使用一个叫做 template 的方法
  -> 语法:template(模板标签的 id 名, 数据)
    + id 名:必须是 id 名
    + 数据:对象数据类型,在模板里面使用的数据
  -> 返回值:是模板标签里面渲染好的 html 结构,是一个字符串
3. 在模板里面使用的语法
3-1. 直接输出
=> 原生 JS 输出
  -> <%= 你要输出的变量 %>,不会解析 html 结构字符串
  -> <%- 你要输出的变量 %>,会解析 html 结构字符串
=> 模板引擎语法输出
  -> {{ 你要输出的变量 }},不会解析 html 结构字符串
  -> {{@ 你要输出的变量 }},会解析 html 结构字符串
=> 要输出的内容可以书写成一个简单的表达式
<style>
  *{
    margin: 0;
    padding: 0;
  }

  div{
    background-color: Pink;
    margin-bottom: 30px;
  }
</style>

<div class="box1"></div>
<!-- 引入 art-template第三方文件 -->
<script src="./template-web.js"></script>

<!-- 定义模板 -->
<!-- 输出语法 -->
<script type="text/html" id="tmp">
  <!-- 简单的模板 -->
  <!-- 输出内容 -->
  <p><%= title%></p>
  <p><%= s%></p>
  <p><%- s%></p>
  <p>{{ s }}</p>
  <p>{{@ s }}</p>
  <!-- 简单的表达式 -->
  <p>{{ boo || '男' }}</p>
  <p>{{ num + 100 }}</p>
</script>

<script>
   // {} 里面写了一个 title: 'abc'
   // 当你在模板里面使用 title 这个变量的时候,会自动给你渲染成 'abc' 字符串
   var str = template('tmp',{title: 'abc', num: 100,boo: true, s: '<h1>你好世界</h1>'})
   document.querySelector('.box1').innerHTML = str
</script>

3-2. 条件判断输出
=> 原生 JS 语法
  <% if(){ %>
    html 结构
  <% } %>
=> 模板引擎语法
  {{ if 条件 }}
    html 结构
  {{ /if }}
<!-- 条件判断 -->
<script type="text/html" id="tmp">
<!-- 简单的模板 -->
<!-- 条件判断 -->
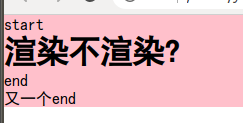
<p>start</p>
<% if(!bool){ %>
<h1>渲染不渲染?</h1>
<% } %>
<p>end</p>
{{ if boo }}
<h1>这个渲染不渲染?</h1>
{{ /if }}
<p>又一个end</p>
</script>
<script>
var str = template('tmp',{arr: arr, title: 'abc', num: 100,boo: false, s: '<h1>你好世界</h1>'})
document.querySelector('.box1').innerHTML = str
</script>
3-3. 循环渲染
=> 原生 JS 语法
  <% for(){ %>
    html 结构(循环多少次,这段 html 结构就有多少个)
  <% } %>
=> 模板引擎语法
  {{ each 数组 }}
    html 结构
    ps: $value 表示数组的每一项, $index 表示数组的索引
  {{ /each }}
  {{ each 数组 v, i}}
    html 结构
    ps: 自己定义两个变量,当你定义好变量后
        第一个变量表示表示数组的每一项
        第二个变量表示数组的索引
        $value 和 $index 就不能用了
  {{ /each }}
<!-- 循环渲染 -->
<script type="text/html" id="tmp">
  <!-- 简单的模板 -->
  <!-- 循环渲染 -->
  <ul>
    <% for(var i = 0; i < arr.length; i++){ %>
      <li><%= arr[i] %></li>
    <% } %>
  </ul>

  <ul>
    {{ each arr }}
      <li>{{ $value }} ---- {{ $index }}</li>
    {{ /each }}
  </ul>

  <ul>
    {{ each arr v, i}}
      <li>{{ v }} ---- {{ i }}</li>
    {{ /each }}
  </ul>
</script>

<script>
   var arr  =['red', 'blue', 'green', 'white', 'black']
   var str = template('tmp',{arr: arr, title: 'abc', num: 100,boo: false, s: '<h1>你好世界</h1>'})
   document.querySelector('.box1').innerHTML = str
</script>

练习
模板引擎渲染页面
<!DOCTYPE html>
<html lang="en">
<head>
    <meta charset="UTF-8">
    <meta http-equiv="X-UA-Compatible" content="IE=edge">
    <meta name="viewport" content="width=device-width, initial-scale=1.0">
    <title>Document</title>
    <style>
        *{
            margin: 0;
            padding: 0;
        }

        ul{
            list-style: none;
        }

        img{
            display: block;
        }

        body > div{
            width: 1200px;
            margin: 0 auto;
        }

        .header, .footer{
            height: 300px;
            line-height: 300px;
            text-align: center;
            font-size: 100px;
            background-color: skyblue;
            color: white;
        }

        .container{
            padding-top: 20px;
        }

        .container ul{
            width: calc(100% - 20);
            height: 410px;
            border: 1px solid #ccc;
            margin-bottom: 20px;
            padding: 20px;
        }

        .container > ul > .top{
            height: 60px;
            line-height: 60px;
            overflow: hidden;
        }

        .container > ul > .top > p{
            float: left;
            font-size: 30px;
        }
        .container > ul > .top > span{
            float: right;
        }

        .container > ul > .left{
            float: left;
            width: 270px;
        }

        .container > ul > .left > img{
            width: 100%;
            height: 100%;
        }

        .container > ul > .right{
            float: left;
            width: 840px;
        }

        .container > ul > .right > li{
            width: 270px;
            height: 180px;
            margin-left: 10px;
            float: left;
            /* background-color: #ccc; */
            margin-bottom: 5px;
        }

        .container > ul > .right > li > .img > img{
            width: 120px;
            float: left;
        }

        .container > ul > .right > li > .description{
            float: left;
            margin-left: 10px;
        }
    </style>
</head>
<body>
    <div class="header">头部</div>
    <div class="container"></div>
    <div class="footer">底部</div>

    <script src="./data/dm_list.js"></script>
    <script src="./template-web.js"></script>
    <!-- 模板标签 -->
    <script type="text/html" id="tmp">
        <ul>
            <div class="top">
                <p>{{ title }}</p>
                <span>查看全部</span>
            </div>
            <div class="left">
                <img src="{{ first.verticalPic }}" alt="">
            </div>
            <div class="right">
                {{ each other }}
                <li>
                    <div class="img">
                        <img src="{{ $value.verticalPic }}" alt="">
                    </div>
                    <div class="description">
                        <p>{{ $value.venueCity }}</p>
                    </div>
                </li>
                {{ /each }}
            </div>
        </ul>
    </script>

    <script>
        /*
          模板引擎渲染页面
            1. 搭建静态页面
            2. 根据四个数组渲染出四个 ul 放在 div 里面

          完成渲染
            1. 引入模板引擎
            2. 创建一个模板标签
            3. 调用模板方法 template
            4. 把 template 的返回值插入页面
            5. 去模板里渲染数据
        */
       console.log(data1[0])
        var container = document.querySelector('.container')

        var list = [
            {
                title: '篮球赛',
                list: data1
            },
            {
                title: '足球赛',
                list: data2
            },
            {
                title: '网球赛',
                list: data3
            },
            {
                title: '保龄球赛',
                list: data4
            },
        ]

        list.forEach(function(item){
            var str = template('tmp', {
                title: item.title,
                first: item.list[0],
                other: item.list.slice(1)
            })
            container.innerHTML += str
        })
    </script>
</body>
</html>

购物车案例
- 购物车案例商品列表页面
<body>
    <div class="header">头部</div>
    <div class="container">
        <ul></ul>
    </div>
    <div class="loading">
        <img src="https://i.pinimg.com/originals/3b/4e/10/3b4e109d6b621ed5a9249769afbd4dfa.gif" alt="">
    </div>
    <div class="footer">底部</div>

    <script>
        // 创建数据
        var dataList = []
        for(var i = 1; i <= 1000; i++){
            var data= {
            "goods_id": i,
            "goods_name": "【2021】联想(Lenovo)小新Pro14标压英特尔酷睿i5高性能全面屏轻薄本笔记本电脑(i5-11300H 16G 512G 2.2K低蓝光 护眼屏幕)",
            "goods_price": 5599.00,
            "goods_big_logo": "https://imgservice.suning.cn/uimg1/b2c/image/nsV6NBS25A03m8YrYqtNgQ.jpg?format=400h_400w_4e_80q",
            "cart_number": 0
            }
            dataList.push(data)
        }

        // 1. 获取元素和一些数据
        // 1-1. ul
        var listBox = document.querySelector('.container > ul')
        // 1-2. 屏幕的高度,不包括滚动条的
        var windowHeight = document.documentElement.clientHeight
        // 1-3. ul 的上边偏移量
        var ulOffsetTop = listBox.offsetTop
        // 1-4. 总共多少页
        var totalPage = Math.ceil(dataList.length / 20)
        // 1-5. 当前页
        var currentPage = 1
        // 1-6. 准备一个开关
        var flag = true // 开启状态,可以加载下一页
        // 1-7. 获取 loading 盒子
        var loading = document.querySelector('.loading')

        // 2. 准备一个拆数组渲染页面的函数
        function bindHtml(){
            // 2-1. 拆数组
            var bindList = dataList.slice((currentPage - 1)* 20, currentPage * 20)
            // console.log(bindList)
            // 2-2. 渲染 ul 下的 li
            // 创建一个文档碎片
            var frg = document.createDocumentFragment()
            // 循环
            bindList.forEach(function(item){
                // 创建 li 节点
                var li = document.createElement('li')
                li.innerHTML = `
                <li>
                    <div class="img">
                      <img src="${item.goods_big_logo}" alt="">
                    </div>
                    <p>${item.goods_name}</p>
                    <span>${item.goods_price.toFixed(2).big().fontcolor('red')}€</span>
                </li>
                `
                // 创建一个 button 按钮
                var btn = document.createElement('button')
                btn.innerHTML = '加入购物车'
                btn.setAttribute('goods_id', item.goods_id)
                btn.onclick = addCart
                li.appendChild(btn)

                // 插入到 frg 里面
                frg.appendChild(li)
            })
            listBox.appendChild(frg)
            // 当 frg 插入到 ul 里面以后
            // 表示页面渲染完毕了
            // ul 的高已经改变了
            // 就可以把开关打开了
            flag = true
            // 页面渲染完毕, loading 可以消失
            loading.classList.remove('active')
        }
        bindHtml()

        // 3. 浏览器滚动事件
        window.onscroll = function(){
            // 3-1. 获取浏览器卷去的高度
            var scrollTop = (document.documentElement.scrollTop || document.body.scrollTop) + windowHeight
            // 3-2. 获取 ul 的高, offsetHeight 或者 clientHeight
            // offsetHeight -> 内容 + padding + border
            // clientHeight -> 内容 + padding
            var ulHeight = listBox.offsetHeight + ulOffsetTop
            // console.log(scrollTop, ulHeight)

            // 4. 加载下一页
            // ul 的底部没有进来的时候不加载下一页
            if(scrollTop < ulHeight) return
            // 到了最后一页不再继续加载
            if(currentPage === totalPage) return
            // 如果开关是关闭状态,直接返回,不再加载
            if(!flag) return
            flag = false  // 把开关关闭

            // 加载下一页
            // 先让 loading 盒子显示
            loading.classList.add('active')
            // 使用定时器模拟一个加载效果
            setTimeout(function(){
                currentPage++
                bindHtml()
            }, 500)
            }

        /*
        加入购物车功能

        1. 涉及到两个页面
          => 跨页面通讯
          => localStorage, 浏览器的本地存储
          => 本地打开的任何一个页面,都是浏览器里面的页面
          => 你在 a 页面存储的内容,在 b
          => 因为一条商品信息是一个对象
          => 准备一个数组,点击添加购物车的时候
            -> 把这个对象放在数组里面
            -> 如果数组里面有这数据,那么 number++
            -> 如果数组里面没有这数据,那么直接 push
        2. 需要点击事件
          => 每一个 button 按钮都要有点击事件
          => 包括后来渲染上去的 button 按钮都要有点击事件

        加入购物车代码实现
          1. 在点击事件里面
            => 拿到当前渲染这个 li 的那一条数据
            => 渲染页面的时候,把这一条数据的 id 渲染上去
            => 拿到元素身上的 goods_id 自定义属性
          2. 去到原始数组里面找到 id 对应的数据
            => find / filter
          3. 要把这条数据存储到数组里面
            => 数组从哪来? 创建一个数组
              -> 函数里面创建还是外面?外面
              -> 向数组里 push 一条数据,然后存储到 localStorage 里面
              -> 跳转到购物车页面以后,数组里面有一条数据
              -> 当我再一次回到列表页面的时候
              -> 再点击一条数据加入购物车
              -> 数组将再次为空
              -> 所以创建数组不好使
            => 数组从哪来? 直接从 localStorage 里面获取
              -> 如果里面有,就直接用里面的
              -> 如果里面没有,那么就用个新数组
              -> 第一次向里面添加以后,localStorage 里面的数组就有一条数据
              -> 当我再一次打开页面的时候,点击加入购物车的时候,先拿到 localStorage 里面的数组
          4. 向数组里面添加
            => 如果数组是空数组,直接 push
            => 如果不是空数组
              -> 先看看数组里面有没有这个数据
              -> 如果有,让 cart_number++
              -> 如果没有, push, cart_number = 1
        */
        var arr = []
        function addCart(){
            var goodsId = this.getAttribute('goods_id') - 0
            // 2. 在原始数组里找到数据
            var goods = dataList.find(function(item){
                return item.goods_id === goodsId
            })
            // cart_number

            // 3.先从 loaclStorage 里面获取一个数组
            var list = JSON.parse(window.localStorage.getItem('cart')) || []

            // 4. 向数组里面添加
            if(!list.length){ // 数组没有内容
                goods.cart_number = 1
                list.push(goods)
            }else{ // 数组里面有内容
                // 4-2. 先看看数组里面有没有这个数据
                // some() 只要数组里面有任意一条满足数据就为true
                // 看数组里面是否有一个 goods_id 和我点击的这个数据 id 是一样的
                var res = list.some(function(item){
                    return item.goods_id === goodsId
                })
                if(res){ // 数组里面有这一条数据
                    // 找到这条数据的索引,把这条数据的 goods.cart_number++
                    // findIndex()
                    var index = list.findIndex(function(item){
                        return item.goods_id === goodsId
                    })
                    list[index].cart_number++
                }else{ // 没有这一条数据
                    // 直接让 goods.cart_number = 1, push
                    goods.cart_number = 1
                    list.push(goods)
                }
            }

            // 5. 把组装好的数组存起来
            window.localStorage.setItem('cart', JSON.stringify(list))
        }
    </script>
</body>
</html>
<body>

    <h1>我是购物车页面</h1>

    <div class="box"></div>

    <!-- 引入模板引擎 -->
    <script src="./template-web.js"></script>

    <!-- 创建一个模板标签 -->
    <script type="text/html" id="tmp">
        <div class="top">
            全选: <input type="checkbox">
        </div>
        <ul>
            {{ each list }}
            <li>
                <div class="select">
                    <input type="checkbox">
                </div>
                <div class="img">
                    <img src="{{ $value.goods_big_logo}}" alt="">
                </div>
                <div class="desc">
                    {{ $value.goods_name }}
                </div>
                <div class="price">
                    €{{ $value.goods_price }}
                </div>
                <div class="number">
                    <button {{ $value.cart_number == 1 && "disabled" }}>-</button>
                    <input type="text" value="{{ $value.cart_number }}">
                    <button>+</button>
                </div>
                <div class="xiaoji">
                    €{{ $value.goods_price * $value.cart_number }}
                </div>
                <div class="del">
                    <button>删除</button>
                </div>
            </li>
            {{ /each }}
        </ul>
        <div class="bottom">
            <p>总计: {{ total }} 件</p>
            <button>去结算</button>
            <button>清空购物车</button>
            <button>继续去购物</button>
            <p>总价: {{ totalPrice }} €</p>
        </div>
    </script>

    <script>
        // 开始渲染页面
        // 0. 获取元素
        var box = document.querySelector('.box')

        // 1. 先从 localStorage 里拿到数据
        var cart = JSON.parse(window.localStorage.getItem('cart'))

        // 2. 判断数组里面有没有数据
        if(!cart.length){
            box.innerHTML = '您还没有添加购物车,快去选购吧:)'
        }else{
            // 3. 准备各种数据
            var total = 0
            var totalPrice = 0
            cart.forEach(function(item){
                total += item.cart_number
                totalPrice += item.cart_number * item.goods_price
            })

            var str = template('tmp', {
                list: cart,
                total: total,
                totalPrice: totalPrice.toFixed(2)
            })
            box.innerHTML = str
        }
    </script>
</body>
</html>


购物车案例 + 事件委托
代码不放了


 被折叠的 条评论
为什么被折叠?
被折叠的 条评论
为什么被折叠?
 到【灌水乐园】发言


