


1、ide环境准备:eclipse neno2
2、(maven项目)导入jar包,百度搜索maven spring webmvc到maven中央仓库去下载。
3、配置web.xml文件。(因为spring webmvc主要是配合web项目改善control控制层)
<servlet>
        <servlet-name>dispatcherServlet</servlet-name>
        <servlet-class>org.springframework.web.servlet.DispatcherServlet</servlet-class>
         <init-param>
          <param-name>contextConfigLocation</param-name>
          //注意:这里是加载spring webmvc的配置文件(spring webmvc本身也有配置文件)
          <param-value>classpath:spring/spring_mvc.xml</param-value>
         </init-param>
         //这里的值可以为1,0,也可以不配置
         //配置为1是指服务器已启动就初始化加载spring mvc的配置文件
         //配置为0或者不配置,则不加载,等到调用第一个control时再加载
        <load-on-startup>1</load-on-startup>
</servlet>
<servlet-mapping>
        <servlet-name>dispatcherServlet</servlet-name>
        <url-pattern>/</url-pattern>
</servlet-mapping>
4、现在写一个测试类helloControl,实现Controller接口,这个接口是spring webmvc框架给我们提供的。
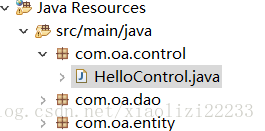
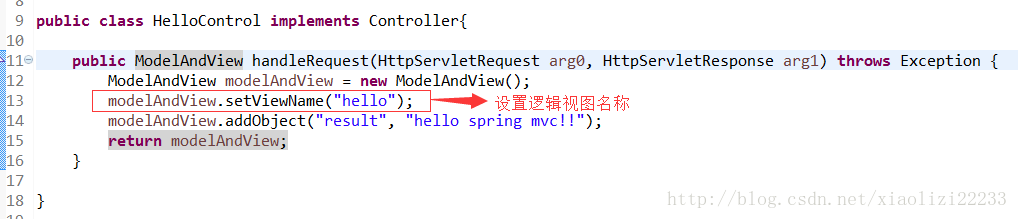
public class HelloControl implements Controller{

    public ModelAndView handleRequest(HttpServletRequest arg0, HttpServletResponse arg1) throws Exception {
        ModelAndView modelAndView = new ModelAndView();
        //这里定义了一个逻辑视图叫hello
        modelAndView.setViewName("hello");
        modelAndView.addObject("result", "hello spring mvc!!");
        return modelAndView;
    }

}
一、在配置文件中配置bean的方式
5、现在新建一个spring webmvc的配置文件,到配置文件中去配置这个测试类,把测试类中的逻辑视图名称加上前后缀,转换成物理视图路径
<?xml version="1.0" encoding="UTF-8"?>
<beans xmlns="http://www.springframework.org/schema/beans"
    xmlns:xsi="http://www.w3.org/2001/XMLSchema-instance"
    xmlns:context="http://www.springframework.org/schema/context"
    xsi:schemaLocation="http://www.springframework.org/schema/beans
                        http://www.springframework.org/schema/beans/spring-beans.xsd
                        http://www.springframework.org/schema/context
                        http://www.springframework.org/schema/context/spring-context.xsd">
    <bean id="/hello" class="com.oa.control.HelloControl"></bean>
    <bean id="viewResolver" class="org.springframework.web.servlet.view.InternalResourceViewResolver">
        <property name="prefix" value="/WEB-INF/jsp/"/>
        <property name="suffix" value=".jsp"/>
   </bean>
</beans>
6、现在整理一下思路:
6.1当服务器一启动,就开始加载spring webmvc配置文件
6.2而在spring webmvc中配置了测试类helloControl的bean,当在地址栏输入/hello时,就能通过配置文件中的bean找到com.oa.control.HelloControl这个类
6.3然后执行这个类中的方法,得到jsp的物理视图,返回ModelAndView
6.4又回到spring webmvc配置文件中,加上前后缀名得到一个视图的物理路径,即/WEB-INF/jsp/hello.jsp
7、现在就是说该物理路径下应该有个jsp文件叫hello,新建hello.jsp
<body>
//显示出我们加进去的内容
${requestScope.result}
</body>
8、将项目发布至服务器下
9、网页显示为:
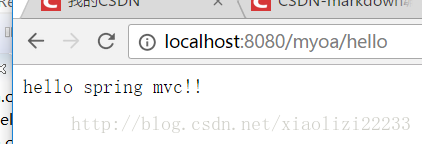
10、这样第一个入门例子就完成了
二、采用注解的方式
1、spring webmvc配置文件如下:
<?xml version="1.0" encoding="UTF-8"?>
<beans xmlns="http://www.springframework.org/schema/beans"
    xmlns:xsi="http://www.w3.org/2001/XMLSchema-instance"
    xmlns:context="http://www.springframework.org/schema/context"
    xmlns:mvc="http://www.springframework.org/schema/mvc"
    xsi:schemaLocation="http://www.springframework.org/schema/beans
                        http://www.springframework.org/schema/beans/spring-beans.xsd
                        http://www.springframework.org/schema/context
                        http://www.springframework.org/schema/context/spring-context.xsd
                        http://www.springframework.org/schema/mvc
                        http://www.springframework.org/schema/mvc/spring-mvc.xsd">
       //这里是指声明采用注解驱动
     <mvc:annotation-driven></mvc:annotation-driven>
     //组建扫描
     <context:component-scan base-package="com.oa.control"></context:component-scan>

    <bean id="viewResolver" class="org.springframework.web.servlet.view.InternalResourceViewResolver">
        <property name="prefix" value="/WEB-INF/jsp/"/>
        <property name="suffix" value=".jsp"/>
   </bean>
</beans>
2、测试类如下:
@Controller
public class HelloControl{
    @RequestMapping("/hello")
    public String demo(HttpServletRequest req){
        req.setAttribute("result", "hello spring mvc!!!mmmm");
        return "hello";
    }
}


 1003
1003

 被折叠的 条评论
为什么被折叠?
被折叠的 条评论
为什么被折叠?
 到【灌水乐园】发言


