


目录
1.8.7. 运行 httpd 2.2 (挂载目录到容器中)
1.1. 环境说明
System Version: CentOS Linux release 7.2.1511 (Core)
Docker Version: Docker Community Edition Latest version
1.2. 配置 yum 仓库源
# yum-config-manager \
 --add-repo \
 https://download.docker.com/linux/centos/docker-ce.repo
1.3. 安装并启动 Docker 引擎
1.
安装最新版本的
Docker
引擎和
containerd
。安装如下包:
# yum install docker-ce docker-ce-cli containerd.io
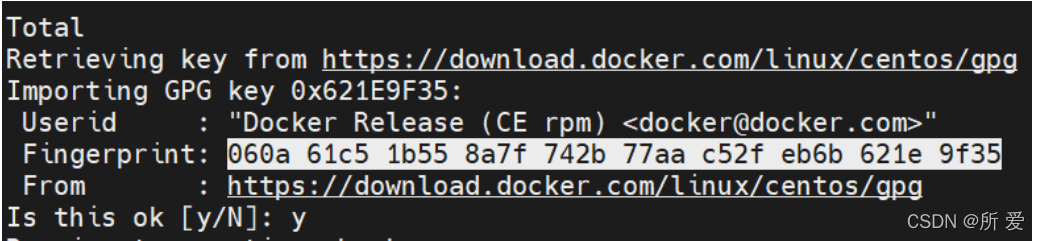
如果提示接受
GPG key
,验证特征是否匹配,如果是
060A 61C5 1B55 8A7F 742B 77AA C52F
EB6B 621E 9F35
,选择接受。
上面的命令安装
Docker
,但并不启动它。安装的同时会创建
docker
组。但并没有添加任何用户到
docker
组。需要后期手动添加。
2.
暂时禁用和停止防火墙服务。
在本
CentOS
系统启动
docker
服务时会遇到防火墙命令失败的情况,下面先停止防火墙服务,并
暂时禁用该服务。
systemctl stop firewalld
systemctl disable firewalld
3.
启动
Docker
服务
# systemctl start docker1.4. 配置国内 docker 仓库(镜像加速)
国内从
DockerHub
拉取镜像有时会遇到困难,此时可以配置镜像加速器。
Docker
官方和国内很多云服
务商都提供了国内加速器服务,例如:
科大镜像:
https://docker.mirrors.ustc.edu.cn/
网易:
https://hub-mirror.c.163.com/
七牛云加速器:
https://reg-mirror.qiniu.com
百度:
https://mirror.baidubce.com
在
/etc/docker/daemon.json
中写入如下内容(如果文件不存在请新建该文件)。
[root@localhost ~]# cat /etc/docker/daemon.json
{
"registry-mirrors": [
"https://hub-mirror.c.163.com",
"https://mirror.baidubce.com"
 ]
}
1.5. 验证 Docker 引擎是否安装成功
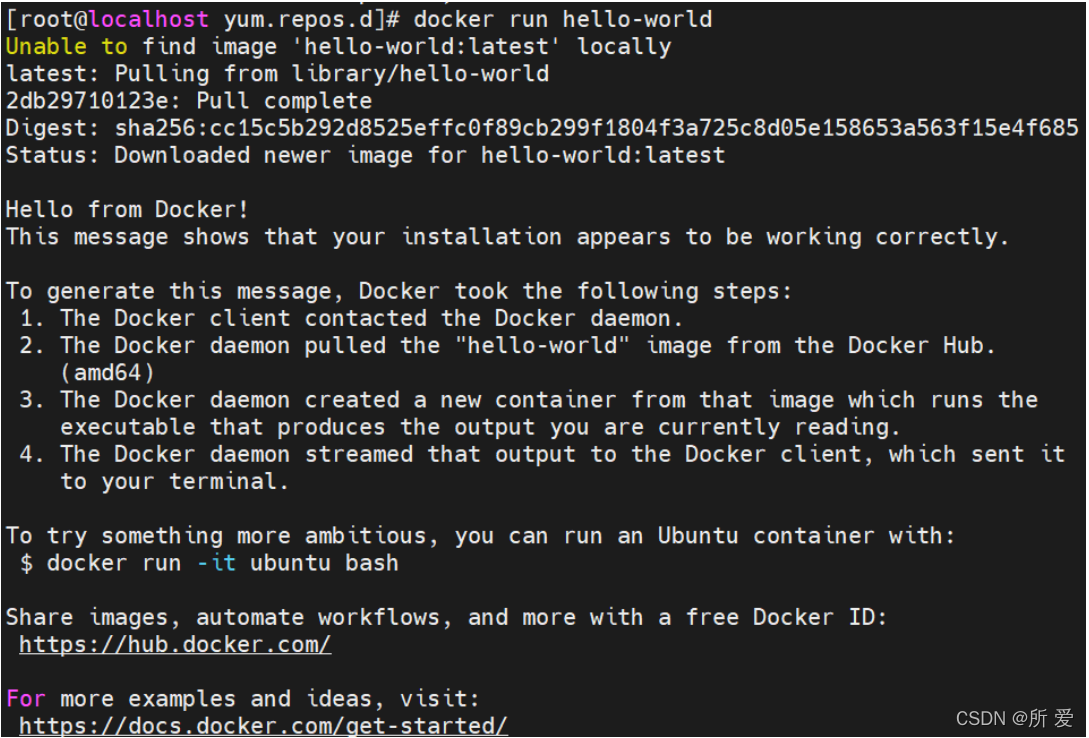
通过运行
hello-world
镜像,验证
Docker
引擎是否安装成功。
# docker run hello-world
上面的命令会从官方
docker hub
下载
hello-world
镜像并启动容器。容器运行成功,会打印消息并退出。
1.6. Python 镜像使用示例
1.6.1. 下载 python 镜像
下面的命令会从
docker hub
镜像下载
python
镜像。
# docker pull python1.6.2. 运行 python 镜像
# docker -it python bash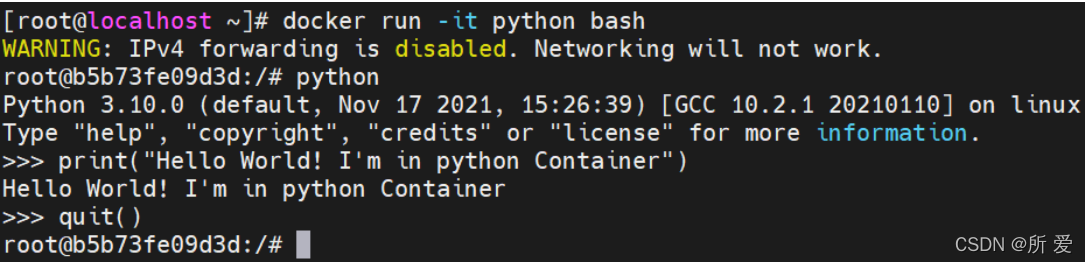
执行 exit 命令可以退出并停止容器。
1.6.3. 保存 python 镜像到本地
从官网下载镜像后,使用如下命令将镜像保存到本地,即可在本地使用镜像包测试。
# docker save -o python.tar python1.6.4. 删除 python 镜像
# docer rmi pythoh1.6.5. 加载本地 python 镜像文件
# docker load < python.tar
1.6.6. 查看镜像列表
# docker image ls 
1.7. Ubuntu 镜像使用示例
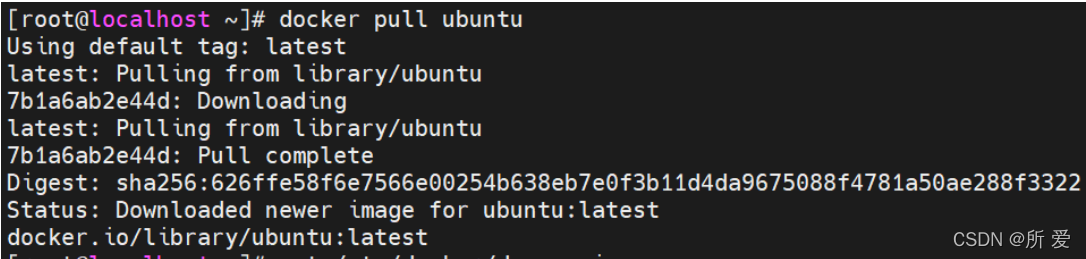
1.7.1. 下载 ubuntu 镜像
# docker pull ubuntu
上面的命令会从
Docker Hub
下载
ubuntu
镜像到本地。
1.7.2. 运行 ubuntu 镜像
# docker run -it ubuntu bash 
进入 ubuntu 系统后,执行 exit 命令退出容器,并停止容器
1.7.3. 保存 ubuntu 镜像到本地
[root@localhost ~]# docker save -o ubuntu.tar ubuntu
[root@localhost ~]# ls
anaconda-ks.cfg Desktop Documents Downloads Music Pictures Public python.tar Templates ubuntu.tar Videos
[root@localhost ~]# ll
total 990132 -rw-------. 1 root root 2754 Feb 27 2019 anaconda-ks.cfg drwxr-xr-x. 2 root root 6 Feb 27 2019 Desktop drwxr-xr-x. 2 root root 6 Feb 27 2019 Documents drwxr-xr-x. 2 root root 6 Feb 27 2019 Downloads drwxr-xr-x. 2 root root 6 Feb 27 2019 Music drwxr-xr-x. 2 root root 6 Feb 27 2019 Pictures drwxr-xr-x. 2 root root 6 Feb 27 2019 Public -rw-------. 1 root root 938725376 Nov 22 01:49 python.tar drwxr-xr-x. 2 root root 6 Feb 27 2019 Templates -rw-------. 1 root root 75164672 Nov 22 06:27 ubuntu.tar drwxr-xr-x. 2 root root 6 Feb 27 2019 Videos
1.7.4. 删除 ubuntu 镜像
[root@localhost ~]# docker rmi ubuntu
如果删除镜像时提示该镜像被容器使用,请先使用
docker container rm xxx
命令删除相应容器。
1.7.5. 加载本地 ubuntu 镜像文件
测试刚才保存的镜像文件是否可用。
[root@localhost ~]# ls
anaconda-ks.cfg Documents Music Public Templates Videos Desktop Downloads Pictures python.tar ubuntu.tar
[root@localhost ~]# docker load < ubuntu.tar
9f54eef41275: Loading layer 75.16MB/75.16MB Loaded image: ubuntu:latest
[root@localhost ~]# docker images
REPOSITORY TAG IMAGE ID CREATED SIZE python latest f48ea80eae5a 5 days ago 917MB ubuntu latest ba6acccedd29 5 weeks ago 72.8MB hello-world latest feb5d9fea6a5 8 weeks ago 13.3kB
1.8. httpd 2.4 镜像使用示例
1.8.1. 开启网络转发功能
在
/etc/sysctl.conf
文件中添加如下行:
net.ipv4.ip_forward=1
运行下面的命令重启网络服务:
systemctl restart network1.8.2. 下载 httpd 2.2 镜像
[root@localhost ~]# docker pull httpd:2.21.8.3. 运行 httpd 2.2 镜像
[root@localhost ~]# docker run -itd -p 8009:80 --name web httpd:2.2
参数说明:
-i
交互
-t
控制台
-d
后台运行
-p
本机端口
:
容器端口
--name
为
docker
容器起的名称
-v
本机文件目录
:
容器中的文件目录(挂载目录到容器中)
如果访问容器的
httpd
服务报如下错误:
[root@localhost ~]# curl 127.0.0.1:8009
curl: (56) Recv failure: Connection reset by peer
按照如下步骤重置网卡:
#
停止
docker
systemctl stop docker
#docker0
ip link set dev docker0 down
#
删除
docker0
网桥
brctl delbr docker0
#
增加
docker0
网桥
brctl addbr docker0
#
增加网卡
ip addr add 172.16.10.1/24 dev docker0
#
启用网卡
ip link set dev docker0 up
#
重启
docker
服务
systemctl restart docker
重新启动httpd容器,并测试 http 服务:
[root@localhost ~]# docker container list -a


[root@localhost ~]# docker container restart e28
e28
[root@localhost ~]# docker container list -a

[root@localhost ~]# curl 127.0.0.1:8009
<html><body><h1>It works!</h1></body></html>
1.8.4. 保存 httpd 2.2 镜像到本地
[root@localhost ~]# docker save -o httpd2.2.tar httpd:2.2
[root@localhost ~]# ls
anaconda-ks.cfg Documents httpd2.2.tar Pictures python.tar ubuntu.tar
website
Desktop Downloads Music Public Templates Videos
1.8.5. 删除 httpd 2.2 镜像
[root@localhost ~]# docker rmi httpd:2.2
[root@localhost ~]# docker images
1.8.6. 加载本地 httpd 2.2 镜像文件
[root@localhost ~]# docker load < httpd2.2.tar
[root@localhost ~]# docker images
1.8.7. 运行 httpd 2.2 (挂载目录到容器中)
# 运行 httpd 2.2,并挂载本地网页程序目录到容器
[root@localhost website]# docker run -itd -p 8008:80 --name mysite -v /root/website/:/usr/local/apache2/htdocs/ httpd:2.2
#--name自己定义

# 查看容器中的进程状态
[root@localhost website]# docker exec mysite ps -ef | grep httpd

# 查看容器中的端口链接状态
[root@localhost website]# docker exec mysite ss -antup | grep 80

# 测试 web 服务器
[root@localhost website]# curl localhost:8008v
1.9. 构建自己的镜像(基于 httpd 2.2)
1.9.1. 创建 Dockerfile 文件
在当前目录下创建
Dockerfile
,内容如下:
FROM httpd:2.2
COPY ./website/ /usr/local/apache2/htdocs/
上面的
website
目录在当前路径下,目录中是自己的网页程序文件。
1.9.2. docker build 构建镜像
# 运行如下命令,在当前目录下构建新的镜像:myhttpd
[root@localhost ~]# docker build -t myhttpd .

# 查看当前镜像列表
[root@localhost ~]# docker images | grep myhttpd
1.9.3. 基于新镜像 myhttpd 运行容器
[root@localhost ~]# docker run -itd -p 8007:80 --name newsite myhttpd
#--name之前自己设置的名字
1.9.4. 测试新容器运行情况
[root@localhost ~]# docker run -itd -p 8007:80 --name newsite myhttpd
[root@localhost ~]# curl localhost:8007
1.10. 离线安装docker引擎
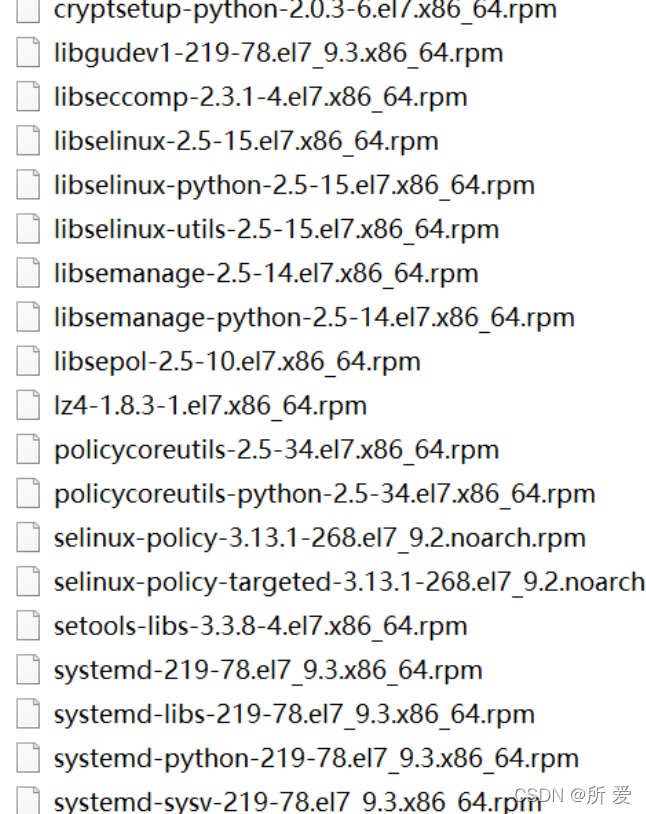
1.10.1. 更新软件包
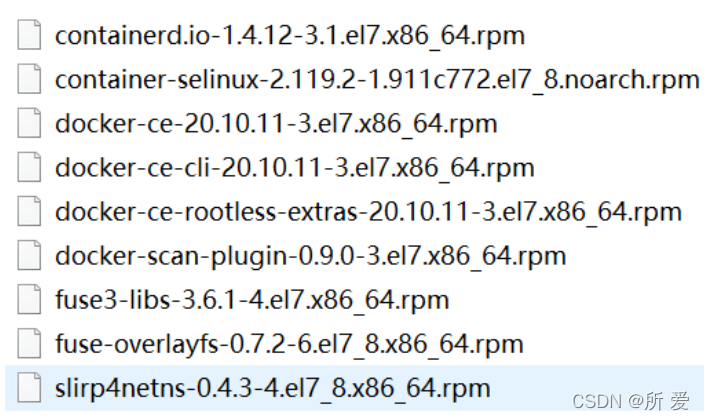
下载下图中的
rpm
包,并执行更新操作
# rpm -Uvh *.rpm
1.10.2. 安装软件包
安装下图中的软件包:
# rpm -ivh *.rpm


 54
54


 被折叠的 条评论
为什么被折叠?
被折叠的 条评论
为什么被折叠?
 到【灌水乐园】发言


