1. 需求分析
    本文的目标就是实现一个简单的登陆注册系统,系统的功能就是让用户能够正常的登陆和注册。
    1.1功能需求
    系统主要有2个功能:登陆和注册.
    (1)登陆:用户在系统界面上输入登陆账号和密码,之后点击按钮就能登陆,并且系统能返回登陆的结果。
    (2)注册:用户的系统的界面上输入待注册的账号和密码,之后点击注册,输入必要信息进行注册,并且系统能返回注册结果。
    1.2用户分析
    本文的用户暂时只考虑一个,即是普通用户。
2. 功能分析
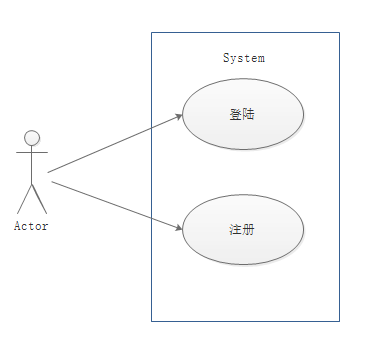
本文的用例图如下:

用例分析如下:
(1)登陆功能
    用例:登陆
    用例描述:用户登陆系统
    参与者:普通用户
    前置条件:用户打开登陆界面;
行为序列:
    1)  用户输入账号和密码;
    2)  点击登陆按钮;
    3)  客户端请求登陆并上传数据;
    4)  服务器接收请求数据,查询数据库,返回查询结果;
    5)  客户端接收登陆结果,显示登陆结果信息。
异常:
    取消:系统退出或者用户执行其他操作;用户输入空值。
(2)注册功能
用例:注册
用例描述:用户注册
参与者:普通用户
前置条件:用户打开注册界面;
行为序列:
1) 用户输入账号和密码以及其他信息;
2) 点击注册按钮;
3) 客户端请求注册,上传数据;
4) 服务器接受数据插入数据库,返回注册结果;
5) 客户端接收注册结果,显示注册结果信息。
异常:
取消:系统推出或者用户执行其他操作,用户输入注册信息不合规则。3系统设计
3.1系统体系结构

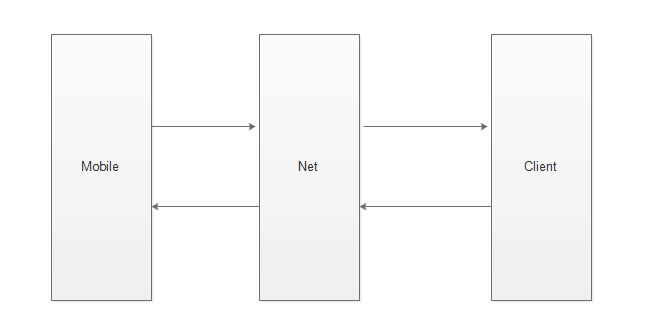
本文采用C/S结构,客户端采用Android平台,服务器采用J2EE的Struts 2.0框架,消息格式符合JSON规范,通讯协议采用HTTP协议。
3.2数据库设计
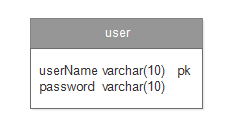
系统数据库只有一站表,即DB_User,数据库的设计如下:

3.3界面设计
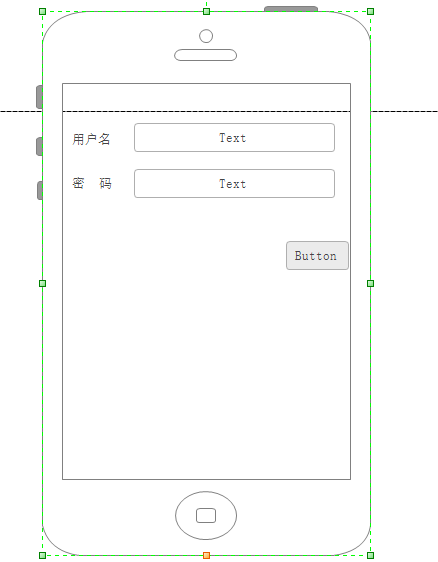
手机端的界面如下:
4.系统实现
4.1客户端界面
<?xml version="1.0" encoding="utf-8"?>
<LinearLayout xmlns:android="http://schemas.android.com/apk/res/android"
    android:layout_width="fill_parent"
    android:layout_height="fill_parent"
    android:orientation="vertical" >
    <LinearLayout
        android:id="@+id/linearLayout1"
        android:layout_width="match_parent"
        android:layout_height="wrap_content" >

        <TextView
            android:id="@+id/name_hint"
            android:layout_width="wrap_content"
            android:layout_height="wrap_content"
            android:text="用户名称" />

        <EditText
            android:id="@+id/UserName"
            android:layout_width="wrap_content"
            android:layout_height="wrap_content"
            android:layout_weight="1" >
            <requestFocus />
        </EditText>

    </LinearLayout>

    <LinearLayout
        android:id="@+id/linearLayout2"
        android:layout_width="match_parent"
        android:layout_height="wrap_content" >

        <TextView
            android:id="@+id/textView2"
            android:layout_width="wrap_content"
            android:layout_height="wrap_content"
            android:text="用户密码" />

        <EditText
            android:id="@+id/textPasswd"
            android:layout_width="wrap_content"
            android:layout_height="wrap_content"
            android:layout_weight="1"
            android:inputType="textPassword" />

    </LinearLayout>

    <Button
        android:id="@+id/btnLogin"
        android:layout_width="wrap_content"
        android:layout_height="wrap_content"
        android:text="登录" />

</LinearLayout>
4.2登陆请求的实现
/**
     * 获取Struts2 Http 登录的请求信息
     * @param  userName
     * @param  password
     */
    public void loginRemoteService(String userName,String password){
        String result=null;
        try {

            //创建一个HttpClient对象
            HttpClient httpclient = new DefaultHttpClient();
            //远程登录URL
            url= url_constant+"userName="+userName+"&password="+password;
            Log.d("远程URL", url);
            //创建HttpGet对象
            HttpGet request=new HttpGet(url);
            //请求的类型
            request.addHeader("Accept","text/json");
            //获取响应的结果
            HttpResponse response =httpclient.execute(request);
            //获取HttpEntity
            HttpEntity entity=response.getEntity();
            //获取响应的结果信息
            String json =EntityUtils.toString(entity,"UTF-8");
            //JSON的解析过程
            if(json!=null){
                JSONObject jsonObject=new JSONObject(json);
                result=jsonObject.get("message").toString();
            }
           if(result==null){
               json="登录失败请重新登录";
           }
            //创建提示框提醒是否登录成功
             AlertDialog.Builder builder=new Builder(MainActivity.this);
             builder.setTitle("提示")
             .setMessage(result)
             .setPositiveButton("确定", new DialogInterface.OnClickListener() {

                @Override
                public void onClick(DialogInterface dialog, int which) {
                    dialog.dismiss();
                }
            }).create().show();

         } catch (ClientProtocolException e) {
            // TODO Auto-generated catch block
            e.printStackTrace();
        } catch (IOException e) {
            // TODO Auto-generated catch block
            e.printStackTrace();
        } catch (JSONException e) {
            // TODO Auto-generated catch block
            e.printStackTrace();
        }
    }
4.3登陆请求的响应的实现
public void  login(){
try {

this.response.setContentType("text/html;charset=utf-8");
this.response.setCharacterEncoding("UTF-8");

Map<String,String> json=new HashMap<String,String>();

String username=this.request.getParameter("userName");
String password=this.request.getParameter("password");
UserDaoImp userDaoImp=new UserDaoImp();
//boolean b=userDaoImp.login(username,password);
boolean b=true;
if (b)
{
     json.put("message", "登录成功!");
}
else
{
    json.put("message","登录失败!");
}
byte[] jsonBytes = json.toString().getBytes("utf-8");
response.setContentLength(jsonBytes.length);
response.getOutputStream().write(jsonBytes);
response.getOutputStream().flush();
response.getOutputStream().close();
} catch (Exception e) {
e.printStackTrace();
}

}
4.4注册请求的实现
略;
4.5注册请求的响应的实现
略;
4.6数据库连接的实现
public Connection getConnection()
    {
        Connection connection = null;
        try {
            Class.forName("com.mysql.jdbc.Driver");     connection=DriverManager.getConnection("jdbc:mysql://localhost:3306/","root","123");
        } catch (ClassNotFoundException e) {
            e.printStackTrace();
        } catch (SQLException e) {
            e.printStackTrace();
        }
        return connection;
    }
4.7登陆的数据库的实现
public boolean login(String usrName,String password)
    {
        boolean b = false;
        GetConn getConn=new GetConn();
        ResultSet rs = null;
        Connection conn=getConn.getConnection();
        try {
            PreparedStatement ps=conn.prepareStatement("select * from DB_User where usrName=? and password=?");
            ps.setString(1,usrName);
            ps.setString(2,password);
            rs=ps.executeQuery();
            if (rs.next())
            {
                b=true;
            }
            else
            {
                b=false;
            }
        } catch (SQLException e) {
            e.printStackTrace();
        }
        return b;
    }
4,8注册的数据库的实现
略;


 99
99

 被折叠的 条评论
为什么被折叠?


