


一、starter启动原理
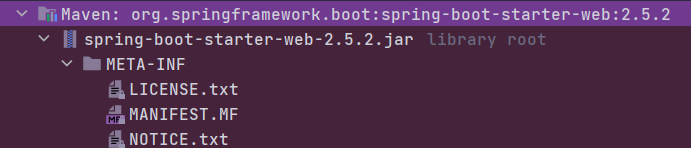
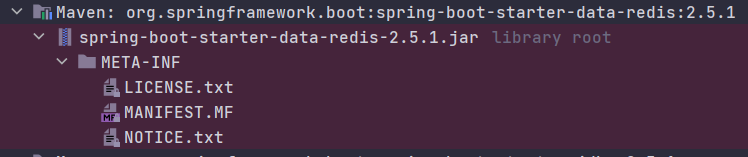
从上图可以发现,web场景启动器和redis场景启动器的jar包里面没有源代码。
这是web-starter的pom文件:
  <dependencies>
    <dependency>
      <groupId>org.springframework.boot</groupId>
      <artifactId>spring-boot-starter</artifactId>
      <version>2.5.1</version>
      <scope>compile</scope>
    </dependency>
    <dependency>
      <groupId>org.springframework.boot</groupId>
      <artifactId>spring-boot-starter-json</artifactId>
      <version>2.5.1</version>
      <scope>compile</scope>
    </dependency>
    <dependency>
      <groupId>org.springframework.boot</groupId>
      <artifactId>spring-boot-starter-tomcat</artifactId>
      <version>2.5.1</version>
      <scope>compile</scope>
    </dependency>
    <dependency>
      <groupId>org.springframework</groupId>
      <artifactId>spring-web</artifactId>
      <version>5.3.8</version>
      <scope>compile</scope>
    </dependency>
    <dependency>
      <groupId>org.springframework</groupId>
      <artifactId>spring-webmvc</artifactId>
      <version>5.3.8</version>
      <scope>compile</scope>
    </dependency>
  </dependencies>
由此可以得出,一个stater中默认只是来说明当前starter有多少个依赖。
对于一个场景真正的自动配置功能是由spring-boot-autoconfigure这个jar包来实现的。

二、自定义starter
1.创建starter
- 首先我们要创建一个空项目。用来容纳我们自己的starter、autoconfigure以及测试用到项目

- 之后在项目中添加两个个module,以maven为例。一个用来当作场景启动器,另一个用来当作自动配置包


2.配置starter
- 在starter包中引入自动配置
<?xml version="1.0" encoding="UTF-8"?>
<project xmlns="http://maven.apache.org/POM/4.0.0"
         xmlns:xsi="http://www.w3.org/2001/XMLSchema-instance"
         xsi:schemaLocation="http://maven.apache.org/POM/4.0.0 http://maven.apache.org/xsd/maven-4.0.0.xsd">
    <modelVersion>4.0.0</modelVersion>

    <groupId>org.example</groupId>
    <artifactId>hello-spring-boot-starter</artifactId>
    <version>1.0-SNAPSHOT</version>

    <dependencies>
        <dependency>
            <groupId>com.xiao</groupId>
            <artifactId>hello-spring-boot-starter-autoconfigure</artifactId>
            <version>0.0.1-SNAPSHOT</version>
        </dependency>
    </dependencies>
</project>
- 将自动配置包中没用的依赖删除
<?xml version="1.0" encoding="UTF-8"?>
<project xmlns="http://maven.apache.org/POM/4.0.0" xmlns:xsi="http://www.w3.org/2001/XMLSchema-instance"
         xsi:schemaLocation="http://maven.apache.org/POM/4.0.0 https://maven.apache.org/xsd/maven-4.0.0.xsd">
    <modelVersion>4.0.0</modelVersion>
    <parent>
        <groupId>org.springframework.boot</groupId>
        <artifactId>spring-boot-starter-parent</artifactId>
        <version>2.5.2</version>
        <relativePath/> <!-- lookup parent from repository -->
    </parent>
    <groupId>com.xiao</groupId>
    <artifactId>hello-spring-boot-starter-autoconfigure</artifactId>
    <version>0.0.1-SNAPSHOT</version>
    <name>hello-spring-boot-starter-autoconfigure</name>
    <description>Demo project for Spring Boot</description>
    <properties>
        <java.version>1.8</java.version>
    </properties>
    <dependencies>
        <dependency>
            <groupId>org.springframework.boot</groupId>
            <artifactId>spring-boot-starter</artifactId>
        </dependency>
    </dependencies>
</project>

3.编写自动配置包的功能
这里我们模拟一个功能场景,业务逻辑是页面输出人名,模拟打招呼。需要自动配置包帮我们配置。
service类:
//不需要手动注入到容器里,交给自动配置类管理
public class HelloService {

    @Autowired
    HelloProperties helloProperties;

    public String sayHello(String userName) {
        return helloProperties.getPrefix() + userName + helloProperties.getSuffix();
    }
}
HelloService的自动配置类:
@Configuration
@EnableConfigurationProperties(HelloProperties.class)
public class HelloServiceAutoConfiguration {

    @Bean
    //只有当容器中没有HelloService类型的组件时,此方法才会给容器中注入组件
    @ConditionalOnMissingBean
    public HelloService helloService(){
        return new HelloService();
    }
}
Hello属性类:
@ConfigurationProperties("hello")
public class HelloProperties {

    private String prefix;//前缀
    private String suffix;//后缀

    public String getPrefix() {
        return prefix;
    }

    public void setPrefix(String prefix) {
        this.prefix = prefix;
    }

    public String getSuffix() {
        return suffix;
    }

    public void setSuffix(String suffix) {
        this.suffix = suffix;
    }
}
@EnableConfigurationProperties(HelloProperties.class)注解有两个功能:
1.将HelloProperties与配置文件的相关属性(hello)绑定。
2.将HelloProperties注入到容器中
@ConditionalOnMissingBean:
只有当容器中没有HelloService类型的组件时,此方法才会给容器中注入组件
4.将这两个项目打包到maven仓库

打包完成之后,我们就可以在别的项目中引用了。
5.创建一个测试项目

在此项目的pom文件里将我们自定义的starter引入进来。
        <dependency>
            <groupId>org.example</groupId>
            <artifactId>hello-spring-boot-starter</artifactId>
            <version>1.0-SNAPSHOT</version>
        </dependency>
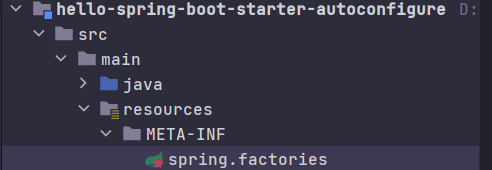
注意:虽然引入了自动配置包,但是自动配置类还不能生效。根据SpringBoot自动配置原理,我们还需在自动配置包中 使用META-INF/spring.factories 中 EnableAutoConfiguration 的值,使得项目启动加载指定的自动配置类

弄好之后需要重新打包。
在测试的项目中创建一个controller
@RestController
public class HelloController {
@Autowired
HelloService helloService;
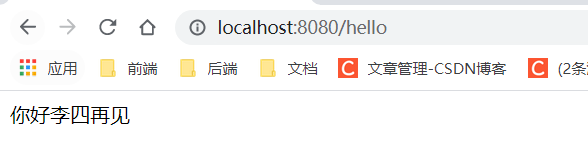
@GetMapping("/hello")
public String sayHello(){
return helloService.sayHello("李四");
}
}
yml文件配置:
hello.prefix=你好
hello.suffix=再见
最后打开游览器查看测试结果:


 1026
1026


 被折叠的 条评论
为什么被折叠?
被折叠的 条评论
为什么被折叠?
 到【灌水乐园】发言


