


HTTP协议的状态管理
1.由于HTTP协议是一款基于短连接的协议,所以对于
服务端来说,客户端的每一个请求都是独立的请求.
Http协议的请求是无状态的.
服务端无法把客户端发送的多次请求当成一个整体
来看待.无法把多次请求所涉及到的数据保存下来.
2.如何实现HTTP的状态管理?
Cookie机制 把数据保存在客户端
Session机制 把数据保存在服务端
Cookie机制
1>客户端发送第一次请求,服务端返回http响应数据包
在响应数据包中含有传输cookie的消息头:
Set-Cookie: cishu=10
2>客户端接收服务端的响应,解析响应数据包,
获取cookie信息,然后需要把cookie信息存储到
客户端中.
3>当客户端发送后续请求时,需要携带cookie一同
发送,在请求数据包中添加下列消息头:
Cookie: cishu=10
4>服务端接收请求后,获取cookie信息执行后续
操作,完成http状态管理.
Session机制 把数据存到服务端
1>客户端发送请求,服务端将会为该客户端分配一个
JSESSIONID,并且把需要保存的数据与JSESSIONID
绑定在一起,保存在服务端中. 在返回的响应数据包
中携带JSESSIONID让客户端保存:
Set-Cookie: JSESSIONID=ABCDEFABCDEFABCDEF
2>客户端接收响应,解析响应后,获取JSESSIONID并且
保存在客户端.
3>客户端发送后续请求时,需要在请求数据包中携带
JSESSIONID一同发送:
Cookie: JSESSIONID=ABCDEFABCDEFABCDEF
4>服务端接收请求后,获取JSESSIONID,找到与之
绑定在一起的session数据,执行后续操作.
完成http状态管理.
下面就以一个登录节目来详细介绍一下如何利用ssension机制,把数据保存到服务端
在介绍之前我们还要了解一下网络请求分为两种方式。一种是Get请求,一种是Post请求
他们之间的区别为:
GET/POST两种请求方式的区别?
1>参数在数据包中的存放位置
GET: 请求资源路径后用?拼接
POST: 请求数据包中的实体部分
2>是否适合传递中文
GET: 不适合
POST: 比较适合
3>是否适合大数据量提交
GET: 不适合
POST: 适合
4>安全性
GET: 相对不安全
POST: 相对安全
想看一下效果图吧
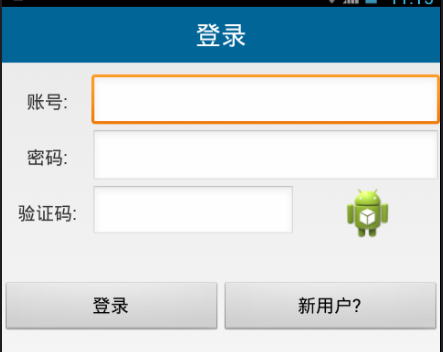
xml中布局如下
<RelativeLayout xmlns:android="http://schemas.android.com/apk/res/android"
    xmlns:tools="http://schemas.android.com/tools"
    android:layout_width="match_parent"
    android:layout_height="match_parent" >

    <TextView
        android:id="@+id/textView2"
        android:layout_width="match_parent"
        android:layout_height="50dp"
        android:layout_marginBottom="10dp"
        android:background="#026598"
        android:gravity="center"
        android:text="登录"
        android:textColor="#ffffff"
        android:textSize="20sp" />

    <TextView
        android:id="@+id/textView1"
        android:layout_width="80dp"
        android:layout_height="50dp"
        android:layout_alignParentLeft="true"
        android:layout_below="@+id/textView2"
        android:gravity="center"
        android:text="账号:" />

    <EditText
        android:id="@+id/etName"
        android:layout_width="wrap_content"
        android:layout_height="wrap_content"
        android:layout_alignBottom="@+id/textView1"
        android:layout_alignParentRight="true"
        android:layout_below="@+id/textView2"
        android:layout_toRightOf="@+id/textView1"
        android:ems="10" >
    </EditText>

    <TextView
        android:id="@+id/tvAge"
        android:layout_width="80dp"
        android:layout_height="50dp"
        android:layout_below="@+id/textView1"
        android:layout_toLeftOf="@+id/etName"
        android:gravity="center"
        android:text="密码:" />

    <TextView
        android:id="@+id/TextView02"
        android:layout_width="80dp"
        android:layout_height="50dp"
        android:layout_alignParentLeft="true"
        android:layout_below="@+id/tvAge"
        android:gravity="center"
        android:text="验证码:" />

    <EditText
        android:id="@+id/etPassword"
        android:layout_width="wrap_content"
        android:layout_height="wrap_content"
        android:layout_above="@+id/TextView02"
        android:layout_alignLeft="@+id/etName"
        android:layout_alignParentRight="true"
        android:layout_below="@+id/etName"
        android:ems="10" />

    <EditText
        android:id="@+id/etCode"
        android:layout_width="wrap_content"
        android:layout_height="wrap_content"
        android:layout_alignLeft="@+id/etPassword"
        android:layout_below="@+id/etPassword"
        android:layout_toLeftOf="@+id/ivCode"
        android:ems="10" />

    <ImageView
        android:id="@+id/ivCode"
        android:layout_width="130dp"
        android:layout_height="50dp"
        android:layout_alignParentRight="true"
        android:onClick="doClick"
        android:layout_below="@+id/etPassword"
        android:src="@drawable/ic_launcher" />

    <LinearLayout
        android:layout_width="match_parent"
        android:layout_height="wrap_content"
        android:layout_alignParentLeft="true"
        android:layout_below="@+id/TextView02"
        android:layout_marginTop="36dp" >

        <Button
            android:id="@+id/btnLogin"
            android:layout_width="0dp"
            android:layout_weight="1"
            android:layout_height="wrap_content"
            android:onClick="doClick"
            android:text="登录" />

        <Button
            android:id="@+id/btnToRegist"
            android:layout_weight="1"
            android:layout_width="0dp"
            android:layout_height="wrap_content"
            android:onClick="doClick"
            android:text="新用户?" />
    </LinearLayout>

</RelativeLayout>首先当布局一加载时,就需要获取验证码,验证码接口地址为”http://172.60.50.93:8888/ems/getCode.do”
这里我们用的请求方式是Get请求,登录界面是需要向服务器发送两次请求的,所以我们用到了HTTP状态的管理,并且为了安全,选用的ssesion机制,保存数据 的,代码如下
    /**
     * 工作线程中执行 获取验证码图片
     */
    private void getCode() throws IOException{
        URL url = new URL("http://172.60.50.93:8888/ems/getCode.do");
        HttpURLConnection conn = (HttpURLConnection)       url.openConnection();
        conn.setRequestMethod("GET");
        InputStream is = conn.getInputStream();
        //把inputstream解析为一个Bitmap
        bitmap=BitmapFactory.decodeStream(is);
        //除了获取图片之外  还需要解析响应消息头
        //Set-Cookie
        JSESSIONID=conn.getHeaderField("Set-Cookie");
        // JSESSIONID=afasfasfsadfa; Path=/dfdf
        if(JSESSIONID!=null){
            JSESSIONID = JSESSIONID.split(";")[0];
        }
        Log.i("info", JSESSIONID+"");
        //把bitmap设置给imageView 需要在主线程做
        handler.sendEmptyMessage(HANDLER_IMAGE_LOAD_SUCCESS);
}工作线程中执行登录业务,登录的接口地址为”http://172.60.50.93:8888/ems/login.do“,这里需要的参数loginname,password,code ,并且接口给我们的方式为Post请求
/**
     * 工作线程中执行登录业务
     */
    public void login() throws IOException, JSONException{
        //1.  URL
        URL url = new URL("http://172.60.50.93:8888/ems/login.do");
        //2.  HttpUrlConnection
        HttpURLConnection conn = (HttpURLConnection) url.openConnection();
        //3.  POST
        conn.setRequestMethod("POST");
        //4.  属性
        conn.setDoOutput(true);
        //设置Content-Type消息头
        conn.setRequestProperty("Content-Type", "application/x-www-form-urlencoded");
        //设置Cookie消息头
        conn.setRequestProperty("Cookie", JSESSIONID);
        //5.  参数
        OutputStream os = conn.getOutputStream();
        String name = etName.getText().toString();
        String pwd = etPassword.getText().toString();
        String code = etCode.getText().toString();
        String params = "loginname="+name+"&password="+pwd+"&code="+code;
        os.write(params.getBytes("utf-8"));
        os.flush();
        //6.  获取inputstream  respText
        InputStream is = conn.getInputStream();
        BufferedReader reader = new BufferedReader(new InputStreamReader(is));
        StringBuilder sb = new StringBuilder();
        String line = "";
        while((line = reader.readLine()) != null){
            sb.append(line);
        }
        String jsonText = sb.toString();
        //7.  解析json  {result:ok} {result:error, msg:xx}
        JSONObject obj = new JSONObject(jsonText);
        String res=obj.getString("result");
        if("ok".equals(res)){  //请求成功
            handler.sendEmptyMessage(HANDLER_LOGIN_SUCCESS);
        }else{ //请求失败
            Message msg = new Message();
            msg.what = HANDLER_LOGIN_FAIL;
            msg.obj = obj.getString("msg");
            handler.sendMessage(msg );
        }


    }
工作线程是无法进行界面更新的,必须要在主线程中执行界面的更新,这里就用到了handled
开始就声明Handled类的实例,重写handleMessage方法
private Handler handler = new Handler(){
        public void handleMessage(android.os.Message msg) {
            switch (msg.what) {
            case HANDLER_LOGIN_SUCCESS:
                Toast.makeText(LoginActivity.this, "恭喜,登录成功!", Toast.LENGTH_SHORT).show();
                Intent intent = new Intent(LoginActivity.this, ListEmpActivity.class);
                startActivity(intent);
                finish();
                break;
            case HANDLER_LOGIN_FAIL:
                Toast.makeText(LoginActivity.this, "登录失败:"+msg.obj, Toast.LENGTH_SHORT).show();
                break;
            case HANDLER_IMAGE_LOAD_SUCCESS:
                if(bitmap!=null){ //图片加载成功
                    ivCode.setImageBitmap(bitmap);
                }
                break;
            }
        }
    };

    private static final int HANDLER_IMAGE_LOAD_SUCCESS=1;
    private static final int HANDLER_LOGIN_SUCCESS = 2;
    private static final int HANDLER_LOGIN_FAIL = 3;
为按钮添加点击事件
public void doClick(View view){
        switch (view.getId()) {
        case R.id.btnToRegist: //去注册
            Intent intent = new Intent(this, RegistActivity.class);
            startActivityForResult(intent, 101);
            break;
        case R.id.btnLogin:  //登录
            new Thread(){
                public void run() {
                    try {
                        login();
                    } catch (IOException e) {
                        e.printStackTrace();
                    } catch (JSONException e) {
                        e.printStackTrace();
                    }
                }
            }.start();
            break;
        case R.id.ivCode: //换一张
            new Thread(){
                public void run() {
                    try {
                        getCode();
                    } catch (IOException e) {
                        e.printStackTrace();
                    }
                }
            }.start();
            break;
        }
    }
之前也说了,布局已加载,就需要获取验证码,所以在OnCreate()方法中代码如下
@Override
    protected void onCreate(Bundle savedInstanceState) {
        super.onCreate(savedInstanceState);
        setContentView(R.layout.activity_login);
        //初始化
        setViews();
        //发送http请求 获取验证码图片 设置给ImageView
        new Thread(){
            public void run() {
                try {
                    getCode();
                } catch (IOException e) {
                    e.printStackTrace();
                }
            }
        }.start();
    }
以上就是整个登录界面的过程,主要是要根据接口文档提供的要求,选择请求方式。


 140
140

 被折叠的 条评论
为什么被折叠?
被折叠的 条评论
为什么被折叠?
 到【灌水乐园】发言


