


 本文详述在Red Hat Enterprise Linux 6 64位和Centos 6.6系统下,通过界面安装方式安装Oracle 11g的步骤,包括修改配置文件、安装Oracle产品、建库、配置监听和网络服务以及启动服务的详细过程。
本文采用界面安装方式,适用于局域网远程安装Oracle和直接在Linux服务器上安装。
通过互联网环境安装没有试验过,互联网环境采用静默方式安装比较好。
本文在Red Hat Enterprise Linux 6 64 位系统、Centos 6.6系统下安装通过。
本文使用的工具:
Xshell 4、Xftp 4、VMware 10.0.3
安装的Oracle版本为:
Oracle Database 11g Enterprise Edition Release 11.2.0.3.0 - 64bit Production
使用的Oracle安装包:
p10404530_112030_Linux-x86-64_1of7.zip
p10404530_112030_Linux-x86-64_2of7.zip
目录
一、修改配置文件
1.1、修改/etc/security/limits.conf文件,修改用户的SHELL的限制。
1.2、修改/etc/pam.d/login 文件。
1.3、修改linux内核,修改/etc/sysctl.conf文件。
1.4、修改/etc/profile。
1.5、创建用户和组。
1.6、创建数据库软件目录和数据文件存放目录。
1.7、配置oracle用户的环境变量。
1.8、上传Oracle安装文件
1.9、解压安装文件
二、安装Oracle 11.2产品
三、数据库建库
四、配置监听及本地网络服务
五、启动Oracle服务和监听器
一、修改配置文件
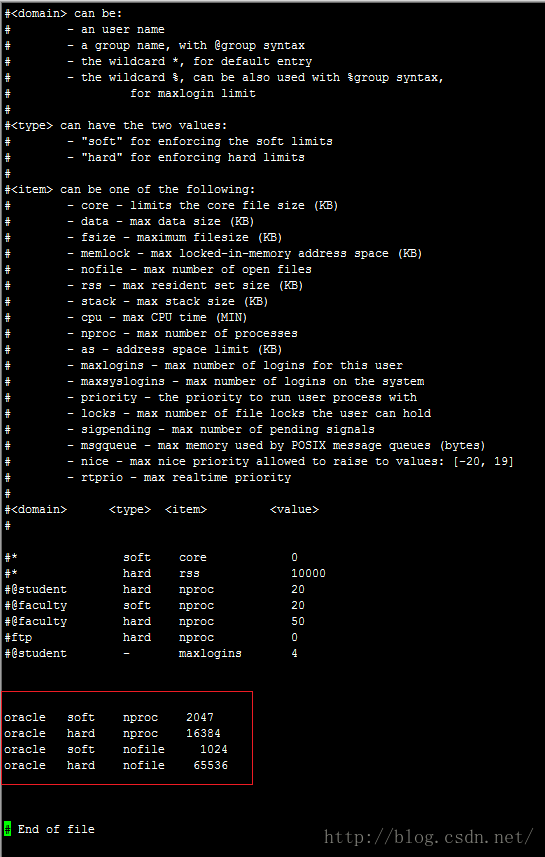
1.1、修改/etc/security/limits.conf文件,修改用户的SHELL的限制。
输入命令:vi /etc/security/limits.conf,将下列内容加入该文件。
oracle   soft    nproc    2047
oracle   hard    nproc    16384
oracle   soft    nofile   1024
oracle hard nofile 65536按Insert键进入编辑状态,编辑完成后按Esc键退出编辑状态,按键输入英文冒号wq“:wq”保存退出。不想保存:按Esc键,然后按Ctrl+Z。
[root@localhost ~]# su - root
[root@localhost ~]# vi /etc/security/limits.conf
1.2、修改/etc/pam.d/login 文件。
输入命令:vi /etc/pam.d/login,将下列内容加入该文件。
session   required    /lib/security/pam_limits.so
session   required    pam_limits.so
1.3、修改linux内核,修改/etc/sysctl.conf文件。
输入命令: vi /etc/sysctl.conf ,将下列内容加入该文件。
fs.file-max = 6815744
fs.aio-max-nr = 1048576
kernel.shmall = 2097152
kernel.shmmax = 2147483648
kernel.shmmni = 4096
kernel.sem = 250 32000 100 128
net.ipv4.ip_local_port_range = 9000 65500
net.core.rmem_default = 4194304
net.core.rmem_max = 4194304
net.core.wmem_default = 262144
net.core.wmem_max = 1048576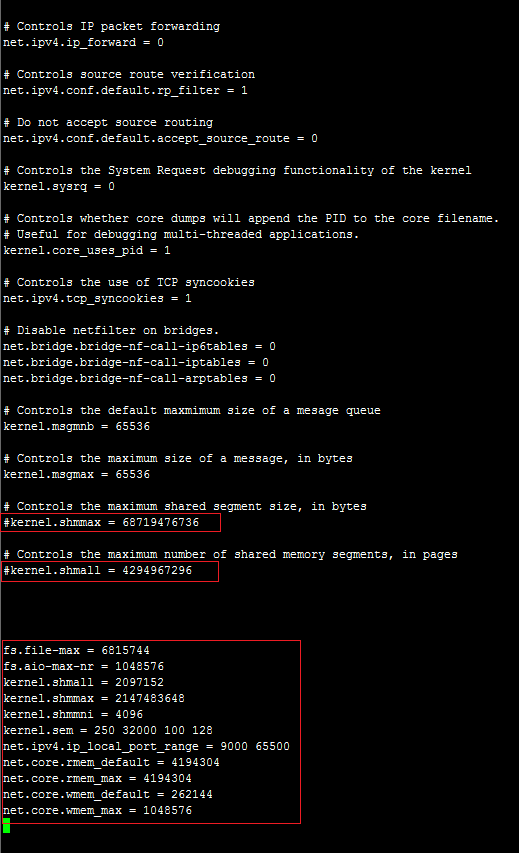
用#符号注释掉原有的配置。
# Controls the maximum shared segment size, in bytes
#kernel.shmmax = 68719476736
# Controls the maximum number of shared memory segments, in pages
#kernel.shmall = 4294967296
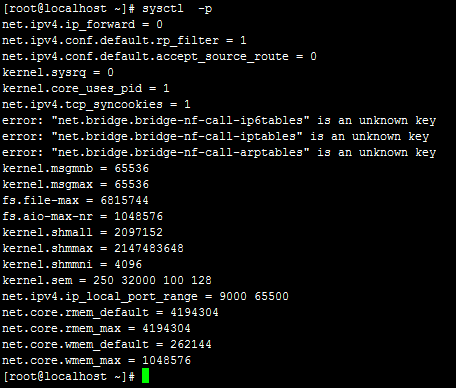
输入命令:sysctl -p,使/etc/sysctl.conf配置文件立即生效。
1.4、修改/etc/profile。
输入命令:vi /etc/profile,将下列内容加入该文件。
if [ $USER = "oracle" ]; then
if [ $SHELL = "/bin/ksh" ]; then
  ulimit -p 16384
  ulimit -n 65536
else
  ulimit -u 16384 -n 65536
fi
fi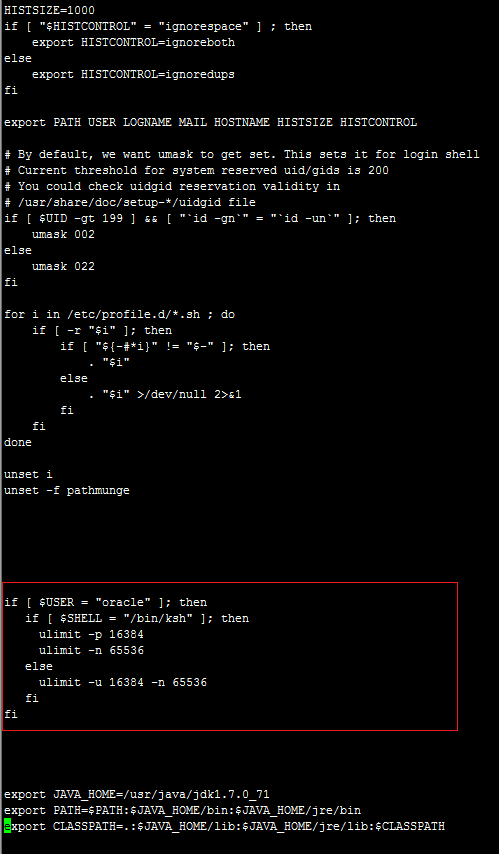
 最低0.47元/天 解锁文章


 1216
1216

 被折叠的 条评论
为什么被折叠?
被折叠的 条评论
为什么被折叠?
 到【灌水乐园】发言


