


转载借鉴:
https://www.jianshu.com/p/499ddf24c49c
https://blog.csdn.net/weixin_44606660/article/details/86604963
如有侵权联系删除
实现如下效果
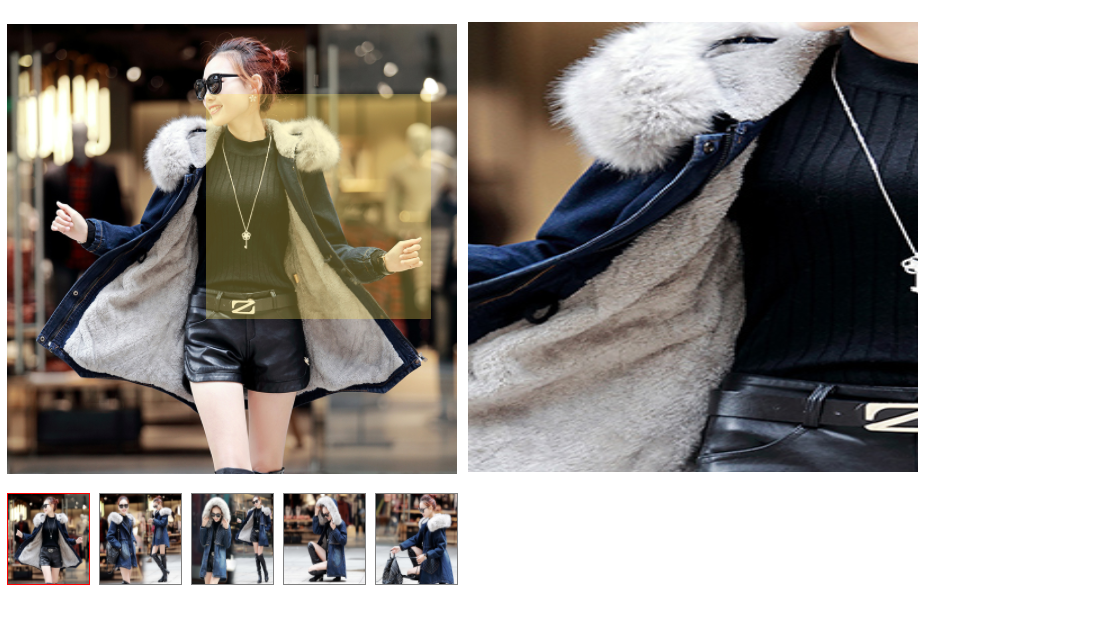
优化了代码,结合两位老师的代码,组合实现了,点击商品显示对应商品大图的效果跟,商品放大镜的效果
<!DOCTYPE html>
<html lang="en">

	<head>
		<meta charset="UTF-8">
		<title>Document</title>
		<script src="js/main.js" type="text/javascript" charset="utf-8"></script>
		<!--实现css-->
		<style type="text/css">
			/*这里是选择跟整体设计开始*/
			ul,
			li {
				list-style: none;
				padding-left: 0px;
			}

			.box {
				width: 900px;
				height: 500px;
				text-align: left;
			}

			#pic {
				width: 500px;
				height: 500px;
				margin-top: 30px;
			}

			ul li {
				width: 90px;
				height: 100px;
				text-align: center;
				float: left;
				margin-right: 10px;
				border: 1px solid gray;
			}

			ul li img {
				width: 100%;
				height: 100%;
			}

			ul li:hover img {
				width: 100%;
				;
				height: 100%;
				;
			}

			ul li.sel {
				border-color: red;
				//border-width: 1.5px;
			}

			ul li.sel img {
				width: 100%;
				;
				height: 100%;
				;
				#curPic:hover {
					cursor: move;
				}
			}

			/*这里是选择跟整体设计结束*/
			/*从这边开始是放大图片处理css*/
			#curPic img {
				width: 500px;
				height: 500px;
			}

			#mgf {
				display: none;
				position: absolute;
				top: 0;
				left: 0;
				background-color: rgba(255, 230, 93, 0.3);
				width: 250px;
				height: 250px;
			}

			#boxEnlarge {
				display: none;
				position: absolute;
				top: 35px;
				left: 520px;
				overflow: hidden;
			}
			/*放大处理结束*/
		</style>
	</head>

	<body>
		<div class="box">

		<!--设置放大镜的html代码块开始-->
			<div id="parent">

				<div id="curPic">
					<div id="mgf"></div>
					<img src="img/dd1.jpg" alt="" class="small-img" id="pic">
				</div>

				<div id="boxEnlarge">
					<img src="img/dd1.jpg" alt="" class="small-img" id="pic">
				</div>
			</div>
<!--设置放大镜的html代码块结束-->
<!--设置选择图片的html代码开始-->
			<ul>
				<li class="sel"><img src="img/dd1.jpg" alt=""></li>
				<li><img src="img/dd2.jpg" alt=""></li>
				<li><img src="img/dd3.jpg" alt=""></li>
				<li><img src="img/dd4.jpg" alt=""></li>
				<li><img src="img/dd5.jpg" alt=""></li>
			</ul>
			<!--设置选择图片的html代码结束-->
		</div>
<!--设置选择图片js代码-->
		<script type="text/javascript">
			var lis = document.getElementsByTagName("ul")[0].getElementsByTagName('li'); //li
			var oImg = document.getElementById('pic');

			//为li添加单击事件
			for(var i = 0; i < lis.length; i++) {
				lis[i].onclick = function() {
					oImg.src = this.children[0].src;
					for(var j = 0; j < lis.length; j++) {
						lis[j].className = "";
					}
					this.className = "sel";
				};
			}
		</script>
		<!--设置放大镜的代码-->
<script type="text/javascript">
			var parent = document.getElementById('parent');
			var curpic = document.getElementById('curPic');
			var mgf = document.getElementById("mgf");
			var boxEnlarge = document.getElementById("boxEnlarge");
			/*鼠标移至图片范围时,显示‘放大镜’和放大区域*/
			curpic.onmouseover = function() {
				var mgf = document.getElementById("mgf");
				mgf.style.display = "block";
				boxEnlarge.style.display = "block";
			}
			/*鼠标移出图片范围时,隐藏‘放大镜’和放大区域*/
			curpic.onmouseout = function() {
				var mgf = document.getElementById("mgf");
				mgf.style.display = "none";
				boxEnlarge.style.display = "none";
			}
			curpic.onmousemove = function() {
				Move();
			}

			function Move(e) {
				/*根据‘放大镜’和放大倍数设置放大区域大小*/
				boxEnlarge.style.width = mgf.offsetWidth * 2 + 'px';
				boxEnlarge.style.height = mgf.offsetHeight * 2 + 'px';

				/*鼠标移至‘放大镜’中心*/
				e = e || event;
				var mgfx = e.clientX - curpic.offsetLeft - parent.offsetLeft - mgf.offsetWidth / 2;
				var mgfy = e.clientY - curpic.offsetTop - parent.offsetTop - mgf.offsetHeight / 2;
				if(mgfx < 0) {
					mgfx = 0;
				}
				if(mgfx >= curpic.offsetWidth - mgf.offsetWidth) {
					mgfx = curpic.offsetWidth - mgf.offsetWidth;
				}
				if(mgfy < 0) {
					mgfy = 0;
				}
				if(mgfy >= curpic.offsetHeight - mgf.offsetHeight) {
					mgfy = curpic.offsetHeight - mgf.offsetHeight;
				}
				mgf.style.left = mgfx + 'px';
				mgf.style.top = mgfy + 'px';

				/*设置放大的图片尺寸并根据‘放大镜’的移动调整显示区域*/
				var pic = boxEnlarge.children[0];
				pic.style.width = curpic.offsetWidth * 2 + 'px';
				pic.style.height = curpic.offsetHeight * 2 + 'px';
				pic.style.marginLeft = ((-1) * mgf.offsetLeft * 2) + 'px';
				pic.style.marginTop = ((-1) * mgf.offsetTop * 2) + 'px';
			}
		</script>
	</body>

</html>
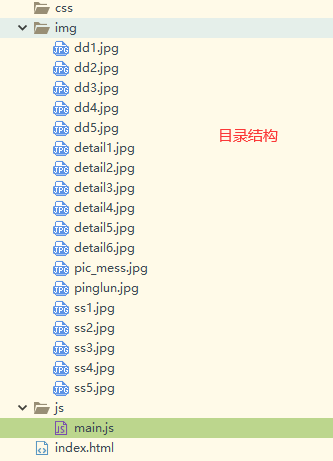
素材:


 648
648

 被折叠的 条评论
为什么被折叠?
被折叠的 条评论
为什么被折叠?
 到【灌水乐园】发言


