一、相关pom依赖
 <dependencies>
        <!-- SpringBoot整合Web组件 -->
        <dependency>
            <groupId>org.springframework.boot</groupId>
            <artifactId>spring-boot-starter-web</artifactId>
        </dependency>

        <!-- springBoot整合freemarker -->
        <dependency>
            <groupId>org.springframework.boot</groupId>
            <artifactId>spring-boot-starter-freemarker</artifactId>
        </dependency>

        <!--springBoot整合security -->
        <dependency>
            <groupId>org.springframework.boot</groupId>
            <artifactId>spring-boot-starter-security</artifactId>
        </dependency>

    </dependencies>
二、案例环境准备代码
1)、application.yml
server:
  port: 9001
# 配置freemarker
spring:
  freemarker:
    # 设置模板后缀名
    suffix: .ftl
    # 设置文档类型
    content-type: text/html
    # 设置页面编码格式
    charset: UTF-8
    # 设置页面缓存
    cache: false
    # 设置ftl文件路径
    template-loader-path:
      - classpath:/templates
  # 设置静态文件路径,js,css等
  mvc:
    static-path-pattern: /static/**
2)、controller案例代码
@Controller
public class OrderController {
	// 首页
	@RequestMapping("/")
	public String index() {
		return "index";
	}

	// 查询订单
	@RequestMapping("/showOrder")
	public String showOrder() {
		return "showOrder";
	}

	// 添加订单
	@RequestMapping("/addOrder")
	public String addOrder() {
		return "addOrder";
	}

	// 修改订单
	@RequestMapping("/updateOrder")
	public String updateOrder() {
		return "updateOrder";
	}

	// 删除订单
	@RequestMapping("/deleteOrder")
	public String deleteOrder() {
		return "deleteOrder";
	}

	// 自定义登陆页面
	@GetMapping("/login")
	public String login() {
		return "login";
	}

}
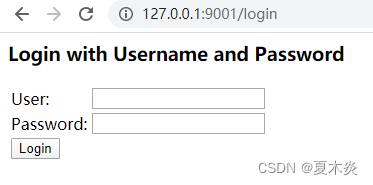
3)、默认配置时测试访问主页,默认是fromLogin模式

三、修改默认配置
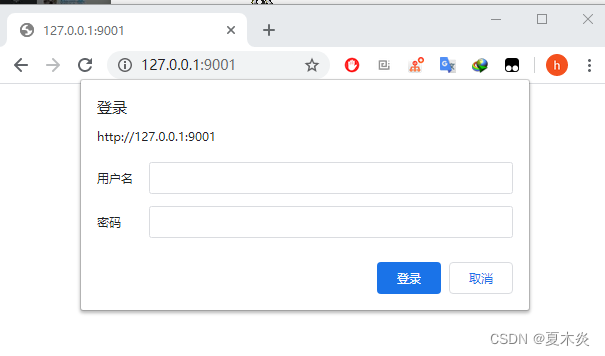
1)、httpBasicm模式案例(浏览器与服务器做认证授权)
配置安全认证:
@Component
@EnableWebSecurity
public class SecurityConfig extends WebSecurityConfigurerAdapter {

    /**
     * 配置认证用户信息和权限
     * @param auth 认证
     * @throws Exception 异常
     */
    @Override
    protected void configure(AuthenticationManagerBuilder auth) throws Exception {
        //设置账户权限
        auth.inMemoryAuthentication().withUser("admin").password("123456").authorities("addOrder");

    }

    /**
     * 配置拦截请求资源
     * @param http 请求
     * @throws Exception 异常
     */
    @Override
    protected void configure(HttpSecurity http) throws Exception {
        //拦截所有请求,设置认证模式为httpBasic
        http.authorizeRequests().antMatchers("/**").fullyAuthenticated().and().httpBasic();
    }

    /**
     * 配置密码不加密
     * @return NoOpPasswordEncoder
     */
    @Bean
    public static NoOpPasswordEncoder passwordEncoder(){
        return (NoOpPasswordEncoder) NoOpPasswordEncoder.getInstance();
    }

}
访问主页:

2)、formLogin模式案例
配置安全认证:
@Component
@EnableWebSecurity
public class SecurityConfig extends WebSecurityConfigurerAdapter {

    /**
     * 配置认证用户信息和权限
     * @param auth 认证
     * @throws Exception 异常
     */
    @Override
    protected void configure(AuthenticationManagerBuilder auth) throws Exception {
        //设置管理员有showOrder updateOrder addOrder deleteOrder 权限
        auth.inMemoryAuthentication().withUser("admin").password("123456").authorities("showOrder","updateOrder","addOrder","deleteOrder");
        //设置普通用户有showOrder updateOrder  权限
        auth.inMemoryAuthentication().withUser("user").password("123456").authorities("showOrder","updateOrder");

    }

    /**
     * 配置拦截请求资源
     * @param http 请求
     * @throws Exception 异常
     */
    @Override
    protected void configure(HttpSecurity http) throws Exception {
        //拦截所有请求,设置认证模式为formLogin
        http.authorizeRequests()
                //配置查询订单权限
                .antMatchers("/showOrder").hasAnyAuthority("showOrder")
                //配置新增订单权限
                .antMatchers("/addOrder").hasAnyAuthority("addOrder")
                //配置修改订单权限
                .antMatchers("/updateOrder").hasAnyAuthority("updateOrder")
                //配置删除订单权限
                .antMatchers("/deleteOrder").hasAnyAuthority("deleteOrder")
                .antMatchers("/**").fullyAuthenticated().and().formLogin();
    }

    /**
     * 配置密码不加密
     * @return NoOpPasswordEncoder
     */
    @Bean
    public static NoOpPasswordEncoder passwordEncoder(){
        return (NoOpPasswordEncoder) NoOpPasswordEncoder.getInstance();
    }

}
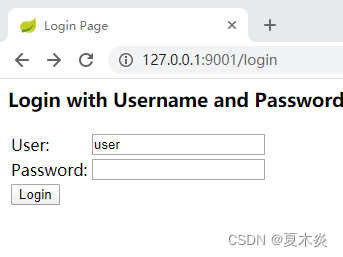
验证结果管理员有所有权限,普通用户只有查询和修改权限:


四、配置自定义错误页和登入页
1)、错误页
@Configuration
public class WebServerAutoConfiguration {
    @Bean
    public ConfigurableServletWebServerFactory webServerFactory() {
        TomcatServletWebServerFactory factory = new TomcatServletWebServerFactory();
        ErrorPage errorPage400 = new ErrorPage(HttpStatus.BAD_REQUEST, "/error/400");
        ErrorPage errorPage401 = new ErrorPage(HttpStatus.UNAUTHORIZED, "/error/401");
        ErrorPage errorPage403 = new ErrorPage(HttpStatus.FORBIDDEN, "/error/403");
        ErrorPage errorPage404 = new ErrorPage(HttpStatus.NOT_FOUND, "/error/404");
        ErrorPage errorPage415 = new ErrorPage(HttpStatus.UNSUPPORTED_MEDIA_TYPE, "/error/415");
        ErrorPage errorPage500 = new ErrorPage(HttpStatus.INTERNAL_SERVER_ERROR, "/error/500");
        factory.addErrorPages(errorPage400, errorPage401, errorPage403, errorPage404, errorPage415, errorPage500);
        return factory;
    }
}
@Controller
public class ErrorController {
// 403权限不足页面
@RequestMapping("/error/403")
public String error() {
return "/error/403";
}
...
}2)、登入页
http.authorizeRequests()
                //配置查询订单权限
                .antMatchers("/showOrder").hasAnyAuthority("showOrder")
                //配置新增订单权限
                .antMatchers("/addOrder").hasAnyAuthority("addOrder")
                //配置修改订单权限
                .antMatchers("/updateOrder").hasAnyAuthority("updateOrder")
                //配置删除订单权限
                .antMatchers("/deleteOrder").hasAnyAuthority("deleteOrder")
                //配置自定义登入页,禁用csrf(方便演示)
                .antMatchers("/**").fullyAuthenticated().and().formLogin().loginPage("/login").and().csrf().disable();
3)、自定义认证成功或者失败处理
@Component
public class MyAuthenticationFailureHandler implements AuthenticationFailureHandler {

	public void onAuthenticationFailure(HttpServletRequest req, HttpServletResponse res, AuthenticationException auth)
			throws IOException, ServletException {
		System.out.println("用户认证失败");
		res.sendRedirect("https://www.zhqwfj.xyz");
	}

}
@Component
public class MyAuthenticationSuccessHandler implements AuthenticationSuccessHandler {

	// 用户认证成功
	public void onAuthenticationSuccess(HttpServletRequest req, HttpServletResponse res, Authentication auth)
			throws IOException, ServletException {
		System.out.println("用户登陆成功");
		res.sendRedirect("/");
	}
}
@Component
@EnableWebSecurity
public class SecurityConfig extends WebSecurityConfigurerAdapter {
	@Autowired
    private MyAuthenticationSuccessHandler successHandler;
	@Autowired
    private MyAuthenticationFailureHandler failHandler;
	// 用户认证信息
	@Override
	protected void configure(AuthenticationManagerBuilder auth) throws Exception {
		// 设置用户账号信息和权限
		 auth.inMemoryAuthentication().withUser("admin").password("123456").authorities("showOrder","addOrder","updateOrder","deleteOrder");
		 // 添加 useradd账号 只有添加查询和添加订单权限
		 auth.inMemoryAuthentication().withUser("userAdd").password("123456")
			.authorities("showOrder","addOrder");
	}

	// 配置HttpSecurity 拦截资源
	protected void configure(HttpSecurity http) throws Exception {
// 拦截请求, 权限名称
		http.authorizeRequests()
		.antMatchers("/showOrder").hasAnyAuthority("showOrder")
		.antMatchers("/addOrder").hasAnyAuthority("addOrder")
		.antMatchers("/login").permitAll()
		.antMatchers("/updateOrder").hasAnyAuthority("updateOrder")
		.antMatchers("/deleteOrder").hasAnyAuthority("deleteOrder")
		//并且关闭csrf
		.antMatchers("/**").fullyAuthenticated().and().formLogin().loginPage("/login").successHandler(successHandler).failureHandler(failHandler).and().csrf().disable();


	}

	// SpringBoot2.0抛弃了原来的NoOpPasswordEncoder,要求用户保存的密码必须要使用加密算法后存储,在登录验证的时候Security会将获得的密码在进行编码后再和数据库中加密后的密码进行对比
	@Bean
	public static NoOpPasswordEncoder passwordEncoder() {
		return (NoOpPasswordEncoder) NoOpPasswordEncoder.getInstance();
	}

}


 3508
3508


 被折叠的 条评论
为什么被折叠?


