


一、目标
在centos7上编译安装nginx
二、环境
centos7.6,nginx1.17.7
三、详细步骤
1.预安装先决组件
yum -y install gcc gcc-c++ autoconf automake make -y
yum -y install  libxml2  libxml2-dev  libxslt-devel  perl-devel perl-ExtUtils-Embed GeoIP GeoIP-devel GeoIP-data
yum install -y gd-devel pcre-devel libcurl-devel gperftoo openssl-devel
2.下载nginx
官方源码下载页面 http://nginx.org/en/download.html
还可以根据自己的情况下载指定的源码包(只需要更改URL中的版本号数字即可)
http://nginx.org/download/nginx-1.16.1.tar.gz
http://nginx.org/download/nginx-1.17.7.tar.gz
wget -P /usr/local/src/ http://nginx.org/download/nginx-1.17.7.tar.gz
cd /usr/local/src
tar zxvf nginx-1.17.7.tar.gz
cd /usr/local/src/nginx-1.17.7
3.添加用于启动nginx的账号和组
groupadd nginx
useradd -M -g nginx -s /sbin/nologin nginx
4.编译nginx源码(这里使用命令--with仅仅安装了部分nginx的包,实际中你需要去搜相关的软件包去安装,以满足自己业务需求)
注意:
--prefix=/usr/local/nginx 指定安装路径,你可以修改
user=nginx 指定启动nginx的用户叫nginx
group=nginx 指定启动nginx的用户组叫nginx
./configure \
--prefix=/usr/local/nginx \
--user=nginx \
--group=nginx \
--with-http_ssl_module \
--with-stream=dynamic \
--with-http_realip_module \
--with-http_stub_status_module \
--with-http_gzip_static_module \
--with-http_gunzip_module \
--with-http_flv_module \
--with-http_mp4_module \
--pid-path=/usr/local/nginx/nginx.pid \
--lock-path=/usr/local/nginx/ningx.lock \
--with-http_geoip_module \
--with-http_auth_request_module \
--with-http_secure_link_module \
--http-log-path=/usr/local/nginx/access.log \
--error-log-path=/usr/local/nginx/error.log \
--with-debug \
--with-stream
注意上面的各种path路径为了区分就写成自定义的了,用的时候注意改变pid和log路径
下面的已能大部分需求
./configure --prefix=/usr/local/nginx --with-http_stub_status_module --with-http_ssl_module --with-stream
5.开始安装nginx
make && make install6.查看nginx是否安装成功(查看版本号)
cd /usr/local/nginx/sbin
./nginx -V
7.修改nginx主配置文件,让nginx成为nginx程序的启动用户
如果你修改了nginx的安装路径,那么本条命令后半段的路径也需要修改成你的nginx安装路径
cp /usr/local/nginx/conf/nginx.conf{,.bak}
sed -i 's/#user  nobody;/user  nginx nginx;/' /usr/local/nginx/conf/nginx.conf
8.将nginx添加到系统服务中
ln -s /usr/local/nginx/sbin/nginx /usr/bin/nginx

cat > /usr/lib/systemd/system/nginx.service <<EOF
[Unit]
Description=nginx  high performance web server
After=network.target remote-fs.target nss-lookup.target

[Service]
Type=forking
ExecStartPre=/usr/local/nginx/sbin/nginx -t -c /usr/local/nginx/conf/nginx.conf
ExecStart=/usr/local/nginx/sbin/nginx -c /usr/local/nginx/conf/nginx.conf
ExecReload=/usr/local/nginx/sbin/nginx -s reload
ExecStop=/usr/local/nginx/sbin/nginx -s stop
ExecQuit=/usr/local/nginx/sbin/nginx -s quit
PrivateTmp=true


[Install]
WantedBy=multi-user.target
EOF
9.添加启动nginx启动用户
chown -R nginx.nginx /usr/local/nginx
chown -R nginx.nginx /data/logs/nginx
10.查看进程是否有nginx服务
ps -ef |grep nginx
杀掉所有nginx服务
pkill nginx
11.启动nginx、并设置nginx开机自启
systemctl daemon-reload
systemctl restart nginx
systemctl enable nginx
12.如果要给nginx增加一个配置目录conf.d的话需要如下修改
vim /usr/local/nginx/conf/nginx.conf
#在http块里的最后加上如下一行内容。
    include ../conf.d/*.conf;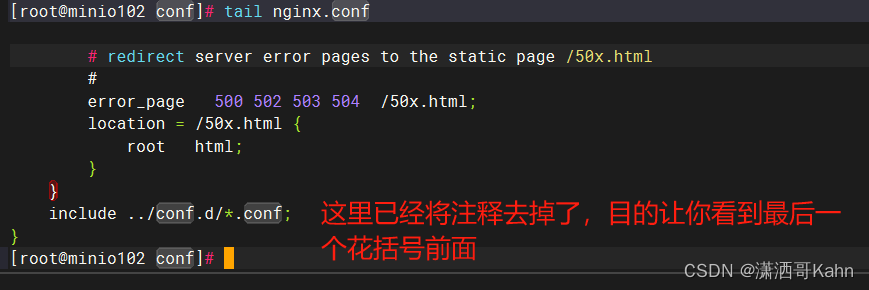
mkdir /usr/local/nginx/conf.d

cat << EOF > /usr/local/nginx/conf.d/minioClusterWeb.conf
upstream minio{
        ip_hash;
        server 192.168.10.101:9000;
        server 192.168.10.102:9000;
}
server {
        listen 19000;
        server_name minio;
        location / {
                proxy_pass http://minio;
                proxy_set_header Host $http_host;
                client_max_body_size 1000m;
        }
}
EOF

chown -R nginx.nginx /usr/local/nginx/conf.d
然后重新加载nginx即可
-----------END------------------------------------


 1120
1120


 被折叠的 条评论
为什么被折叠?
被折叠的 条评论
为什么被折叠?
 到【灌水乐园】发言


