


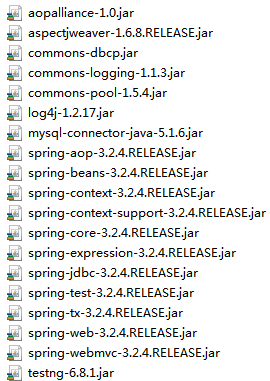
提示: 此demo应用spring版本3.2.4,具体所需jar包如下图
以上为准备工作,接下来按步骤完成整个项目
1.首先新建一个Web项目
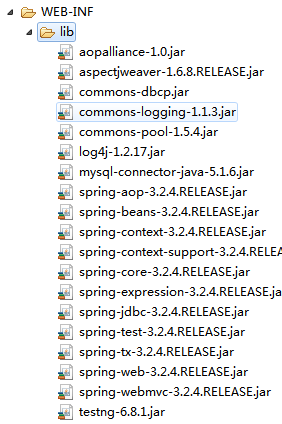
2.然后将一开始准备好的jar包导入项目中,可以直接通过copy的方式,粘贴
到项目WEB-INF\lib目录下。
3.要使用springmvc,需要在web.xml配置springmvc调度器
<?xml version="1.0" encoding="UTF-8"?>
<web-app version="2.5"
    xmlns="http://java.sun.com/xml/ns/javaee"
    xmlns:xsi="http://www.w3.org/2001/XMLSchema-instance"
    xsi:schemaLocation="http://java.sun.com/xml/ns/javaee
    http://java.sun.com/xml/ns/javaee/web-app_2_5.xsd">
  <welcome-file-list>
    <welcome-file>index.jsp</welcome-file>
  </welcome-file-list>
  <!-- SpringMVC Dispatcher -->
    <servlet>
        <servlet-name>SpringMVC</servlet-name>
        <servlet-class>org.springframework.web.servlet.DispatcherServlet
        </servlet-class>
        <init-param>
            <param-name>contextConfigLocation</param-name>
            <!-- springmvc配置文件 -->
            <param-value>/WEB-INF/applicationContext.xml</param-value>
        </init-param>
        <load-on-startup>1</load-on-startup>
    </servlet>
    <servlet-mapping>
        <servlet-name>SpringMVC</servlet-name>
        <url-pattern>/</url-pattern>  <!-- 拦截所有请求 -->
    </servlet-mapping>
    <!-- /SpringMVC Dispatcher -->
</web-app>
4.创建springmvc配置文件,名字要与web.xml中配置的文件名一致
applicationContext.xml :
<?xml version="1.0" encoding="UTF-8"?>
<beans xmlns="http://www.springframework.org/schema/beans"
    xmlns:p="http://www.springframework.org/schema/p"
    xmlns:xsi="http://www.w3.org/2001/XMLSchema-instance"
    xmlns:context="http://www.springframework.org/schema/context"
    xmlns:aop="http://www.springframework.org/schema/aop"
    xmlns:tx="http://www.springframework.org/schema/tx"
    xsi:schemaLocation="http://www.springframework.org/schema/beans
                       http://www.springframework.org/schema/beans/spring-beans-2.5.xsd
                       http://www.springframework.org/schema/context
                       http://www.springframework.org/schema/context/spring-context-2.5.xsd
                       http://www.springframework.org/schema/aop
                       http://www.springframework.org/schema/aop/spring-aop-2.5.xsd
                       http://www.springframework.org/schema/tx
                       http://www.springframework.org/schema/tx/spring-tx-2.5.xsd">
    <!-- 扫描类包,将标注Spring注解的类自动转化成Bean ,同时完成Bean的注入 -->
    <context:component-scan base-package="com.smart.pigy.*" />
    <!-- 定义一个使用dbcp实现的数据源 -->
    <bean id="dataSource" class="org.apache.commons.dbcp.BasicDataSource"
        destroy-method="close"
        p:driverClassName = "com.mysql.jdbc.Driver"
        p:url="jdbc:mysql://127.0.0.1:3306/sampledb"
        p:username="root"
        p:password="root"
     />
     <!-- 定义jdbc模板 Bean-->
     <bean id="jdbcTemplate" class="org.springframework.jdbc.core.JdbcTemplate"
        p:dataSource-ref="dataSource"
      />

      <!-- 配置事务管理器 -->
      <bean id="transactionManager"
        class="org.springframework.jdbc.datasource.DataSourceTransactionManager"
        p:dataSource-ref="dataSource"
      />
      <!-- 通过AOP配置提供事务增强,让service包下的所有Bean的所有方法拥有事务 -->
      <aop:config proxy-target-class="true">
            <aop:pointcut expression=" execution(* com.smart.service..*(..))" id="serviceMethod"/>
            <aop:advisor advice-ref="txAdvice" pointcut-ref="serviceMethod" />
      </aop:config>
      <tx:advice id="txAdvice" transaction-manager="transactionManager">
            <tx:attributes>
                <tx:method name="*"/>
            </tx:attributes>
      </tx:advice>
      <bean class="org.springframework.web.servlet.view.InternalResourceViewResolver"
        p:prefix="/"
        p:suffix=".jsp"
       />
</beans>
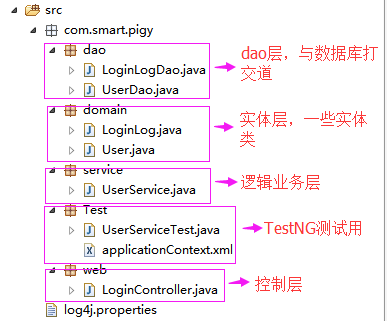
5.以上的基本的工作已经完成,剩下的就是创建java类
项目demo附件:demo


 170
170

 被折叠的 条评论
为什么被折叠?
被折叠的 条评论
为什么被折叠?
 到【灌水乐园】发言


