profile 配置 切换不同的数据库环境

在开发的时候经常会使用不同的环境。开发的时候时使用的测试数据库环境,但是在上线的时候则是使用的是另一套数据库环境。那么这个应该怎么配置呢?


从头开始详细讲述一下:

1.首先,是在src-->resources-->prop 下面的properties文件中配置好连接数据库的账号密码以及数据库的url。当然路径可能有所不同,但是肯定是在properties文件中。这边可以有多个properties文件,因为你可能的数据库环境有好几个,比如测试数据库、在线数据库或者其他的数据库。


2.在spring-orm.xml文件中配置和数据库的连接,但是并不是在这个地方指定和哪一个数据库环境(1中的properties文件),这里只是操作连接数据库(账号、密码、以及url都对就没关系)。所以里面的bean的配置就不多说。


3.这里才是重点:要告诉spring-orm.xml是个哪个数据库环境连接,是在web.xml中指定的!!!恕我愚昧,找了好久才找到。


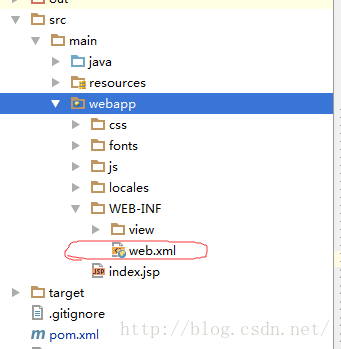
在这个文件中进行修改下面的节点(我是使用的local.properties文件)

  • 1
    点赞
  • 0
    收藏
    觉得还不错? 一键收藏
  • 0
    评论
目录 推荐序 前言 第1章 认识Oracle RAC 1.1 RAC产生的背景 1.2 RAC体系结构 1.2.1整体结构 1.2.2物理层次结构 1.2.3逻辑层次结构 1.3 RAC的特点 1.3.1双机并行 1.3.2高可用性 1.3.3易伸缩性 1.3.4低成本 1.3.5高吞吐量 1.4 RAC存在的问题 1.4.1稳定性 1.4.2高性能 1.5 RAC软件 1.5.1存储管理软件 1.5.2集群管理软件 1.5.3数据库管理软件 1.6本章小结 第2章 搭建类似生产环境的RAC 2.1搭建环境 2.1.1 RAC的物理结构 2.1.硬件环境 2.1.3软件环境 2.2搭建存储服务器 2.2.1安装Openfiler操作系统 2.2.2Openfiler主界面 2.2.3配置iSCSI磁盘 2.3搭建数据库服务器 2.3.1为服务器配置4个网卡 2.3.2安装Linux操作系统 2.3.3挂载iSCSI磁盘 2.3.4配置udev固定iSCSI磁盘设备名称 2.3.5配置服务器的图形化环境 2.4 RAC运行环境安装前检查 2.4.1服务器检查 2.4.2存储检查 2.4.3网络检查 2.5配置数据库服务器 2.5.1安装软件包 2.5.2修改系统参数 2.5.3配置域名解析服务 2.5.4配置hosts文件 2.5.5创建组、用户和目录 2.5.6设置环境变量 2.5.7配置SSH用户等效性 2.5.8配置时间同步服务 2.5.9安装cvuqdisk包 2.5.10 CVU验证安装环境 2.6创建ASM磁盘 2.6.1安装ASMLib驱动 2.6.2创建ASMLib磁盘 2.7部署RAC 2.7.1安装Grid Infrastructure 2.7.2安装Database DBMS 2.7.3创建ASM磁盘组 2.7.4创建RAC数据库 2.8测试RAC 2.8.1连接方式测试 2.8.2异常情况测试 2.9虚拟机搭建RAC 2.9.1虚拟机Xen简介 2.9.2启动主机Xen内核 2.9.3 Xen虚拟机创建网络环境 2.9.4创建Xen存储服务器 2.9.5创建Xen数据库服务器 2.10本章小结 第3章 Clusterware集群软件 3.1 Grid Infrastructure架构 3.1.1 GI的特点 3.1.2 GI的应用 3.1.3 Clusterware的特点 3.1.4 Clusterware增强的特性 3.2 Clusterware磁盘文件 3.2.1表决磁盘 3.2.2集群注册表 3.2.3本地注册表 3.3 Clusterware启动流程 3.3.1启动流程 3.3.2后台进程 3.4 Clusterware隔离机制 3.4.1 Clusterware心跳 3.4.2 Clusterware隔离特性IPMI 3.4.3 RAC隔离体系 3.5网格即插即用 3.5.1 GPnP结构 3.5.2 GPnP profile文件 3.5.3 mDNS服务 3.6日志体系 3.6.1 ADR的特点 3.6.2 ADR目录结构 3.6.3命令行工具ADRCI 3.6.4 Clusterware日志文件 3.6.5 ASM实例和监听日志文件 3.6.6 Database日志文件 3.7本章小结 第4章 ASM存储软件 4.1 ASM简介 4.1.1 ASM的特点 4.1.2 ASM实例的功能 4.2 ASM磁盘组 4.2.1 ASM磁盘 4.2.2共享ASM磁盘组 4.2.3 ASM逻辑结构 4.2.4 ASM故障组 4.2.5 ASM条带化 4.3 ASM文件 4.3.1 ASM文件类型 4.3.2 ASM别名 4.3.3 ASM文件模板 4.4 ASM数据结构 4.4.1物理元数据 4.4.2虚拟元数据 4.5 ASM操作 4.5.1 RDBMS操作ASM文件 4.5.2 ASM文件的分配 4.5.3 ASM区间读写特性 4.5.4 ASM同步技术 4.5.5 ASM实例恢复和Crash恢复 4.5.6 ASM磁盘组操作 4.6 ACFS集群文件系统 4.6.1 ACFS概述 4.6.2 ADVM动态卷管理 4.6.3 ACFS快照 4.6.4 ACFS的备份和恢复 4.6.5 ACFS同ASM整合 4.7本章小结 第5章 RAC工作原理 5.1单实例并发与一致性 5.1.1数据读一致性与写一致性 5.1.2多版本数据块 5.1.3
ORACLE常用命令 一、ORACLE的启动和关闭 1、在单机环境下 要想启动或关闭ORACLE系统必须首先切换到ORACLE用户,如下 su - oracle a、启动ORACLE系统 oracle>svrmgrl SVRMGR>connect internal SVRMGR>startup SVRMGR>quit b、关闭ORACLE系统 oracle>svrmgrl SVRMGR>connect internal SVRMGR>shutdown SVRMGR>quit 启动oracle9i数据库命令: $ sqlplus /nolog SQL*Plus: Release 9.2.0.1.0 - Production on Fri Oct 31 13:53:53 2003 Copyright (c) 1982, 2002, Oracle Corporation. All rights reserved. SQL> connect / as sysdba Connected to an idle instance. SQL> startup^C SQL> startup ORACLE instance started. 2、在双机环境下 要想启动或关闭ORACLE系统必须首先切换到root用户,如下 su - root a、启动ORACLE系统 hareg -y oracle b、关闭ORACLE系统 hareg -n oracle Oracle数据库有哪几种启动方式 说明: 有以下几种启动方式: 1、startup nomount 非安装启动,这种方式启动下可执行:重建控制文件、重建数据库 读取init.ora文件,启动instance,即启动SGA和后台进程,这种启动只需要init.ora文件。 2、startup mount dbname 安装启动,这种方式启动下可执行: 数据库日志归档、 数据库介质恢复、 使数据文件联机或脱机, 重新定位数据文件、重做日志文件。 执行“nomount”,然后打开控制文件,确认数据文件和联机日志文件的位置, 但此时不对数据文件和日志文件进行校验检查。 3、startup open dbname 先执行“nomount”,然后执行“mount”,再打开包括Redo log文件在内的所有数据库文件, 这种方式下可访问数据库中的数据。 4、startup,等于以下三个命令 startup nomount alter database mount alter database open 5、startup restrict 约束方式启动 这种方式能够启动数据库,但只允许具有一定特权的用户访问 非特权用户访问时,会出现以下提示: ERROR: ORA-01035: ORACLE 只允许具有 RESTRICTED SESSION 权限的用户使用 6、startup force 强制启动方式 当不能关闭数据库时,可以用startup force来完成数据库的关闭 先关闭数据库,再执行正常启动数据库命令 7、startup pfile=参数文件名 带初始化参数文件的启动方式 先读取参数文件,再按参数文件中的设置启动数据库 例:startup pfile=E:Oracleadminoradbpfileinit.ora 8、startup EXCLUSIVE 二、用户如何有效地利用数据字典  ORACLE的数据字典是数据库的重要组成部分之一,它随着数据库的产生而产生, 随着数据库的变化而变化, 体现为sys用户下的一些表和视图。数据字典名称是大写的英文字符。 数据字典里存有用户信息、用户的权限信息、所有数据对象信息、表的约束条件、统计分析数据库的视图等。 我们不能手工修改数据字典里的信息。   很多时候,一般的ORACLE用户不知道如何有效地利用它。   dictionary   全部数据字典表的名称和解释,它有一个同义词dict dict_column   全部数据字典表里字段名称和解释 如果我们想查询跟索引有关的数据字典时,可以用下面这条SQL语句: SQL>select * from dictionary where instr(comments,'index')>0; 如果我们想知道user_indexes表各字段名称的详细含义,可以用下面这条SQL语句: SQL>select column_name,comments from dict_columns where table_name='USER_INDEXES'; 依此类推,就可以轻松知道数据字典的详细名称和解释,不用查看ORACLE的其它文档资料了。 下面按类别列出一些ORACLE用户常用数据字典的查询使用方法。 1、用户 查看当前用户的缺省表空间 SQL>select username,default_tablespace from user_users; 查看当前用户的角色 SQL>select * from user_role_privs; 查看当前用户的系统权限和表级权限 SQL>select * from user_sys_privs; SQL>select * from user_tab_privs; 2、表 查看用户下所有的表 SQL>select * from user_tables; 查看名称包含log字符的表 SQL>select object_name,object_id from user_objects where instr(object_name,'LOG')>0; 查看某表的创建时间 SQL>select object_name,created from user_objects where object_name=upper('&table_name'); 查看某表的大小 SQL>select sum(bytes)/(1024*1024) as "size(M)" from user_segments where segment_name=upper('&table_name'); 查看放在ORACLE的内存区里的表 SQL>select table_name,cache from user_tables where instr(cache,'Y')>0; 3、索引 查看索引个数和类别 SQL>select index_name,index_type,table_name from user_indexes order by table_name; 查看索引被索引的字段 SQL>select * from user_ind_columns where index_name=upper('&index_name'); 查看索引的大小 SQL>select sum(bytes)/(1024*1024) as "size(M)" from user_segments where segment_name=upper('&index_name'); 4、序列号 查看序列号,last_number是当前值 SQL>select * from user_sequences; 5、视图 查看视图的名称 SQL>select view_name from user_views; 查看创建视图的select语句 SQL>set view_name,text_length from user_views; SQL>set long 2000; 说明:可以根据视图的text_length值设定set long 的大小 SQL>select text from user_views where view_name=upper('&view_name'); 6、同义词 查看同义词的名称 SQL>select * from user_synonyms; 7、约束条件 查看某表的约束条件 SQL>select constraint_name, constraint_type,search_condition, r_constraint_name from user_constraints where table_name = upper('&table_name'); SQL>select c.constraint_name,c.constraint_type,cc.column_name from user_constraints c,user_cons_columns cc where c.owner = upper('&table_owner') and c.table_name = upper('&table_name') and c.owner = cc.owner and c.constraint_name = cc.constraint_name order by cc.position; 8、存储函数和过程 查看函数和过程的状态 SQL>select object_name,status from user_objects where object_type='FUNCTION'; SQL>select object_name,status from user_objects where object_type='PROCEDURE'; 查看函数和过程的源代码 SQL>select text from all_source where owner=user and name=upper('&plsql_name'); 三、查看数据库的SQL 1、查看表空间的名称及大小 select t.tablespace_name, round(sum(bytes/(1024*1024)),0) ts_size from dba_tablespaces t, dba_data_files d where t.tablespace_name = d.tablespace_name group by t.tablespace_name; 2、查看表空间物理文件的名称及大小 select tablespace_name, file_id, file_name, round(bytes/(1024*1024),0) total_space from dba_data_files order by tablespace_name; 3、查看回滚段名称及大小 select segment_name, tablespace_name, r.status, (initial_extent/1024) InitialExtent,(next_extent/1024) NextExtent, max_extents, v.curext CurExtent From dba_rollback_segs r, v$rollstat v Where r.segment_id = v.usn(+) order by segment_name ; 4、查看控制文件 select name from v$controlfile; 5、查看日志文件 select member from v$logfile; 6、查看表空间的使用情况 select sum(bytes)/(1024*1024) as free_space,tablespace_name from dba_free_space group by tablespace_name; SELECT A.TABLESPACE_NAME,A.BYTES TOTAL,B.BYTES USED, C.BYTES FREE, (B.BYTES*100)/A.BYTES "% USED",(C.BYTES*100)/A.BYTES "% FREE" FROM SYS.SM$TS_AVAIL A,SYS.SM$TS_USED B,SYS.SM$TS_FREE C WHERE A.TABLESPACE_NAME=B.TABLESPACE_NAME AND A.TABLESPACE_NAME=C.TABLESPACE_NAME; 7、查看数据库库对象 select owner, object_type, status, count(*) count# from all_objects group by owner, object_type, status; 8、查看数据库的版本 Select version FROM Product_component_version Where SUBSTR(PRODUCT,1,6)='Oracle'; 9、查看数据库的创建日期和归档方式 Select Created, Log_Mode, Log_Mode From V$Database; 四、ORACLE用户连接的管理 用系统管理员,查看当前数据库有几个用户连接: SQL> select username,sid,serial# from v$session; 如果要停某个连接用 SQL> alter system kill session 'sid,serial#'; 如果这命令不行,找它UNIX的进程数 SQL> select pro.spid from v$session ses,v$process pro where ses.sid=21 and ses.paddr=pro.addr; 说明:21是某个连接的sid数 然后用 kill 命令杀此进程号。 五、SQL*PLUS使用 a、近入SQL*Plus $sqlplus 用户名/密码 退出SQL*Plus SQL>exit b、在sqlplus下得到帮助信息 列出全部SQL命令和SQL*Plus命令 SQL>help 列出某个特定的命令的信息 SQL>help 命令名 c、显示表结构命令DESCRIBE SQL>DESC 表名 d、SQL*Plus中的编辑命令 显示SQL缓冲区命令 SQL>L 修改SQL命令 首先要将待改正行变为当前行 SQL>n 用CHANGE命令修改内容 SQL>c/旧/新 重新确认是否已正确 SQL>L 使用INPUT命令可以在SQL缓冲区中增加一行或多行 SQL>i SQL>输入内容 e、调用外部系统编辑器 SQL>edit 文件名 可以使用DEFINE命令设置系统变量EDITOR来改变文本编辑器的类型,在login.sql文件中定义如下一行 DEFINE_EDITOR=vi f、运行命令文件 SQL>START test SQL>@test 常用SQL*Plus语句 a、表的创建、修改、删除 创建表的命令格式如下: create table 表名 (列说明列表); 为基表增加新列命令如下: ALTER TABLE 表名 ADD (列说明列表) 例:为test表增加一列Age,用来存放年龄 sql>alter table test add (Age number(3)); 修改基表列定义命令如下: ALTER TABLE 表名 MODIFY (列名 数据类型) 例:将test表中的Count列宽度加长为10个字符 sql>alter atble test modify (County char(10)); b、将一张表删除语句的格式如下: DORP TABLE 表名; 例:表删除将同时删除表的数据和表的定义 sql>drop table test c、表空间的创建、删除 六、ORACLE逻辑备份的SH文件 完全备份的SH文件:exp_comp.sh rq=` date +"%m%d" ` su - oracle -c "exp system/manager full=y inctype=complete file=/oracle/export/db_comp$rq.dmp" 累计备份的SH文件:exp_cumu.sh rq=` date +"%m%d" ` su - oracle -c "exp system/manager full=y inctype=cumulative file=/oracle/export/db_cumu$rq.dmp" 增量备份的SH文件: exp_incr.sh rq=` date +"%m%d" ` su - oracle -c "exp system/manager full=y inctype=incremental file=/oracle/export/db_incr$rq.dmp" root用户crontab文件 /var/spool/cron/crontabs/root增加以下内容 0 2 1 * * /oracle/exp_comp.sh 30 2 * * 0-5 /oracle/exp_incr.sh 45 2 * * 6 /oracle/exp_cumu.sh 当然这个时间表可以根据不同的需求来改变的,这只是一个例子。 七、ORACLE 常用的SQL语法和数据对象 一.数据控制语句 (DML) 部分 1.INSERT (往数据表里插入记录的语句) INSERT INTO 表名(字段名1, 字段名2, ……) VALUES ( 值1, 值2, ……); INSERT INTO 表名(字段名1, 字段名2, ……) SELECT (字段名1, 字段名2, ……) FROM 另外的表名; 字符串类型的字段值必须用单引号括起来, 例如: ’GOOD DAY’ 如果字段值里包含单引号’ 需要进行字符串转换, 我们把它替换成两个单引号''. 字符串类型的字段值超过定义的长度会出错, 最好在插入前进行长度校验. 日期字段的字段值可以用当前数据库的系统时间SYSDATE, 精确到秒 或者用字符串转换成日期型函数TO_DATE(‘2001-08-01’,’YYYY-MM-DD’) TO_DATE()还有很多种日期格式, 可以参看ORACLE DOC. 年-月-日 小时:分钟:秒 的格式YYYY-MM-DD HH24:MI:SS INSERT时最大可操作的字符串长度小于等于4000个单字节, 如果要插入更长的字符串, 请考虑字段用CLOB类型, 方法借用ORACLE里自带的DBMS_LOB程序包. INSERT时如果要用到从1开始自动增长的序列号, 应该先建立一个序列号 CREATE SEQUENCE 序列号的名称 (最好是表名+序列号标记) INCREMENT BY 1 START WITH 1 MAXVALUE 99999 CYCLE NOCACHE; 其中最大的值按字段的长度来定, 如果定义的自动增长的序列号 NUMBER(6) , 最大值为999999 INSERT 语句插入这个字段值为: 序列号的名称.NEXTVAL 2.DELETE (删除数据表里记录的语句) DELETE FROM表名 WHERE 条件; 注意:删除记录并不能释放ORACLE里被占用的数据块表空间. 它只把那些被删除的数据块标成unused. 如果确实要删除一个大表里的全部记录, 可以用 TRUNCATE 命令, 它可以释放占用的数据块表空间 TRUNCATE TABLE 表名; 此操作不可回退. 3.UPDATE (修改数据表里记录的语句) UPDATE表名 SET 字段名1=值1, 字段名2=值2, …… WHERE 条件; 如果修改的值N没有赋值或定义时, 将把原来的记录内容清为NULL, 最好在修改前进行非空校验; 值N超过定义的长度会出错, 最好在插入前进行长度校验.. 注意事项: A. 以上SQL语句对表都加上了行级锁, 确认完成后, 必须加上事物处理结束的命令 COMMIT 才能正式生效, 否则改变不一定写入数据库里. 如果想撤回这些操作, 可以用命令 ROLLBACK 复原. B. 在运行INSERT, DELETE 和 UPDATE 语句前最好估算一下可能操作的记录范围, 应该把它限定在较小 (一万条记录) 范围内,. 否则ORACLE处理这个事物用到很大的回退段. 程序响应慢甚至失去响应. 如果记录数上十万以上这些操作, 可以把这些SQL语句分段分次完成, 其间加上COMMIT 确认事物处理. 二.数据定义 (DDL) 部分 1.CREATE (创建表, 索引, 视图, 同义词, 过程, 函数, 数据库链接等) ORACLE常用的字段类型有 CHAR 固定长度的字符串 VARCHAR2 可变长度的字符串 NUMBER(M,N) 数字型M是位数总长度, N是小数的长度 DATE 日期类型 创建表时要把较小的不为空的字段放在前面, 可能为空的字段放在后面 创建表时可以用中文的字段名, 但最好还是用英文的字段名 创建表时可以给字段加上默认值, 例如 DEFAULT SYSDATE 这样每次插入和修改时, 不用程序操作这个字段都能得到动作的时间 创建表时可以给字段加上约束条件 例如 不允许重复 UNIQUE, 关键字 PRIMARY KEY 2.ALTER (改变表, 索引, 视图等) 改变表的名称 ALTER TABLE 表名1 TO 表名2; 在表的后面增加一个字段 ALTER TABLE表名 ADD 字段名 字段名描述; 修改表里字段的定义描述 ALTER TABLE表名 MODIFY字段名 字段名描述; 给表里的字段加上约束条件 ALTER TABLE 表名 ADD CONSTRAINT 约束名 PRIMARY KEY (字段名); ALTER TABLE 表名 ADD CONSTRAINT 约束名 UNIQUE (字段名); 把表放在或取出数据库的内存区 ALTER TABLE 表名 CACHE; ALTER TABLE 表名 NOCACHE; 3.DROP (删除表, 索引, 视图, 同义词, 过程, 函数, 数据库链接等) 删除表和它所有的约束条件 DROP TABLE 表名 CASCADE CONSTRAINTS; 4.TRUNCATE (清空表里的所有记录, 保留表的结构) TRUNCATE 表名; 三.查询语句 (SELECT) 部分 SELECT字段名1, 字段名2, …… FROM 表名1, [表名2, ……] WHERE 条件; 字段名可以带入函数 例如: COUNT(*), MIN(字段名), MAX(字段名), AVG(字段名), DISTINCT(字段名), TO_CHAR(DATE字段名,'YYYY-MM-DD HH24:MI:SS') NVL(EXPR1, EXPR2)函数 解释: IF EXPR1=NULL RETURN EXPR2 ELSE RETURN EXPR1 DECODE(AA﹐V1﹐R1﹐V2﹐R2....)函数 解释: IF AA=V1 THEN RETURN R1 IF AA=V2 THEN RETURN R2 ..… ELSE RETURN NULL LPAD(char1,n,char2)函数 解释: 字符char1按制定的位数n显示,不足的位数用char2字符串替换左边的空位 字段名之间可以进行算术运算 例如: (字段名1*字段名1)/3 查询语句可以嵌套 例如: SELECT …… FROM (SELECT …… FROM表名1, [表名2, ……] WHERE 条件) WHERE 条件2; 两个查询语句的结果可以做集合操作 例如: 并集UNION(去掉重复记录), 并集UNION ALL(不去掉重复记录), 差集MINUS, 交集INTERSECT 分组查询 SELECT字段名1, 字段名2, …… FROM 表名1, [表名2, ……] GROUP BY字段名1 [HAVING 条件] ; 两个以上表之间的连接查询 SELECT字段名1, 字段名2, …… FROM 表名1, [表名2, ……] WHERE 表名1.字段名 = 表名2. 字段名 [ AND ……] ; SELECT字段名1, 字段名2, …… FROM 表名1, [表名2, ……] WHERE 表名1.字段名 = 表名2. 字段名(+) [ AND ……] ; 有(+)号的字段位置自动补空值 查询结果集的排序操作, 默认的排序是升序ASC, 降序是DESC SELECT字段名1, 字段名2, …… FROM 表名1, [表名2, ……] ORDER BY字段名1, 字段名2 DESC; 字符串模糊比较的方法 INSTR(字段名, ‘字符串’)>0 字段名 LIKE ‘字符串%’ [‘%字符串%’] 每个表都有一个隐含的字段ROWID, 它标记着记录的唯一性. 四.ORACLE里常用的数据对象 (SCHEMA) 1.索引 (INDEX) CREATE INDEX 索引名ON 表名 ( 字段1, [字段2, ……] ); ALTER INDEX 索引名 REBUILD; 一个表的索引最好不要超过三个 (特殊的大表除外), 最好用单字段索引, 结合SQL语句的分析执行情况, 也可以建立多字段的组合索引和基于函数的索引 ORACLE8.1.7字符串可以索引的最大长度为1578 单字节 ORACLE8.0.6字符串可以索引的最大长度为758 单字节 2.视图 (VIEW) CREATE VIEW 视图名AS SELECT …. FROM …..; ALTER VIEW视图名 COMPILE; 视图仅是一个SQL查询语句, 它可以把表之间复杂的关系简洁化. 3.同义词 (SYNONMY) CREATE SYNONYM同义词名FOR 表名; CREATE SYNONYM同义词名FOR 表名@数据库链接名; 4.数据库链接 (DATABASE LINK) CREATE DATABASE LINK数据库链接名CONNECT TO 用户名 IDENTIFIED BY 密码 USING ‘数据库连接字符串’; 数据库连接字符串可以用NET8 EASY CONFIG或者直接修改TNSNAMES.ORA里定义. 数据库参数global_name=true时要求数据库链接名称跟远端数据库名称一样 数据库全局名称可以用以下命令查出 SELECT * FROM GLOBAL_NAME; 查询远端数据库里的表 SELECT …… FROM 表名@数据库链接名; 五.权限管理 (DCL) 语句 1.GRANT 赋于权限 常用的系统权限集合有以下三个: CONNECT(基本的连接), RESOURCE(程序开发), DBA(数据库管理) 常用的数据对象权限有以下五个: ALL ON 数据对象名, SELECT ON 数据对象名, UPDATE ON 数据对象名, DELETE ON 数据对象名, INSERT ON 数据对象名, ALTER ON 数据对象名 GRANT CONNECT, RESOURCE TO 用户名; GRANT SELECT ON 表名 TO 用户名; GRANT SELECT, INSERT, DELETE ON表名 TO 用户名1, 用户名2; 2.REVOKE 回收权限 REVOKE CONNECT, RESOURCE FROM 用户名; REVOKE SELECT ON 表名 FROM 用户名; REVOKE SELECT, INSERT, DELETE ON表名 FROM 用户名1, 用户名2; 查询数据库中第63号错误: select orgaddr,destaddr from sm_histable0116 where error_code='63'; 查询数据库中开户用户最大提交和最大下发数: select MSISDN,TCOS,OCOS from ms_usertable; 查询数据库中各种错误代码的总和: select error_code,count(*) from sm_histable0513 group by error_code order by error_code; 查询报表数据库中话单统计种类查询。 select sum(Successcount) from tbl_MiddleMt0411 where ServiceType2=111 select sum(successcount),servicetype from tbl_middlemt0411 group by servicetype 原文地址:http://www.cnoug.org/viewthread.php?tid=60293 //创建一个控制文件命令到跟踪文件 alter database backup controlfile to trace; //增加一个新的日志文件组的语句 connect internal as sysdba alter database add logfile group 4 (’/db01/oracle/CC1/log_1c.dbf’, ’/db02/oracle/CC1/log_2c.dbf’) size 5M; alter database add logfile member ’/db03/oracle/CC1/log_3c.dbf’ to group 4; //在Server Manager上MOUNT并打开一个数据库: connect internal as sysdba startup mount ORA1 exclusive; alter database open; //生成数据字典 @catalog @catproc //在init.ora 中备份数据库的位置 log_archive_dest_1 = ’/db00/arch’ log_archive_dest_state_1 = enable log_archive_dest_2 = "service=stby.world mandatory reopen=60" log_archive_dest_state_2 = enable //对用户的表空间的指定和管理相关的语句 create user USERNAME identified by PASSWORD default tablespace TABLESPACE_NAME; alter user USERNAME default tablespace TABLESPACE_NAME; alter user SYSTEM quota 0 on SYSTEM; alter user SYSTEM quota 50M on TOOLS; create user USERNAME identified by PASSWORD default tablespace DATA temporary tablespace TEMP; alter user USERNAME temporary tablespace TEMP; //重新指定一个数据文件的大小 : alter database datafile ’/db05/oracle/CC1/data01.dbf’ resize 200M; //创建一个自动扩展的数据文件: create tablespace DATA datafile ’/db05/oracle/CC1/data01.dbf’ size 200M autoextend ON next 10M maxsize 250M; //在表空间上增加一个自动扩展的数据文件: alter tablespace DATA add datafile ’/db05/oracle/CC1/data02.dbf’ size 50M autoextend ON maxsize 300M; //修改参数: alter database datafile ’/db05/oracle/CC1/data01.dbf’ autoextend ON maxsize 300M; //在数据文件移动期间重新命名: alter database rename file ’/db01/oracle/CC1/data01.dbf’ to ’/db02/oracle/CC1/data01.dbf’; alter tablespace DATA rename datafile ’/db01/oracle/CC1/data01.dbf’ to ’/db02/oracle/CC1/data01.dbf’; alter database rename file ’/db05/oracle/CC1/redo01CC1.dbf’ to ’/db02/oracle/CC1/redo01CC1.dbf’; alter database datafile ’/db05/oracle/CC1/data01.dbf’ resize 80M; //创建和使用角色: create role APPLICATION_USER; grant CREATE SESSION to APPLICATION_USER; grant APPLICATION_USER to username; //回滚段的管理 create rollback segment SEGMENT_NAME tablespace RBS; alter rollback segment SEGMENT_NAME offline; drop rollback segment SEGMENT_NAME; alter rollback segment SEGMENT_NAME online; //回滚段上指定事务 commit; set transaction use rollback segment ROLL_BATCH; insert into TABLE_NAME select * from DATA_LOAD_TABLE; commit; //查询回滚段的 大小和优化参数 select * from DBA_SEGMENTS where Segment_Type = ’ROLLBACK’; select N.Name, /* rollback segment name */ S.OptSize /* rollback segment OPTIMAL size */ from V$ROLLNAME N, V$ROLLSTAT S where N.USN=S.USN; //回收回滚段 alter rollback segment R1 shrink to 15M; alter rollback segment R1 shrink; //例子 set transaction use rollback segment SEGMENT_NAME alter tablespace RBS default storage (initial 125K next 125K minextents 18 maxextents 249) create rollback segment R4 tablespace RBS storage (optimal 2250K); alter rollback segment R4 online; select Sessions_Highwater from V$LICENSE; grant select on EMPLOYEE to PUBLIC; //用户和角色 create role ACCOUNT_CREATOR; grant CREATE SESSION, CREATE USER, ALTER USER to ACCOUNT_CREATOR; alter user THUMPER default role NONE; alter user THUMPER default role CONNECT; alter user THUMPER default role all except ACCOUNT_CREATOR; alter profile DEFAULT limit idle_time 60; create profile LIMITED_PROFILE limit FAILED_LOGIN_ATTEMPTS 5; create user JANE identified by EYRE profile LIMITED_PROFILE; grant CREATE SESSION to JANE; alter user JANE account unlock; alter user JANE account lock; alter profile LIMITED_PROFILE limit PASSWORD_LIFE_TIME 30; alter user jane password expire; //创建操作系统用户 REM Creating OPS$ accounts create user OPS$FARMER identified by SOME_PASSWORD default tablespace USERS temporary tablespace TEMP; REM Using identified externally create user OPS$FARMER identified externally default tablespace USERS temporary tablespace TEMP; //执行ORAPWD ORAPWD FILE=filename PASSWORD=password ENTRIES=max_users create role APPLICATION_USER; grant CREATE SESSION to APPLICATION_USER; create role DATA_ENTRY_CLERK; grant select, insert on THUMPER.EMPLOYEE to DATA_ENTRY_CLERK; grant select, insert on THUMPER.TIME_CARDS to DATA_ENTRY_CLERK; grant select, insert on THUMPER.DEPARTMENT to DATA_ENTRY_CLERK; grant APPLICATION_USER to DATA_ENTRY_CLERK; grant DATA_ENTRY_CLERK to MCGREGOR; grant DATA_ENTRY_CLERK to BPOTTER with admin option; //设置角色 set role DATA_ENTRY_CLERK; set role NONE; //回收权利: revoke delete on EMPLOYEE from PETER; revoke all on EMPLOYEE from MCGREGOR; //回收角色: revoke ACCOUNT_CREATOR from HELPDESK; drop user USERNAME cascade; grant SELECT on EMPLOYEE to MCGREGOR with grant option; grant SELECT on THUMPER.EMPLOYEE to BPOTTER with grant option; revoke SELECT on EMPLOYEE from MCGREGOR; create user MCGREGOR identified by VALUES ’1A2DD3CCEE354DFA’; alter user OPS$FARMER identified by VALUES ’no way’; //备份与恢复 使用 export 程序 exp system/manager file=expdat.dmp compress=Y owner=(HR,THUMPER) exp system/manager file=hr.dmp owner=HR indexes=Y compress=Y imp system/manager file=hr.dmp full=Y buffer=64000 commit=Y //备份表 exp system/manager FILE=expdat.dmp TABLES=(Thumper.SALES) //备份分区 exp system/manager FILE=expdat.dmp TABLES=(Thumper.SALES:Part1) //输入例子 imp system/manager file=expdat.dmp imp system/manager file=expdat.dmp buffer=64000 commit=Y exp system/manager file=thumper.dat owner=thumper grants=N indexes=Y compress=Y rows=Y imp system/manager file=thumper.dat FROMUSER=thumper TOUSER=flower rows=Y indexes=Y imp system/manager file=expdat.dmp full=Y commit=Y buffer=64000 imp system/manager file=expdat.dmp ignore=N rows=N commit=Y buffer=64000 //使用操作系统备份命令 REM TAR examples tar -cvf /dev/rmt/0hc /db0[1-9]/oracle/CC1 tar -rvf /dev/rmt/0hc /orasw/app/oracle/CC1/pfile/initcc1.ora tar -rvf /dev/rmt/0hc /db0[1-9]/oracle/CC1 /orasw/app/oracle/CC1/pfile/initcc1.ora //离线备份的shell脚本 ORACLE_SID=cc1; export ORACLE_SID ORAENV_ASK=NO; export ORAENV_ASK . oraenv svrmgrl <<EOF1 connect internal as sysdba shutdown immediate; exit EOF1 insert backup commands like the "tar" commands here svrmgrl <<EOF2 connect internal as sysdba startup EOF2 //在Server Manager上设置为archivelog mode: connect internal as sysdba startup mount cc1; alter database archivelog; archive log start; alter database open; //在Server Manager上设置为archivelog mode: connect internal as sysdba startup mount cc1; alter database noarchivelog; alter database open; select Name, Value from V$PARAMETER where Name like ’log_archive%’; //联机备份的脚本 # # Sample Hot Backup Script for a UNIX File System database # # Set up environment variables: ORACLE_SID=cc1; export ORACLE_SID ORAENV_ASK=NO; export ORAENV_ASK . oraenv svrmgrl <<EOFarch1 connect internal as sysdba REM REM 备份 SYSTEM tablespace REM alter tablespace SYSTEM begin backup; !tar -cvf /dev/rmt/0hc /db01/oracle/CC1/sys01.dbf alter tablespace SYSTEM end backup; REM REM The SYSTEM tablespace has now been written to a REM tar saveset on the tape device /dev/rmt/0hc. The REM rest of the tars must use the "-rvf" clause to append REM to that saveset. REM REM 备份 RBS tablespace REM alter tablespace RBS begin backup; !tar -rvf /dev/rmt/0hc /db02/oracle/CC1/rbs01.dbf alter tablespace RBS end backup; REM REM 备份 DATA tablespace REM For the purposes of this example, this tablespace REM will contain two files, data01.dbf and data02.dbf. REM The * wildcard will be used in the filename. REM alter tablespace DATA begin backup; !tar -rvf /dev/rmt/0hc /db03/oracle/CC1/data0*.dbf alter tablespace DATA end backup; REM REM 备份 INDEXES tablespace REM alter tablespace INDEXES begin backup; !tar -rvf /dev/rmt/0hc /db04/oracle/CC1/indexes01.dbf alter tablespace INDEXES end backup; REM REM 备份 TEMP tablespace REM alter tablespace TEMP begin backup; !tar -rvf /dev/rmt/0hc /db05/oracle/CC1/temp01.dbf alter tablespace TEMP end backup; REM REM Follow the same pattern to back up the rest REM of the tablespaces. REM REM REM Step 2. 备份归档日志文件. archive log stop REM REM Exit Server Manager, using the indicator set earlier. exit EOFarch1 # # Record which files are in the destination directory. # Do this by setting an environment variable that is # equal to the directory listing for the destination # directory. # For this example, the log_archive_dest is # /db01/oracle/arch/CC1. # FILES=`ls /db01/oracle/arch/CC1/arch*.dbf`; export FILES # # Now go back into Server Manager and restart the # archiving process. Set an indicator (called EOFarch2 # in this example). # svrmgrl <<EOFarch2 connect internal archive log start; exit EOFarch2 # # Now back up the archived redo logs to the tape # device via the "tar" command, then delete them # from the destination device via the "rm" command. # You may choose to compress them instead. # tar -rvf /dev/rmt/0hc $FILES rm -f $FILES # # Step 3. 备份控制文件到磁盘. # svrmgrl <<EOFarch3 connect internal alter database backup controlfile to ’db01/oracle/CC1/CC1controlfile.bck’; exit EOFarch3 # # 备份控制文件到磁带. # tar -rvf /dev/rmt/0hc /db01/oracle/CC1/CC1controlfile.bck # # End of hot backup script. //自动生成开始备份的脚本 set pagesize 0 feedback off select ’alter tablespace ’||Tablespace_Name||’ begin backup;’ from DBA_TABLESPACES where Status ’INVALID’ spool alter_begin.sql / spool off //自动生成备份结束的脚本 set pagesize 0 feedback off select ’alter tablespace ’||Tablespace_Name||’ end backup;’ from DBA_TABLESPACES where Status ’INVALID’ spool alter_end.sql / spool off //备份归档日志文件的脚本. REM See text for alternatives. # Step 1: Stop the archiving process. This will keep # additional archived redo log files from being written # to the destination directory during this process. # svrmgrl <<EOFarch1 connect internal as sysdba archive log stop; REM REM Exit Server Manager using the indicator set earlier. exit EOFarch1 # # Step 2: Record which files are in the destination # directory. # Do this by setting an environment variable that is # equal to the directory listing for the destination # directory. # For this example, the log_archive_dest is # /db01/oracle/arch/CC1. # FILES=`ls /db01/oracle/arch/CC1/arch*.dbf`; export FILES # # Step 3: Go back into Server Manager and restart the # archiving process. Set an indicator (called EOFarch2 # in this example). # svrmgrl <<EOFarch2 connect internal as sysdba archive log start; exit EOFarch2 # # Step 4. Back up the archived redo logs to the tape # device via the "tar" command, then delete them # from the destination device via the "rm" command. # tar -rvf /dev/rmt/0hc $FILES # # Step 5. Delete those files from the destination directory. # rm -f $FILES # # End of archived redo log file backup script. REM 磁盘到磁盘的备份 REM REM Back up the RBS tablespace - to another disk (UNIX) REM alter tablespace RBS begin backup; !cp /db02/oracle/CC1/rbs01.dbf /db10/oracle/CC1/backups alter tablespace RBS end backup; REM REM 移动归档日志文件的shell脚本 # # Procedure for moving archived redo logs to another device # svrmgrl <<EOFarch2 connect internal as sysdba archive log stop; !mv /db01/oracle/arch/CC1 /db10/oracle/arch/CC1 archive log start; exit EOFarch2 # # end of archived redo log directory move. //生成创建控制文件命令 alter database backup controlfile to trace; //时间点恢复的例子 connect internal as sysdba startup mount instance_name; recover database until time ’1999-08-07:14:40:00’; //创建恢复目录 rman rcvcat rman/rman@ // 在(UNIX)下创建恢复目录 RMAN> create catalog tablespace rcvcat; // 在(NT)下创建恢复目录 RMAN> create catalog tablespace "RCVCAT"; //连接描述符范例 (DESCRIPTION= (ADDRESS= (PROTOCOL=TCP) (HOST=HQ) (PORT=1521)) (CONNECT DATA= (SID=loc))) // listener.ora 的条目entry // listener.ora 的条目entry LISTENER = (ADDRESS_LIST = (ADDRESS= (PROTOCOL=IPC) (KEY= loc.world) ) ) SID_LIST_LISTENER = (SID_LIST = (SID_DESC = (SID_NAME = loc) (ORACLE_HOME = /orasw/app/oracle/product/8.1.5.1) ) ) // tnsnames.ora 的条目 LOC= (DESCRIPTION= (ADDRESS = (PROTOCOL = TCP) (HOST = HQ) (PORT = 1521)) ) (CONNECT_DATA = (SERVICE_NAME = loc) (INSTANCE_NAME = loc) ) ) //连接参数的设置(sql*net) LOC =(DESCRIPTION= (ADDRESS= (COMMUNITY=TCP.HQ.COMPANY) (PROTOCOL=TCP) (HOST=HQ) (PORT=1521)) (CONNECT DATA= (SID=loc))) //参数文件配置范例 // tnsnames.ora HQ =(DESCRIPTION= (ADDRESS= (PROTOCOL=TCP) (HOST=HQ) (PORT=1521)) (CONNECT DATA= (SID=loc))) // listener.ora LISTENER = (ADDRESS_LIST = (ADDRESS= (PROTOCOL=IPC) (KEY= loc) ) ) SID_LIST_LISTENER = (SID_LIST = (SID_DESC = (SID_NAME = loc) (ORACLE_HOME = /orasw/app/oracle/product/8.1.5.1) ) ) // Oracle8I tnsnames.ora LOC= (DESCRIPTION= (ADDRESS = (PROTOCOL = TCP) (HOST = HQ) (PORT = 1521)) ) (CONNECT_DATA = (SERVICE_NAME = loc) (INSTANCE_NAME = loc) ) ) //使用 COPY 实现数据库之间的复制 copy from remote_username/remote_password@service_name to username/password@service_name [append|create|insert|replace] TABLE_NAME using subquery; REM COPY example set copycommit 1 set arraysize 1000 copy from HR/PUFFINSTUFF@loc - create EMPLOYEE - using - select * from EMPLOYEE //监视器的管理 lsnrctl start lsnrctl start my_lsnr lsnrctl status lsnrctl status hq 检查监视器的进程 ps -ef | grep tnslsnr //在 lsnrctl 内停止监视器 set password lsnr_password stop //在lsnrctl 内列出所有的服务 set password lsnr_password services //启动或停止一个NT的listener net start OracleTNSListener net stop OracleTNSListener // tnsnames.ora 文件的内容 fld1 = (DESCRIPTION = (ADDRESS_LIST = (ADDRESS = (PROTOCOL = TCP) (HOST = server1.fld.com)(PORT = 1521)) ) (CONNECT_DATA = (SID = fld1) ) ) //操作系统网络的管理 telnet host_name ping host_name /etc/hosts 文件 130.110.238.109 nmhost 130.110.238.101 txhost 130.110.238.102 azhost arizona //oratab 表项 loc:/orasw/app/oracle/product/8.1.5.1:Y cc1:/orasw/app/oracle/product/8.1.5.1:N old:/orasw/app/oracle/product/8.1.5.0:Y //创建一个控制文件命令到跟踪文件 alter database backup controlfile to trace; //增加一个新的日志文件组的语句 connect internal as sysdba alter database add logfile group 4 (’/db01/oracle/CC1/log_1c.dbf’, ’/db02/oracle/CC1/log_2c.dbf’) size 5M; alter database add logfile member ’/db03/oracle/CC1/log_3c.dbf’ to group 4; //在Server Manager上MOUNT并打开一个数据库: connect internal as sysdba startup mount ORA1 exclusive; alter database open; //生成数据字典 @catalog @catproc //在init.ora 中备份数据库的位置 log_archive_dest_1 = ’/db00/arch’ log_archive_dest_state_1 = enable log_archive_dest_2 = "service=stby.world mandatory reopen=60" log_archive_dest_state_2 = enable //对用户的表空间的指定和管理相关的语句 create user USERNAME identified by PASSWORD default tablespace TABLESPACE_NAME; alter user USERNAME default tablespace TABLESPACE_NAME; alter user SYSTEM quota 0 on SYSTEM; alter user SYSTEM quota 50M on TOOLS; create user USERNAME identified by PASSWORD default tablespace DATA temporary tablespace TEMP; alter user USERNAME temporary tablespace TEMP; //重新指定一个数据文件的大小 : alter database datafile ’/db05/oracle/CC1/data01.dbf’ resize 200M; //创建一个自动扩展的数据文件: create tablespace DATA datafile ’/db05/oracle/CC1/data01.dbf’ size 200M autoextend ON next 10M maxsize 250M; //在表空间上增加一个自动扩展的数据文件: alter tablespace DATA add datafile ’/db05/oracle/CC1/data02.dbf’ size 50M autoextend ON maxsize 300M; //修改参数: alter database datafile ’/db05/oracle/CC1/data01.dbf’ autoextend ON maxsize 300M; //在数据文件移动期间重新命名: alter database rename file ’/db01/oracle/CC1/data01.dbf’ to ’/db02/oracle/CC1/data01.dbf’; alter tablespace DATA rename datafile ’/db01/oracle/CC1/data01.dbf’ to ’/db02/oracle/CC1/data01.dbf’; alter database rename file ’/db05/oracle/CC1/redo01CC1.dbf’ to ’/db02/oracle/CC1/redo01CC1.dbf’; alter database datafile ’/db05/oracle/CC1/data01.dbf’ resize 80M; //创建和使用角色: create role APPLICATION_USER; grant CREATE SESSION to APPLICATION_USER; grant APPLICATION_USER to username; //回滚段的管理 create rollback segment SEGMENT_NAME tablespace RBS; alter rollback segment SEGMENT_NAME offline; drop rollback segment SEGMENT_NAME; alter rollback segment SEGMENT_NAME online; //回滚段上指定事务 commit; set transaction use rollback segment ROLL_BATCH; insert into TABLE_NAME select * from DATA_LOAD_TABLE; commit; //查询回滚段的 大小和优化参数 select * from DBA_SEGMENTS where Segment_Type = ’ROLLBACK’; select N.Name, /* rollback segment name */ S.OptSize /* rollback segment OPTIMAL size */ from V$ROLLNAME N, V$ROLLSTAT S where N.USN=S.USN; //回收回滚段 alter rollback segment R1 shrink to 15M; alter rollback segment R1 shrink; //例子 set transaction use rollback segment SEGMENT_NAME alter tablespace RBS default storage (initial 125K next 125K minextents 18 maxextents 249) create rollback segment R4 tablespace RBS storage (optimal 2250K); alter rollback segment R4 online; select Sessions_Highwater from V$LICENSE; grant select on EMPLOYEE to PUBLIC; //用户和角色 create role ACCOUNT_CREATOR; grant CREATE SESSION, CREATE USER, ALTER USER to ACCOUNT_CREATOR; alter user THUMPER default role NONE; alter user THUMPER default role CONNECT; alter user THUMPER default role all except ACCOUNT_CREATOR; alter profile DEFAULT limit idle_time 60; create profile LIMITED_PROFILE limit FAILED_LOGIN_ATTEMPTS 5; create user JANE identified by EYRE profile LIMITED_PROFILE; grant CREATE SESSION to JANE; alter user JANE account unlock; alter user JANE account lock; alter profile LIMITED_PROFILE limit PASSWORD_LIFE_TIME 30; alter user jane password expire; //创建操作系统用户 REM Creating OPS$ accounts create user OPS$FARMER identified by SOME_PASSWORD default tablespace USERS temporary tablespace TEMP; REM Using identified externally create user OPS$FARMER identified externally default tablespace USERS temporary tablespace TEMP; //执行ORAPWD ORAPWD FILE=filename PASSWORD=password ENTRIES=max_users create role APPLICATION_USER; grant CREATE SESSION to APPLICATION_USER; create role DATA_ENTRY_CLERK; grant select, insert on THUMPER.EMPLOYEE to DATA_ENTRY_CLERK; grant select, insert on THUMPER.TIME_CARDS to DATA_ENTRY_CLERK; grant select, insert on THUMPER.DEPARTMENT to DATA_ENTRY_CLERK; grant APPLICATION_USER to DATA_ENTRY_CLERK; grant DATA_ENTRY_CLERK to MCGREGOR; grant DATA_ENTRY_CLERK to BPOTTER with admin option; //设置角色 set role DATA_ENTRY_CLERK; set role NONE; //回收权利: revoke delete on EMPLOYEE from PETER; revoke all on EMPLOYEE from MCGREGOR; //回收角色: revoke ACCOUNT_CREATOR from HELPDESK; drop user USERNAME cascade; grant SELECT on EMPLOYEE to MCGREGOR with grant option; grant SELECT on THUMPER.EMPLOYEE to BPOTTER with grant option; revoke SELECT on EMPLOYEE from MCGREGOR; create user MCGREGOR identified by VALUES ’1A2DD3CCEE354DFA’; alter user OPS$FARMER identified by VALUES ’no way’; //备份与恢复 使用 export 程序 exp system/manager file=expdat.dmp compress=Y owner=(HR,THUMPER) exp system/manager file=hr.dmp owner=HR indexes=Y compress=Y imp system/manager file=hr.dmp full=Y buffer=64000 commit=Y //备份表 exp system/manager FILE=expdat.dmp TABLES=(Thumper.SALES) //备份分区 exp system/manager FILE=expdat.dmp TABLES=(Thumper.SALES:Part1) //输入例子 imp system/manager file=expdat.dmp imp system/manager file=expdat.dmp buffer=64000 commit=Y exp system/manager file=thumper.dat owner=thumper grants=N indexes=Y compress=Y rows=Y imp system/manager file=thumper.dat FROMUSER=thumper TOUSER=flower rows=Y indexes=Y imp system/manager file=expdat.dmp full=Y commit=Y buffer=64000 imp system/manager file=expdat.dmp ignore=N rows=N commit=Y buffer=64000 //使用操作系统备份命令 REM TAR examples tar -cvf /dev/rmt/0hc /db0[1-9]/oracle/CC1 tar -rvf /dev/rmt/0hc /orasw/app/oracle/CC1/pfile/initcc1.ora tar -rvf /dev/rmt/0hc /db0[1-9]/oracle/CC1 /orasw/app/oracle/CC1/pfile/initcc1.ora //离线备份的shell脚本 ORACLE_SID=cc1; export ORACLE_SID ORAENV_ASK=NO; export ORAENV_ASK . oraenv svrmgrl <<EOF1 connect internal as sysdba shutdown immediate; exit EOF1 insert backup commands like the "tar" commands here svrmgrl <<EOF2 connect internal as sysdba startup EOF2 //在Server Manager上设置为archivelog mode: connect internal as sysdba startup mount cc1; alter database archivelog; archive log start; alter database open; //在Server Manager上设置为archivelog mode: connect internal as sysdba startup mount cc1; alter database noarchivelog; alter database open; select Name, Value from V$PARAMETER where Name like ’log_archive%’; //联机备份的脚本 # # Sample Hot Backup Script for a UNIX File System database # # Set up environment variables: ORACLE_SID=cc1; export ORACLE_SID ORAENV_ASK=NO; export ORAENV_ASK . oraenv svrmgrl <<EOFarch1 connect internal as sysdba REM REM 备份 SYSTEM tablespace REM alter tablespace SYSTEM begin backup; !tar -cvf /dev/rmt/0hc /db01/oracle/CC1/sys01.dbf alter tablespace SYSTEM end backup; REM REM The SYSTEM tablespace has now been written to a REM tar saveset on the tape device /dev/rmt/0hc. The REM rest of the tars must use the "-rvf" clause to append REM to that saveset. REM REM 备份 RBS tablespace REM alter tablespace RBS begin backup; !tar -rvf /dev/rmt/0hc /db02/oracle/CC1/rbs01.dbf alter tablespace RBS end backup; REM REM 备份 DATA tablespace REM For the purposes of this example, this tablespace REM will contain two files, data01.dbf and data02.dbf. REM The * wildcard will be used in the filename. REM alter tablespace DATA begin backup; !tar -rvf /dev/rmt/0hc /db03/oracle/CC1/data0*.dbf alter tablespace DATA end backup; REM REM 备份 INDEXES tablespace REM alter tablespace INDEXES begin backup; !tar -rvf /dev/rmt/0hc /db04/oracle/CC1/indexes01.dbf alter tablespace INDEXES end backup; REM REM 备份 TEMP tablespace REM alter tablespace TEMP begin backup; !tar -rvf /dev/rmt/0hc /db05/oracle/CC1/temp01.dbf alter tablespace TEMP end backup; REM REM Follow the same pattern to back up the rest REM of the tablespaces. REM REM REM Step 2. 备份归档日志文件. archive log stop REM REM Exit Server Manager, using the indicator set earlier. exit EOFarch1 # # Record which files are in the destination directory. # Do this by setting an environment variable that is # equal to the directory listing for the destination # directory. # For this example, the log_archive_dest is # /db01/oracle/arch/CC1. # FILES=`ls /db01/oracle/arch/CC1/arch*.dbf`; export FILES # # Now go back into Server Manager and restart the # archiving process. Set an indicator (called EOFarch2 # in this example). # svrmgrl <<EOFarch2 connect internal archive log start; exit EOFarch2 # # Now back up the archived redo logs to the tape # device via the "tar" command, then delete them # from the destination device via the "rm" command. # You may choose to compress them instead. # tar -rvf /dev/rmt/0hc $FILES rm -f $FILES # # Step 3. 备份控制文件到磁盘. # svrmgrl <<EOFarch3 connect internal alter database backup controlfile to ’db01/oracle/CC1/CC1controlfile.bck’; exit EOFarch3 # # 备份控制文件到磁带. # tar -rvf /dev/rmt/0hc /db01/oracle/CC1/CC1controlfile.bck # # End of hot backup script. //自动生成开始备份的脚本 set pagesize 0 feedback off select ’alter tablespace ’||Tablespace_Name||’ begin backup;’ from DBA_TABLESPACES where Status ’INVALID’ spool alter_begin.sql / spool off //自动生成备份结束的脚本 set pagesize 0 feedback off select ’alter tablespace ’||Tablespace_Name||’ end backup;’ from DBA_TABLESPACES where Status ’INVALID’ spool alter_end.sql / spool off //备份归档日志文件的脚本. REM See text for alternatives. # Step 1: Stop the archiving process. This will keep # additional archived redo log files from being written # to the destination directory during this process. # svrmgrl <<EOFarch1 connect internal as sysdba archive log stop; REM REM Exit Server Manager using the indicator set earlier. exit EOFarch1 # # Step 2: Record which files are in the destination # directory. # Do this by setting an environment variable that is # equal to the directory listing for the destination # directory. # For this example, the log_archive_dest is # /db01/oracle/arch/CC1. # FILES=`ls /db01/oracle/arch/CC1/arch*.dbf`; export FILES # # Step 3: Go back into Server Manager and restart the # archiving process. Set an indicator (called EOFarch2 # in this example). # svrmgrl <<EOFarch2 connect internal as sysdba archive log start; exit EOFarch2 # # Step 4. Back up the archived redo logs to the tape # device via the "tar" command, then delete them # from the destination device via the "rm" command. # tar -rvf /dev/rmt/0hc $FILES # # Step 5. Delete those files from the destination directory. # rm -f $FILES # # End of archived redo log file backup script. REM 磁盘到磁盘的备份 REM REM Back up the RBS tablespace - to another disk (UNIX) REM alter tablespace RBS begin backup; !cp /db02/oracle/CC1/rbs01.dbf /db10/oracle/CC1/backups alter tablespace RBS end backup; REM REM 移动归档日志文件的shell脚本 # # Procedure for moving archived redo logs to another device # svrmgrl <<EOFarch2 connect internal as sysdba archive log stop; !mv /db01/oracle/arch/CC1 /db10/oracle/arch/CC1 archive log start; exit EOFarch2 # # end of archived redo log directory move. //生成创建控制文件命令 alter database backup controlfile to trace; //时间点恢复的例子 connect internal as sysdba startup mount instance_name; recover database until time ’1999-08-07:14:40:00’; //创建恢复目录 rman rcvcat rman/rman@ // 在(UNIX)下创建恢复目录 RMAN> create catalog tablespace rcvcat; // 在(NT)下创建恢复目录 RMAN> create catalog tablespace "RCVCAT"; //连接描述符范例 (DESCRIPTION= (ADDRESS= (PROTOCOL=TCP) (HOST=HQ) (PORT=1521)) (CONNECT DATA= (SID=loc))) // listener.ora 的条目entry //创建一个控制文件命令到跟踪文件 alter database backup controlfile to trace; //增加一个新的日志文件组的语句 connect internal as sysdba alter database add logfile group 4 (’/db01/oracle/CC1/log_1c.dbf’, ’/db02/oracle/CC1/log_2c.dbf’) size 5M; alter database add logfile member ’/db03/oracle/CC1/log_3c.dbf’ to group 4; //在Server Manager上MOUNT并打开一个数据库: connect internal as sysdba startup mount ORA1 exclusive; alter database open; //生成数据字典 @catalog @catproc //在init.ora 中备份数据库的位置 log_archive_dest_1 = ’/db00/arch’ log_archive_dest_state_1 = enable log_archive_dest_2 = "service=stby.world mandatory reopen=60" log_archive_dest_state_2 = enable //对用户的表空间的指定和管理相关的语句 create user USERNAME identified by PASSWORD default tablespace TABLESPACE_NAME; alter user USERNAME default tablespace TABLESPACE_NAME; alter user SYSTEM quota 0 on SYSTEM; alter user SYSTEM quota 50M on TOOLS; create user USERNAME identified by PASSWORD default tablespace DATA temporary tablespace TEMP; alter user USERNAME temporary tablespace TEMP; //重新指定一个数据文件的大小 : alter database datafile ’/db05/oracle/CC1/data01.dbf’ resize 200M; //创建一个自动扩展的数据文件: create tablespace DATA datafile ’/db05/oracle/CC1/data01.dbf’ size 200M autoextend ON next 10M maxsize 250M; //在表空间上增加一个自动扩展的数据文件: alter tablespace DATA add datafile ’/db05/oracle/CC1/data02.dbf’ size 50M autoextend ON maxsize 300M; //修改参数: alter database datafile ’/db05/oracle/CC1/data01.dbf’ autoextend ON maxsize 300M; //在数据文件移动期间重新命名: alter database rename file ’/db01/oracle/CC1/data01.dbf’ to ’/db02/oracle/CC1/data01.dbf’; alter tablespace DATA rename datafile ’/db01/oracle/CC1/data01.dbf’ to ’/db02/oracle/CC1/data01.dbf’; alter database rename file ’/db05/oracle/CC1/redo01CC1.dbf’ to ’/db02/oracle/CC1/redo01CC1.dbf’; alter database datafile ’/db05/oracle/CC1/data01.dbf’ resize 80M; //创建和使用角色: create role APPLICATION_USER; grant CREATE SESSION to APPLICATION_USER; grant APPLICATION_USER to username; //回滚段的管理 create rollback segment SEGMENT_NAME tablespace RBS; alter rollback segment SEGMENT_NAME offline; drop rollback segment SEGMENT_NAME; alter rollback segment SEGMENT_NAME online; //回滚段上指定事务 commit; set transaction use rollback segment ROLL_BATCH; insert into TABLE_NAME select * from DATA_LOAD_TABLE; commit; //查询回滚段的 大小和优化参数 select * from DBA_SEGMENTS where Segment_Type = ’ROLLBACK’; select N.Name, /* rollback segment name */ S.OptSize /* rollback segment OPTIMAL size */ from V$ROLLNAME N, V$ROLLSTAT S where N.USN=S.USN; //回收回滚段 alter rollback segment R1 shrink to 15M; alter rollback segment R1 shrink; //例子 set transaction use rollback segment SEGMENT_NAME alter tablespace RBS default storage (initial 125K next 125K minextents 18 maxextents 249) create rollback segment R4 tablespace RBS storage (optimal 2250K); alter rollback segment R4 online; select Sessions_Highwater from V$LICENSE; grant select on EMPLOYEE to PUBLIC; //用户和角色 create role ACCOUNT_CREATOR; grant CREATE SESSION, CREATE USER, ALTER USER to ACCOUNT_CREATOR; alter user THUMPER default role NONE; alter user THUMPER default role CONNECT; alter user THUMPER default role all except ACCOUNT_CREATOR; alter profile DEFAULT limit idle_time 60; create profile LIMITED_PROFILE limit FAILED_LOGIN_ATTEMPTS 5; create user JANE identified by EYRE profile LIMITED_PROFILE; grant CREATE SESSION to JANE; alter user JANE account unlock; alter user JANE account lock; alter profile LIMITED_PROFILE limit PASSWORD_LIFE_TIME 30; alter user jane password expire; //创建操作系统用户 REM Creating OPS$ accounts create user OPS$FARMER identified by SOME_PASSWORD default tablespace USERS temporary tablespace TEMP; REM Using identified externally create user OPS$FARMER identified externally default tablespace USERS temporary tablespace TEMP; //执行ORAPWD ORAPWD FILE=filename PASSWORD=password ENTRIES=max_users create role APPLICATION_USER; grant CREATE SESSION to APPLICATION_USER; create role DATA_ENTRY_CLERK; grant select, insert on THUMPER.EMPLOYEE to DATA_ENTRY_CLERK; grant select, insert on THUMPER.TIME_CARDS to DATA_ENTRY_CLERK; grant select, insert on THUMPER.DEPARTMENT to DATA_ENTRY_CLERK; grant APPLICATION_USER to DATA_ENTRY_CLERK; grant DATA_ENTRY_CLERK to MCGREGOR; grant DATA_ENTRY_CLERK to BPOTTER with admin option; //设置角色 set role DATA_ENTRY_CLERK; set role NONE; //回收权利: revoke delete on EMPLOYEE from PETER; revoke all on EMPLOYEE from MCGREGOR; //回收角色: revoke ACCOUNT_CREATOR from HELPDESK; drop user USERNAME cascade; grant SELECT on EMPLOYEE to MCGREGOR with grant option; grant SELECT on THUMPER.EMPLOYEE to BPOTTER with grant option; revoke SELECT on EMPLOYEE from MCGREGOR; create user MCGREGOR identified by VALUES ’1A2DD3CCEE354DFA’; alter user OPS$FARMER identified by VALUES ’no way’; //备份与恢复 使用 export 程序 exp system/manager file=expdat.dmp compress=Y owner=(HR,THUMPER) exp system/manager file=hr.dmp owner=HR indexes=Y compress=Y imp system/manager file=hr.dmp full=Y buffer=64000 commit=Y //备份表 exp system/manager FILE=expdat.dmp TABLES=(Thumper.SALES) //备份分区 exp system/manager FILE=expdat.dmp TABLES=(Thumper.SALES:Part1) //输入例子 imp system/manager file=expdat.dmp imp system/manager file=expdat.dmp buffer=64000 commit=Y exp system/manager file=thumper.dat owner=thumper grants=N indexes=Y compress=Y rows=Y imp system/manager file=thumper.dat FROMUSER=thumper TOUSER=flower rows=Y indexes=Y imp system/manager file=expdat.dmp full=Y commit=Y buffer=64000 imp system/manager file=expdat.dmp ignore=N rows=N commit=Y buffer=64000 //使用操作系统备份命令 REM TAR examples tar -cvf /dev/rmt/0hc /db0[1-9]/oracle/CC1 tar -rvf /dev/rmt/0hc /orasw/app/oracle/CC1/pfile/initcc1.ora tar -rvf /dev/rmt/0hc /db0[1-9]/oracle/CC1 /orasw/app/oracle/CC1/pfile/initcc1.ora //离线备份的shell脚本 ORACLE_SID=cc1; export ORACLE_SID ORAENV_ASK=NO; export ORAENV_ASK . oraenv svrmgrl <<EOF1 connect internal as sysdba shutdown immediate; exit EOF1 insert backup commands like the "tar" commands here svrmgrl <<EOF2 connect internal as sysdba startup EOF2 //在Server Manager上设置为archivelog mode: connect internal as sysdba startup mount cc1; alter database archivelog; archive log start; alter database open; //在Server Manager上设置为archivelog mode: connect internal as sysdba startup mount cc1; alter database noarchivelog; alter database open; select Name, Value from V$PARAMETER where Name like ’log_archive%’; //联机备份的脚本 # # Sample Hot Backup Script for a UNIX File System database # # Set up environment variables: ORACLE_SID=cc1; export ORACLE_SID ORAENV_ASK=NO; export ORAENV_ASK . oraenv svrmgrl <<EOFarch1 connect internal as sysdba REM REM 备份 SYSTEM tablespace REM alter tablespace SYSTEM begin backup; !tar -cvf /dev/rmt/0hc /db01/oracle/CC1/sys01.dbf alter tablespace SYSTEM end backup; REM REM The SYSTEM tablespace has now been written to a REM tar saveset on the tape device /dev/rmt/0hc. The REM rest of the tars must use the "-rvf" clause to append REM to that saveset. REM REM 备份 RBS tablespace REM alter tablespace RBS begin backup; !tar -rvf /dev/rmt/0hc /db02/oracle/CC1/rbs01.dbf alter tablespace RBS end backup; REM REM 备份 DATA tablespace REM For the purposes of this example, this tablespace REM will contain two files, data01.dbf and data02.dbf. REM The * wildcard will be used in the filename. REM alter tablespace DATA begin backup; !tar -rvf /dev/rmt/0hc /db03/oracle/CC1/data0*.dbf alter tablespace DATA end backup; REM REM 备份 INDEXES tablespace REM alter tablespace INDEXES begin backup; !tar -rvf /dev/rmt/0hc /db04/oracle/CC1/indexes01.dbf alter tablespace INDEXES end backup; REM REM 备份 TEMP tablespace REM alter tablespace TEMP begin backup; !tar -rvf /dev/rmt/0hc /db05/oracle/CC1/temp01.dbf alter tablespace TEMP end backup; REM REM Follow the same pattern to back up the rest REM of the tablespaces. REM REM REM Step 2. 备份归档日志文件. archive log stop REM REM Exit Server Manager, using the indicator set earlier. exit EOFarch1 # # Record which files are in the destination directory. # Do this by setting an environment variable that is # equal to the directory listing for the destination # directory. # For this example, the log_archive_dest is # /db01/oracle/arch/CC1. # FILES=`ls /db01/oracle/arch/CC1/arch*.dbf`; export FILES # # Now go back into Server Manager and restart the # archiving process. Set an indicator (called EOFarch2 # in this example). # svrmgrl <<EOFarch2 connect internal archive log start; exit EOFarch2 # # Now back up the archived redo logs to the tape # device via the "tar" command, then delete them # from the destination device via the "rm" command. # You may choose to compress them instead. # tar -rvf /dev/rmt/0hc $FILES rm -f $FILES # # Step 3. 备份控制文件到磁盘. # svrmgrl <<EOFarch3 connect internal alter database backup controlfile to ’db01/oracle/CC1/CC1controlfile.bck’; exit EOFarch3 # # 备份控制文件到磁带. # tar -rvf /dev/rmt/0hc /db01/oracle/CC1/CC1controlfile.bck # # End of hot backup script. //自动生成开始备份的脚本 set pagesize 0 feedback off select ’alter tablespace ’||Tablespace_Name||’ begin backup;’ from DBA_TABLESPACES where Status ’INVALID’ spool alter_begin.sql / spool off //自动生成备份结束的脚本 set pagesize 0 feedback off select ’alter tablespace ’||Tablespace_Name||’ end backup;’ from DBA_TABLESPACES where Status ’INVALID’ spool alter_end.sql / spool off //备份归档日志文件的脚本. REM See text for alternatives. # Step 1: Stop the archiving process. This will keep # additional archived redo log files from being written # to the destination directory during this process. # svrmgrl <<EOFarch1 connect internal as sysdba archive log stop; REM REM Exit Server Manager using the indicator set earlier. exit EOFarch1 # # Step 2: Record which files are in the destination # directory. # Do this by setting an environment variable that is # equal to the directory listing for the destination # directory. # For this example, the log_archive_dest is # /db01/oracle/arch/CC1. # FILES=`ls /db01/oracle/arch/CC1/arch*.dbf`; export FILES # # Step 3: Go back into Server Manager and restart the # archiving process. Set an indicator (called EOFarch2 # in this example). # svrmgrl <<EOFarch2 connect internal as sysdba archive log start; exit EOFarch2 # # Step 4. Back up the archived redo logs to the tape # device via the "tar" command, then delete them # from the destination device via the "rm" command. # tar -rvf /dev/rmt/0hc $FILES # # Step 5. Delete those files from the destination directory. # rm -f $FILES # # End of archived redo log file backup script. REM 磁盘到磁盘的备份 REM REM Back up the RBS tablespace - to another disk (UNIX) REM alter tablespace RBS begin backup; !cp /db02/oracle/CC1/rbs01.dbf /db10/oracle/CC1/backups alter tablespace RBS end backup; REM REM 移动归档日志文件的shell脚本 # # Procedure for moving archived redo logs to another device # svrmgrl <<EOFarch2 connect internal as sysdba archive log stop; !mv /db01/oracle/arch/CC1 /db10/oracle/arch/CC1 archive log start; exit EOFarch2 # # end of archived redo log directory move. //生成创建控制文件命令 alter database backup controlfile to trace; //时间点恢复的例子 connect internal as sysdba startup mount instance_name; recover database until time ’1999-08-07:14:40:00’; //创建恢复目录 rman rcvcat rman/rman@ // 在(UNIX)下创建恢复目录 RMAN> create catalog tablespace rcvcat; // 在(NT)下创建恢复目录 RMAN> create catalog tablespace "RCVCAT"; //连接描述符范例 (DESCRIPTION= (ADDRESS= (PROTOCOL=TCP) (HOST=HQ) (PORT=1521)) (CONNECT DATA= (SID=loc))) // listener.ora 的条目entry ……………………………………………………………………………………
Spring Boot的Profile功能可以帮助我们在不同环境中轻松地配置和管理应用程序。通过使用Profile,我们可以在开发、测试和生产环境中分别使用不同配置文件,而不需要手动更改配置文件或代码。 首先,在Spring Boot应用程序的配置文件中,我们可以定义多个Profile。这些Profile可以根据不同环境进行命名,例如"dev"表示开发环境,"test"表示测试环境,"prod"表示生产环境等等。 接着,我们可以在配置文件中为每个Profile配置不同的属性。这样,当应用程序以不同Profile运行时,它将加载对应的配置文件,并使用相应的属性。例如,在开发环境中,我们可能希望打开调试模式、使用内存数据库和禁用缓存,而在生产环境中,我们可能希望关闭调试模式、使用真实数据库和启用缓存。 在代码中,我们可以使用@Profile注解来指定应用程序应该使用哪个Profile。例如,我们可以将@Service或@Configuration类注解为@Profile("dev"),这样它们仅在开发环境中起作用。同时,我们还可以使用@ActiveProfiles注解来指定当前激活的Profile。 最后,在启动应用程序时,我们可以通过设置"spring.profiles.active"系统属性或环境变量来指定要激活的Profile。例如,我们可以在命令行中使用"-Dspring.profiles.active=dev"来指定激活开发环境。 通过使用Spring Boot的Profile功能,我们可以轻松地在多个环境切换应用程序的配置和行为,使得开发、测试和生产环境之间的部署和管理更加方便。

“相关推荐”对你有帮助么?

  • 非常没帮助
  • 没帮助
  • 一般
  • 有帮助
  • 非常有帮助
提交
评论
添加红包

请填写红包祝福语或标题

红包个数最小为10个

红包金额最低5元

当前余额3.43前往充值 >
需支付:10.00
成就一亿技术人!
领取后你会自动成为博主和红包主的粉丝 规则
hope_wisdom
发出的红包
实付
使用余额支付
点击重新获取
扫码支付
钱包余额 0

抵扣说明:

1.余额是钱包充值的虚拟货币,按照1:1的比例进行支付金额的抵扣。
2.余额无法直接购买下载,可以购买VIP、付费专栏及课程。

余额充值