


如果你想上传多张图片:http://blog.csdn.net/xuanzhangran/article/details/54929988
如果是上传单张如下:
点击上传图片按钮,上传本地
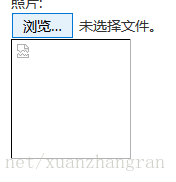
效果如图:
1:原始图框:
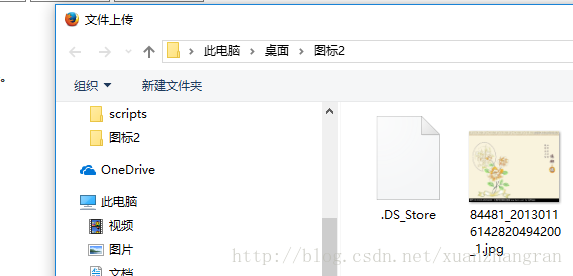
2:点击预览,弹出本地弹框:
3:选中图片点击打开/确认:
实现的代码如下:
前台代码:

<div class="row">
     <span class="personattr">身份证正面照片:</span>
     <input type="hidden" name="img"  id="thumbUrl"/>
     <input type="file" name="logoFile" id="logoFile" onchange="setImg(this);">
     <span><img id="thumburlShow" src="" width="120" height="120"/></span>
 </div>
js代码
function setImg(obj){//用于进行图片上传,返回地址
            var f=$(obj).val();
            if(f == null || f ==undefined || f == ''){
                return false;
            }
            if(!/\.(?:png|jpg|bmp|gif|PNG|JPG|BMP|GIF)$/.test(f))
            {
                alertLayel("类型必须是图片(.png|jpg|bmp|gif|PNG|JPG|BMP|GIF)");
                $(obj).val('');
                return false;
            }
            var data = new FormData();
            $.each($(obj)[0].files,function(i,file){
                data.append('file', file);
            });
            $.ajax({
                type: "POST",
                url: "/business/uploadImg.html",
                data: data,
                cache: false,
                contentType: false,    //不可缺
                processData: false,    //不可缺
                dataType:"json",
                success: function(suc) {
                    if(suc.code==0){
                            $("#thumbUrl").val(suc.message);//将地址存储好
                            $("#thumburlShow").attr("src",suc.message);//显示图片
                        }else{
                        alertLayel("上传失败");
                        $("#url").val("");
                        $(obj).val('');
                    }
                },
                error: function(XMLHttpRequest, textStatus, errorThrown) {
                    alertLayel("上传失败,请检查网络后重试");
                    $("#url").val("");
                    $(obj).val('');
                }
            });
        }
后台代码:
package com.test.business;
import com.idorabox.manage.web.util.TimeUtil;
import com.idorabox.core.utils.DateUtil;
import org.springframework.web.multipart.MultipartFile;
import org.apache.commons.io.FileUtils;
import javax.servlet.ServletContext;
import java.util.Random;
import java.io.File;
    @RequestMapping("/business")
public class BusinessAction {
    @ResponseBody
    @RequestMapping("/uploadImg.html")
    public String uploadPicture(@RequestParam(value="file",required=false)MultipartFile file,
    HttpServletRequest request){

        File targetFile=null;
        String msg="";//返回存储路径
        int code=1;
        String fileName=file.getOriginalFilename();//获取文件名加后缀
        if(fileName!=null&&fileName!=""){
            String returnUrl = request.getScheme() + "://" + request.getServerName() + ":" + request.getServerPort() + request.getContextPath() +"/upload/imgs/";//存储路径
            String path = request.getSession().getServletContext().getRealPath("upload/imgs"); //文件存储位置
            String fileF = fileName.substring(fileName.lastIndexOf("."), fileName.length());//文件后缀
            fileName=new Date().getTime()+"_"+new Random().nextInt(1000)+fileF;//新的文件名

            //先判断文件是否存在
            String fileAdd = DateUtil.format(new Date(),"yyyyMMdd");
            File file1 =new File(path+"/"+fileAdd);
            //如果文件夹不存在则创建
            if(!file1 .exists()  && !file1 .isDirectory()){
                file1 .mkdir();
            }
            targetFile = new File(file1, fileName);
//          targetFile = new File(path, fileName);
            try {
                file.transferTo(targetFile);
//              msg=returnUrl+fileName;
                msg=returnUrl+fileAdd+"/"+fileName;
                code=0;
            } catch (Exception e) {
                e.printStackTrace();
            }
        }
        return JSON.toJSONString(ResponseResult.result(code, msg));
    }
}

ResponseResult 实体类如下:
import java.util.Map;

public class ResponseResult {
    private Integer code;

    private String message;

    private Map<String, Object> result;

    public Integer getCode() {
        return this.code;
    }

    public void setCode(Integer code) {
        this.code = code;
    }

    public String getMessage() {
        return this.message;
    }

    public void setMessage(String message) {
        this.message = message;
    }

    public Map<String, Object> getResult() {
        return this.result;
    }

    public void setResult(Map<String, Object> result) {
        this.result = result;
    }

    private static ResponseResult responseResult;
    /**
     * 返回结果
     * @param code
     * @param message
     * @param token
     * @param map
     * @return
     */
    public static ResponseResult result(int code, String message, Map<String, Object> map){
        responseResult = new ResponseResult();
        responseResult.setCode(code);
        responseResult.setMessage(message);
        responseResult.setResult(map);
        return responseResult;
    }

    public static ResponseResult result(int code, String message){
        responseResult = new ResponseResult();
        responseResult.setCode(code);
        responseResult.setMessage(message);
        return responseResult;
    }

    public ResponseResult() {}

}

注意:后台代码第15行:文件的位置:你需要在你的项目的webapp下创建upload文件,upload下创建imgs文件,否则存储不成功。也就会上传失败。


 4460
4460


 被折叠的 条评论
为什么被折叠?
被折叠的 条评论
为什么被折叠?
 到【灌水乐园】发言


