


开发环境:
JDK:1.5.0.9
Eclispe 3.2
MyEclipse:5.0
Tomcat:5.5.20
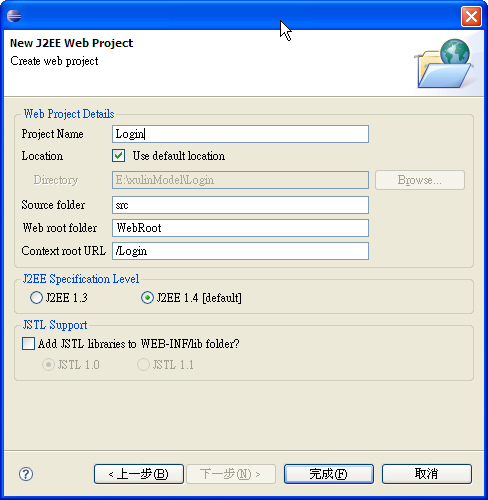
1、先建立一个MyEclipse项目里面的Web项目:
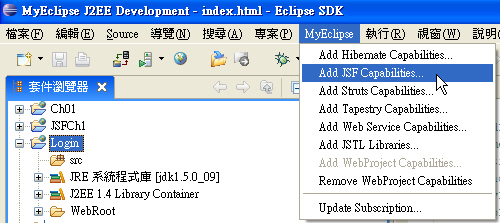
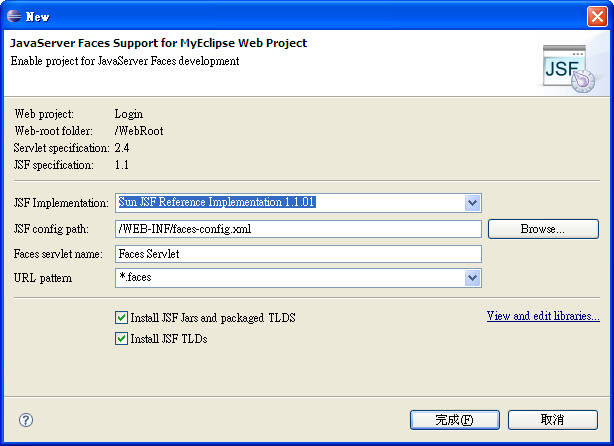
2、然后向Web项目中添加JSF组件,如图所示:
3、在src(源文件夹)中新建一个包com.corejsf,然后新键一个JavaBean:UserBean(也就是普通的类),代码如下:
package
com.corejsf;
public class UserBean {
private String name;
private String password;
public String getName() {
return name;
}
public void setName(String name) {
this .name = name;
}
public String getPassword() {
return password;
}
public void setPassword(String password) {
this .password = password;
}
}
public class UserBean {
private String name;
private String password;
public String getName() {
return name;
}
public void setName(String name) {
this .name = name;
}
public String getPassword() {
return password;
}
public void setPassword(String password) {
this .password = password;
}
}
4、然后建立3个文件,index.html,index.jsp,welcom.jsp
index.html:用于显示提示信息,由于JSP页面第一次加载需要一定的时间,该页面作为一个过渡。
index.jsp:用于用户输入登录信息,并相应提交
welcome.jsp:成功登录页面。(由于本示例很简单,未作任何验证)
代码分别为:
index.html
<
html
>
< head >
< meta http-equiv ="Refresh" content = "0; URL=index.faces" />
< title > Start Web Application </ title >
</ head >
< body >
< p > Please wait for the web application to start. </ p >
</ body >
</ html >
< head >
< meta http-equiv ="Refresh" content = "0; URL=index.faces" />
< title > Start Web Application </ title >
</ head >
< body >
< p > Please wait for the web application to start. </ p >
</ body >
</ html >
index.jsp
<
html
>
<% @ taglib uri = " http://java.sun.com/jsf/core " prefix = " f " %>
<% @ taglib uri = " http://java.sun.com/jsf/html " prefix = " h " %>
< f:view >
< head >
< title > A Simple JavaServer Faces Application </ title >
</ head >
< body >
< h:form >
< h3 > Please enter your name and password. </ h3 >
< table >
< tr >
< td > Name: </ td >
< td >
< h:inputText value = " #{user.name} " />
</ td >
</ tr >
< tr >
< td > Password: </ td >
< td >
< h:inputSecret value = " #{user.password} " />
</ td >
</ tr >
</ table >
< p >
< h:commandButton value = " Login " action = " login " />
</ p >
</ h:form >
</ body >
</ f:view >
</ html >
welcome.jsp
<
html
>
<% @ taglib uri = " http://java.sun.com/jsf/core " prefix = " f " %>
<% @ taglib uri = " http://java.sun.com/jsf/html " prefix = " h " %>
< f:view >
< head >
< title > A Simple JavaServer Faces Application </ title >
</ head >
< body >
< h:form >
< h3 >
Welcome to JavaServer Faces,
< h:outputText value = " #{user.name} " />!
</ h3 >
</ h:form >
</ body >
</ f:view >
</ html >
5、修改两个配置文件:由于使用MyEclipse中的模板生成的XML文件头部标记有问题,所以将配置文件改为:
Web.xml
<?
xml version="1.0"
?>
<! DOCTYPE web-app PUBLIC
"-//Sun Microsystems, Inc.//DTD Web Application 2.3//EN"
"http://java.sun.com/dtd/web-app_2_3.dtd" >
< web-app >
< servlet >
< servlet-name > Faces Servlet </ servlet-name >
< servlet-class > javax.faces.webapp.FacesServlet </ servlet-class >
< load-on-startup > 1 </ load-on-startup >
</ servlet >
< servlet-mapping >
< servlet-name > Faces Servlet </ servlet-name >
< url-pattern > *.faces </ url-pattern >
</ servlet-mapping >
< welcome-file-list >
< welcome-file > index.html </ welcome-file >
</ welcome-file-list >
</ web-app >
faces-config.xml
<?
xml version="1.0"
?>
<! DOCTYPE faces-config PUBLIC
"-//Sun Microsystems, Inc.//DTD JavaServer Faces Config 1.0//EN"
"http://java.sun.com/dtd/web-facesconfig_1_0.dtd" >
< faces-config >
< navigation-rule >
< from-view-id > /index.jsp </ from-view-id >
< navigation-case >
< from-outcome > login </ from-outcome >
< to-view-id > /welcome.jsp </ to-view-id >
</ navigation-case >
</ navigation-rule >
< managed-bean >
< managed-bean-name > user </ managed-bean-name >
< managed-bean-class > com.corejsf.UserBean </ managed-bean-class >
< managed-bean-scope > session </ managed-bean-scope >
</ managed-bean >
</ faces-config >
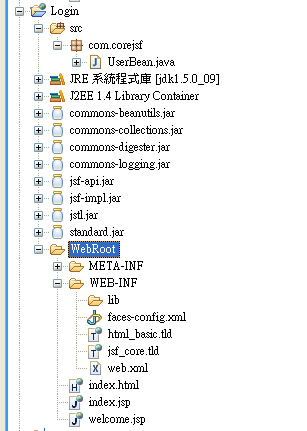
6、所有文件建好后,文件树的结构如下:
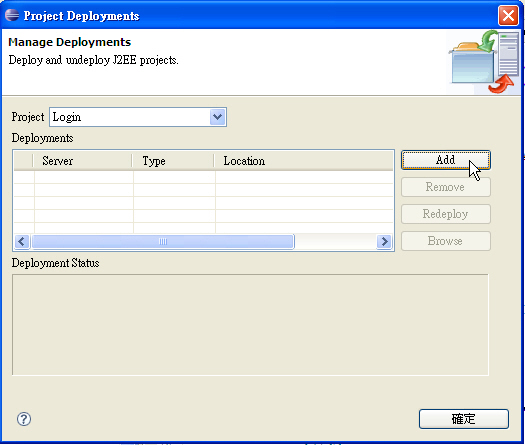
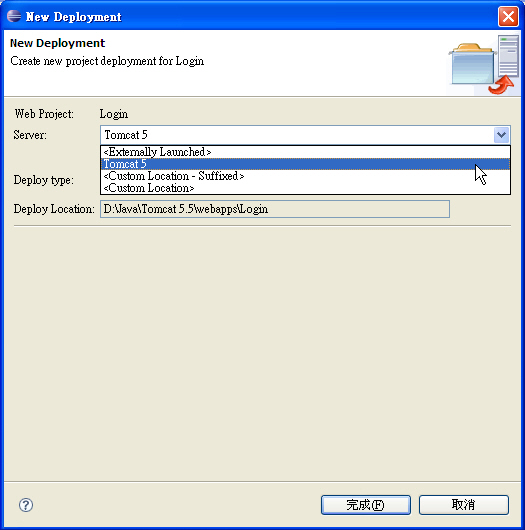
7、使用Tomcat工具进行发布: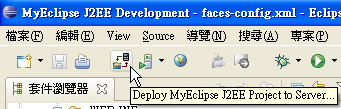
选中Tomcat 5
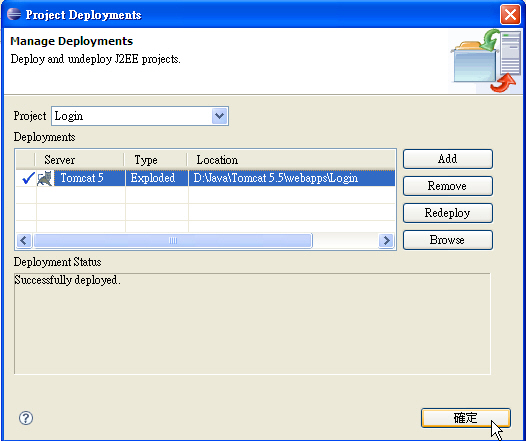
8、发布成功后,就可以运行Tomcat服务器了:
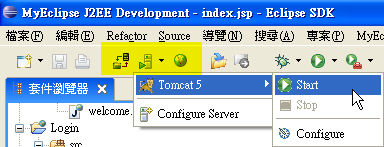
9、服务器成功运行:
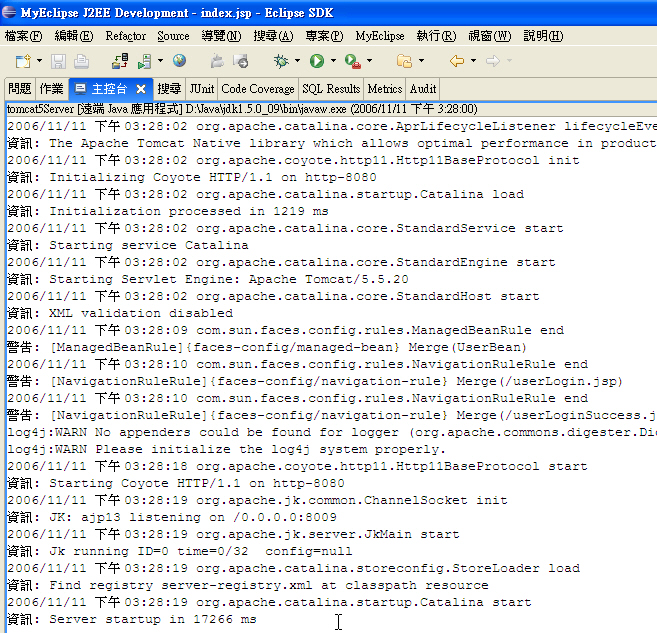
10、打开IE,在地址栏中输入:http://localhost:8080/Login/ 即可登录

11、点击“Login”按钮,页面正确转向。
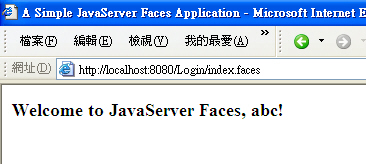
小结:利用MyEclipse建立JSF程序很简单,关键是两个配置文件的头要注意,不然会出错!


 275
275

 被折叠的 条评论
为什么被折叠?
被折叠的 条评论
为什么被折叠?
 到【灌水乐园】发言


