


五、Linux二进制安装MariaDB
1 卸载mariadb
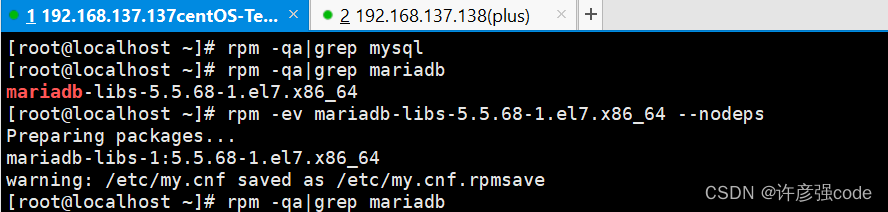
1.1 卸载相关的服务(mysql和mariadb都查询一下)
检查MySQL mariadb
rpm -qa|grep mysql
rpm -qa|grep mariadb
如果存在,删除服务
rpm -ev mariadb-libs-5.5.68-1.el7.x86_64 --nodeps
1.2 查找MySQL和mariadb相关的文件目录
find / -name mysql
find / -name mariadb
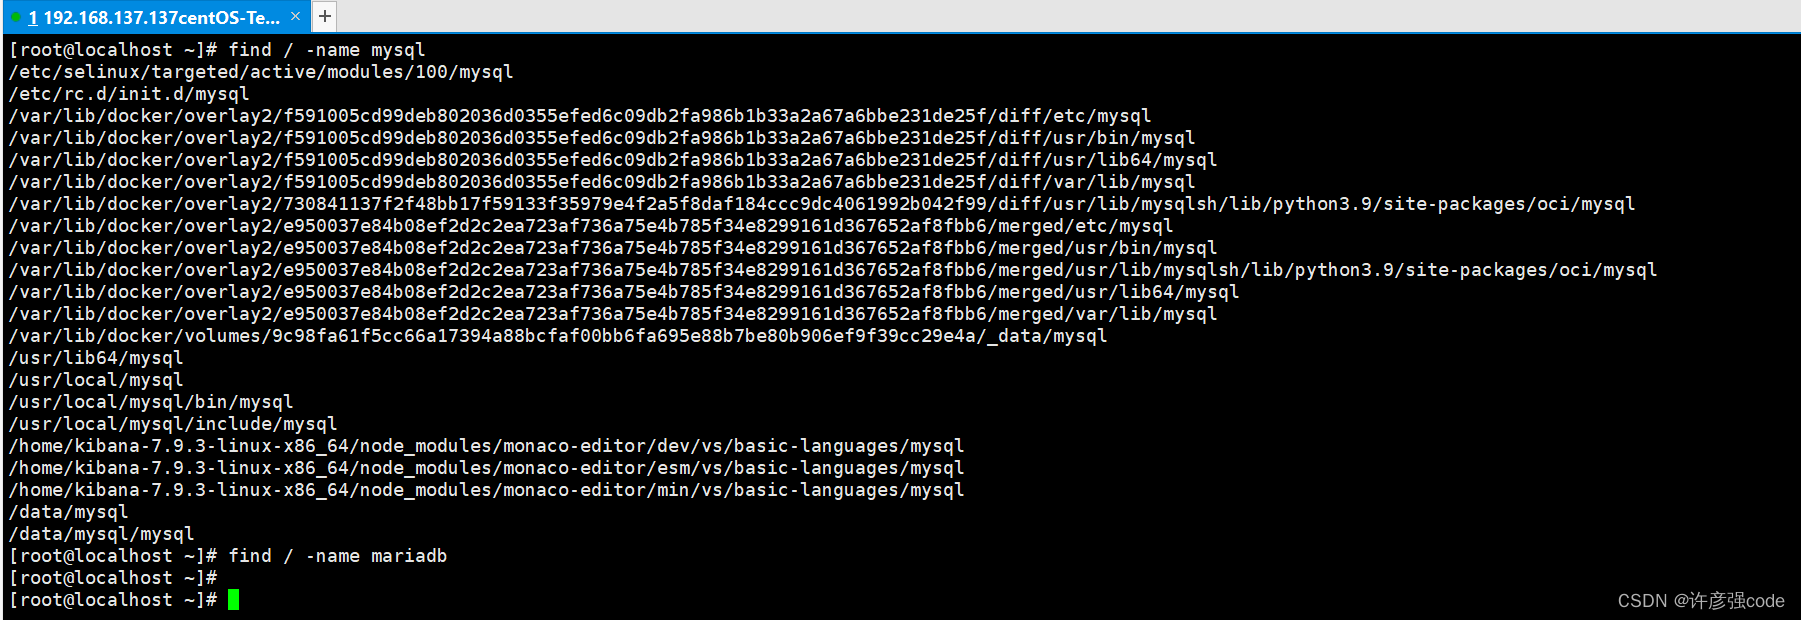
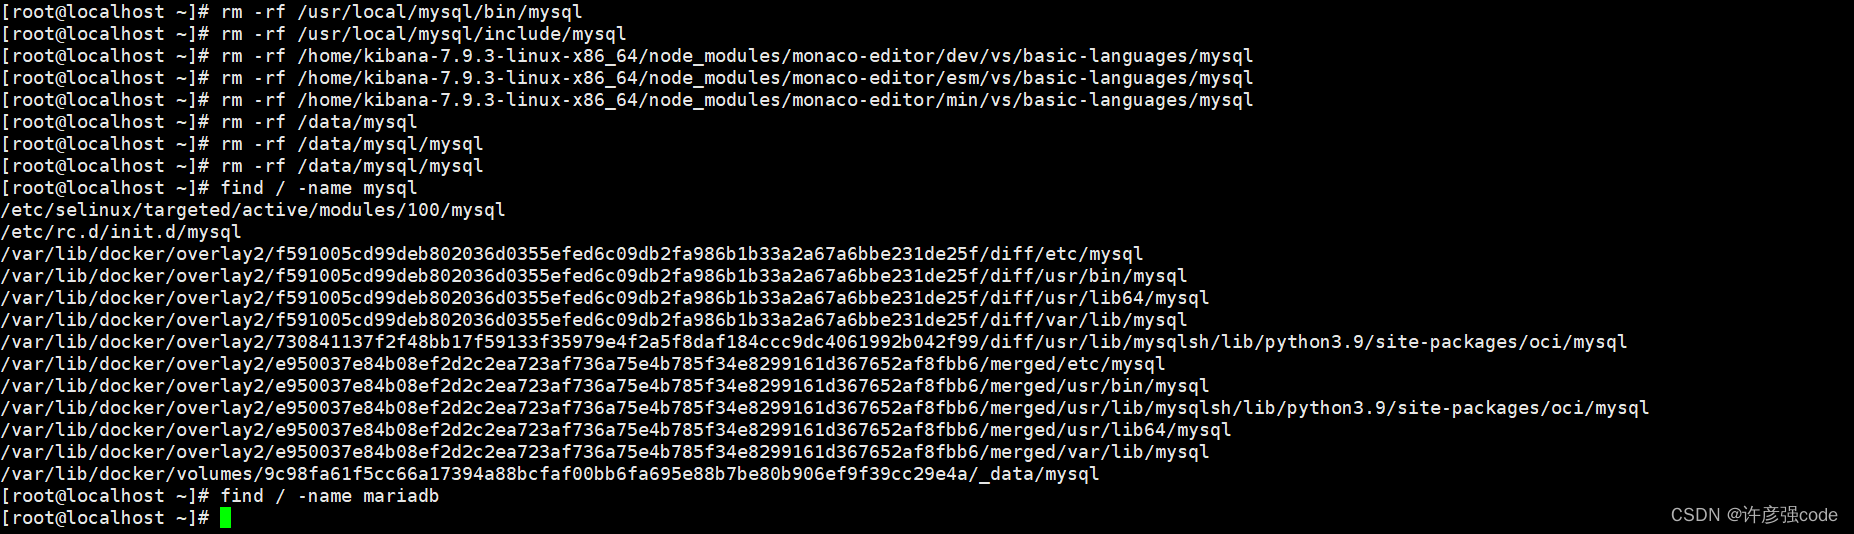
删除目录(因为我docker里也安装了mysql,所以根据自己情况删除 )
rm -rf /usr/lib64/mysql
rm -rf /usr/local/mysql
rm -rf /usr/local/mysql/bin/mysql
rm -rf /usr/local/mysql/include/mysql
rm -rf /home/kibana-7.9.3-linux-x86_64/node_modules/monaco-editor/dev/vs/basic-languages/mysql
rm -rf /home/kibana-7.9.3-linux-x86_64/node_modules/monaco-editor/esm/vs/basic-languages/mysql
rm -rf /home/kibana-7.9.3-linux-x86_64/node_modules/monaco-editor/min/vs/basic-languages/mysql
rm -rf /data/mysql
rm -rf /data/mysql/mysql
2 安装mariadb
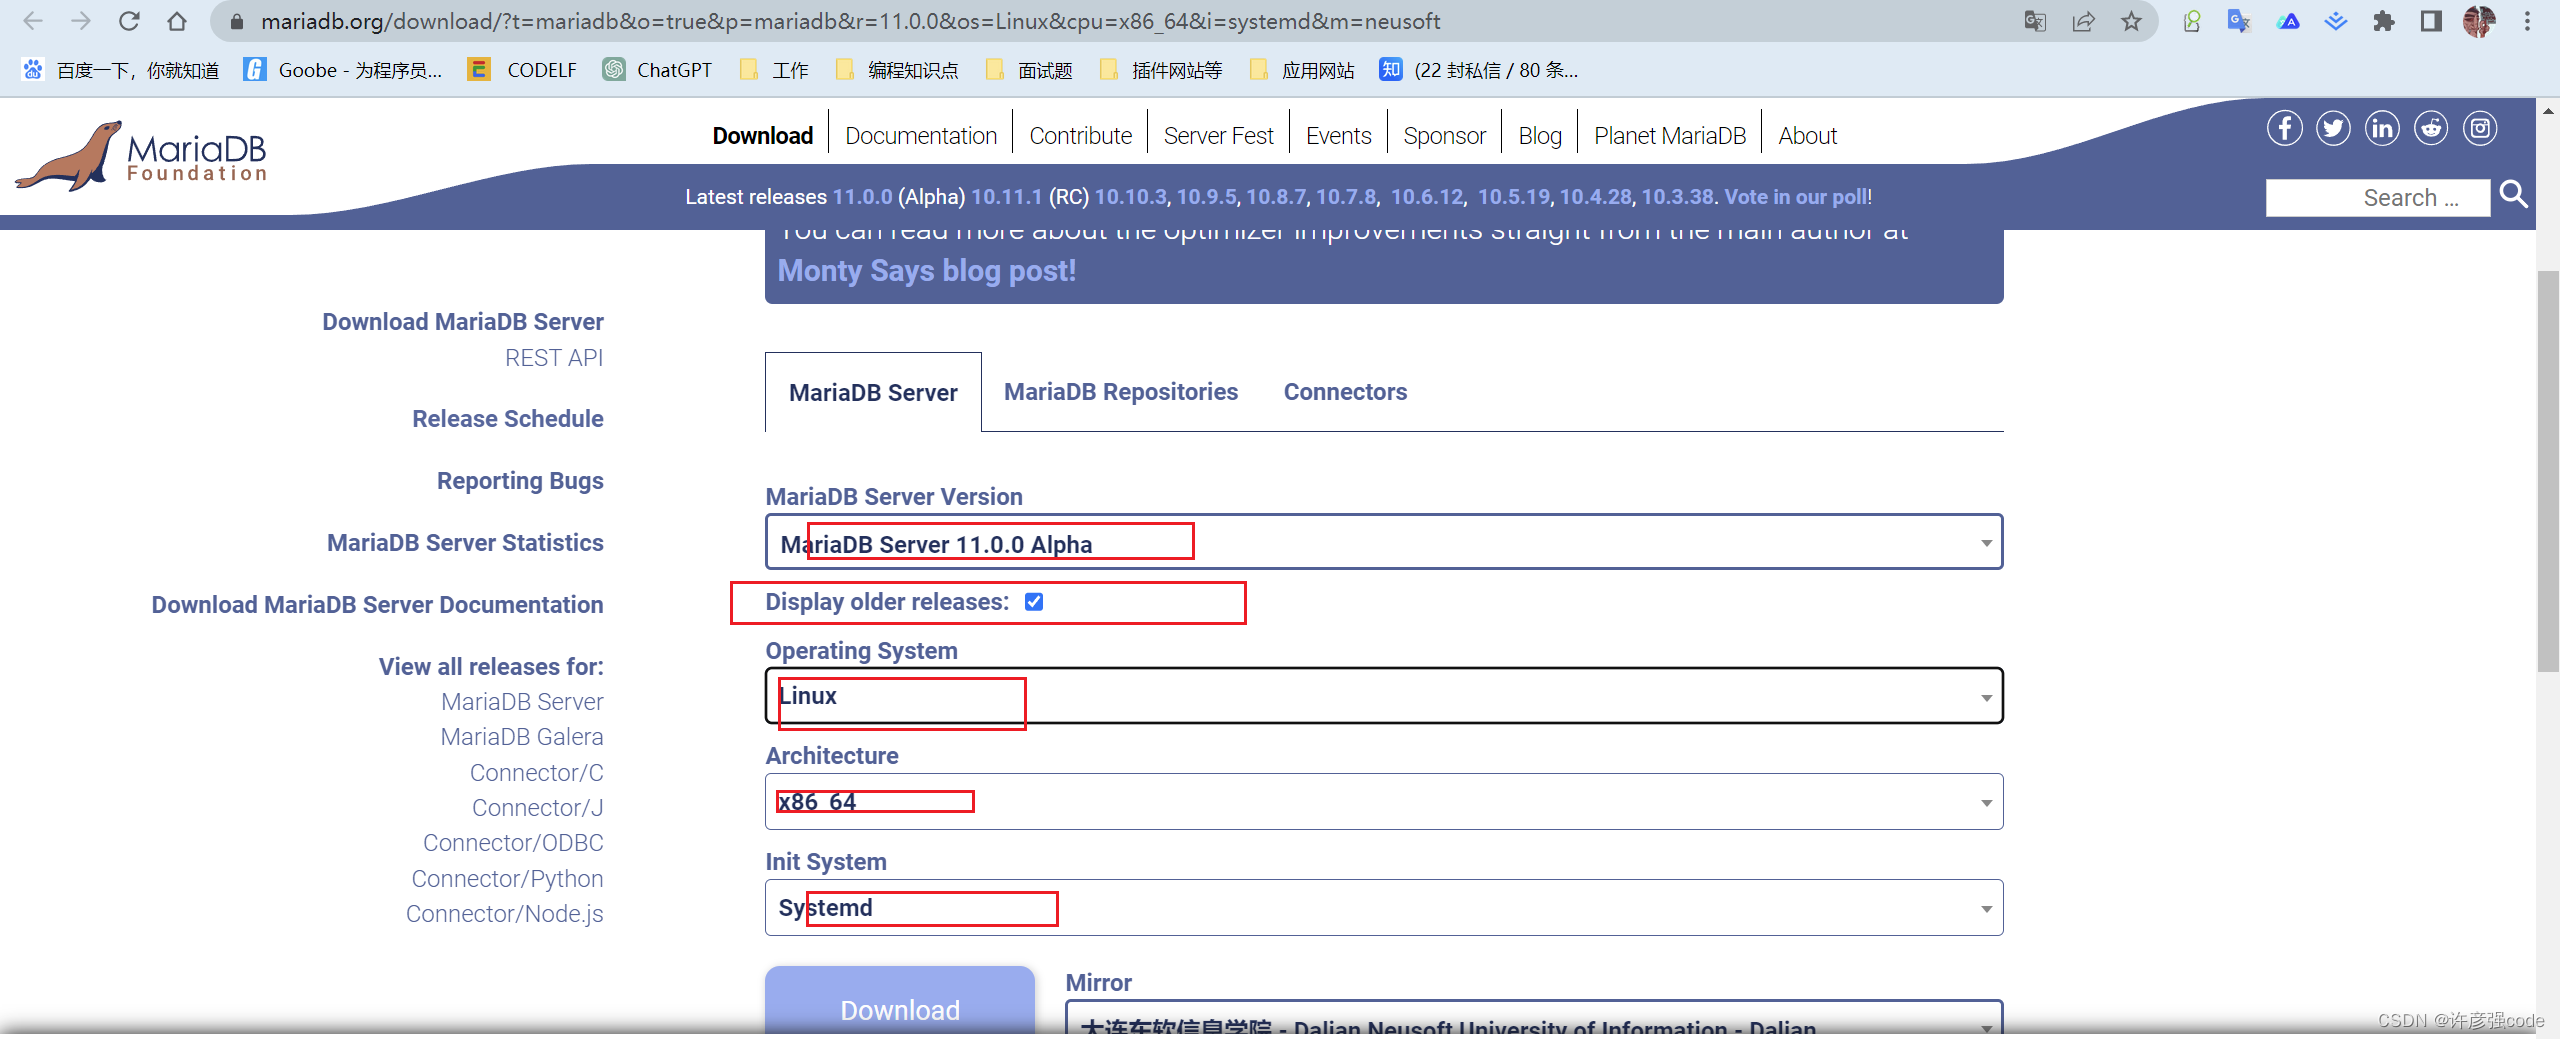
2.1 mariadb下载地址
下载地址: https://mariadb.org/download
百度网盘下载链接:百度网盘
2.2 将安装包放入到服务器中并解压 (我放到opt下)
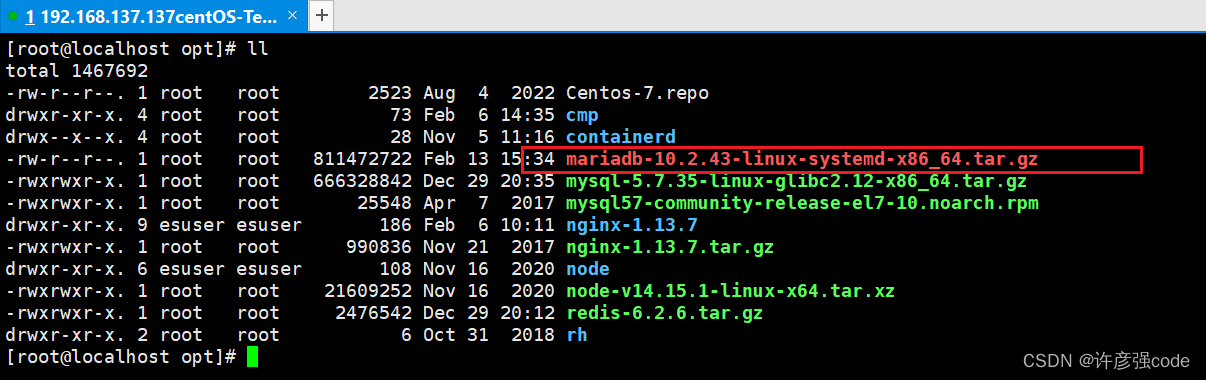
#解压命令
tar -zxvf mariadb-10.2.43-linux-systemd-x86_64.tar.gz
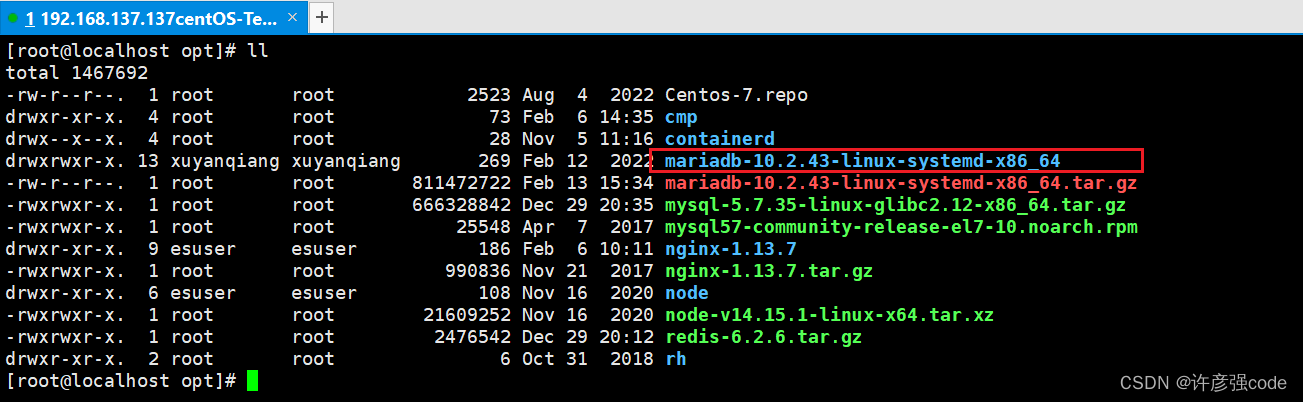
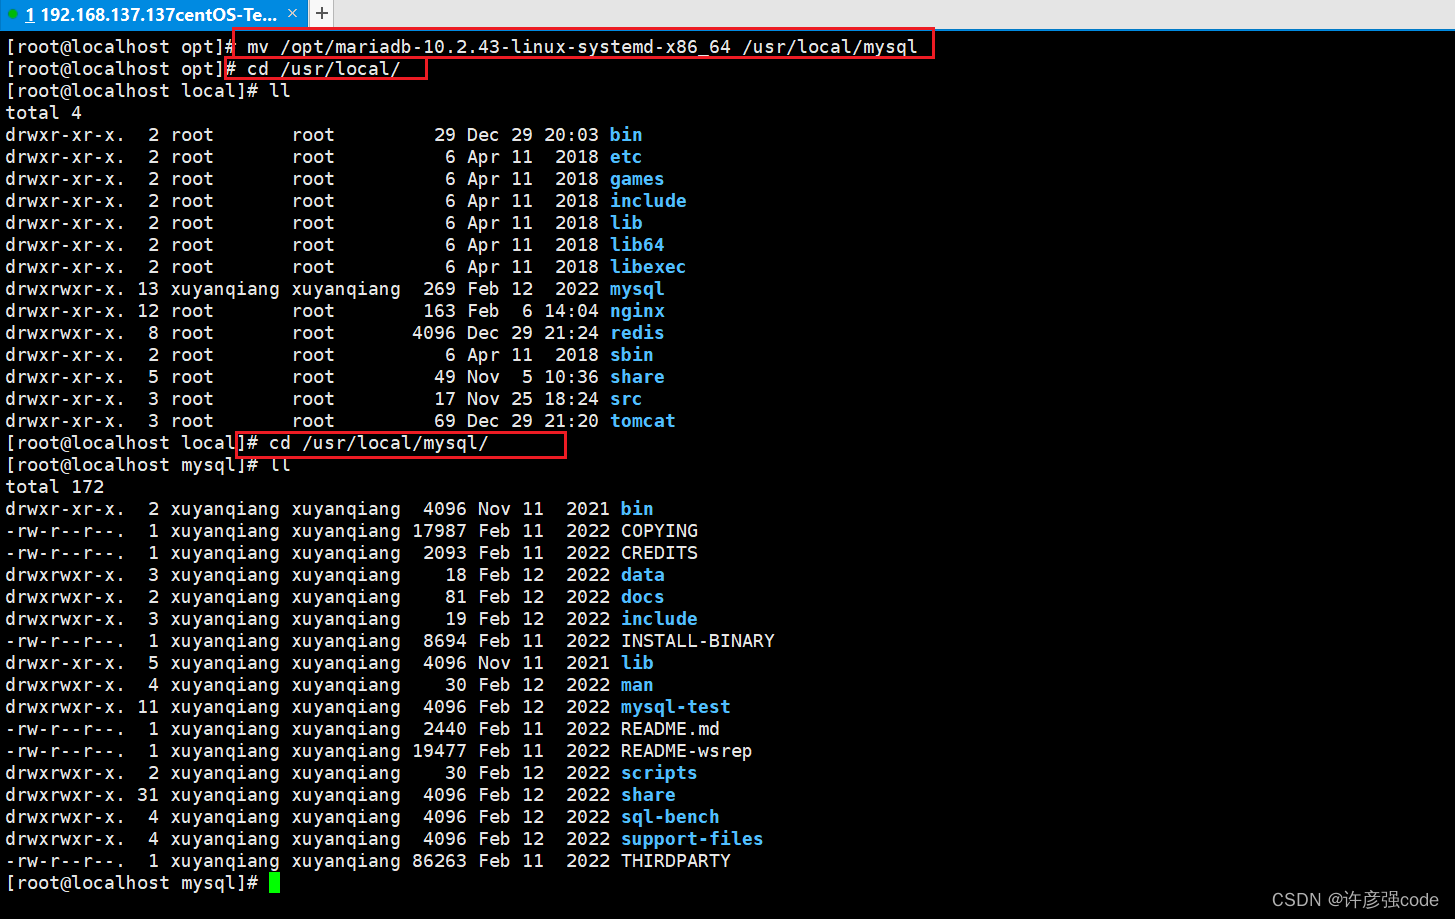
2.3 将解压后的目录移动到安装目录下
mv /opt/mariadb-10.2.43-linux-systemd-x86_64 /usr/local/mariadb
2.4 创建数据目录(根据自己情况修改)
我的数据位置在/usr/local/data/mariadb
cd /usr/local
mkdir data
cd data
mkdir mariadb
2.5 添加用户组和用户及其权限
#1.创建组
groupadd mariadb
#2.创建用户,赋予权限(注意目录)
useradd -g mariadb mariadb
#3.给mysql用户赋予权限(第二步可能会报错,不用管,直接第三步,原因还未找到.解决可以评论和私信我)
chown -R mariadb.mariadb /usr/local/data/mariadb /usr/local/mariadb
2.5.1 组和用户的操作命令
一,组操作
#1,创建组 增加一个test组
groupadd  test
#2,修改组 将test组的名子改成test2
groupmod -n test2  test
#3,删除组 删除 组test2
groupdel test2
#4,查看组
a),查看当前登录用户所在的组 groups,查看apacheuser所在组groups apacheuser
b),查看所有组 cat /etc/group
c),有的linux系统没有/etc/group文件的,这个时候看下面的这个方法
cat /etc/passwd |awk -F [:] '{print $4}' |sort|uniq | getent group |awk -F [:] '{print $1}'
这里用到一个命令是getent,可以通过组ID来查找组信息,如果这个命令没有的话,那就很难查找,系统中所有的组了.
二,用户操作
#1,增加用户
查看复制打印?
[root@krlcgcms01 mytest]# useradd --help
Usage: useradd [options] LOGIN

Options:
 -b, --base-dir BASE_DIR       设置基本路径作为用户的登录目录
 -c, --comment COMMENT         对用户的注释
 -d, --home-dir HOME_DIR       设置用户的登录目录
 -D, --defaults                改变设置
 -e, --expiredate EXPIRE_DATE  设置用户的有效期
 -f, --inactive INACTIVE       用户过期后,让密码无效
 -g, --gid GROUP               使用户只属于某个组
 -G, --groups GROUPS           使用户加入某个组
 -h, --help                    帮助
 -k, --skel SKEL_DIR           指定其他的skel目录
 -K, --key KEY=VALUE           覆盖 /etc/login.defs 配置文件
 -m, --create-home             自动创建登录目录
 -l,                           不把用户加入到lastlog文件中
 -M,                           不自动创建登录目录
 -r,                           建立系统账号
 -o, --non-unique              允许用户拥有相同的UID
 -p, --password PASSWORD       为新用户使用加密密码
 -s, --shell SHELL             登录时候的shell
 -u, --uid UID                 为新用户指定一个UID
 -Z, --selinux-user SEUSER     use a specific SEUSER for the SELinux user mapping
useradd test
passwd test
增加用户test,有一点要注意的,useradd增加一个用户后,不要忘了给他设置密码,不然不能登录的。
#2,修改用户
usermod -d /home/test -G test2 test
将test用户的登录目录改成/home/test,并加入test2组,注意这里是大G。
gpasswd -a test test2 将用户test加入到test2组
gpasswd -d test test2 将用户test从test2组中移出
#3,删除用户
userdel test
将test用户删除
#4,查看用户
a),查看当前登录用户
[root@krlcgcms01 ~]# w
[root@krlcgcms01 ~]# who
b),查看自己的用户名
[root@krlcgcms01 ~]# whoami
c),查看单个用户信息
[root@krlcgcms01 ~]# finger apacheuser
[root@krlcgcms01 ~]# id apacheuser
d),查看用户登录记录
[root@krlcgcms01 ~]# last 查看登录成功的用户记录
[root@krlcgcms01 ~]# lastb 查看登录不成功的用户记录
e),查看所有用户
[root@krlcgcms01 ~]# cut -d : -f 1 /etc/passwd
[root@krlcgcms01 ~]# cat /etc/passwd |awk -F \: '{print $1}'
2.6 安装mariadb
cd /usr/local/mariadb/
./scripts/mysql_install_db --basedir=/usr/local/mariadb --datadir=/usr/local/data/mariadb --skip-name-resolve --user=mariadb
安装成功
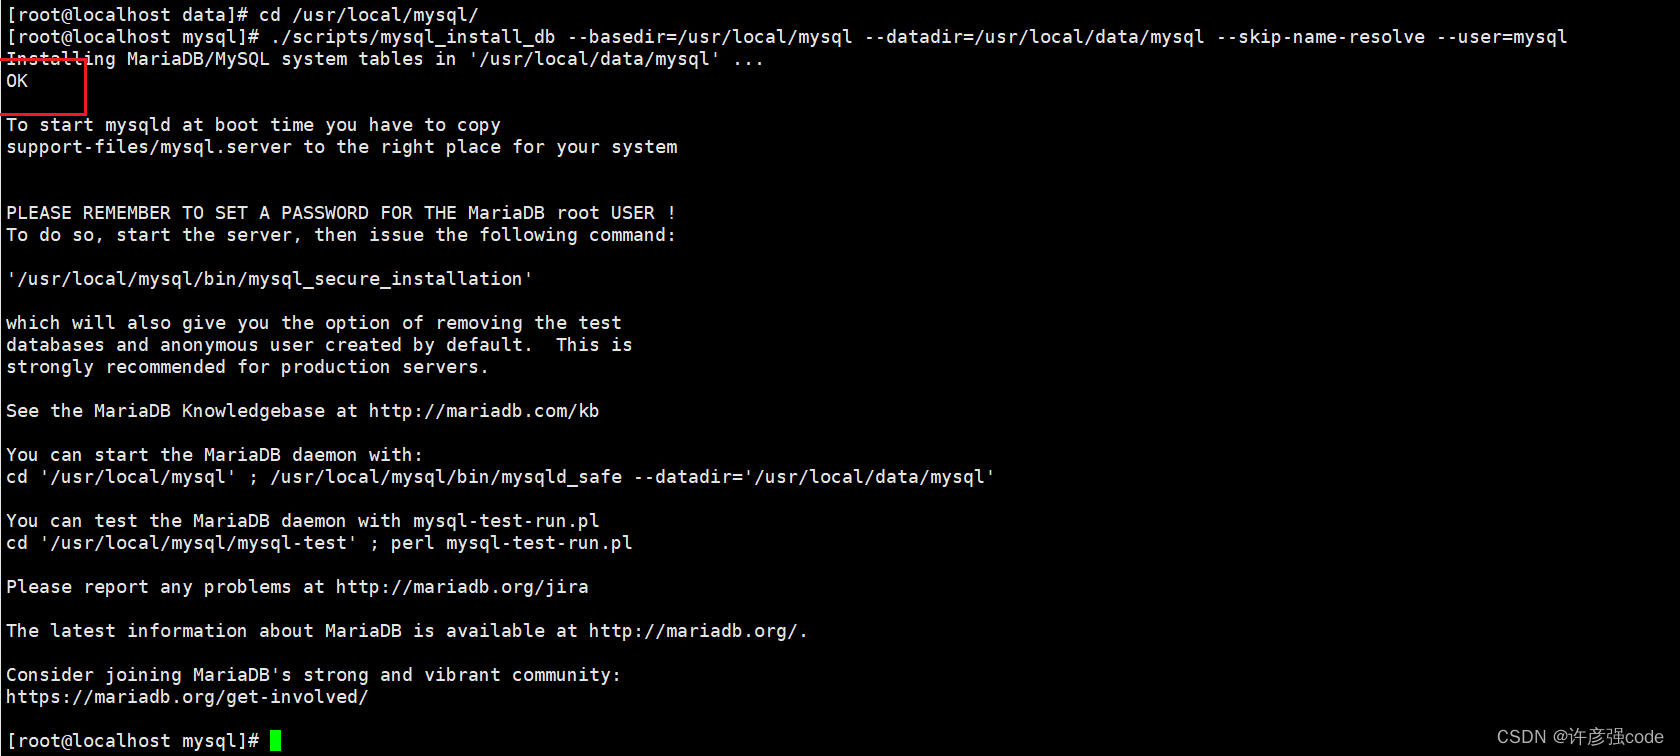
查看数据目录
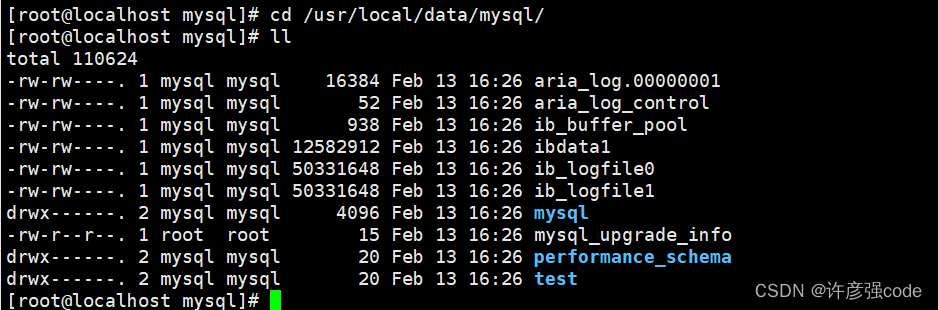
2.7 创建配置文件 /etc/my.cnf
cd /etc/
#展示my.cnf文件,没有不展示
ls -ltr my.cnf
#有的话,备份删除
mv my.cnf my.cnf.backup
#创建新的文件
vi my.cnf
my.cnf具体配置(网上有很多,找一个就行,但是注意目录的修改)
[client]
port    = 3306
socket  = /tmp/mariadb.sock

[mysqld]
port    = 3306
socket  = /tmp/mariadb.sock
user    = mariadb
basedir = /usr/local/mariadb
datadir = /usr/local/data/mariadb
log_error = /usr/local/data/mariadb/mariadb.err
pid-file  = /usr/local/data/mariadb/mariadb.pid

# 禁用DNS解析,使用IP访问的情况下加快访速度。
skip_name_resolve
skip-external-locking
#skip-networking

# 关闭认证,取消注释,可重置 root 密码
# skip-grant-tables

# 这个参数用来缓存MyISAM存储引擎的索引参数。MySQL5.5默认为InnoDB存储引擎,所以这个参数可以设置小点,64MB即可。
key_buffer_size = 64M

# 每个连接传输数据大小.最大1G,须是1024的倍数,一般设为最大的BLOB的值。
# 允许最大接收数据包的大小,防止服务器发送过大的数据包。可以设置为16MB或者更大,但设置的太大也可能有危险。
max_allowed_packet = 4M

# MySQL每打开一个表,都会读入一些数据到table_open_cache缓存中,当MySQL在这个缓存中找不到相应信息时,才会去磁盘上读取。
# 默认值64,假定系统有200个并发连接,则需将此参数设置为200*N(N为每个连接所需的文件描述符数目);
# 当把table_open_cache设置为很大时,如果系统处理不了那么多文件描述符,那么就会出现客户端失效,连接不上。
table_open_cache = 256

# 排序缓冲被用来处理类似ORDER BY以及GROUP BY队列所引起的排序。
# 在表进行order by和group by排序操作时,由于排序的字段没有索引,会出现Using filesort,为了提高性能,可用此参数增加每个线程分配的缓冲区大小。
# 默认为256KB,这个参数不要设置过大,一般在128~256KB即可。另外,一般出现Using filesort的时候,要通过增加索引来解决。
sort_buffer_size = 1M

# 不带索引的全表扫描.使用的buffer的最小值
join_buffer_size = 16M

# 包消息缓冲区初始化为net_buffer_length字节,但需要时可以增长到max_allowed_packet字节。
net_buffer_length = 8K

# 该参数用于表的顺序扫描,表示每个线程分配的缓冲区大小。
# 比如在进行全表扫描时,MySQL会按照数据的存储顺序依次读取数据块,每次读取的数据块首先会暂存在read_buffer_size中
# 当buffer空间被写满或者全部数据读取结束后,再将buffer中的数据返回给上层调用者,以提高效率。
# 默认为128K,这个参数不要设置过大,一般在128~256之间。
read_buffer_size = 1M

# 该参数用于表的随机读取,表示每个线程分配的缓冲区大小。
# 比如,按照一个非索引字段做order by排序操作时,就会利用这个缓冲区来暂存读取的数据。
# 默认为256KB,这个参数不要设置过大,一般在128~512KB。
read_rnd_buffer_size = 512K

# 当对MyISAM表执行repair table或创建索引时,用以缓存排序索引;设置太小时可能会遇到” myisam_sort_buffer_size is too small”
myisam_sort_buffer_size = 16M

# 线程池,线程缓存。用来缓存空闲的线程,以至于不被销毁,如果线程缓存在的空闲线程,需要重新建立新连接,则会优先调用线程池中的缓存,很快就能响应连接请求。
# 每建立一个连接,都需要一个线程与之匹配。
thread_cache_size = 32

# 查询缓冲大小
# 缓存select语句和结果集大小的参数。
# 查询缓存会存储一个select查询的文本与被传送到客户端的相应结果。
# 如果之后接收到一个相同的查询,服务器会从查询缓存中检索结果,而不是再次分析和执行这个同样的查询。
# 如果你的环境中写操作很少,读操作频繁,那么打开query_cache_type=1,会对性能有明显提升。
# 如果写操作频繁,则应该关闭它(query_cache_type=0)。
query_cache_size = 32M

# 指定单个查询能够使用的缓冲区大小,缺省为1M
query_cache_limit = 4M

# 临时HEAP数据表的最大长度(默认设置是32M); 超过这个长度的临时数据表将被转换为MyISAM数据表并存入一个临时文件。
tmp_table_size = 64M

# 设定默认的事务隔离级别
transaction_isolation = REPEATABLE-READ

# 线程使用的堆大小. 此值限制内存中能处理的存储过程的递归深度和SQL语句复杂性,此容量的内存在每次连接时被预留.
thread_stack = 512K

# 指定一个请求的最大连接时间
wait_timeout = 10

# 是否显示默认时间戳。
explicit_defaults_for_timestamp = true

# 该参数用来设置最大连接数,告诉你当前你的服务器允许多少并发连接。
# 默认为100,一般设置为512-1000即可。请记住,太多的连接会导致内存的使用量过高并且会锁住你的 MySQL 服务器。
# 一般小网站需要 100-200 的连接数,而较大可能需要 500-800 甚至更多。这里的值很大程度上取决于你 MySQL/MariaDB 的使用情况。
max_connections = 500

# 每个客户端连接最大的错误允许数量,当超过该次数,MYSQL服务器将禁止此主机的连接请求,直到MYSQL服务器重启或通过flush hosts命令清空此主机的相关信息
# 如果有时网络抽风,或者应用配置错误,或者其他原因导致客户端短时间内不断的尝试连接,客户端可能会被列入黑名单,然后将无法连接,直到再次刷新主机缓存。
# 这个选项默认值太小了,可以考虑设的足够大(如果你的服务器配置够强大的话)。
max_connect_errors = 100

# mysql打开最大文件数
open_files_limit = 65535

# 是操作系统在监听队列中所能保持的连接数
back_log = 300


# 开启二进制日志功能,若不指定路径则默认和数据存放在同一目录,生产环境强烈建议将MySQL日志和数据分开存放。
log-bin=mysql-bin

# 指定默认的二进制日志格式。
binlog_format=mixed

# 给服务器分配一个独一无二的ID编号; n的取值范围是1~2的32次方启用二进制日志功能。在复制数据同步的时候会用到,Helloweba后面会有文章介绍。
server-id   = 1

# 启用二进制日志后,保留日志的天数。服务器会自动清理指定天数前的日志文件,如果不设置则会导致服务器空间耗尽。一般设置为7~14天。
expire_logs_days = 10

# 用 InnoDB 作为默认引擎
# 新数据表的默认存储引擎(默认设置是MyISAM)。这项设置还可以通过–default-table-type选项来设置。
default_storage_engine = InnoDB

# 打开独立表空间
# InnoDB 提供了更灵活的方式,它把每个数据库的信息保存在一个 .ibd 数据文件中。每个 .idb 文件代表它自己的表空间。
# 通过这样的方式可以更快地完成类似 “TRUNCATE” 的数据库操作,当删除或截断一个数据库表时,你也可以回收未使用的空间。
# 这样配置的另一个好处是你可以将某些数据库表放在一个单独的存储设备。这可以大大提升你磁盘的 I/O 负载。
innodb_file_per_table = 1

# InnoDB主目录,所有与InnoDB数据表有关的目录或文件路径都相对于这个路径。在默认的情况下,这个主目录就是MySQL的数据目录。
innodb_data_home_dir = /usr/local/data/mariadb

# 用来容纳InnoDB为数据表的表空间: 可能涉及一个以上的文件; 每一个表空间文件的最大长度都必须以字节(B)、兆字节(MB)或千兆字节(GB)为单位给出;
# 表空间文件的名字必须以分号隔开; 最后一个表空间文件还可以带一个autoextend属性和一个最大长度(max:n)
innodb_data_file_path = ibdata1:10M:autoextend

# 用来存放InnoDB日志文件的目录路径(如ib_logfile0、ib_logfile1等)。在默认的情况下,InnoDB驱动程序将使用 MySQL数据目录作为自己保存日志文件的位置。
innodb_log_group_home_dir = /usr/local/data/mariadb

# InnoDB使用一个缓冲池来保存索引和原始数据, 可设置这个变量到服务器物理内存大小的80%
# 这个参数是InnoDB存储引擎的核心参数,默认为128KB,这个参数要设置为物理内存的60%~70%。
innodb_buffer_pool_size = 2048M

# 在InnoDb核心内的允许线程数量,建议的设置是CPU数量加上磁盘数量的两倍
innodb_thread_concurrency = 16

# 在日志组中每个日志文件的大小
# 事务日志文件写操作缓存区的最大长度(默认设置是1MB)。
innodb_log_file_size = 64M

# 用来缓冲日志数据的缓冲区的大小
# 事务日志所使用的缓存区。InnoDB在写事务日志的时候,为了提高性能,先将信息写入Innodb Log Buffer中,
# 当满足innodb_flush_log_trx_commit参数所设置的相应条件(或者日志缓冲区写满)时,再将日志写到文件(或者同步到磁盘)中。
# 可以通过innodb_log_buffer_size参数设置其可以使用的最大内存空间。
# 默认是8MB,一般为16~64MB即可。
innodb_log_buffer_size = 8M

# 在日志组中的文件总数
innodb_log_files_in_group = 3

# 这个选项决定着什么时候把日志信息写入日志文件以及什么时候把这些文件物理地写(术语称为”同步”)到硬盘上。
# 设置值0的意思是每隔一秒写一次日 志并进行 同步,这可以减少硬盘写操作次数,但可能造成数据丢失;
# 设置值1(设置设置)的意思是在每执行完一条COMMIT命令就写一次日志并进行同步,这可以防止数据丢失,但硬盘写操作可能会很频繁;
# 设置值2是一般折衷的办法,即每执行完一条COMMIT命令写一次日志,每隔一秒进行一次同步。
innodb_flush_log_at_trx_commit = 1

# SQL语句在被回滚前,InnoDB事务等待InnoDB行锁的时间
# 如果某个事务在等待n秒(s)后还没有获得所需要的资源,就使用ROLLBACK命令放弃这个事务。
# 这项设置对于发现和处理未能被InnoDB数据表驱动 程序识别出来的死锁条件有着重要的意义。这个选项的默认设置是50s。
innodb_lock_wait_timeout = 50

# 慢查询时长
long_query_time = 2

# 将没有使用索引的查询也记录下来
log-queries-not-using-indexes

# 指定服务端默认字符集
character-set-server=utf8mb4

[mysqldump]
quick
max_allowed_packet = 16M

[mysql]
# 指定客户端默认字符集
default-character-set=utf8mb4

# 不适用自动补全
no-auto-rehash

[myisamchk]
key_buffer_size = 64M
sort_buffer_size = 1M
read_buffer = 2M
write_buffer = 2M

[mysqlhotcopy]
interactive-timeout
2.8 新增mariadb.service配置文件
cd /usr/lib/systemd/system
vi mariadb.service
# It's not recommended to modify this file in-place, because it will be
# overwritten during package upgrades.  If you want to customize, the
# best way is to create a file "/etc/systemd/system/mariadb.service",
# containing
#	.include /usr/lib/systemd/system/mariadb.service
#	...make your changes here...
# or create a file "/etc/systemd/system/mariadb.service.d/foo.conf",
# which doesn't need to include ".include" call and which will be parsed
# after the file mariadb.service itself is parsed.
#
# For more info about custom unit files, see systemd.unit(5) or
# https://mariadb.com/kb/en/mariadb/systemd/
#
# Copyright notice:
#
# This file is free software; you can redistribute it and/or modify it
# under the terms of the GNU Lesser General Public License as published by
# the Free Software Foundation; either version 2.1 of the License, or
# (at your option) any later version.

[Unit]
Description=MariaDB 11.3.2 database server
Documentation=man:mariadbd(8)
Documentation=https://mariadb.com/kb/en/library/systemd/
After=network.target

[Install]
WantedBy=multi-user.target


[Service]

##############################################################################
## Core requirements
##

Type=notify

# Setting this to true can break replication and the Type=notify settings
# See also bind-address mariadbd option.
PrivateNetwork=false

##############################################################################
## Package maintainers
##

User=mariadb
Group=mariadb

# CAP_IPC_LOCK To allow memlock to be used as non-root user
# CAP_DAC_OVERRIDE To allow auth_pam_tool (which is SUID root) to read /etc/shadow when it's chmod 0
#   does nothing for non-root, not needed if /etc/shadow is u+r
# CAP_AUDIT_WRITE auth_pam_tool needs it on Debian for whatever reason
CapabilityBoundingSet=CAP_IPC_LOCK CAP_DAC_OVERRIDE CAP_AUDIT_WRITE

# PrivateDevices=true implies NoNewPrivileges=true and
# SUID auth_pam_tool suddenly doesn't do setuid anymore
PrivateDevices=false

# Prevent writes to /usr, /boot, and /etc
ProtectSystem=false

# Database dir: '/usr/local/mariadb/data' should be writable even
# ProtectSystem=full prevents it
ReadWritePaths=-/usr/local/data/mariadb


# Doesn't yet work properly with SELinux enabled
# NoNewPrivileges=true

# Prevent accessing /home, /root and /run/user
ProtectHome=false

# Execute pre and post scripts as root, otherwise it does it as User=
PermissionsStartOnly=true


# Perform automatic wsrep recovery. When server is started without wsrep,
# galera_recovery simply returns an empty string. In any case, however,
# the script is not expected to return with a non-zero status.
# It is always safe to unset _WSREP_START_POSITION environment variable.
# Do not panic if galera_recovery script is not available. (MDEV-10538)
ExecStartPre=/bin/sh -c "systemctl unset-environment _WSREP_START_POSITION"
ExecStartPre=/bin/sh -c "[ ! -e /usr/local/mariadb/bin/galera_recovery ] && VAR= || \
 VAR=`cd /usr/local/mariadb/bin/..; /usr/local/mariadb/bin/galera_recovery`; [ $? -eq 0 ] \
 && systemctl set-environment _WSREP_START_POSITION=$VAR || exit 1"

# Needed to create system tables etc.
# ExecStartPre=/usr/local/mariadb/scripts/mysql_install_db -u mariadb

# Start main service
# MYSQLD_OPTS here is for users to set in /etc/systemd/system/mariadb.service.d/MY_SPECIAL.conf
# Use the [Service] section and Environment="MYSQLD_OPTS=...".
# This isn't a replacement for my.cnf.
# _WSREP_NEW_CLUSTER is for the exclusive use of the script galera_new_cluster
ExecStart=/usr/local/mariadb/bin/mariadbd $MYSQLD_OPTS $_WSREP_NEW_CLUSTER $_WSREP_START_POSITION

# Unset _WSREP_START_POSITION environment variable.
ExecStartPost=/bin/sh -c "systemctl unset-environment _WSREP_START_POSITION"


KillSignal=SIGTERM

# Don't want to see an automated SIGKILL ever
SendSIGKILL=no

# Restart crashed server only, on-failure would also restart, for example, when
# my.cnf contains unknown option
Restart=on-abort
RestartSec=5s

UMask=007

##############################################################################
## USERs can override
##
##
## by creating a file in /etc/systemd/system/mariadb.service.d/MY_SPECIAL.conf
## and adding/setting the following under [Service] will override this file's
## settings.

# Useful options not previously available in [mysqld_safe]

# Kernels like killing mariadbd when out of memory because its big.
# Lets temper that preference a little.
# OOMScoreAdjust=-600

# Explicitly start with high IO priority
# BlockIOWeight=1000

# If you don't use the /tmp directory for SELECT ... OUTFILE and
# LOAD DATA INFILE you can enable PrivateTmp=true for a little more security.
PrivateTmp=false

# Set an explicit Start and Stop timeout of 900 seconds (15 minutes!)
# this is the same value as used in SysV init scripts in the past
# Galera might need a longer timeout, check the KB if you want to change this:
# https://mariadb.com/kb/en/library/systemd/#configuring-the-systemd-service-timeout
TimeoutStartSec=900
TimeoutStopSec=900

# Set the maximium number of tasks (threads) to 99% of what the system can
# handle as set by the kernel, reserve the 1% for a remote ssh connection,
# some monitoring, or that backup cron job. Without the directive this would
# be 15% (see DefaultTasksMax in systemd man pages).
TasksMax=99%

##
## Options previously available to be set via [mysqld_safe]
## that now needs to be set by systemd config files as mysqld_safe
## isn't executed.
##

# Number of files limit. previously [mysqld_safe] open-files-limit
LimitNOFILE=32768

# Maximium core size. previously [mysqld_safe] core-file-size
# LimitCore=

# Nice priority. previously [mysqld_safe] nice
# Nice=-5

# Timezone. previously [mysqld_safe] timezone
# Environment="TZ=UTC"

# Library substitutions. previously [mysqld_safe] malloc-lib with explicit paths
# (in LD_LIBRARY_PATH) and library name (in LD_PRELOAD).
# Environment="LD_LIBRARY_PATH=/path1 /path2" "LD_PRELOAD=

# Flush caches. previously [mysqld_safe] flush-caches=1
# ExecStartPre=sync
# ExecStartPre=sysctl -q -w vm.drop_caches=3

# numa-interleave=1 equalivant
# Change ExecStart=numactl --interleave=all /usr/local/mariadb/bin/mariadbd......

# crash-script equalivent
# FailureAction=
不修改会报错
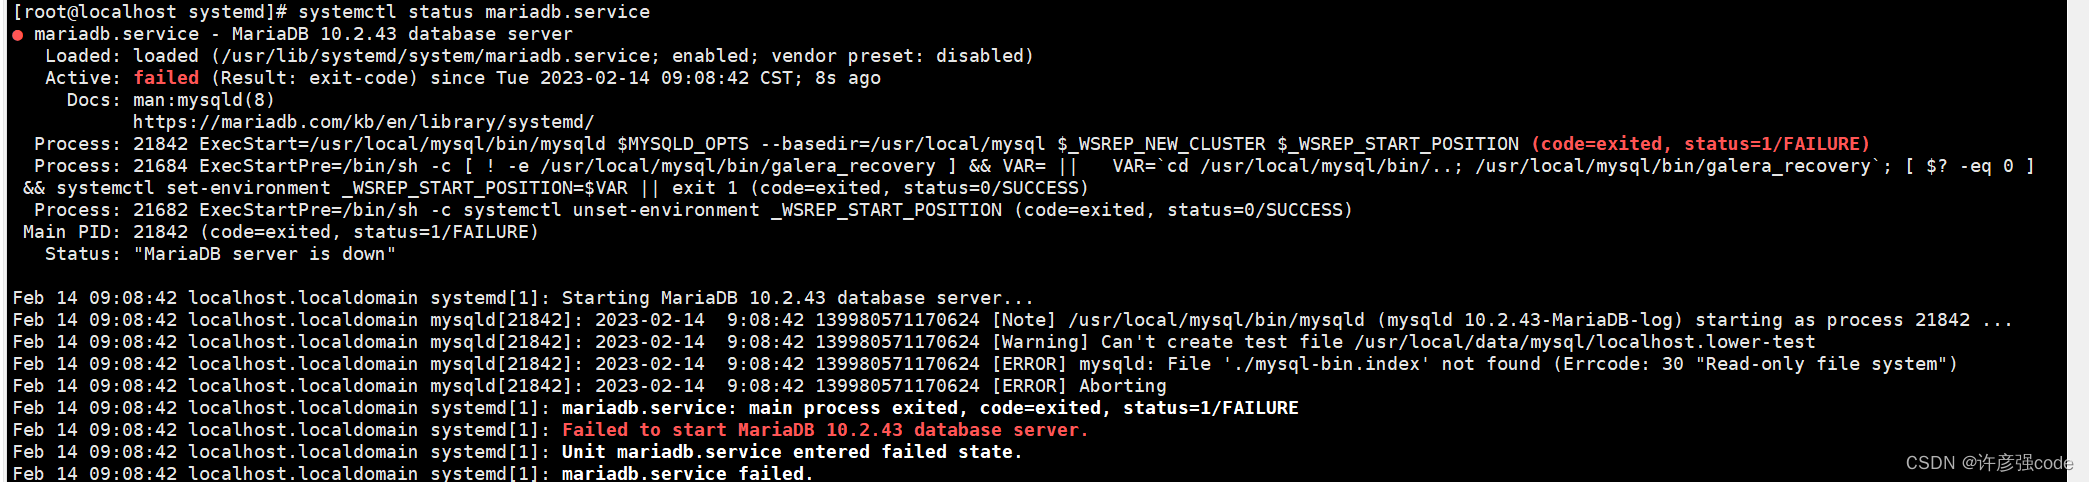
报错详情:详细信息看
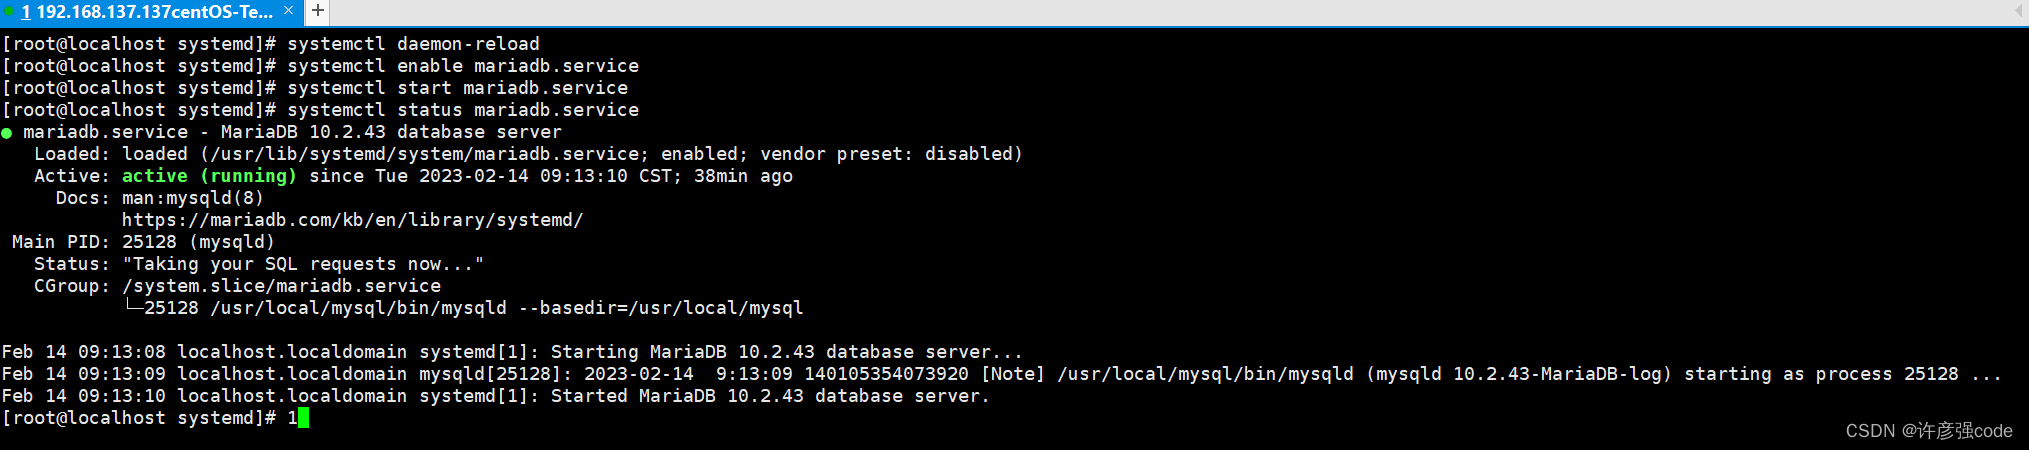
2.9 启动服务
systemctl daemon-reload
systemctl enable mariadb.service
systemctl start mariadb.service
systemctl status mariadb.service
systemctl enable mariadb.service 执行后,会出现提示.我是已经执行过一次了.
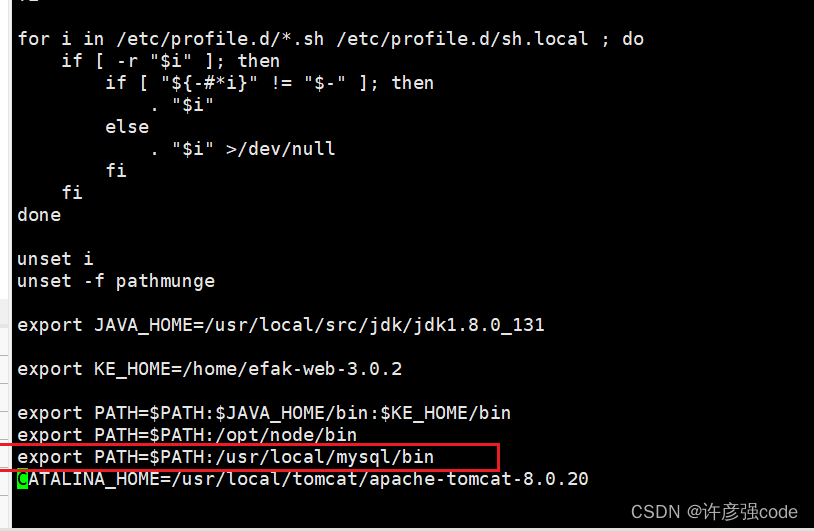
2.10 配置环境变量
vi /etc/profile
添加
export PATH=$PATH:/usr/local/mariadb/bin
配置立即生效
source /etc/profile
3 mysql测试和配置
3.1 测试连接(未配置密码)
mysql
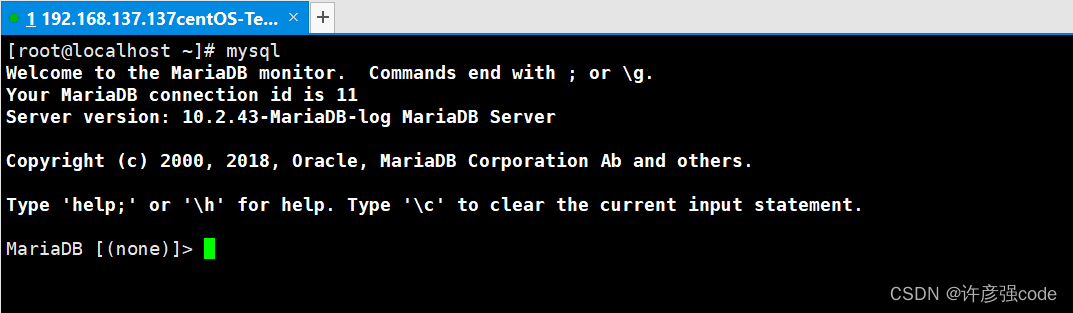
[root@localhost ~]# mysql
Welcome to the MariaDB monitor.  Commands end with ; or \g.
Your MariaDB connection id is 11
Server version: 10.2.43-MariaDB-log MariaDB Server

Copyright (c) 2000, 2018, Oracle, MariaDB Corporation Ab and others.

Type 'help;' or '\h' for help. Type '\c' to clear the current input statement.

MariaDB [(none)]> show databases;
+--------------------+
| Database           |
+--------------------+
| information_schema |
| mysql              |
| performance_schema |
| test               |
+--------------------+
4 rows in set (0.01 sec)

MariaDB [(none)]> select version();
+---------------------+
| version()           |
+---------------------+
| 10.2.43-MariaDB-log |
+---------------------+
1 row in set (0.01 sec)

MariaDB [(none)]> Ctrl-C -- exit!
Aborted
[root@localhost ~]#
3.2 选择mysql数据库
use mysql;
[root@localhost ~]# mysql
Welcome to the MariaDB monitor.  Commands end with ; or \g.
Your MariaDB connection id is 12
Server version: 10.2.43-MariaDB-log MariaDB Server

Copyright (c) 2000, 2018, Oracle, MariaDB Corporation Ab and others.

Type 'help;' or '\h' for help. Type '\c' to clear the current input statement.

MariaDB [(none)]> use mysql;
Database changed
MariaDB [mysql]>
3.3 为root用户设置密码
MariaDB [(none)]> use mysql;
Database changed
MariaDB [mysql]> set password for root@localhost=password('123456');
Query OK, 0 rows affected (0.00 sec)

MariaDB [mysql]> select user,host,password from mysql.user;
+------+-----------------------+-------------------------------------------+
| user | host                  | password                                  |
+------+-----------------------+-------------------------------------------+
| root | localhost             | *6BB4837EB74329105EE4568DDA7DC67ED2CA2AD9 |
| root | localhost.localdomain |                                           |
| root | 127.0.0.1             |                                           |
| root | ::1                   |                                           |
|      | localhost             |                                           |
|      | localhost.localdomain |                                           |
+------+-----------------------+-------------------------------------------+
6 rows in set (0.00 sec)

MariaDB [mysql]>
3.4 测试账号密码
mysql -uroot -p
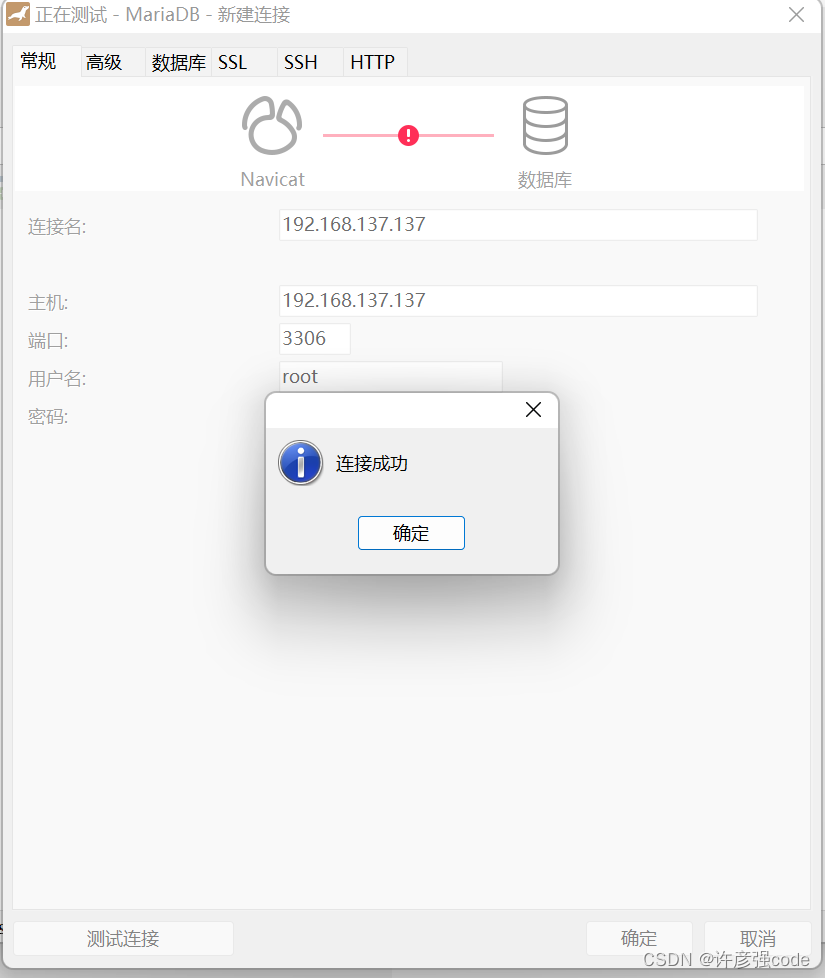
3.5 设置外部连接访问
使用数据库工具访问失败,因为没有配置外部访问;

进入数据库
设置mysql允许外部连接访问(授权):
//授权
grant all privileges on *.* to root@'%' identified by '123456' with grant option;
//刷新
flush privileges;
指定ip地址授权(连接时失败报错1130弹出的地址)
grant all privileges on *.* to root@'ip地址' identified by '密码' with grant option;
flush privileges;
[root@localhost ~]# mysql -uroot -p
Enter password:
Welcome to the MariaDB monitor.  Commands end with ; or \g.
Your MariaDB connection id is 15
Server version: 10.2.43-MariaDB-log MariaDB Server

Copyright (c) 2000, 2018, Oracle, MariaDB Corporation Ab and others.

Type 'help;' or '\h' for help. Type '\c' to clear the current input statement.

MariaDB [(none)]> use mysql;
Database changed

MariaDB [mysql]> select user.User,user.host,user.Password from user;
+------+-----------------------+-------------------------------------------+
| User | host                  | Password                                  |
+------+-----------------------+-------------------------------------------+
| root | localhost             | *6BB4837EB74329105EE4568DDA7DC67ED2CA2AD9 |
| root | localhost.localdomain |                                           |
| root | 127.0.0.1             |                                           |
| root | ::1                   |                                           |
|      | localhost             |                                           |
|      | localhost.localdomain |                                           |
+------+-----------------------+-------------------------------------------+
6 rows in set (0.00 sec)

MariaDB [mysql]> grant all privileges on *.* to root@'%' identified by '123456' with grant option;
Query OK, 0 rows affected (0.00 sec)

MariaDB [mysql]> flush privileges;
Query OK, 0 rows affected (0.00 sec)

MariaDB [mysql]>
连接成功
六、MariaDB主从复制
1 主从赋值前需要注意事项
1. 主从复制肯定需要一主一从了,两个数据库先装好
2. 虽然不强制,但是尽量两台数据库的密码相同
3. 下面就使用A和B数据库来代替,A是主B是从
2 开始进行主从同步操作
2.1 修改配置文件
A和B数据库都进行修改,没有的话就添加
# 服务器id,即唯一id,推荐使用ip的最后一节(主从不一样)
server-id = 161
# 该值为整个结构中服务器的总数(主从一样)
auto-increment-increment = 2
# 避免主键冲突,主从服务器需要设置不同的值(主从不一样)
auto-increment-offset = 1
2.2 防火墙设置
A:(192.168.200.161)
firewall-cmd --permanent --add-rich-rule 'rule family=ipv4 source address= 192.168.200.162 port port=3306 protocol=tcp accept'
firewall-cmd --reload
B:(192.168.200.162)
firewall-cmd --permanent --add-rich-rule 'rule family=ipv4 source address= 192.168.200.161 port port=3306 protocol=tcp accept'
firewall-cmd --reload
2.3 创建同步所需的用户
A:(192.168.200.161)
# mysql -uroot -p123456
grant replication slave on *.* to copy1@192.168.200.162 identified by '123456';
B:(192.168.200.162)
# mysql -uroot -p123456
grant replication slave on *.* to copy2@192.168.200.161 identified by '123456';
2.4 配置同步
A:(192.168.200.161)
MariaDB [(none)]> show master status;
记录下A的File和Position
| mysql-bin.000003 |      562 |              |                  |
B:(192.168.200.162)
MariaDB [(none)]> show master status;
记录下B的File和Position
| mysql-bin.000005 |      546 |              |                  |
A:(192.168.200.161)
change master to master_host='192.168.200.162',master_user='copy2',master_password='123456',master_log_file='mysql-bin.000005',master_log_pos=546,master_port=3306;
start slave;
B:(192.168.200.162)
change master to master_host='192.168.200.161', master_user='copy1',master_password='123456',master_log_file='mysql-bin.000003',master_log_pos=562 ,master_port=3306;
start slave;
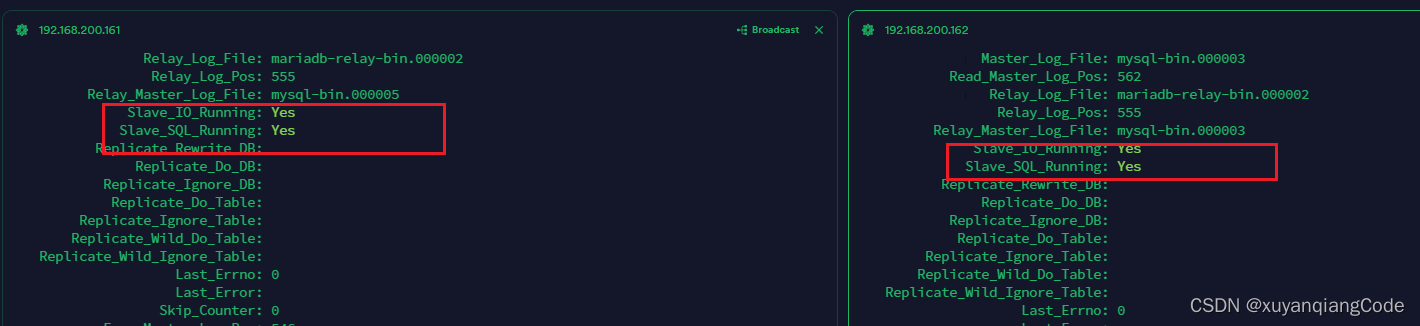
最后查看是否成功:
show slave status\G
看到这样就是成功了
3 检查报错(出现问题时使用)
MariaDB [(none)]> stop slave;
MariaDB [(none)]> reset slave;
MariaDB [(none)]> flush logs;
MariaDB [(none)]> show master status;
MariaDB [(none)]> change master to master_host='【另一台的IP】', master_user='copy1',master_password='EV7F4!RX',master_log_file='【另一台的File】',master_log_pos=【另一台的Position】,master_port=3306;


 1143
1143

 被折叠的 条评论
为什么被折叠?
被折叠的 条评论
为什么被折叠?
 到【灌水乐园】发言


