


1、准备安装包
操作系统centos7.6
pg载地址:www.postgresql.org/download/
下载路径:Downloads–>source
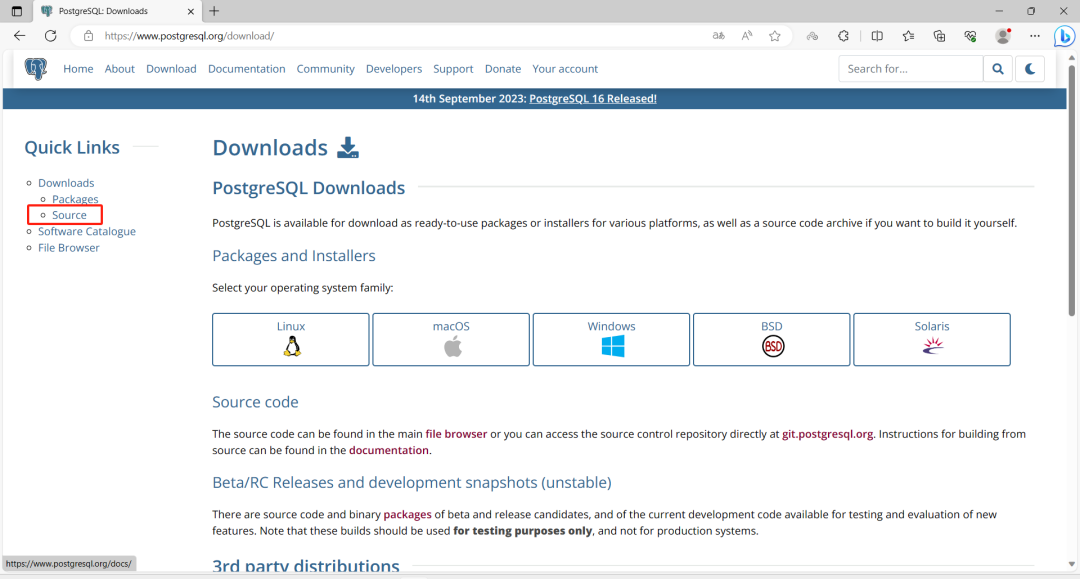
选中你要下载的安装包,避开最新版本, 我这先选 15.5来进行安装。
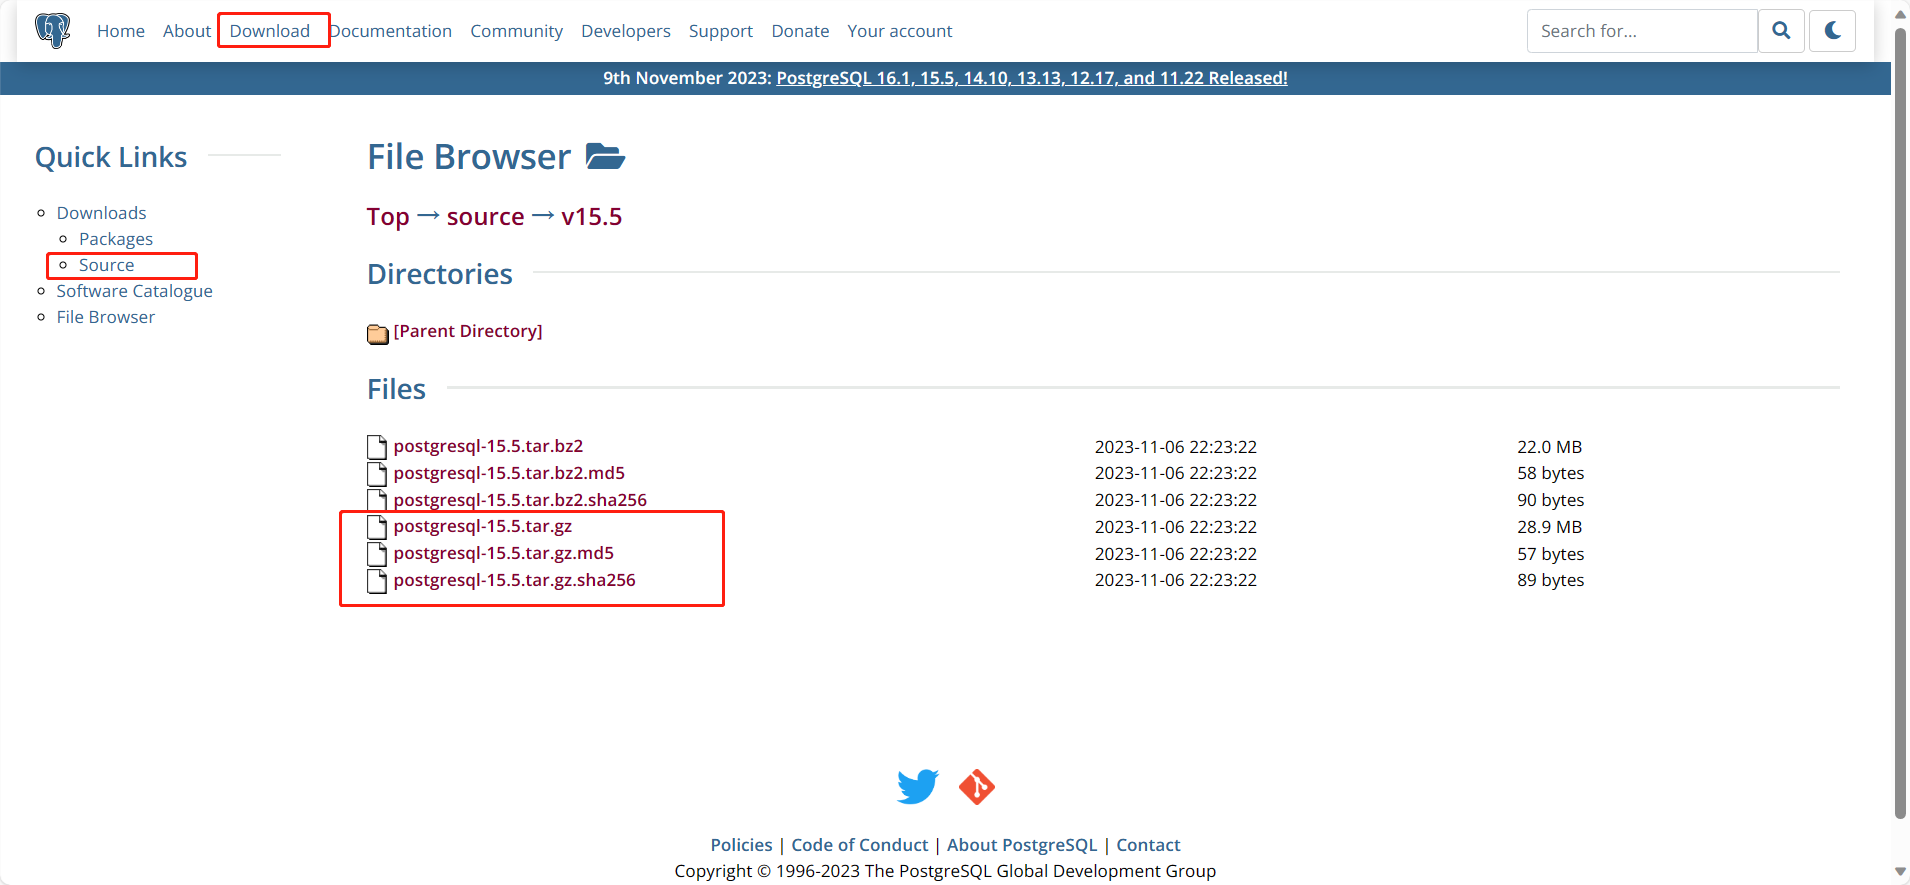
下载最新的tar.gz安装包,(tar.bz2是解压需要系统安装bzip2软件包,与tar.gz包的区别就是压缩效率不一样这个更小)
tar.gz包的MD5值为:
96175683748e68c7bb36ba0306adc8d7 postgresql-15.5.tar.gz
上传安装包至服务器,校验MD5一致

2、修改主机名
hostnamectl set-hostname postgres
3、添加hosts文件
echo "192.168.100.101 `hostname`" >>/etc/hosts
4、配置本地YUM源
rm -rf /etc/yum.repos.d/CentOS*
cat >/etc/yum.repos.d/local.repo<<EOF
[local]
name=local
baseurl=file:///mnt
enabled=1
gpgcheck=0
EOF
这里需要把DVD挂载到/mnt
mount /dev/sr0 /mnt
如果你的环境里没有DVD光驱,可以准备个系统的ISO文件DVD的,传到服务器上,执行如下挂载:
mount -o loop XXX.ISO /mnt
挂载成功后显示如下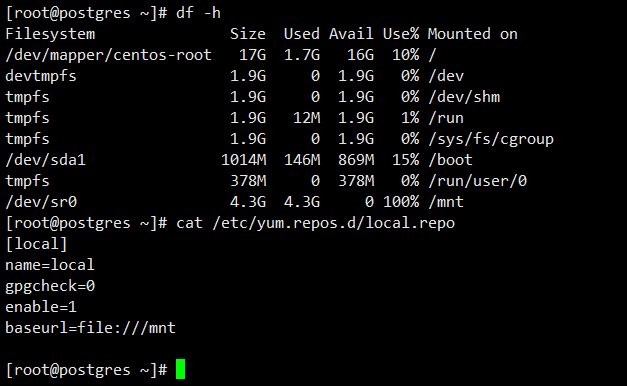
5、安装依赖环境包
uuid-devel-1.6.2-26.el7.x86_64.rpm需要单独下载,
在阿里镜像站centos-vault安装包下载_开源镜像站-阿里云
这个目录里下载 /centos-vault/7.6.1810/os/x86_64/Packages/
yum -y install tcl tcl-devel uuid-devel perl-ExtUtils-Embed readline-devel zlib-devel pam-devel libxml2-devel libxslt-devel openldap-devel python-devel gcc-c++ openssl-devel cmake gcc* readline-devel bison flex libicu-devel net-tools systemd-devel

yum install -y uuid-devel-1.6.2-26.el7.x86_64.rpm
6、创建用户,配置环境
这里没配置其它系统优化参数,以后再详细进行配置。
mkdir -p /u01/postgresql/data
useradd -u 1000 postgres
echo postgres | passwd --stdin postgres
–关闭Selinux
sed -i "s/SELINUX=enforcing/SELINUX=disabled/g" /etc/selinux/config
setenforce 0
–配置postgre用户环境变量
cat >>/home/postgres/.bash_profile<<EOF
export PATH=/u01/db/postgresql/bin:$PATH
export PGDATA=/u01/db/postgresql/data
EOF
7、准备PYTHON
Anaconda介绍
Anaconda,中文大蟒蛇,是一个开源的Python发行版本,其包含了conda、Python等180多个科学包及其依赖项。其中,conda是一个开源的包、环境管理器,可以用于在同一个机器上安装不同版本的软件包及其依赖,并能够在不同的环境之间切换。
为什么要安装Anaconda?
1、Anaconda对于python初学者而言及其友好,相比单独安装python主程序,选择Anaconda可以帮助省去很多麻烦,Anaconda里添加了许多常用的功能包,如果单独安装python,这些功能包则需要一条一条自行安装,在Anaconda中则不需要考虑这些,同时Anaconda还附带捆绑了两个非常好用的交互式代码编辑器(Spyder、Jupyternotebook)。
2、如果我们不安装Anaconda的话,我们安装第三方库就必须要用pip install xxx去安装,当我们安装的库多了,就会形成文件紊乱和繁杂问题。而且pip install方法会默认把库安装在同一个路径中,假如当你去做项目时,别人给你的程序用的库是低版本的,而你自己通过pip安装的是高版本的库,由于存在兼容问题,你的库不能运行该程序,而你也不可能为了这个而删去你的高版本的库去下载这个符合环境的低版本库吧,所以这及其繁琐和不方便。
软件下载地址:
https://mirrors.tuna.tsinghua.edu.cn/anaconda/archive/Anaconda3-2021.11-Linux-x86_64.sh
下载完后,上传到服务器/root目录,使用root执行SH安装
sh Anaconda3-2021.11-Linux-x86_64.sh
需要执行如下操作
# 按enter
# 按空格
# 输入yes
# 输入 /export/anaconda3
# 输入yes
# 重启session
添加环境变量到/etc/profile
export ANACONDA_HOME=/export/anaconda3
export PATH=$PATH:$ANACONDA_HOME/bin
执行命令检查
conda info
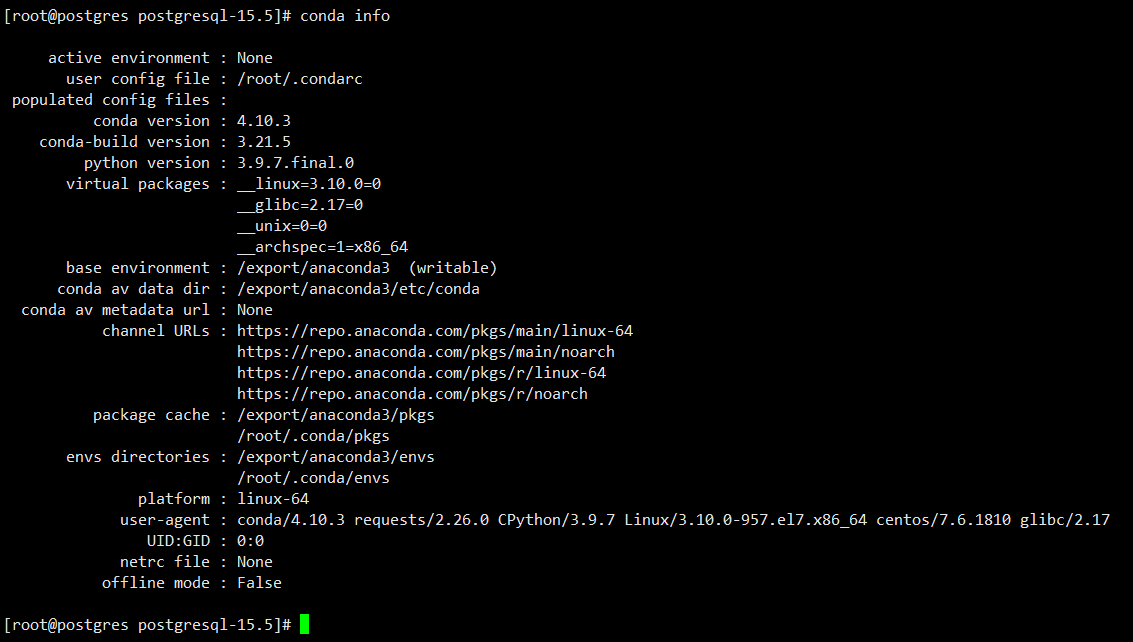
配置环境,配置完,关闭终端,重新连接终端登录系统
[root@postgres postgresql-15.5\]# conda init
no change /export/anaconda3/condabin/conda
no change /export/anaconda3/bin/conda
no change /export/anaconda3/bin/conda-env
no change /export/anaconda3/bin/activate
no change /export/anaconda3/bin/deactivate
no change /export/anaconda3/etc/profile.d/conda.sh
no change /export/anaconda3/etc/fish/conf.d/conda.fish
no change /export/anaconda3/shell/condabin/Conda.psm1
no change /export/anaconda3/shell/condabin/conda-hook.ps1
no change /export/anaconda3/lib/python3.9/site-packages/xontrib/conda.xsh
no change /export/anaconda3/etc/profile.d/conda.csh
modified /root/.bashrc
==> For changes to take effect, close and re-open your current shell. <==
[root@postgres postgresql-15.5\]# conda create -n postgres python=3.9
Collecting package metadata (current\_repodata.json): failed
CondaHTTPError: HTTP 000 CONNECTION FAILED for url https://repo.anaconda.com/pkgs/main/linux-64/current\_repodata.json
Elapsed: -
An HTTP error occurred when trying to retrieve this URL.
HTTP errors are often intermittent, and a simple retry will get you on your way.
If your current network has https://www.anaconda.com blocked, please file
a support request with your network engineering team.
'https://repo.anaconda.com/pkgs/main/linux-64'
8、检查MAKE环境
官方要求postgresql 15编译安装要求
make version 3.81 or newer is required
这里说一下有的安装文档说是用gmake有的说是用make的,这里摘抄一下解释说明
gmake是GNU Make的缩写。
Linux系统环境下的make就是GNU Make,之所以有gmake,是因为在别的平台上,make一般被占用,GNU make只好叫gmake了。
比如在安装二进制文件进行编译时要使用make命令,但如果在Solaris或其他非GNU系统中运行,必须使用GNU make,而不是使用系统自带的make版本,这时要用gmake代替make进行编译。
Solaris包含两种make工具:GCC (GNU Compiler Collection)工具套装包括一个 C 编译器和一个 C++ 编译器,Solaris自身的 make 实用程序。
freebsd自带的make是BSD make。两者的不同在于Makefile部分不兼容。即使是部分,有时候也不能完全把软件给make出来。
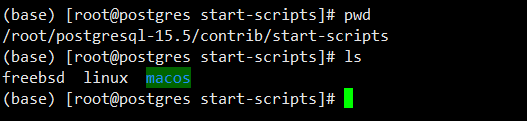
从下图也能看出来gmake指向的也是make,版本也是一致的,符合安装的基本要求。
 9、开始安装
可以参考官网的简易安装,我这里没用这个,要不后期有别的支持需要加入又得重新编译安装。
./configure
make
su
make install
adduser postgres
mkdir -p /usr/local/pgsql/data
chown postgres /usr/local/pgsql/data
su - postgres
/usr/local/pgsql/bin/initdb -D /usr/local/pgsql/data
/usr/local/pgsql/bin/pg\_ctl -D /usr/local/pgsql/data -l logfile start
/usr/local/pgsql/bin/createdb test
/usr/local/pgsql/bin/psql test
我这里改动了下安装方式
解压安装包
tar -zxf postgresql-15.5.tar.gz
cd postgresql-15.5
进行配置、编译安
./configure --prefix=/u01/db/postgresql/ --with-openssl --with-pgport=5432 --with-tcl --with-perl --with-libxml --with-libxslt --with-uuid=ossp --with-pam --with-ldap --with-python --with-systemd
–配置完执行$?查看返回0表示完成,进行下一步安装
make world -j 8 && make install-world
其中-j 8是指多线程操作,加快编译速度;make world
make world 编译一切可以编译的东西,包括文档(HTML和手册)以及额外的模块(contrib)
这里说一下,编译的参数做个解释如下:
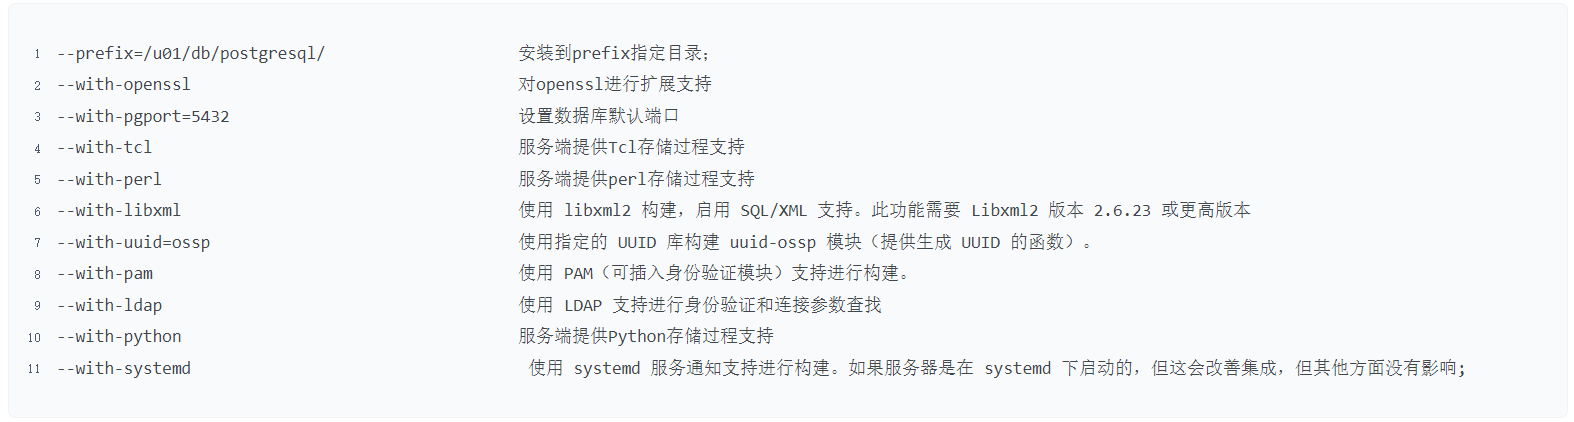
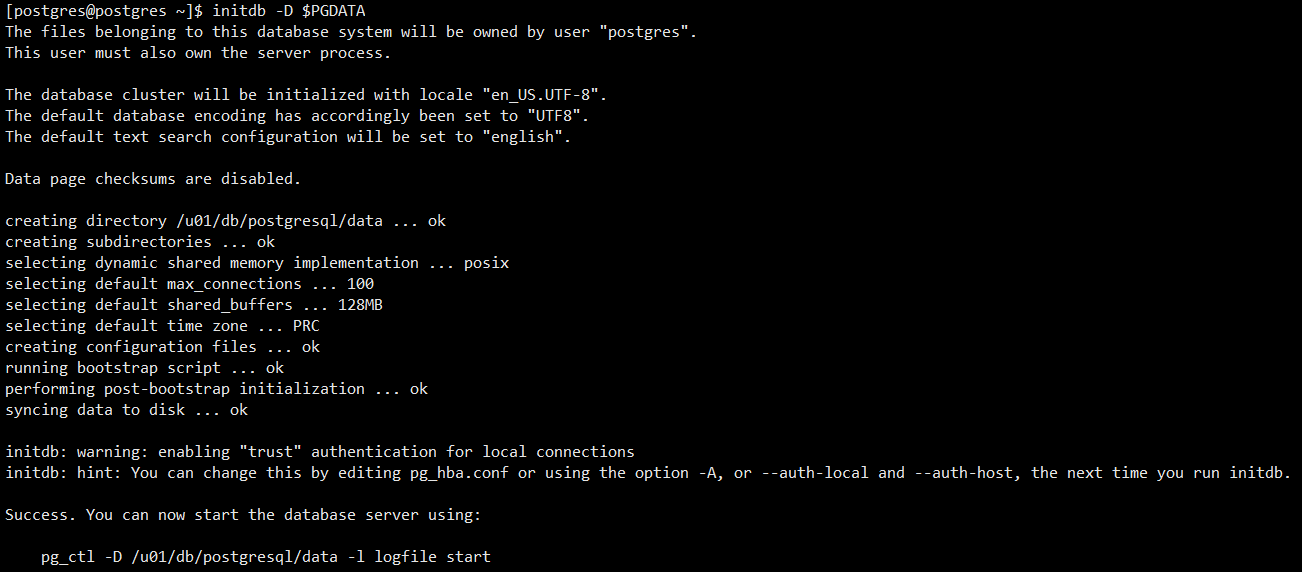
10、初始化数据库
chown -R postgres:postgres /u01/db
su - postgres
initdb -D $PGDATA
返回结果
11、启动&停止数据库
–postgres用户执行,
pg_ctl -D /u01/postgresql/data -l logfile start

检查,会在当前目录下生成logfile文件

检查端口启动

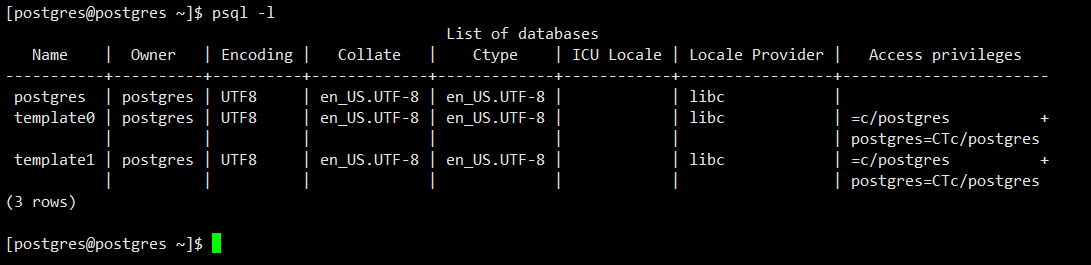
查看数据库psql -l
停止数据库
pg_ctl -D /u01/db/postgresql/data -l logfile stop
12、配置系统服务
在源码的安装目录下/root/postgresql-15.5/contrib/start-scripts有个linux文件,里面为启动配置
脚本里需要修改的地方为
prefix=pg主目录
PGDATA=" PGDATA目录"
内容如下:
#! /bin/sh

# chkconfig: 2345 98 02
# description: PostgreSQL RDBMS

# This is an example of a start/stop script for SysV-style init, such
# as is used on Linux systems.  You should edit some of the variables
# and maybe the 'echo' commands.
#
# Place this file at /etc/init.d/postgresql (or
# /etc/rc.d/init.d/postgresql) and make symlinks to
#   /etc/rc.d/rc0.d/K02postgresql
#   /etc/rc.d/rc1.d/K02postgresql
#   /etc/rc.d/rc2.d/K02postgresql
#   /etc/rc.d/rc3.d/S98postgresql
#   /etc/rc.d/rc4.d/S98postgresql
#   /etc/rc.d/rc5.d/S98postgresql
# Or, if you have chkconfig, simply:
# chkconfig --add postgresql
#
# Proper init scripts on Linux systems normally require setting lock
# and pid files under /var/run as well as reacting to network
# settings, so you should treat this with care.

# Original author:  Ryan Kirkpatrick <pgsql@rkirkpat.net>

# contrib/start-scripts/linux

## EDIT FROM HERE

# Installation prefix
prefix=/u01/db/postgresql

# Data directory
PGDATA="/u01/db/postgresql/data"

# Who to run the postmaster as, usually "postgres".  (NOT "root")
PGUSER=postgres

# Where to keep a log file
PGLOG="$PGDATA/serverlog"

# It's often a good idea to protect the postmaster from being killed by the
# OOM killer (which will tend to preferentially kill the postmaster because
# of the way it accounts for shared memory).  To do that, uncomment these
# three lines:
#PG_OOM_ADJUST_FILE=/proc/self/oom_score_adj
#PG_MASTER_OOM_SCORE_ADJ=-1000
#PG_CHILD_OOM_SCORE_ADJ=0
# Older Linux kernels may not have /proc/self/oom_score_adj, but instead
# /proc/self/oom_adj, which works similarly except for having a different
# range of scores.  For such a system, uncomment these three lines instead:
#PG_OOM_ADJUST_FILE=/proc/self/oom_adj
#PG_MASTER_OOM_SCORE_ADJ=-17
#PG_CHILD_OOM_SCORE_ADJ=0

## STOP EDITING HERE

# The path that is to be used for the script
PATH=/usr/local/sbin:/usr/local/bin:/sbin:/bin:/usr/sbin:/usr/bin

# What to use to start up the postmaster.  (If you want the script to wait
# until the server has started, you could use "pg_ctl start" here.)
DAEMON="$prefix/bin/postmaster"

# What to use to shut down the postmaster
PGCTL="$prefix/bin/pg_ctl"

set -e

# Only start if we can find the postmaster.
test -x $DAEMON ||
{
    echo "$DAEMON not found"
    if [ "$1" = "stop" ]
    then exit 0
    else exit 5
    fi
}

# If we want to tell child processes to adjust their OOM scores, set up the
# necessary environment variables.  Can't just export them through the "su".
if [ -e "$PG_OOM_ADJUST_FILE" -a -n "$PG_CHILD_OOM_SCORE_ADJ" ]
then
    DAEMON_ENV="PG_OOM_ADJUST_FILE=$PG_OOM_ADJUST_FILE PG_OOM_ADJUST_VALUE=$PG_CHILD_OOM_SCORE_ADJ"
fi


# Parse command line parameters.
case $1 in
  start)
    echo -n "Starting PostgreSQL: "
    test -e "$PG_OOM_ADJUST_FILE" && echo "$PG_MASTER_OOM_SCORE_ADJ" > "$PG_OOM_ADJUST_FILE"
    su - $PGUSER -c "$DAEMON_ENV $DAEMON -D '$PGDATA' >>$PGLOG 2>&1 &"
    echo "ok"
    ;;
  stop)
    echo -n "Stopping PostgreSQL: "
    su - $PGUSER -c "$PGCTL stop -D '$PGDATA' -s"
    echo "ok"
    ;;
  restart)
    echo -n "Restarting PostgreSQL: "
    su - $PGUSER -c "$PGCTL stop -D '$PGDATA' -s"
    test -e "$PG_OOM_ADJUST_FILE" && echo "$PG_MASTER_OOM_SCORE_ADJ" > "$PG_OOM_ADJUST_FILE"
    su - $PGUSER -c "$DAEMON_ENV $DAEMON -D '$PGDATA' >>$PGLOG 2>&1 &"
    echo "ok"
    ;;
  reload)
    echo -n "Reload PostgreSQL: "
    su - $PGUSER -c "$PGCTL reload -D '$PGDATA' -s"
    echo "ok"
    ;;
  status)
    su - $PGUSER -c "$PGCTL status -D '$PGDATA'"
    ;;
  *)
    # Print help
    echo "Usage: $0 {start|stop|restart|reload|status}" 1>&2
    exit 1
    ;;
esac

exit 0
修改完后,拷贝该文件到/etc/init.d目录下
cp linux /etc/init.d/postgresql
chmod +x /etc/init.d/postgresql
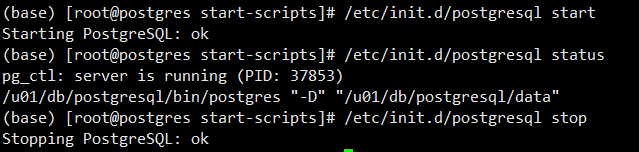
之后可以通过
/etc/init.d/postgresql start 启动
/etc/init.d/postgresql stop 停止
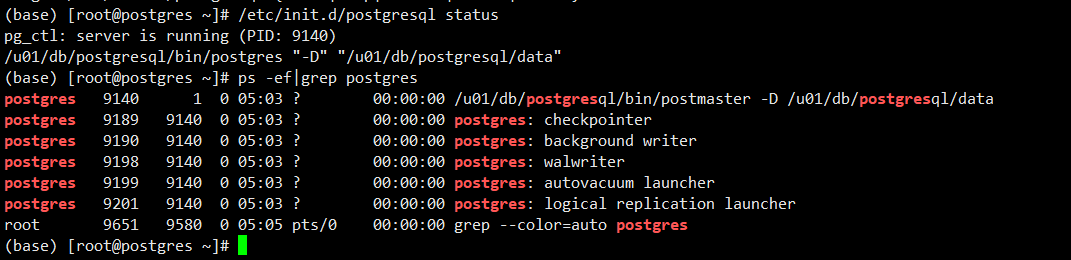
/etc/init.d/postgresql status 查看状态
加到开机启动
chkconfig --add postgresql
chkconfig postgresql on
chkconfig --list
Note: This output shows SysV services only and does not include native
systemd services. SysV configuration data might be overridden by native
systemd configuration.
If you want to list systemd services use ‘systemctl list-unit-files’.
To see services enabled on particular target use
‘systemctl list-dependencies [target]’.
netconsole 0:off1:off2:off3:off4:off5:off6:off
network 0:off1:off2:on3:on4:on5:on6:off
postgresql 0:off1:off2:on3:on4:on5:on6:off
重启查看是否开机自动启动,成功
问题
如不安装python高版本环境或Anaconda ,使用系统自带的低版本python会报错

引用
教IT的小强(博主) 2023年最新版Anaconda3的安装配置及使用教程(非常详细),从零基础入门到精通,看完这一篇就够了(附安装包)-CSDN博客
sqlboy-yuzhenc(博主) Centos7.6安装postgresql15_centos7.6 postgresql-CSDN博客
也欢迎关注我的公众号【徐sir的IT之路】,一起学习!
————————————————————————————
公众号:徐sir的IT之路
CSDN :徐sir(徐慧阳)_数据库记录,系统集成-CSDN博客
墨天轮:徐sir的个人主页 - 墨天轮
PGFANS:PGFans问答社区:全球唯一的PostgreSQL中文技术交流社区
————————————————————————————


 764
764


 被折叠的 条评论
为什么被折叠?
被折叠的 条评论
为什么被折叠?
 到【灌水乐园】发言


