


工具:myeclipse、struts2 jar包(官网下或者myeclipse自带)
1、新建一个web project
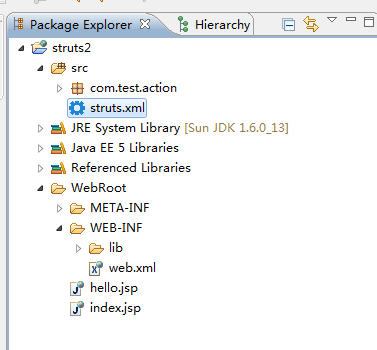
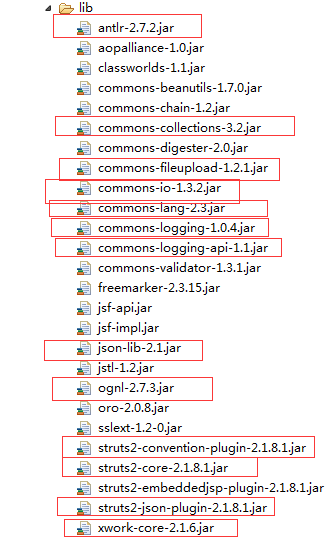
2、导入所需jar包
在lib中导入如下包(标红的为必需的与常用的),复制到lib文件夹下即可。
3、编写web.xml
<?xml version="1.0" encoding="UTF-8"?>
<web-app version="2.5"
    xmlns="http://java.sun.com/xml/ns/javaee"
    xmlns:xsi="http://www.w3.org/2001/XMLSchema-instance"
    xsi:schemaLocation="http://java.sun.com/xml/ns/javaee
    http://java.sun.com/xml/ns/javaee/web-app_2_5.xsd">
  <welcome-file-list>
    <welcome-file>index.jsp</welcome-file>
  </welcome-file-list>
  <filter>
    <filter-name>struts2</filter-name>
    <filter-class>
        org.apache.struts2.dispatcher.ng.filter.StrutsPrepareAndExecuteFilter
    </filter-class>
  </filter>
  <filter-mapping>
    <filter-name>struts2</filter-name>
    <url-pattern>/*</url-pattern>
  </filter-mapping>
 </web-app>
4、编写 struts.xml
在src文件夹下新建struts.xml。并写入以下代码:
<?xml version="1.0" encoding="UTF-8" ?>
<!DOCTYPE struts PUBLIC "-//Apache Software Foundation//DTD Struts Configuration 2.1//EN" "http://struts.apache.org/dtds/struts-2.1.dtd">
<struts>
    <package name="default" namespace="/" extends="struts-default">
        <action name="hello" class="com.test.action.HelloAction">
            <result name ="success">/hello.jsp</result>
        </action>
    </package>
</struts>
5、编写action类
如图:在src下新建包com.test.action,并编写HelloAction.java类。
HelloAction.java
package com.test.action;

import com.opensymphony.xwork2.ActionSupport;

public class HelloAction extends ActionSupport {

    /**
     *
     */
    private static final long serialVersionUID = 1L;

    @Override
    public String execute() throws Exception {
        // TODO Auto-generated method stub
        System.out.println("hello");
        return SUCCESS;
    }
}
6、编写前台jsp页面
在WebRoot文件夹下编写hello.jsp及index.jsp
index.jsp
<%@ page language="java" import="java.util.*" pageEncoding="ISO-8859-1"%>
<%
String path = request.getContextPath();
String basePath = request.getScheme()+"://"+request.getServerName()+":"+request.getServerPort()+path+"/";
%>

<!DOCTYPE HTML PUBLIC "-//W3C//DTD HTML 4.01 Transitional//EN">
<html>
  <head>
    <base href="<%=basePath%>">

    <title>My JSP 'index.jsp' starting page</title>
    <meta http-equiv="pragma" content="no-cache">
    <meta http-equiv="cache-control" content="no-cache">
    <meta http-equiv="expires" content="0">
    <meta http-equiv="keywords" content="keyword1,keyword2,keyword3">
    <meta http-equiv="description" content="This is my page">
    <!--
    <link rel="stylesheet" type="text/css" href="styles.css">
    -->
  </head>

  <body>
    <form action = "hello">
    <input type="submit" value = "submit"/>
    </form>
  </body>
</html>
hello.jsp
<%@ page language="java" import="java.util.*" pageEncoding="ISO-8859-1"%>
<%
String path = request.getContextPath();
String basePath = request.getScheme()+"://"+request.getServerName()+":"+request.getServerPort()+path+"/";
%>

<!DOCTYPE HTML PUBLIC "-//W3C//DTD HTML 4.01 Transitional//EN">
<html>
  <head>
    <base href="<%=basePath%>">

    <title>My JSP 'hello.jsp' starting page</title>

    <meta http-equiv="pragma" content="no-cache">
    <meta http-equiv="cache-control" content="no-cache">
    <meta http-equiv="expires" content="0">
    <meta http-equiv="keywords" content="keyword1,keyword2,keyword3">
    <meta http-equiv="description" content="This is my page">
    <!--
    <link rel="stylesheet" type="text/css" href="styles.css">
    -->

  </head>

  <body>
    hello<br>
  </body>
</html>
7、部署工程到服务器上
将工程部署到tomcat等服务器上,在浏览器输入index.jsp
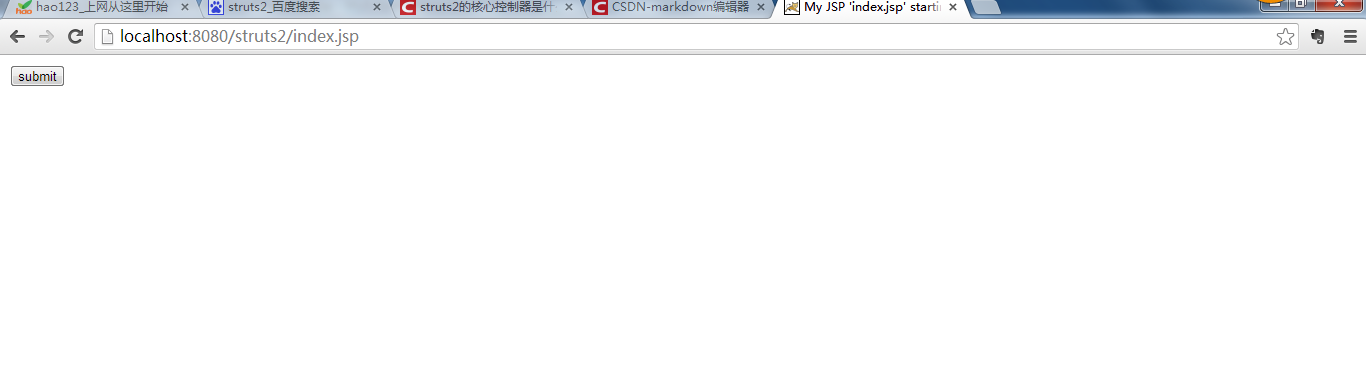
点击按钮即跳转到hello.jsp

结束!


 被折叠的 条评论
为什么被折叠?
被折叠的 条评论
为什么被折叠?
 到【灌水乐园】发言


