


新公司新气象,刚来一个周,捋了捋代码发现技术和之前的项目基本不相同,微服务用的dubbo,为了尽快上手,自己在看文档的同时模仿公司的框架写了个demo,结果问题百出,从0到1的过程走的很艰难,记下来以次为鉴。
先说下框架构成:
分为消费者和生产者两个项目,消费者为一个web项目,通过tomcat启动,生产者为java项目,通过jar包启动。
为了让结构更加清晰,消费者命名api,写controller层代码,生产者项目将接口和实现类分开,接口和实体类写在customer里,实现类写在producer里,并且通过一个父级项目关联,结构如下:
消费者:

生产者:

OK项目建完,开始写代码,模拟一个业务场景,通过顾客Id查询顾客姓名,所以在customer中建立一个类Customer,赋予两个属性customerId和customerName,consumer里写service接口,provider里写serviceImpl和dao,并且provider中也需要实体类,所以记得在provider的pom文件中引入consumer,结构如下
consumer项目:

Customer类代码:
public class Customer implements Serializable {

    private static final long serialVersionUID = -8252366926456004984L;

    private  Integer customerId;

    private  String  customerName;

    public Integer getCustomerId() {
        return customerId;
    }

    public void setCustomerId(Integer customerId) {
        this.customerId = customerId;
    }

    public String getCustomerName() {
        return customerName;
    }

    public void setCustomerName(String customerName) {
        this.customerName = customerName;
    }
}
QueryCustomerService接口代码:
public interface QueryCustomerService {
        /**
         * 查询姓名
         * @param customer
         * @return
         */
        public String queryCustomerNameByCustomerId(Customer customer);

}
provider:

QueryCustomerImpl代码:
@Service("queryCustomerImpl")
public class QueryCustomerImpl implements QueryCustomerService {

    @Autowired
    QueryCustomerDao queryCustomerDao;

    @Override
    public String queryCustomerNameByCustomerId(Customer customer) {
        String customerName=queryCustomerDao.queryCustomer(customer.getCustomerId());
        return customerName+"====over";
    }

}
住:@Service用的是Spring的注解
QueryCustomerDao代码:
@Repository("queryCustomerDao")
public class QueryCustomerDao {
    public static Map<Integer,String> map=new HashMap<>();
    static {
           map.put(1,"wahaha");
           map.put(2,"xiaoxixi");
    }
    public String queryCustomer(Integer customerId){
        return map.get(customerId);
    }
dao在map里存放了两个数据,模拟数据库。
这样一来,生产者端代码写完了,接下来就是添加配置文件。
首先是consumer项目,配置文件很简单,就一个consumer.xml。

<beans xmlns="http://www.springframework.org/schema/beans"
       xmlns:xsi="http://www.w3.org/2001/XMLSchema-instance"
       xmlns:dubbo="http://code.alibabatech.com/schema/dubbo"
       xsi:schemaLocation="http://www.springframework.org/schema/beans http://www.springframework.org/schema/beans/spring-beans.xsd
       http://code.alibabatech.com/schema/dubbo http://code.alibabatech.com/schema/dubbo/dubbo.xsd">
    <dubbo:application name="dubbo-consumer"/>
    <!--向 zookeeper 订阅 provider 的地址,由 zookeeper 定时推送-->
    <dubbo:registry protocol="zookeeper" address="127.0.0.1:2181"/>
    <!--使用 dubbo 协议调用定义好application.xml的QueryCustomerService 接口-->
    <dubbo:reference id="queryCustomerService" interface="com.jk.xym.service.QueryCustomerService"/>
</beans>
provider里面的配置文件稍微多一点,因为还需要spring的配置文件:

dubbo项目中的spring配置文件和provider的配置文件要写在resources/META-INF下,dubbo会默认读取该路径下的配置。
application.xml:主要配置一下扫描的包路径,还有需要读取的dubbo的配置文件路径。
<context:component-scan base-package="com.jk.xym" />

   <context:property-placeholder location="classpath*:dubbo.properties" ignore-unresolvable="true" file-encoding="UTF-8"/>
   <!--<context:property-placeholder location="classpath*:*.properties,classpath:redis.properties" ignore-unresolvable="true" />-->

<!-- 启用 aspectj 动 态代理 -->
<aop:aspectj-autoproxy proxy-target-class="true" />
provider.xml:dubbo关键配置之一。
<!--定义了提供方应用信息,用于计算依赖关系;在 dubbo-provider会显示这个名字,方便辨识-->
<dubbo:application name="dubbo-provider" owner="programmer" organization="dubbo" />
<!--使用 zookeeper 注册中心暴露服务,注意要先开启 zookeeper,这里配置的address是集群模式,个人用修改为本地:localhost:2181-->
<dubbo:registry port="8086" protocol="zookeeper" address="localhost:2181"/>
<!-- 用dubbo协议在20880端口暴露服务 -->
<dubbo:protocol name="dubbo" port="20880" />
<!--使用 dubbo 协议实现定义好的 QueryCustomerService 接口,黑色字体部分修改为创建类的包目录 -->
<dubbo:service interface="com.jk.xym.service.QueryCustomerService" ref="queryCustomerImpl" protocol="dubbo" >
    <dubbo:method name="queryCustomerNameByCustomerId" retries="0"/>
</dubbo:service>
dubbo.properties :dubbo的关键配置之一。
#超时时间(ms)
dubbo.service.timeout=10000
#名称
dubbo.application.name=dubbo-demo
dubbo.application.owner=programmer
#链接zk地址
dubbo.registry.address=zookeeper://localhost:2181

#监控协议
dubbo.monitor.protocol=registry
#协议名称
dubbo.protocol.name=dubbo
#协议端口
dubbo.protocol.port=20880
#负载方式
dubbo.service.loadbalance=roundrobin

#以下是jvm启动参数配置
java_class=com.alibaba.dubbo.container.Main
java_mem_opts= -server -Xmx2g -Xms2g -Xmn256m -XX:PermSize=128m -Xss256k -XX:+DisableExplicitGC -XX:+UseConcMarkSweepGC -XX:+CMSParallelRemarkEnabled -XX:+UseCMSCompactAtFullCollection -XX:LargePageSizeInBytes=128m -XX:+UseFastAccessorMethods -XX:+UseCMSInitiatingOccupancyOnly -XX:CMSInitiatingOccupancyFraction=70
java_opts= -Djava.awt.headless=true -Djava.net.preferIPv4Stack=true
logback.xml为输出日志配置,非必须配置。这里我就不附图了。
配置文件结束,那么最后还剩pom文件,pom文件就不附图了,说下关键的配置吧。
provider模块:
1.spring相关配置
2.dubbo相关配置(com.alibaba.dubbo)
3.zookeeper相关配置 (包含com.101tec.zkclient ,org.apache.zookeeper)
4.处理java字节码的类库 (org.javassist,如果没有该jar包,在消费端拿不到生产端注入的实体类)
5.maven插件配置(maven-jar-plugin,maven-shade-plugin这个插件很好用,会自动的给你把依赖包打上,并且重名的配置会自动追加,省去了很多麻烦,具体的使用方法很多博客里都有,这就不写了,里面有个mainclass这个标签一定要写,这里做个铺垫,等不及的同学可以直接划到结尾。)
6.netty(dubbo底层用了netty框架)
其他的就缺什么配什么吧
consumer模块:
这个就比较简单,配置一下spring就好了。
到此,我们的生产者端就配置完了,接下来去搞消费者端。
=======================================分割线
消费者端:
作为一个消费者,目的就是消费生产者端提供的数据,所以消费者端写一个controller就好了,代码如下:
@Controller
public class QueryCustomerController {

    @Autowired
    QueryCustomerService queryCustomerService;

    @RequestMapping("/queryCustomerName")
    @ResponseBody
    public String queryCustomerName(Integer customerId){
        Customer customer=new Customer();
        customer.setCustomerId(customerId);
       String CustomerName= queryCustomerService.queryCustomerNameByCustomerId(customer);
       System.out.println("123");
       return CustomerName;
    }
}
之后是配置相关的文件,因为消费者端是个web项目,所以就按照web项目来配置,除了web.xml,主要配置文件还有一下这些
我们一个一个来,首先是
dubbo.properties:这个简单配置一下链接zk的地址就好了
dubbo.registry.address=zookeeper://localhost:2181dubbo-api:dubbo主要配置之一
<beans xmlns:xsi="http://www.w3.org/2001/XMLSchema-instance"
       xmlns:dubbo="http://code.alibabatech.com/schema/dubbo"
       xmlns="http://www.springframework.org/schema/beans"
       xsi:schemaLocation="http://www.springframework.org/schema/beans http://www.springframework.org/schema/beans/spring-beans-2.5.xsd
      http://code.alibabatech.com/schema/dubbo http://code.alibabatech.com/schema/dubbo/dubbo.xsd">

    <!--dubbo服务相关配置-->
    <dubbo:application name="dubbo-api" owner="xym-web" organization="dubbox"/>
    <dubbo:registry address="${dubbo.registry.address}"/>
    <dubbo:protocol name="dubbo" />

    <!--配置需要调用的接口,这个可以参考上面consumer里面的配置-->
   <dubbo:reference id="queryCustomerService" interface="com.jk.xym.service.QueryCustomerService" check="false"  timeout="30000" />

</beans>
spring-context.xml 和spring-mvc.xml:spring常规配置,因为懒,就不附图了,需要的小伙伴可以自行百度
有一点需要注意的是在spring-context.xml里面引入其他的配置文件记得用import标签,ex:
<import resource="dubbo-api.xml"/>接下来是web.xml,也是常规配置。
最后就是pom文件,这里用到的pom 与我上面提到的关键pom保持一致即可。
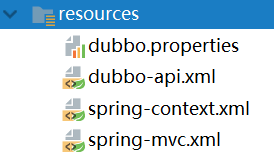
最后附上一张api的目录图:

接下来就是分别打成jar包和war包,启动就\(^o^)/~了~~~
等等,这就完事了?好像少了点什么
=======================================分割线
让我们把目光拉回到生产者端
整个项目里面好像没有main方法,这里也是我纳闷了很久的地方,之前用springboot也好,或者普通的java项目也好,打成jar包,那肯定得需要一个程序的入口,仔细查了查dubbo的启动方式,发现dubbo除了可以通过web启动,main方法启动外,框架里面还有一个人家已经准备好的Main类,
com.alibaba.dubbo.container.Main这个类里面已经写好了调用spring的方法,所以打成jar包之后,如果我们之前配置了mainclass的话直接java -jar xxx.jar就好了
如果没有配置,那我们指定一下main方法所在的类,启动指令为:
java -cp xxx.jar com.alibaba.dubbo.container.Main
这样就能成功启动了。


 489
489


 被折叠的 条评论
为什么被折叠?
被折叠的 条评论
为什么被折叠?
 到【灌水乐园】发言


