


前言
01—外置配置文件
1. Springboot读取核心配置文件(.properties)优先读取:jar包当前目录下的/config目录,因此要外置配置文件就在jar所在目录新建config文件夹,然后放入配置文件。
2. 项目中我们会用到xml来实例bean、定时任务、日志(使用springboot集成日志插件无需引入)等,因此需要引入对应的xml,步骤1中我们在jar包同级目录下新建了config文件夹,所以这些乱七八糟的东西都放在config文件夹下,想要调用他们首先我们要找到config文件夹的路径,好的方法没找到,只能用笨办法了,就是在配置文件中增加一条配置,配置config文件夹所在的目录。
.properties文件中添加如下键值对(绝对路径):
springboot.jar.path=D:/stsworkspace/config
02—外置静态资源
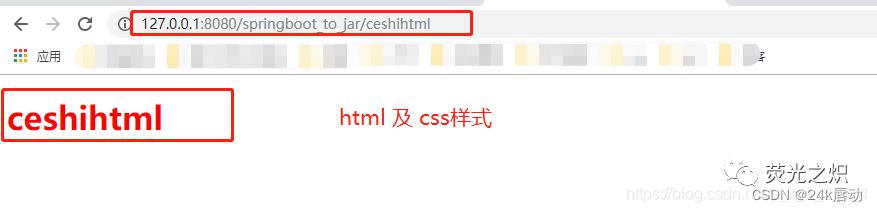
静态资源访问采用thymeleaf,在配置文件中将spring.thymeleaf.prefix配置成外部地址。
切记外部资源引用 格式:file:xxx/xxx/xx
03—外置第三方jar包
通常第三方jar包打进jar包里,但是导致程序jar资源过大,所以也可以和步骤1一样,在项目jar包同级目录下新建lib文件夹,用于存放第三方jar,这个只需要在pom.xml打包时候,打包插件分离出来就可以了。
下面来看实际操作
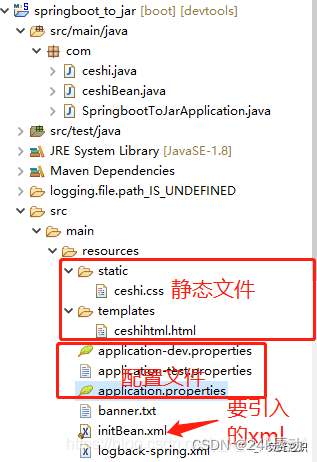
测试用的项目结构如图
1.首先pom.xml中打包插件,源码如下
<build>
    <resources>
      <!--防止过滤掉代码中xml-->
         <resource>
          <directory>src/main/java</directory>
          <includes>
             <include>**/*.xml</include>
          </includes>
         </resource>
      </resources>
    <plugins>
             <plugin>
                <groupId>org.apache.maven.plugins</groupId>
                <artifactId>maven-surefire-plugin</artifactId>
                <configuration>
                    <skipTests>true</skipTests>
                </configuration>
            </plugin>
            <!--拷贝资源文件-->
           <plugin>
              <groupId>org.apache.maven.plugins</groupId>
              <artifactId>maven-resources-plugin</artifactId>
              <executions>
                <!--拷贝配置文件-->
                  <execution>
                      <id>copy-resources</id>
                      <phase>package</phase>
                      <goals>
                          <goal>copy-resources</goal>
                      </goals>
                      <configuration>
                          <outputDirectory>${project.build.directory}/config</outputDirectory>
                          <resources>
                              <resource>
                                  <directory>src/main/resources</directory>
                                  <!-- 去除静态资源和页面资源 -->
                                  <excludes>
                            <exclude>templates/**</exclude>
                            <exclude>static/**</exclude>
                        </excludes>
                                  <filtering>true</filtering>
                              </resource>
                          </resources>
                          <encoding>UTF-8</encoding>
                      </configuration>
                  </execution>
                  <!--拷贝页面文件-->
                  <execution>
                      <id>copy-html</id>
                      <phase>package</phase>
                      <goals>
                          <goal>copy-resources</goal>
                      </goals>
                      <configuration>
                          <outputDirectory>${project.build.directory}/templates</outputDirectory>
                          <resources>
                              <resource>
                                  <directory>src/main/resources/templates</directory>
                                  <filtering>true</filtering>
                              </resource>
                          </resources>
                          <encoding>UTF-8</encoding>
                      </configuration>
                  </execution>
                  <!--拷贝静态资源文件-->
                  <execution>
                      <id>copy-static</id>
                      <phase>package</phase>
                      <goals>
                          <goal>copy-resources</goal>
                      </goals>
                      <configuration>
                          <outputDirectory>${project.build.directory}/static</outputDirectory>
                          <resources>
                              <resource>
                                  <directory>src/main/resources/static</directory>
                                  <filtering>true</filtering>
                              </resource>
                          </resources>
                          <encoding>UTF-8</encoding>
                      </configuration>
                  </execution>
              </executions>
          </plugin>
         <!--拷贝资源jar copy-lib-->
          <plugin>
            <groupId>org.apache.maven.plugins</groupId>
            <artifactId>maven-dependency-plugin</artifactId>
            <executions>
               <execution>
                  <id>copy-lib</id>
                  <phase>package</phase>
                  <goals>
                     <goal>copy-dependencies</goal>
                  </goals>
                  <configuration>
                     <outputDirectory>${project.build.directory}/lib</outputDirectory>
                     <excludeTransitive>false</excludeTransitive>
                     <stripVersion>false</stripVersion>
                     <includeScope>runtime</includeScope>
                  </configuration>
               </execution>
            </executions>
         </plugin>


       <!--打包jar-->
           <plugin>
              <groupId>org.apache.maven.plugins</groupId>
              <artifactId>maven-jar-plugin</artifactId>
              <configuration>
                  <!--不打包资源文件-->
                  <excludes>
              <exclude>*.properties</exclude>
            <exclude>*.yml</exclude>
            <exclude>*.xml</exclude>
            <exclude>*.txt</exclude>
            <exclude>static/**</exclude>
            <exclude>templates/**</exclude>
                  </excludes>
                  <archive>
                      <manifest>
                        <addClasspath>true</addClasspath>
                        <!--指定第3方入口类-->
              <classpathPrefix>lib/</classpathPrefix>
              <useUniqueVersions>false</useUniqueVersions>
                          <!--指定项目启动入口类-->
                          <mainClass>com.SpringbootToJarApplication</mainClass>
                      </manifest>
                  </archive>
                  <outputDirectory>${project.build.directory}</outputDirectory>
              </configuration>
           </plugin>
    </plugins>
  </build>
2.主配置文件application.properties
#项目发布根路径(上下文路径),项目名称 ps:前面一定加/
server.servlet.context-path=/springboot_to_jar#多配置
spring.profiles.active=test

# thymeleaf
spring.thymeleaf.cache=false
spring.thymeleaf.prefix=file:${spring.jar.path}/templates/
spring.thymeleaf.suffix=.html
spring.thymeleaf.mode=HTML5
spring.thymeleaf.encoding=UTF-8
spring.thymeleaf.servlet.content-type=text/html
application-test.properties
#修改端口号
server.port=8080

#日志路径
logging.file.path=D:/springBoot/123#jar包所在位置
spring.jar.path=D:/stsworkspace/springboot_to_jar/target
sdf=123
3.启动类SpringbootToJarApplication.java
package com;
import org.springframework.boot.SpringApplication;
import org.springframework.boot.autoconfigure.SpringBootApplication;
import org.springframework.context.annotation.ImportResource;
@SpringBootApplication
//引入xml
@ImportResource(locations={"file:${spring.jar.path}/config/initBean.xml"})public class SpringbootToJarApplication {
  public static void main(String[] args) {
    SpringApplication.run(SpringbootToJarApplication.class, args);
  }
}
ok 了 打包
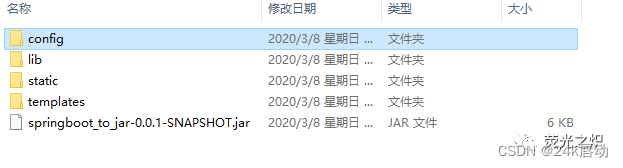
打包结果:

将文件拖出
打开jar

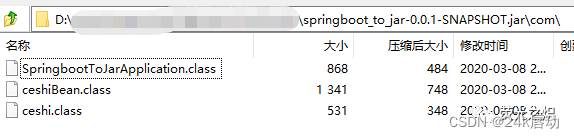
里面无配置文件、无引入的第3方包、无静态资源,只有我们的代码。
cmd 切换到jar包目录 执行:java -jar springboot_to_jar.jar
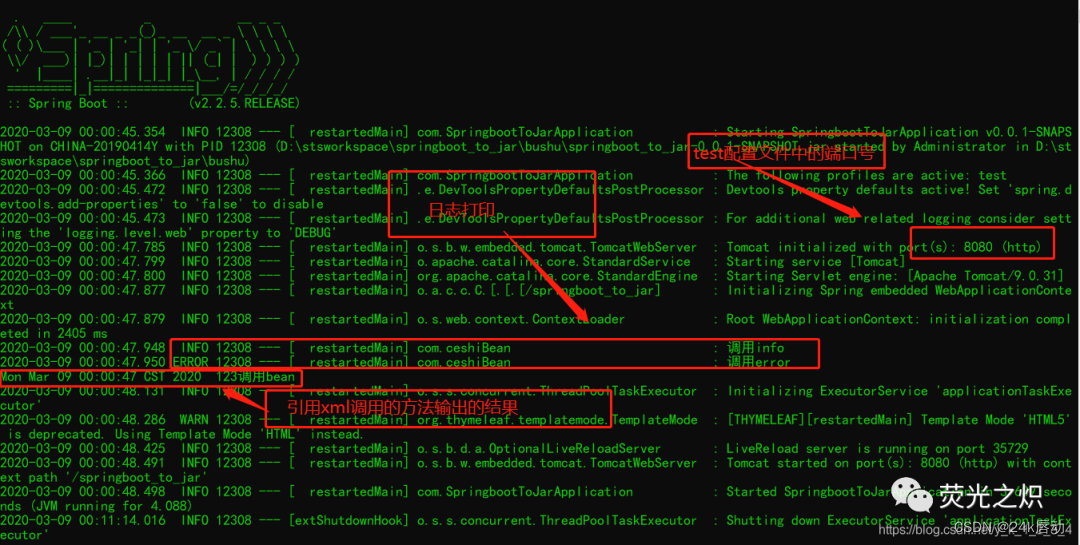
搞定了 以后只更新我们的代码就可以了,修改配置文件 只要重启一下就ok了
微信扫一扫
关注该公众号


 1万+
1万+


 被折叠的 条评论
为什么被折叠?
被折叠的 条评论
为什么被折叠?
 到【灌水乐园】发言


