


一、环境描述
主机A:192.168.3.109
主机B:192.168.3.169
二、安装MySQL
三、授权用户,然后退出(尽量使用安全级别高的密码)
grant replication slave, file on *.* to 'root'@'192.168.3.169' identified by '密码';
flush privileges;
quit;
如果使用简单密码,可参考此博客修改配置:
主机A:
[root@test109 ~]# mysql -u root -p

mysql> grant replication slave, file on *.* to 'root'@'192.168.3.169' identified by '1q22w3e$R%T^Y';
Query OK, 0 rows affected, 1 warning (0.00 sec)

mysql> grant all privileges on *.* to 'root'@192.168.3.169' identified by '1q22w3e$R%T^Y';

mysql> flush privileges;
Query OK, 0 rows affected (0.00 sec)

mysql> quit;
Bye
[root@test109 ~]#
主机B:
[root@test169 ~]# mysql -u root -p

mysql> grant replication slave, file on *.* to 'root'@'192.168.3.109' identified by '1q22w3e$R%T^Y';
Query OK, 0 rows affected, 1 warning (0.01 sec)

mysql> grant all privileges on *.* to 'root'@192.168.3.109' identified by '1q22w3e$R%T^Y';

mysql> flush privileges;
Query OK, 0 rows affected (0.01 sec)

mysql> quit;
Bye
[root@test169 ~]#
添加了这一条,是因为发现对host为192.168.3.109做了限制,应用程序连接不过来,所以要授予所有权限 grant all privileges on *.* to 'root'@192.168.3.109' identified by '1q22w3e$R%T^Y';
四、停止mysql服务,修改配置文件/etc/my.cnf
my.cnf配置项解析,可根据自己需要配置,
参考博客:/etc/my.cnf配置项详细解析https://blog.csdn.net/yang1393214887/article/details/121281009
主机A:
service mysql stop
vim /etc/my.cnf
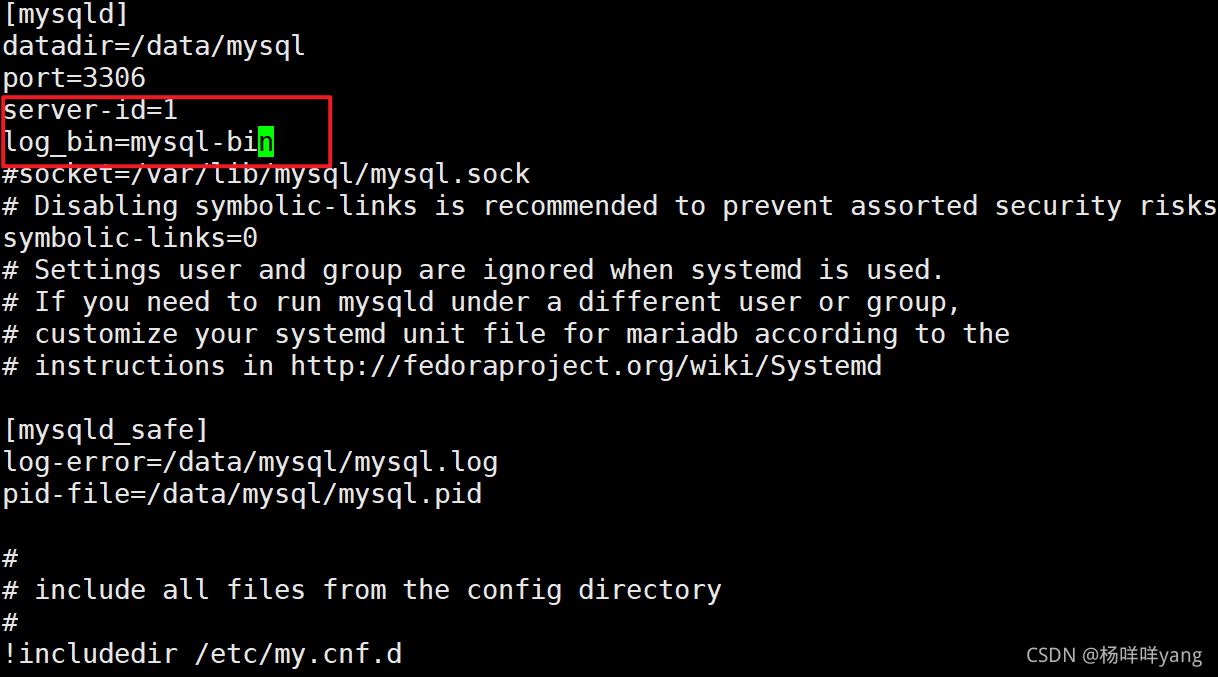
!!!具体的生产环境要根据具体的业务增加配置
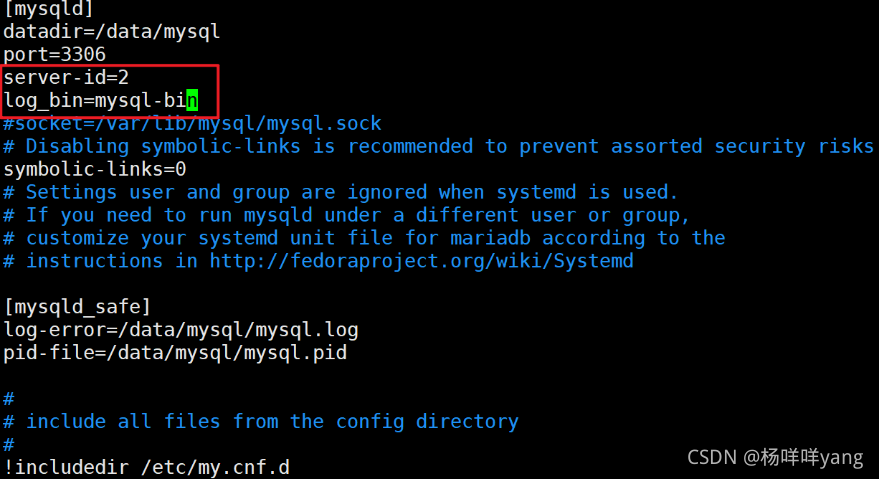
主机B:
service mysql stop
vim /etc/my.cnf
注意server-id=2,区别于主机A
我的生产环境参考:
bin_log的两项:atfm和cdh为要同步的数据库名。多了可以再添加,只有一个就只写一个
server-id要不同
auto_increment_offset=2要不同(牵扯自动列增长,第一台从1开始增长,第二台从2开始增长)

添加的配置:
注意:两台数据库的区别:server-id要不同,auto_increment_offset=2要不同(牵扯自动列增长,第一台从1开始增长,第二台从2开始增长)
log-bin=mysql-bin
server-id = 2
binlog-do-db=atfm
binlog-do-db=cdh
binlog-ignore-db=mysql
#replicate-do-db=eps
replicate-ignore-db=mysql,information_schema,performance_schema
log-slave-updates
slave-skip-errors=all
skip-name-resolve
sync_binlog=1
auto_increment_increment=2
auto_increment_offset=2分别启动两个MySQL:service mysql restart
五、锁定表
主机A:
锁定:flush tables with read lock\G
查看同步状态:show master status\G
[root@test109 ~]# mysql -u root -p

mysql> flush tables with read lock\G
Query OK, 0 rows affected (0.00 sec)

mysql> show master status\G
*************************** 1. row ***************************
             File: mysql-bin.000003
         Position: 154
     Binlog_Do_DB:
 Binlog_Ignore_DB:
Executed_Gtid_Set:
1 row in set (0.00 sec)

mysql>
记住上面的数字
Position:新安装的数据库都是154
File:mysql-bin.000003
注意:如果数据库之前做过同步,show master status\G会显示相应的记录
重置同步服务即可: reset slave;
如果两个数据库都为老数据库,之前使用过,需要分别备份两个数据库。保持两个数据库数据一致。
主机B:
[root@test169 ~]# mysql -u root -p

mysql> flush tables with read lock\G
Query OK, 0 rows affected (0.00 sec)

mysql> show master status\G
*************************** 1. row ***************************
             File: mysql-bin.000002
         Position: 154
     Binlog_Do_DB:
 Binlog_Ignore_DB:
Executed_Gtid_Set:
1 row in set (0.00 sec)

mysql>
记住上面的数字
Position:新安装的数据库都是154
File:mysql-bin.0000002
六、分别配置对方的参数,开启slave
B同步A的数据,A同步B的数据,两个互为主从,所以两个主机都要配置。
( 另外:如果只要一个主从,另一个可以不配置。配置的哪个是从,主只需要具有同步数据的用户)
主机A:A为从,B为主。(注意:修改谁的配置,谁就是从)
mysql> change master to master_host='192.168.3.169',master_user='root',master_password='1q2w3e$R%T^Y',master_log_file='mysql-bin.000002',master_log_pos=154;
Query OK, 0 rows affected, 2 warnings (0.01 sec)

mysql> start slave;
Query OK, 0 rows affected (0.00 sec)

mysql>
主机B:B为从,A为主。
mysql> change master to master_host='192.168.3.109',master_user='root',master_password=''1q2w3e$R%T^Y',master_log_file='mysql-bin.000003',master_log_pos=154;
Query OK, 0 rows affected, 2 warnings (0.01 sec)

mysql> start slave;
Query OK, 0 rows affected (0.00 sec)

mysql>
七、查看各自机器上的IO进程和 SLAVE进程是否都开启
show slave status\G
主机A:

主机B:
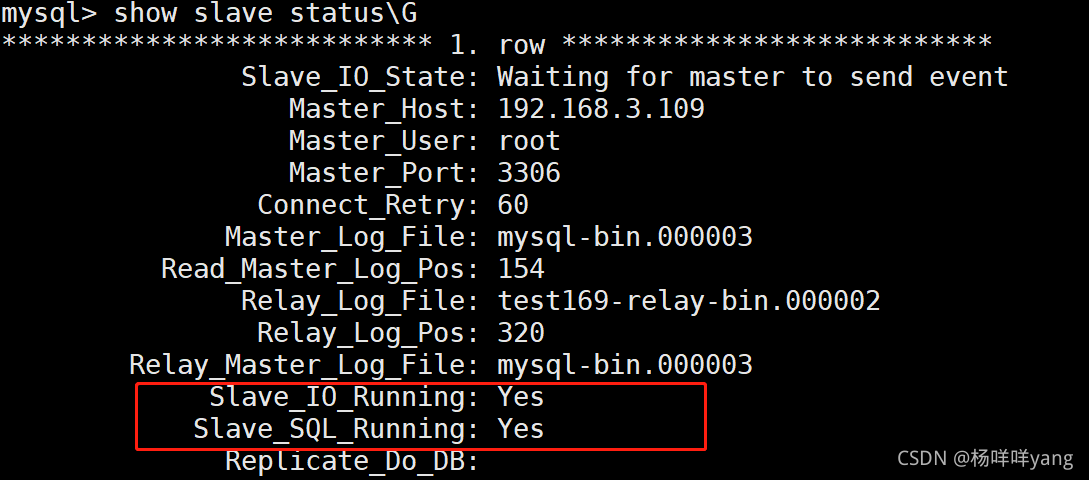
如果两个都是NO,使用因为slave没启动,开启即可:start slave;
八、释放掉 锁 ,测试数据
unlock tables;
主机A、B:

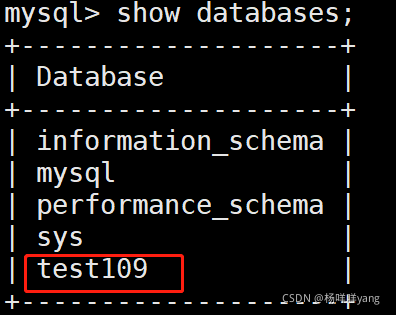
在主机A上创建数据库,在B上看是否同步过去:
创建语句:create database test109;
查看语句:show databases;

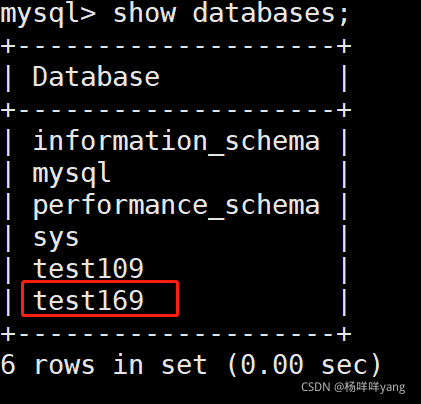
在主机B上创建数据库,在A上看是否同步过去:
创建语句:create database test169;
查看语句:show databases;

如数据同步异常,需要本分数据,重新同步,参考博客:


 2892
2892


 被折叠的 条评论
为什么被折叠?
被折叠的 条评论
为什么被折叠?
 到【灌水乐园】发言


