一 常用窗口
- Swing窗体是Swing的一个组件,同时也是创建图形化用户界面的容器,可以将其它组件放置在窗体容器中。
1.1 JFrame框架窗口
- JFrame窗体是一个容器,在Swing开发中它是Swing程序中各个组件的载体。
JFrame jf = new JFrame(title);
- 在开发中更常用的方式是通过继承java.swing.JFrame类创建一个窗体,可通过this关键字调用其方法。
- 在JFrame对象创建完成后,需要调用getContentPane()方法将窗体转换为容器,然后在容器中添加组件
- 或设置布局管理器,通常这个容器用来包含和显示组件。如果需要将组件添加至容器,可以使用来自Container类的add()方法进行设置。
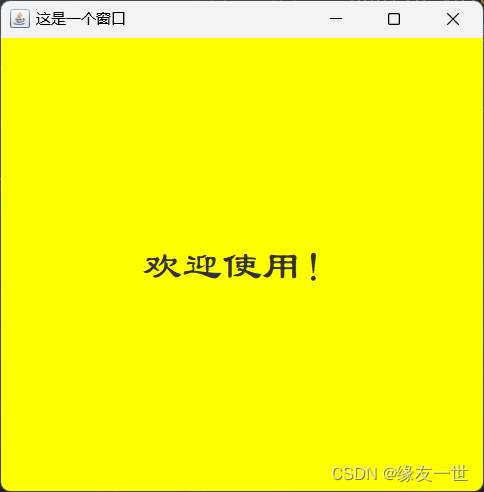
1.2 演示-JFRame,JLable的使用
import javax.swing.*;
import java.awt.*;
public class TestJFrame {
public void init() {
JFrame jFrame = new JFrame("这是一个窗口");
jFrame.setBounds(300,300,500,500);
jFrame.setVisible(true);
Container container = jFrame.getContentPane();
container.setBackground(Color.yellow);
JLabel jlabel=new JLabel("欢迎使用!");
Font font = new Font("隶书",Font.PLAIN,40);
jlabel.setFont(font);
jlabel.setHorizontalAlignment(SwingConstants.CENTER);
jFrame.add(jlabel);
jFrame.setDefaultCloseOperation(WindowConstants.EXIT_ON_CLOSE);
}
public static void main(String[] args) {
new TestJFrame().init();
}
}
| 常用的窗体关闭方式 | 说明 |
|---|
DO_NOTHING_ON_CLOSE | 什么也不做就将窗体关闭 |
DISPOSE_ON_CLOSE | 任何注册监听程序对象后会自动隐藏并释放窗体 |
HIDE_ON_CLOSE | 隐藏窗口的默认窗口关闭 |
EXIT_ON_CLOSE | 退出应用程序默认窗口关闭 |
1.3 JDialog标签
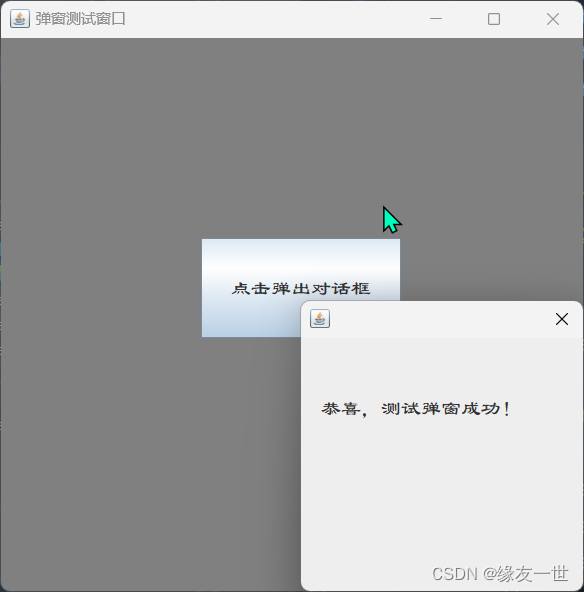
- JDialog窗体是Swing组件中的对话框,继承了AWT组件中的java.awt.Dialog类。功能是从一个窗体中弹出另一个窗体。
1.3.1 演示-JDialog标签
import javax.swing.*;
import java.awt.*;
import java.awt.event.ActionEvent;
import java.awt.event.ActionListener;
public class TestDialog extends JFrame {
public TestDialog() {
super("弹窗测试窗口");
this.setBounds(200,200,600,600);
this.setVisible(true);
this.setDefaultCloseOperation(WindowConstants.EXIT_ON_CLOSE);
this.setLayout(null);
Container container = this.getContentPane();
container.setLayout(null);
container.setBackground(Color.gray);
JButton jButton = new JButton("点击弹出对话框");
Font font = new Font("隶书",Font.PLAIN,20);
jButton.setFont(font);
jButton.setBounds(200,200,200,100);
container.add(jButton);
jButton.addActionListener(new ActionListener() {
@Override
public void actionPerformed(ActionEvent e) {
new MyDialog();
}
});
}
public static void main(String[] args) {
new TestDialog();
}
}
class MyDialog extends JDialog{
public MyDialog() {
this.setVisible(true);
this.setBounds(500,500,300,300);
Container container = this.getContentPane();
container.setLayout(null);
JLabel jLabel = new JLabel("恭喜,测试弹窗成功!");
Font font = new Font("隶书",Font.PLAIN,20);
jLabel.setFont(font);
jLabel.setVisible(true);
jLabel.setBounds(20,20,300,100);
container.add(jLabel);
}
}
二 标签组件
- 在Swing中显示文本或提示信息的方法是使用标签,它支持文本字符串和图标。如:JLabel
2.1 标签
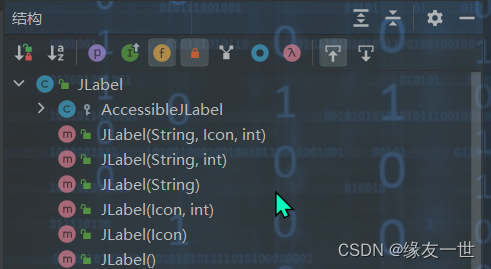
- 标签由JLabel类定义,可以显示一行只读文本、一个图像或带图像的文本。
- JLabel类提供了许多构造方法,如显示只有文本的标签、只有图标的标签或包含文本与图标的标签等。
- 常用语法格式如下,创建的是一个不带图标和文本的JLabel对象:
JLabel jLable = new JLabel();
2.2 图标
2.2.1 ICon接口简介
- Swing中的图标可以放置在按钮、标签等组件上,用于描述组件的用途。
- 图标可以用Java支持的图片文件类型进行创建,也可以使用java.awt.Graphics类提供的功能方法来创建。
- 在Swing中通过Icon接口来创建图标,可以在创建时给定图标的大小、颜色等特性。
- Icon是接口,在使用Icon接口的时候,必须实现Icon接口的三个方法
public int getIconHeight()
public int getIconWidth()
public void paintIcon(Component arg0, Graphics arg1, int arg2, int arg3)
- 前两个方法用于获取图片的长宽,paintIcon()方法用于实现在指定坐标位置画图
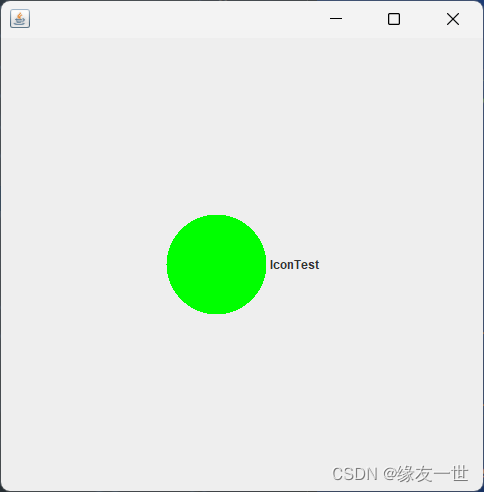
2.2.2 演示-用Icon接口创建图标
import javax.swing.*;
import java.awt.*;
public class TestIcon extends JFrame implements Icon {
private int width;
private int height;
public TestIcon() {
}
public TestIcon(int width,int height) {
this.width=width;
this.height=height;
}
public void init() {
this.setVisible(true);
this.setDefaultCloseOperation(WindowConstants.EXIT_ON_CLOSE);
setBounds(300,300,500,500);
TestIcon testIcon = new TestIcon(100, 100);
JLabel label = new JLabel("IconTest", testIcon, SwingConstants.CENTER);
Container container = getContentPane();
container.add(label);
}
@Override
public void paintIcon(Component c, Graphics g, int x, int y) {
g.setColor(Color.green);
g.fillOval(x,y,width,height);
}
@Override
public int getIconWidth() {
return width;
}
@Override
public int getIconHeight() {
return height;
}
public static void main(String[] args) {
new TestIcon().init();
}
}
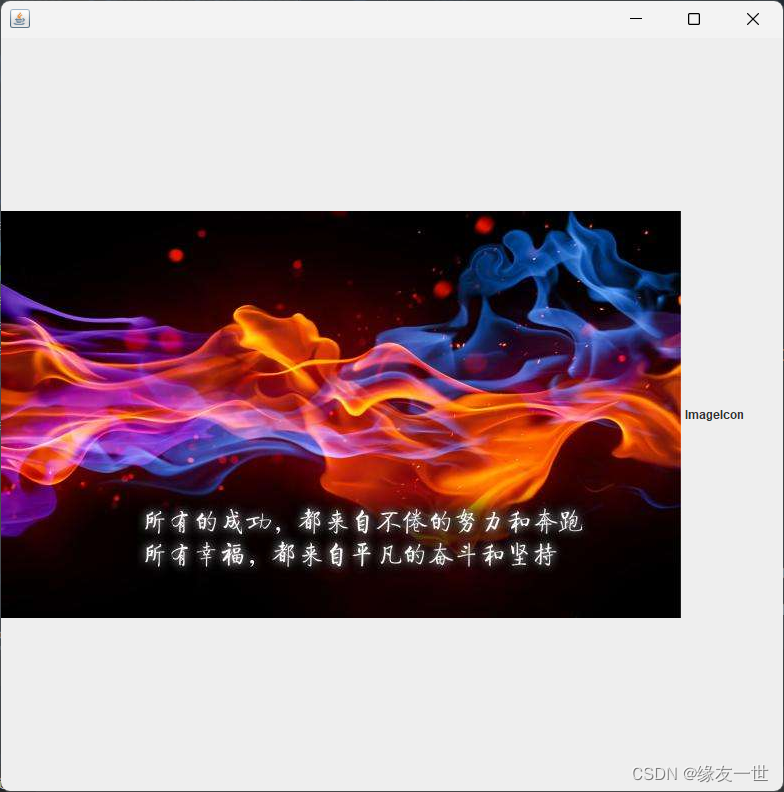
2.3 图片图标
- Swing中的图标除了可以绘制之外,还可以使用某个特定的图片创建。利用javax.swing.ImageIcon类根据现有图片创建图标。
2.3.1 演示-图片图标
import javax.swing.*;
import java.awt.*;
import java.net.URL;
public class TestImageIcon extends JFrame {
public TestImageIcon() {
Container container = getContentPane();
URL url = TestImageIcon.class.getResource("picture01.jpeg");
JLabel label = new JLabel("ImageIcon");
label.setBounds(20,20,700,700);
ImageIcon imageIcon = new ImageIcon(url);
label.setIcon(imageIcon);
container.add(label);
setBounds(200,200,800,800);
setVisible(true);
setDefaultCloseOperation(WindowConstants.EXIT_ON_CLOSE);
}
public static void main(String[] args) {
new TestImageIcon();
}
}
三 布局管理器
- Swing中,每个组件在容器中都有一个具体的位置和大小,入布局管理器它提供了基本的布局功能,可以有效的处理整个窗体的布局。
- 常用的布局管理器包括流布局管理器、边界布局管理器、网格布局管理器等。
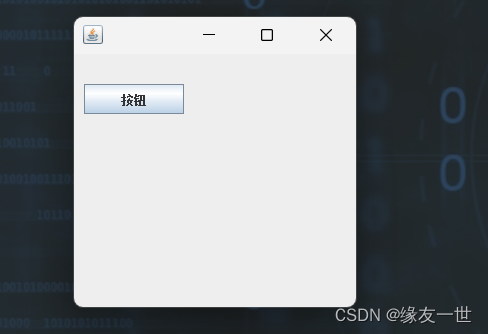
3.1 绝对布局
3.1.1 绝对布局简介
- 硬性指定组件在容器中的位置和大小,可以使用绝对坐标的方式来指定组件的位置。
- 使用步骤:
- 使用Container.setLayout(null)方法取消布局管理器
- 使用Container.setBounds()方法设置每个组件的位置和大小
Container container = getContentPane();
container.setLayout(null);
JButton jb = new JButton("按钮");
jb.setBounds(10, 30, 100, 30);
container.add(jb);
3.1.2 演示-AbsoluteLayout
import javax.swing.*;
import java.awt.*;
public class TestAbsoluteLayout extends JFrame {
public TestAbsoluteLayout() {
setVisible(true);
setBounds(300,300,300,300);
Container container = getContentPane();
container.setLayout(null);
JButton jb = new JButton("按钮");
jb.setBounds(10, 30, 100, 30);
container.add(jb);
setDefaultCloseOperation(WindowConstants.EXIT_ON_CLOSE);
}
public static void main(String[] args) {
new TestAbsoluteLayout();
}
}
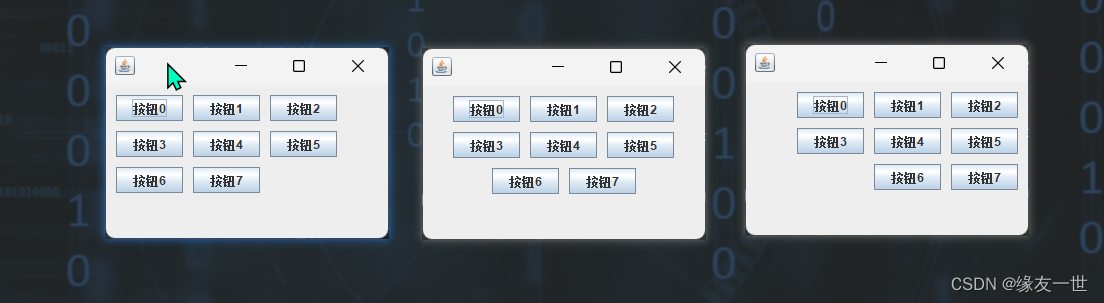
3.2 流式布局管理器
3.2.1 FlowLayout简介
- 流布局管理器是布局管理器中最基本的布局管理器,使用FlowLayout类,像“流”一样从左到右摆放组件,直到占据了这一行的所有空间,再向下移动一行。组件在每一行的位置默认居中排列,要更改位置可自行设置。
- 在FlowLayout的有参构造方法中:
- alignment设置为0时,每一行的组件将被指定左对齐排列;
- 当alignment被设置为2时,每一行的组件将被指定右对齐排列;
- 当alignment被设置为1时,是默认的居中排列。
3.2.1 演示-FlowLayout
public class TestFlowLayout extends JFrame {
public TestFlowLayout() {
Container container = this.getContentPane();
this.setLayout(new FlowLayout(1, 10, 10));
for(int i=0; i<=7; i++) {
container.add(new JButton("按钮" + i));
}
this.setSize(300, 200);
this.setVisible(true);
this.setDefaultCloseOperation(WindowConstants.EXIT_ON_CLOSE);
}
public static void main(String[] args) {
new TestFlowLayout();
}
}
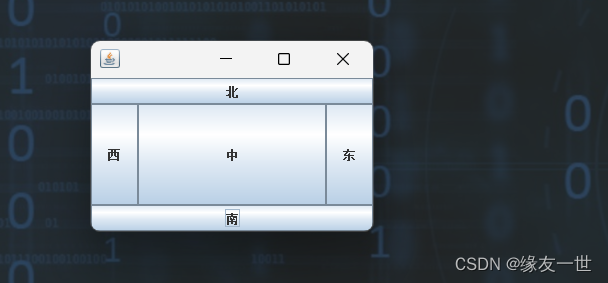
3.3 边界布局管理器
3.3.1 BorderLayout简介
- 在不指定窗体布局时,Swing组件默认的布局管理器是边界布局管理器,使用的是BorderLayout类。
3.3.2 演示-BorderLayout使用
import javax.swing.*;
import java.awt.*;
public class TestBorderLayout extends JFrame {
public TestBorderLayout() {
String[] borderPosition={BorderLayout.CENTER,BorderLayout.NORTH,BorderLayout.SOUTH,BorderLayout.WEST,BorderLayout.EAST};
String[] buttonContents={"中","北","南","西","东"};
Container container = this.getContentPane();
this.setLayout(new BorderLayout());
for (int i = 0; i < 5; i++) {
container.add(borderPosition[i],new JButton(buttonContents[i]));
}
setVisible(true);
setBounds(300,300,300,200);
setDefaultCloseOperation(WindowConstants.EXIT_ON_CLOSE);
}
public static void main(String[] args) {
new TestBorderLayout();
}
}
3.4 网格布局管理器
3.4.1 GridLayout简介
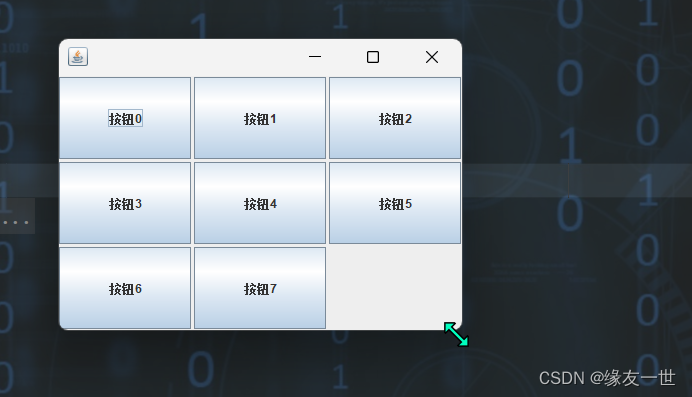
- 网格布局管理器将容器划分为网格,组件按行按列排列,使用GridLayout类。在此布局管理器中,每个组件的大小都相同,且会填满整个网格,改变窗体大小,组件也会随之改变。
3.4.2 演示-GridLayout使用
import javax.swing.*;
import java.awt.*;
public class TestGridLayout extends JFrame {
public TestGridLayout() {
Container container = this.getContentPane();
this.setLayout(new GridLayout(3,3,3,3));
for(int i=0; i<=7; i++) {
container.add(new JButton("按钮" + i));
}
this.setSize(300, 200);
this.setVisible(true);
this.setDefaultCloseOperation(WindowConstants.EXIT_ON_CLOSE);
}
public static void main(String[] args) {
new TestGridLayout();
}
}
四 面板
- 面板也是一个容器,可作为容器容纳其他组件,但也必须被添加到其他容器中。Swing中常用面板有JPanel面板和JScrollPane面板。
4.1 JPanel
- JPanel面板可以聚集一些组件来布局。继承自java.awt.Container类。
import javax.swing.*;
import java.awt.*;
public class TestJPanel extends JFrame {
public TestJPanel() {
setBounds(200,200,600,600);
setVisible(true);
setDefaultCloseOperation(WindowConstants.EXIT_ON_CLOSE);
Container container = getContentPane();
container.setLayout(new GridLayout(2,1,10,10));
JPanel panel = new JPanel(new GridLayout(1, 3));
panel.add(new JButton("01"));
panel.add(new JButton("02"));
panel.add(new JButton("03"));
container.add(panel);
}
public static void main(String[] args) {
new TestJPanel();
}
}

4.2 JScrollPane
4.2.1 JScrollPane简介
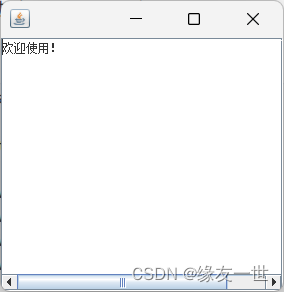
- 若遇到一个较小的容器窗体中显示一个较大部分内容的情况,可用JScrollPane面板。这是一个带滚动条的面板,就像平时浏览网页,经常遇到的滚动条一样。
- 如果需要在JScrollPane面板中放置多个组件,需将这多个组件放置在JPanel面板上,然后将JPanel面板作为一个整体组件添加在JScrollPane面板上。
4.2.2 演示
import javax.swing.*;
import java.awt.*;
public class TestJScroll extends JFrame {
public TestJScroll() {
Container container = getContentPane();
JTextArea textArea = new JTextArea(10, 30);
textArea.setText("欢迎使用!");
JScrollPane scrollPane = new JScrollPane(textArea);
container.add(scrollPane);
container.setVisible(true);
setBounds(200,200,300,300);
setVisible(true);
setDefaultCloseOperation(WindowConstants.EXIT_ON_CLOSE);
}
public static void main(String[] args) {
new TestJScroll();
}
}
五 按钮组件
5.1 提交按钮组件(JButton)
- JButton在之前的例子中已经出现多次,是较为常用的组件,用于触发特定动作。可以在按钮上显示文本标签,还可以显示图标。
5.2 JButton演示
import javax.swing.*;
import java.awt.*;
import java.net.URL;
public class TestJButton extends JFrame {
public TestJButton() {
Container container = this.getContentPane();
URL url = TestJButton.class.getResource("picture01.jpeg");
ImageIcon icon = new ImageIcon(url);
JButton button = new JButton();
button.setIcon(icon);
button.setToolTipText("图片按钮");
container.add(button);
setVisible(true);
setBounds(200,200,600,600);
setDefaultCloseOperation(WindowConstants.EXIT_ON_CLOSE);
}
public static void main(String[] args) {
new TestJButton();
}
}

5.3 单选按钮组件(JRadioButton)
- 默认情况下,单选按钮显示一个圆形图标,通常在其旁放置一些说明性文字。当用户选中某个单选按钮后,按钮组中其它按钮将被自动取消,这时就需要按钮组(ButtonGroup)来将同组按钮放在一起,该按钮组中的按钮只能选择一个,而不在此按钮中的按钮不受影响。
import javax.swing.*;
import java.awt.*;
public class TestJRadioButton extends JFrame {
public TestJRadioButton() {
Container container = this.getContentPane();
JRadioButton button01 = new JRadioButton("button01");
JRadioButton button02 = new JRadioButton("button02");
JRadioButton button03 = new JRadioButton("button03");
ButtonGroup group = new ButtonGroup();
group.add(button01);
group.add(button02);
group.add(button03);
container.add(button01,BorderLayout.NORTH);
container.add(button02,BorderLayout.CENTER);
container.add(button03,BorderLayout.SOUTH);
setVisible(true);
setBounds(200,200,600,600);
setDefaultCloseOperation(WindowConstants.EXIT_ON_CLOSE);
}
public static void main(String[] args) {
new TestJRadioButton();
}
}
5.4 复选框组件(JCheckBox)
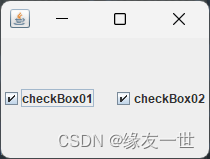
- 复选框是一个方块图标,外加一段描述性文字,与单选按钮的区别就是可以多选。每一个复选框都提供“选中”与“不选中”两种状态。
import javax.swing.*;
import java.awt.*;
public class TestJCheckBox extends JFrame {
public TestJCheckBox() {
Container container = this.getContentPane();
JCheckBox checkBox01 = new JCheckBox("checkBox01");
JCheckBox checkBox02 = new JCheckBox("checkBox02");
container.add(checkBox01,BorderLayout.WEST);
container.add(checkBox02,BorderLayout.EAST);
setVisible(true);
setBounds(200,200,600,600);
setDefaultCloseOperation(WindowConstants.EXIT_ON_CLOSE);
}
public static void main(String[] args) {
new TestJCheckBox();
}
}
六 列表组件
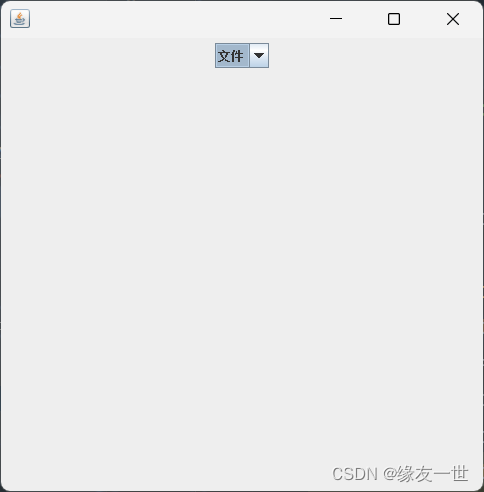
6.1 下拉列表(JComBox)
public class TestComboBox extends JFrame {
public TestComboBox() {
Container container = getContentPane();
JPanel panel = new JPanel();
panel.setBounds(20,20,100,100);
JComboBox comboBox = new JComboBox();
comboBox.addItem(null);
comboBox.addItem("文件");
comboBox.addItem("视图");
comboBox.addItem("工具");
panel.add(comboBox);
container.add(panel);
setVisible(true);
setBounds(300,300,500,500);
setDefaultCloseOperation(WindowConstants.EXIT_ON_CLOSE);
}
public static void main(String[] args) {
new TestComboBox();
}
}
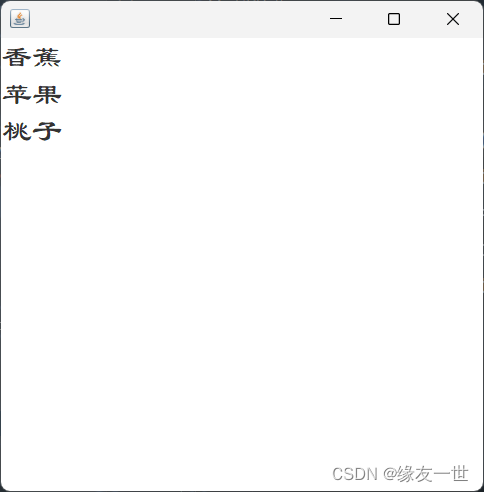
6.2 列表框(JList)
- 列表框只是在窗体上占据固定的大小,如果要使列表框具有滚动效果,可以将列表框放入滚动面板中。
import javax.swing.*;
import java.awt.*;
import java.util.Vector;
public class TestJList extends JFrame {
public TestJList() {
Container container = getContentPane();
JPanel panel = new JPanel();
panel.setBounds(20,20,100,100);
Vector contents = new Vector();
contents.add("香蕉");
contents.add("苹果");
contents.add("桃子");
JList jList = new JList(contents);
Font font = new Font("隶书",Font.PLAIN,30);
jList.setFont(font);
container.add(jList);
setVisible(true);
setBounds(300,300,500,500);
setDefaultCloseOperation(WindowConstants.EXIT_ON_CLOSE);
}
public static void main(String[] args) {
new TestJList();
}
}
七 文本组件
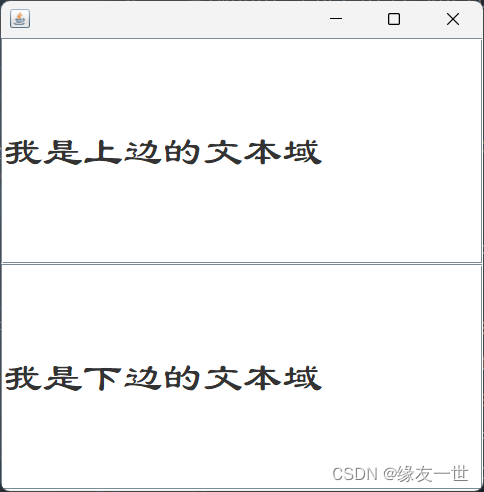
7.1 文本框(JTextField)
import javax.swing.*;
import java.awt.*;
public class TestTextField extends JFrame{
public TestTextField() {
Container container = getContentPane();
Font font = new Font("隶书",Font.PLAIN,40);
JPanel panel = new JPanel();
panel.setBounds(20,20,100,100);
panel.setLayout(new GridLayout(2,1));
JTextField field1 = new JTextField("我是上边的文本域");
JTextField field2 = new JTextField("我是下边的文本域",10);
field1.setFont(font);
field2.setFont(font);
panel.add(field1);
panel.add(field2);
container.add(panel);
setVisible(true);
setBounds(300,300,500,500);
setDefaultCloseOperation(WindowConstants.EXIT_ON_CLOSE);
}
public static void main(String[] args) {
new TestTextField();
}
}
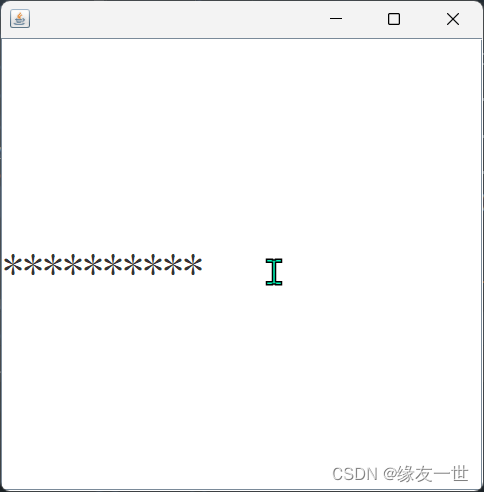
7.2 密码框(JPasswordField)
- 密码框与文本框的定义与用法类似,但会使用户输入的字符串以某种符号进行加密。
import javax.swing.*;
import java.awt.*;
public class TestJPasswordField extends JFrame {
public TestJPasswordField() {
Container container = getContentPane();
Font font = new Font("隶书",Font.PLAIN,40);
JPasswordField passwordField = new JPasswordField();
passwordField.setVisible(true);
passwordField.setEchoChar('*');
passwordField.setFont(font);
container.add(passwordField);
setVisible(true);
setBounds(300,300,500,500);
setDefaultCloseOperation(WindowConstants.EXIT_ON_CLOSE);
}
public static void main(String[] args) {
new TestJPasswordField();
}
}
7.3 文本域(JTextArea)
import javax.swing.*;
import java.awt.*;
public class TestJTextArea extends JFrame {
public TestJTextArea() {
Container container = getContentPane();
Font font = new Font("隶书",Font.PLAIN,40);
JTextField textField = new JTextField();
textField.setFont(font);
textField.setText("这是一个文本域!");
textField.setBounds(10,10,100,100);
container.add(textField);
setVisible(true);
setBounds(300,300,500,500);
setDefaultCloseOperation(WindowConstants.EXIT_ON_CLOSE);
}
public static void main(String[] args) {
new TestJTextArea();
}
}

八 JAVAGUI编程初识之贪吃蛇小案例
8.1 前言
- 学习狂神说,感谢!
- 虽然游戏本身并不有多大的意义,但是练习它还是很有价值的。
8.2 下载源码和素材
snake项目源码+素材
8.3 效果展示
8.4 所有源码
8.4.1 StartGame
import javax.swing.*;
public class StartGame {
public static void main(String[] args) {
JFrame frame = new JFrame();
frame.add(new GamePanel());
frame.setVisible(true);
frame.setBounds(400,100,900,720);
frame.setResizable(false);
frame.setDefaultCloseOperation(WindowConstants.EXIT_ON_CLOSE);
}
}
8.4.2 Data
import javax.swing.*;
import java.net.URL;
public class Data {
public static URL headerURL=Data.class.getResource("statics/header.png");
public static ImageIcon header= new ImageIcon(headerURL);
public static URL upURL=Data.class.getResource("statics/up.png");
public static ImageIcon up= new ImageIcon(upURL);
public static URL downURL=Data.class.getResource("statics/down.png");
public static ImageIcon down= new ImageIcon(downURL);
public static URL leftURL=Data.class.getResource("statics/left.png");
public static ImageIcon left= new ImageIcon(leftURL);
public static URL rightURL=Data.class.getResource("statics/right.png");
public static ImageIcon right= new ImageIcon(rightURL);
public static URL bodyURL=Data.class.getResource("statics/body.png");
public static ImageIcon body= new ImageIcon(bodyURL);
public static URL foodURL=Data.class.getResource("statics/food.png");
public static ImageIcon food= new ImageIcon(foodURL);
}
8.4.3 GamePanel
import javax.swing.*;
import java.awt.*;
import java.awt.event.ActionEvent;
import java.awt.event.ActionListener;
import java.awt.event.KeyEvent;
import java.awt.event.KeyListener;
import java.util.Random;
public class GamePanel extends JPanel implements KeyListener, ActionListener {
int length;
int[] snakeX=new int[600];
int[] snakeY=new int[500];
int foodX;
int foodY;
int score;
Random random=new Random();
String headDirection;
boolean isStart=false;
boolean isFail=false;
Timer timer=new Timer(100,this);
public GamePanel() {
init();
this.setFocusable(true);
this.addKeyListener(this);
timer.start();
}
public void init() {
length=3;
headDirection="right";
snakeX[0]=100;snakeY[0]=100;
snakeX[1]=75;snakeY[1]=100;
snakeX[2]=50;snakeY[2]=100;
foodInit();
score=0;
}
public void foodInit() {
foodX=25+25*random.nextInt(34);
foodY=75+25*random.nextInt(24);
}
@Override
protected void paintComponent(Graphics g) {
super.paintComponent(g);
this.setBackground(Color.gray);
Data.header.paintIcon(this,g,12,11);
g.fillRect(25,75,850,600);
g.setColor(Color.GREEN);
g.setFont(new Font("微软黑体",Font.BOLD,18));
g.drawString("长度"+length,750,35);
g.drawString("分数"+score,750,50);
Data.food.paintIcon(this,g,foodX,foodY);
if(headDirection.equals("right")) {
Data.right.paintIcon(this,g,snakeX[0],snakeY[0]);
}else if(headDirection.equals("left")) {
Data.left.paintIcon(this,g,snakeX[0],snakeY[0]);
}else if(headDirection.equals("up")) {
Data.up.paintIcon(this,g,snakeX[0],snakeY[0]);
}else if(headDirection.equals("down")) {
Data.down.paintIcon(this,g,snakeX[0],snakeY[0]);
}
for (int i = 1; i < length; i++) {
Data.body.paintIcon(this,g,snakeX[i],snakeY[i]);
}
for (int i = 1; i < length; i++) {
if(snakeX[0]==snakeX[i] && snakeY[0]==snakeY[i]) {
isFail=true;
}
}
if(isStart==false) {
g.setColor(Color.orange);
g.setFont(new Font("微软黑体",Font.BOLD,40));
g.drawString("按下空格开始游戏",300,350);
}
if(isFail) {
g.setColor(Color.red);
g.setFont(new Font("微软黑体",Font.BOLD,40));
g.drawString("游戏失败,按下空格重新开始",200,350);
}
}
@Override
public void keyPressed(KeyEvent e) {
int keyCode = e.getKeyCode();
if(keyCode==KeyEvent.VK_SPACE) {
if(isFail) {
isFail=false;
init();
}else {
isStart=!isStart;
}
this.repaint();
}
if(keyCode==KeyEvent.VK_UP) {
headDirection="up";
}else if(keyCode==KeyEvent.VK_DOWN) {
headDirection="down";
}else if(keyCode==KeyEvent.VK_LEFT) {
headDirection="left";
}else if(keyCode==KeyEvent.VK_RIGHT) {
headDirection="right";
}
}
@Override
public void actionPerformed(ActionEvent e) {
if(isStart && isFail==false) {
if(snakeX[0]==foodX && snakeY[0]==foodY) {
length++;
score+=10;
foodInit();
}
for (int i = length - 1; i >0 ; i--) {
snakeX[i]=snakeX[i-1];
snakeY[i]=snakeY[i-1];
}
if(headDirection.equals("right")) {
snakeX[0]= snakeX[0]+25;
if(snakeX[0]>850) {
snakeX[0]=25;
}
}else if(headDirection.equals("left")) {
snakeX[0]= snakeX[0]-25;
if(snakeX[0]<25) {
snakeX[0]=850;
}
}else if(headDirection.equals("up")) {
snakeY[0]= snakeY[0]-25;
if(snakeY[0]<75) {
snakeY[0]=650;
}
}else if(headDirection.equals("down")) {
snakeY[0]= snakeY[0]+25;
if(snakeY[0]>650) {
snakeY[0]=75;
}
}
repaint();
}
timer.start();
}
@Override
public void keyTyped(KeyEvent e) {
}
@Override
public void keyReleased(KeyEvent e) {
}
}


 被折叠的 条评论
为什么被折叠?
被折叠的 条评论
为什么被折叠?
 到【灌水乐园】发言


