


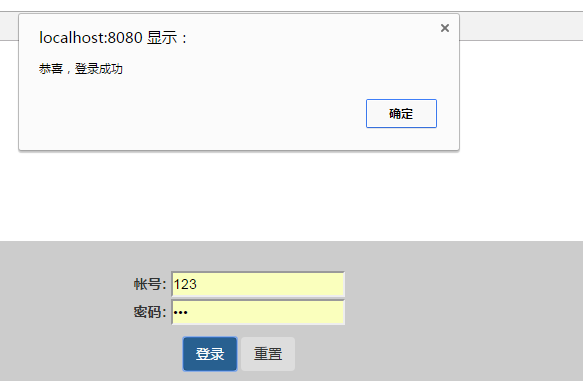
概述:实现登录功能,用户输入帐号和密码,通过form表单提交至后台处理,查询数据库,如果用户名和密码均正确,则弹框提示用户登录成功,否则提示登录失败。
开发工具:eclipse Mars.2 Release (4.5.2)
服务器 :apache-tomcat-7.0.68
数据库:MySql
效果图:
项目结构图:

前台源码:用到了简单的 bootstrap 和 jquery
<%@ page language="java" contentType="text/html; charset=utf-8"
	pageEncoding="utf-8"%>
<%@ page import="java.util.*" %>
<!DOCTYPE html >
<html>
<head>
	<meta http-equiv="Content-Type" content="text/html; charset=utf-8">
	<!--修正IE浏览器渲染效果的问题-->
	<meta http-equiv="X-UA-Compatible" content="IE=edge">
	<!--内容自适应-->
	<meta name="viewport" content="width=device-width, initial-scale=1">
	<link rel="stylesheet" href="css/bootstrap.css" type="text/css" >
	<script type="text/javascript" src="js/jquery.js"></script>
	<title>用户登录</title>
	<!-- 点击重置按钮清空用户名和密码 -->
	<script>
		$(document).ready(function(){
			$("#reset").click(function(){
				$("#username").val("");
				$("#pwd").val("");
			});
		});
	</script>
</head>
<body>
	<div class="row text-center" style="padding-top:30px; padding-bottom:30px; background-color: #CCC; margin-top:200px;">
		<form action="LoginServlet" method="post">
			<div class="col-md-6 col-md-offset-3">
				<div>
					<label>帐号:</label>
					<input type="text" id="username" name="username" />
				</div>
				<div>
					<label class="img-circle">密码:</label>
					<!-- name很中要,用于后台获取值,一般class修饰样式,id在js中用 -->
					<input class="input" id="pwd" name="pwd" type="password" />
				</div>
				<div style="margin:10px 0px;">
					<input class="btn btn-primary" type="submit" value="登录" />
					<input class="btn btn-group" id="reset" type="button" value="重置" />
				</div>
			</div>
		</form>
	</div>
	<script type="text/javascript" src="js/jquery.js"></script>
</body>
</html>后台代码:使用了servlet
package com.test;

import java.io.IOException;
import java.io.PrintWriter;
import java.sql.DriverManager;
import java.sql.PreparedStatement;
import java.sql.ResultSet;
import java.sql.SQLException;

import javax.servlet.ServletException;
import javax.servlet.http.HttpServlet;
import javax.servlet.http.HttpServletRequest;
import javax.servlet.http.HttpServletResponse;

import com.mysql.jdbc.Connection;

/**
 * Servlet implementation class LoginServlet
 */
//如果在web.xml中声明过servlet 就把这一句注释掉
//@WebServlet("/LoginServlet")
public class LoginServlet extends HttpServlet {
	private static final long serialVersionUID = 1L;

    /**
     * @see HttpServlet#HttpServlet()
     */
    public LoginServlet() {
        super();
        // TODO Auto-generated constructor stub
    }

	/**
	 * @see HttpServlet#doGet(HttpServletRequest request, HttpServletResponse response)
	 */
	protected void doGet(HttpServletRequest request, HttpServletResponse response) throws ServletException, IOException {
		// TODO Auto-generated method stub
		response.getWriter().append("Served at: ").append(request.getContextPath());
	}

	/**
	 * @see HttpServlet#doPost(HttpServletRequest request, HttpServletResponse response)
	 */
	protected void doPost(HttpServletRequest request, HttpServletResponse response) throws ServletException, IOException {
		request.setCharacterEncoding("utf-8");
		response.setCharacterEncoding("utf-8");
		response.setContentType("text/html; charset=UTF-8");

		//mysql数据库驱动
		String driver = "com.mysql.jdbc.Driver";
		//链接数据库的url test为数据库名
		String url = "jdbc:mysql://127.0.0.1:3306/test";
		//数据库用户
		String user = "root";
		//数据库密码/在这里输入数据库密码
		String password = "123456";

		//从前台读取到的用户名
		String username = request.getParameter("username");
		//从前台读取到的密码
		String pwd = request.getParameter("pwd");

		//数据库链接成功时返回的实例
		Connection conn = null;
		//查询成功时返回的记录集
		ResultSet rs = null;
		try{
			//加载驱动
			Class.forName(driver);
			//获取链接
			conn = (Connection) DriverManager.getConnection(url, user, password);
			//准备sql查询
			String sql = "select * from User where username=? and pwd=?";
			//使用PreparedStatement,可以防止sql注入
			PreparedStatement ps = conn.prepareStatement(sql);
			ps.setString(1, username);
			ps.setString(2, pwd);
			//执行查询,返回记录集
			rs = ps.executeQuery();
			//如果查询到用户名和密码,则允许用户登录
			if (rs.next()){
				System.out.println("login ok!!");
				PrintWriter out = response.getWriter();
				out.flush();
				out.println("<script>");
				out.println("alert('恭喜,登录成功');");
				out.println("history.back();");
				out.println("</script>");
				out.close();
			}else{
				System.out.println("login fail!!");
				PrintWriter out = response.getWriter();
				out.flush();
				out.println("<script>");
				out.println("alert('很遗憾,用户名或密码错误');");
				out.println("history.back();");
				out.println("</script>");
				out.close();
			}
			//关闭PreparedStatement
			ps.close();

		}catch(Exception e){
			e.printStackTrace();
		}finally{
			//最后一定要关闭链接
			if (conn != null){
				try {
					conn.close();
				} catch (SQLException e) {
					// TODO Auto-generated catch block
					e.printStackTrace();
				}
			}
			if(rs != null){
				try {
					rs.close();
				} catch (SQLException e) {
					// TODO Auto-generated catch block
					e.printStackTrace();
				}
			}
		}
		doGet(request, response);
	}

}
web.xml配置文件: 用于配置写好的servlet, 如果servlet中有 @WebServlet("/LoginServlet")则不用再配置,否则会产生错误。
<?xml version="1.0" encoding="UTF-8"?>
<web-app xmlns:xsi="http://www.w3.org/2001/XMLSchema-instance" xmlns="http://java.sun.com/xml/ns/javaee" xsi:schemaLocation="http://java.sun.com/xml/ns/javaee http://java.sun.com/xml/ns/javaee/web-app_3_0.xsd" id="WebApp_ID" version="3.0">
  <display-name>mysqlTest</display-name>
  <welcome-file-list>
    <welcome-file>index.html</welcome-file>
    <welcome-file>index.htm</welcome-file>
    <welcome-file>index.jsp</welcome-file>
    <welcome-file>default.html</welcome-file>
    <welcome-file>default.htm</welcome-file>
    <welcome-file>default.jsp</welcome-file>
  </welcome-file-list>

    <servlet>
	    <description></description>
	    <display-name>LoginServlet</display-name>
	    <servlet-name>LoginServlet</servlet-name>
	    <servlet-class>com.test.LoginServlet</servlet-class>
    </servlet>
  <servlet-mapping>
    <servlet-name>LoginServlet</servlet-name>
    <url-pattern>/LoginServlet</url-pattern>
  </servlet-mapping>
</web-app>


 2748
2748

 被折叠的 条评论
为什么被折叠?
被折叠的 条评论
为什么被折叠?
 到【灌水乐园】发言


