


Pre
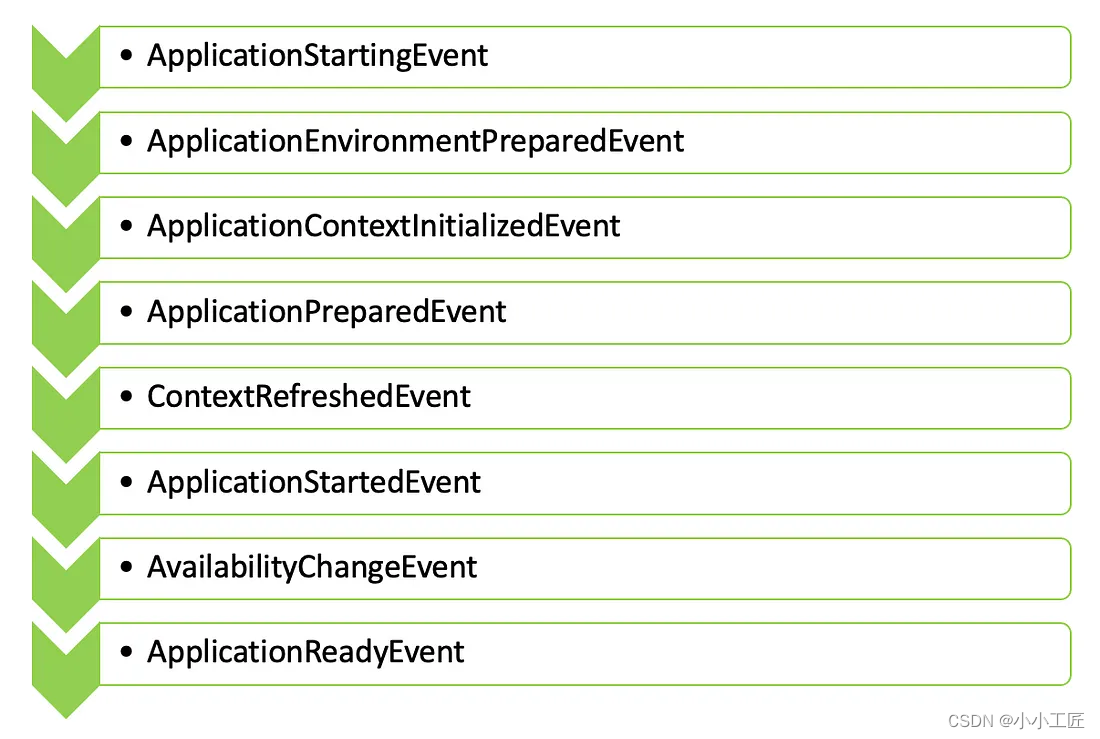
Spring Boot - Application Events 的发布顺序_ApplicationEnvironmentPreparedEvent
概述
Spring Boot 的广播机制是基于观察者模式实现的,它允许在 Spring 应用程序中发布和监听事件。这种机制的主要目的是为了实现解耦,使得应用程序中的不同组件可以独立地改变和复用逻辑,而无需直接进行通信。
在 Spring Boot 中,事件发布和监听的机制是通过 ApplicationEvent、ApplicationListener 以及事件发布者(ApplicationEventPublisher)来实现的。其中,ApplicationEvent 是所有自定义事件的基础,自定义事件需要继承自它。
ApplicationListener 是监听特定事件并做出响应的接口,开发者可以通过实现该接口来定义自己的监听器。事件发布者(通常由 Spring 的 ApplicationContext 担任)负责发布事件。
ApplicationEnvironmentPreparedEvent事件在Spring Boot应用程序中非常有用。当应用程序环境准备就绪时,可以使用此事件来执行一些初始化操作,例如设置系统属性、加载配置文件、动态修改环境等。
通过监听ApplicationEnvironmentPreparedEvent事件,我们可以在Spring Boot应用程序启动之前对环境进行一些自定义的配置和修改,以满足特定的需求。例如,可以在此事件中动态加载不同的配置文件,根据环境变量设置不同的系统属性,或者执行其他与环境相关的初始化操作
Code
package com.artisan.event;

import org.springframework.boot.SpringApplication;
import org.springframework.boot.context.event.ApplicationEnvironmentPreparedEvent;
import org.springframework.context.ApplicationListener;
import org.springframework.core.env.ConfigurableEnvironment;
import org.springframework.core.env.MapPropertySource;
import org.springframework.core.env.PropertiesPropertySource;
import org.springframework.core.env.PropertySource;

import java.util.HashMap;
import java.util.Map;
import java.util.Properties;

/**
 * @author 小工匠
 * @version 1.0
 * @mark: show me the code , change the world
 */
public class ApplicationEnvironmentPreparedListener implements ApplicationListener<ApplicationEnvironmentPreparedEvent> {

    /**
     * ApplicationEnvironmentPreparedEvent 在应用程序环境准备时触发,此时应用程序上下文尚未初始化。
     * <p>
     * 通过侦听此事件,我们可以访问环境的属性、配置文件和配置源。
     * 然后,我们可以执行一些任务,例如修改属性值、添加或删除配置源、激活特定配置文件或根据环境状态应用自定义逻辑。
     * <p>
     * <p>
     * 为了处理事件 ApplicationEnvironmentPreparedEvent ,我们可以通过实现 ApplicationListener ApplicationEnvironmentPreparedEvent 作为泛型类型的接口来创建自定义事件侦听器。
     * 此侦听器可以在主应用程序类中手动注册
     *
     * @param event the event to respond to
     */
    @Override
    public void onApplicationEvent(ApplicationEnvironmentPreparedEvent event) {
        System.out.println("--------------------> Handling ApplicationEnvironmentPreparedEvent here!");

        ConfigurableEnvironment environment = event.getEnvironment();

        // 添加自定义属性创建一个Map对象
        Map<String, Object> propertiesMap = new HashMap<>();
        propertiesMap.put("myDynamicProperty", "myValue");

        // 将Map转换为Properties
        Properties properties = new Properties();
        properties.putAll(propertiesMap);

        // 创建一个PropertiesPropertySource
        PropertySource<?> propertySource = new PropertiesPropertySource("dynamicProperties", properties);
        // 将PropertiesPropertySource添加到环境属性源中
        environment.getPropertySources().addFirst(propertySource);

        SpringApplication springApplication = event.getSpringApplication();
        springApplication.setDefaultProperties(properties);

    }
}
如何使用呢?
方式一:
@SpringBootApplication
public class LifeCycleApplication {

    /**
     * 除了手工add , 在 META-INF下面 的 spring.factories 里增加
     * org.springframework.context.ApplicationListener=自定义的listener 也可以
     *
     * @param args
     */
    public static void main(String[] args) {

        SpringApplication springApplication = new SpringApplication(LifeCycleApplication.class);

       // 当我们运行 Spring Boot 应用程序时,将调用 的方法 ApplicationEnvironmentPreparedListener#onApplicationEvent() 允许我们根据需要访问和修改应用程序的环境
       springApplication.addListeners(new ApplicationEnvironmentPreparedListener());

       springApplication.run(args);
    }


}
方式二: 通过spring.factories 配置
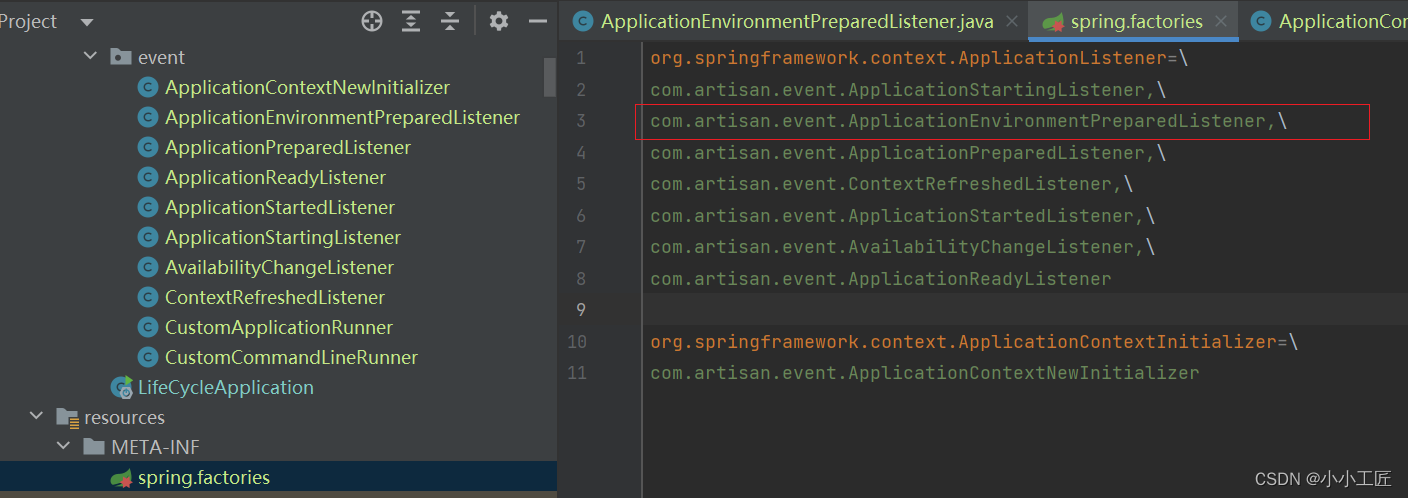
org.springframework.context.ApplicationListener=\
com.artisan.event.ApplicationEnvironmentPreparedListener
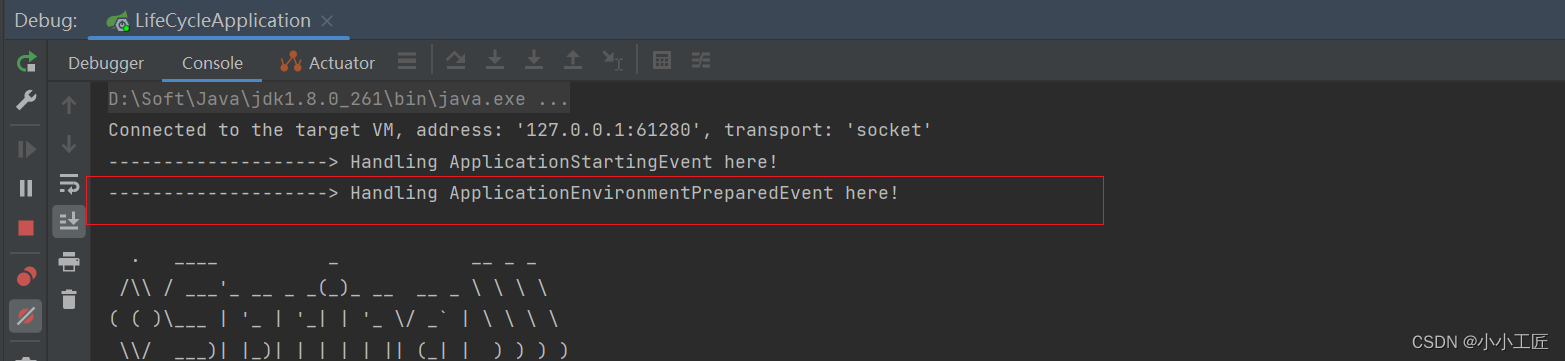
运行日志
源码分析
首先main方法启动入口
SpringApplication.run(LifeCycleApplication.class, args);
跟进去
public static ConfigurableApplicationContext run(Class<?> primarySource, String... args) {
		return run(new Class<?>[] { primarySource }, args);
	}
继续
public static ConfigurableApplicationContext run(Class<?>[] primarySources, String[] args) {
		return new SpringApplication(primarySources).run(args);
	}
这里首先关注 new SpringApplication(primarySources)
new SpringApplication(primarySources)
	/**
	 * Create a new {@link SpringApplication} instance. The application context will load
	 * beans from the specified primary sources (see {@link SpringApplication class-level}
	 * documentation for details. The instance can be customized before calling
	 * {@link #run(String...)}.
	 * @param resourceLoader the resource loader to use
	 * @param primarySources the primary bean sources
	 * @see #run(Class, String[])
	 * @see #setSources(Set)
	 */
	@SuppressWarnings({ "unchecked", "rawtypes" })
	public SpringApplication(ResourceLoader resourceLoader, Class<?>... primarySources) {
		this.resourceLoader = resourceLoader;
		Assert.notNull(primarySources, "PrimarySources must not be null");
		this.primarySources = new LinkedHashSet<>(Arrays.asList(primarySources));
		this.webApplicationType = WebApplicationType.deduceFromClasspath();
		this.bootstrappers = new ArrayList<>(getSpringFactoriesInstances(Bootstrapper.class));
		setInitializers((Collection) getSpringFactoriesInstances(ApplicationContextInitializer.class));
		setListeners((Collection) getSpringFactoriesInstances(ApplicationListener.class));
		this.mainApplicationClass = deduceMainApplicationClass();
	}
聚焦 setListeners((Collection) getSpringFactoriesInstances(ApplicationListener.class));
run
继续run
// 开始启动Spring应用程序
public ConfigurableApplicationContext run(String... args) {
StopWatch stopWatch = new StopWatch(); // 创建一个计时器
stopWatch.start(); // 开始计时
DefaultBootstrapContext bootstrapContext = createBootstrapContext(); // 创建引导上下文
ConfigurableApplicationContext context = null; // Spring应用上下文,初始化为null
configureHeadlessProperty(); // 配置无头属性(如:是否在浏览器中运行)
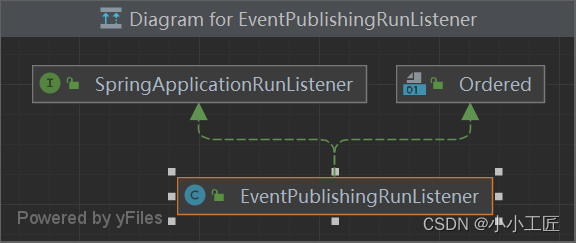
SpringApplicationRunListeners listeners = getRunListeners(args); // 获取运行监听器
listeners.starting(bootstrapContext, this.mainApplicationClass); // 通知监听器启动过程开始
try {
ApplicationArguments applicationArguments = new DefaultApplicationArguments(args); // 创建应用参数
ConfigurableEnvironment environment = prepareEnvironment(listeners, bootstrapContext, applicationArguments); // 预备环境
configureIgnoreBeanInfo(environment); // 配置忽略BeanInfo
Banner printedBanner = printBanner(environment); // 打印Banner
context = createApplicationContext(); // 创建应用上下文
context.setApplicationStartup(this.applicationStartup); // 设置应用启动状态
prepareContext(bootstrapContext, context, environment, listeners, applicationArguments, printedBanner); // 准备上下文
refreshContext(context); // 刷新上下文,执行Bean的生命周期
afterRefresh(context, applicationArguments); // 刷新后的操作
stopWatch.stop(); // 停止计时
if (this.logStartupInfo) { // 如果需要记录启动信息
new StartupInfoLogger(this.mainApplicationClass).logStarted(getApplicationLog(), stopWatch); // 记录启动信息
}
listeners.started(context); // 通知监听器启动完成
callRunners(context, applicationArguments); // 调用Runner
}
catch (Throwable ex) {
handleRunFailure(context, ex, listeners); // 处理运行失败
throw new IllegalStateException(ex); // 抛出异常
}
try {
listeners.running(context); // 通知监听器运行中
}
catch (Throwable ex) {
handleRunFailure(context, ex, null); // 处理运行失败
throw new IllegalStateException(ex); // 抛出异常
}
return context; // 返回应用上下文
}
我们重点看
ConfigurableEnvironment environment = prepareEnvironment(listeners, bootstrapContext, applicationArguments);
继续
private ConfigurableEnvironment prepareEnvironment(SpringApplicationRunListeners listeners,
        DefaultBootstrapContext bootstrapContext, ApplicationArguments applicationArguments) {
    // 获取或创建环境对象
    ConfigurableEnvironment environment = getOrCreateEnvironment();
    // 使用应用程序参数配置环境
    configureEnvironment(environment, applicationArguments.getSourceArgs());
    // 将配置属性源附加到环境中
    ConfigurationPropertySources.attach(environment);
    // 通知监听器环境已经准备好
    listeners.environmentPrepared(bootstrapContext, environment);
    // 将默认属性属性源移动到环境的末尾
    DefaultPropertiesPropertySource.moveToEnd(environment);
    // 配置额外的配置文件
    configureAdditionalProfiles(environment);
    // 将环境绑定到Spring应用程序
    bindToSpringApplication(environment);
    // 如果不是自定义环境,则转换环境
    if (!this.isCustomEnvironment) {
        environment = new EnvironmentConverter(getClassLoader()).convertEnvironmentIfNecessary(environment,
                deduceEnvironmentClass());
    }
    // 再次将配置属性源附加到环境,确保所有属性源都被正确加载
    ConfigurationPropertySources.attach(environment);
    // 返回配置好的环境对象
    return environment;
}
重点关注: listeners.environmentPrepared(bootstrapContext, environment);
 void environmentPrepared(ConfigurableBootstrapContext bootstrapContext, ConfigurableEnvironment environment) {
		doWithListeners("spring.boot.application.environment-prepared",
				(listener) -> listener.environmentPrepared(bootstrapContext, environment));
	}
继续 listener.environmentPrepared(bootstrapContext, environment)
发布事件
	@Override
	public void environmentPrepared(ConfigurableBootstrapContext bootstrapContext,
			ConfigurableEnvironment environment) {
		this.initialMulticaster.multicastEvent(
				new ApplicationEnvironmentPreparedEvent(bootstrapContext, this.application, this.args, environment));
	}
继续
	@Override
	public void multicastEvent(ApplicationEvent event) {
		multicastEvent(event, resolveDefaultEventType(event));
	}
@Override
public void multicastEvent(final ApplicationEvent event, @Nullable ResolvableType eventType) {
    // 如果eventType不为null,则直接使用它;否则,使用resolveDefaultEventType方法来解析事件的默认类型。
    ResolvableType type = (eventType != null ? eventType : resolveDefaultEventType(event));

    // 获取一个线程池执行器,它用于异步执行监听器调用。
    Executor executor = getTaskExecutor();

    // 获取所有对应该事件类型的监听器。
    for (ApplicationListener<?> listener : getApplicationListeners(event, type)) {
        // 如果执行器不为null,则使用它来异步执行监听器调用;
        // 否则,直接同步调用监听器。
        if (executor != null) {
            executor.execute(() -> invokeListener(listener, event));
        }
        else {
            invokeListener(listener, event);
        }
    }
}
继续
private void doInvokeListener(ApplicationListener listener, ApplicationEvent event) {
		try {
			listener.onApplicationEvent(event);
		}
		catch (ClassCastException ex) {
			......
		}
	}
就到了我们自定义实现的代码逻辑中了。
     @Override
    public void onApplicationEvent(ApplicationEnvironmentPreparedEvent event) {
        System.out.println("--------------------> Handling ApplicationEnvironmentPreparedEvent here!");
     .....
     .....

    }


 8325
8325


 被折叠的 条评论
为什么被折叠?
被折叠的 条评论
为什么被折叠?
 到【灌水乐园】发言


